How to make a snowflake out of paper: flat and volumetric paper snowflake crafts
Dark winter evenings before the holidays, you can devote yourself to such an activity as creating Christmas decorations. Such a pastime will especially appeal to children who are waiting for a New Year's miracle. Decorative snowflakes can be created not only from paper but also from dough, fluffy wire, cotton buds, and other elements
Paper snowflakes
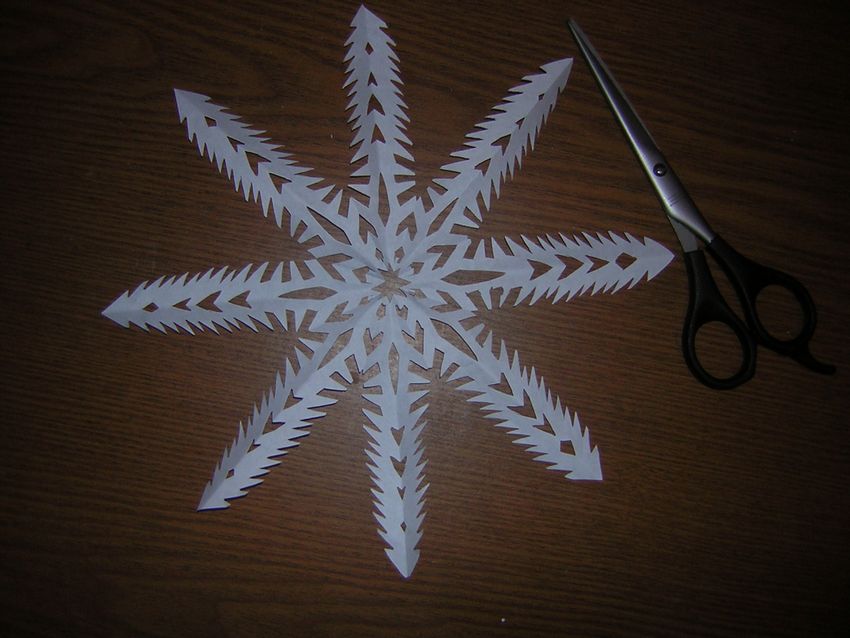
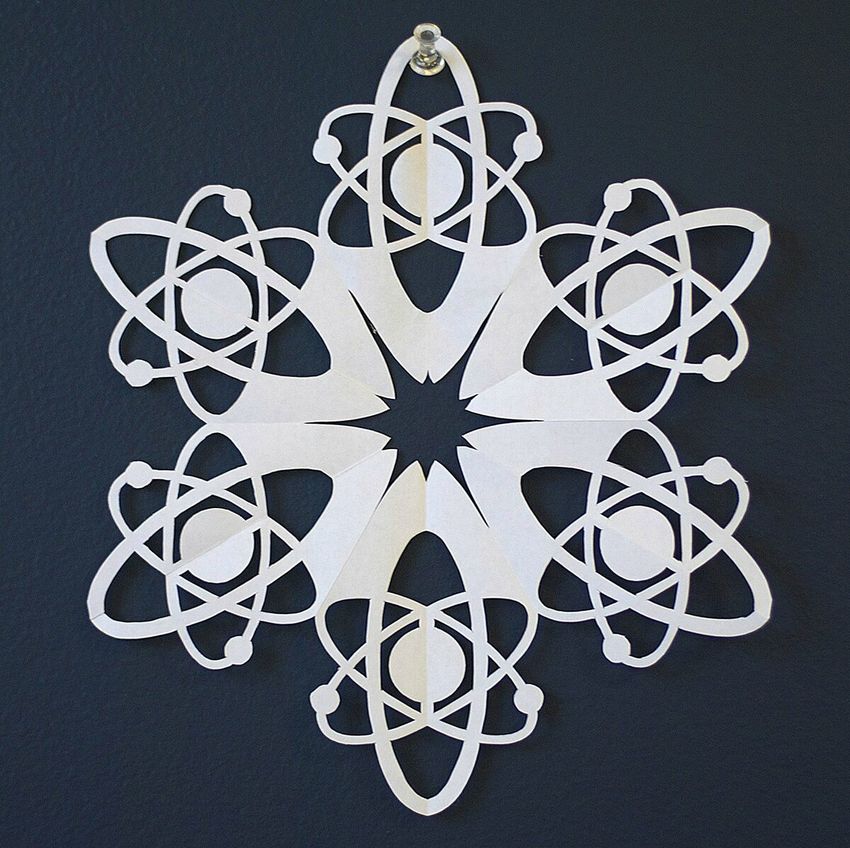
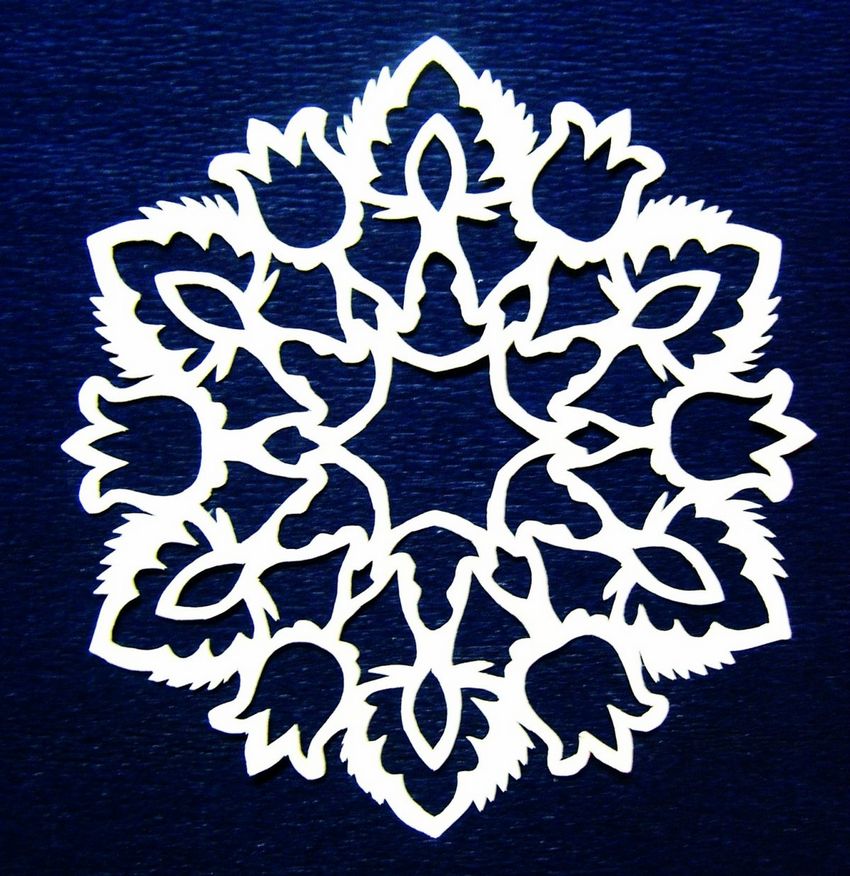
One of the fun activities with children is to cut out snowflakes. Such snowflakes can decorate the windows of the house, school, kindergarten.
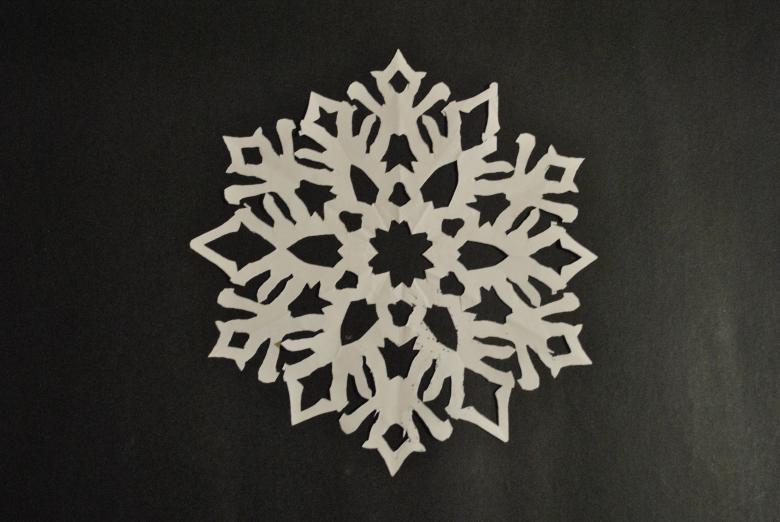
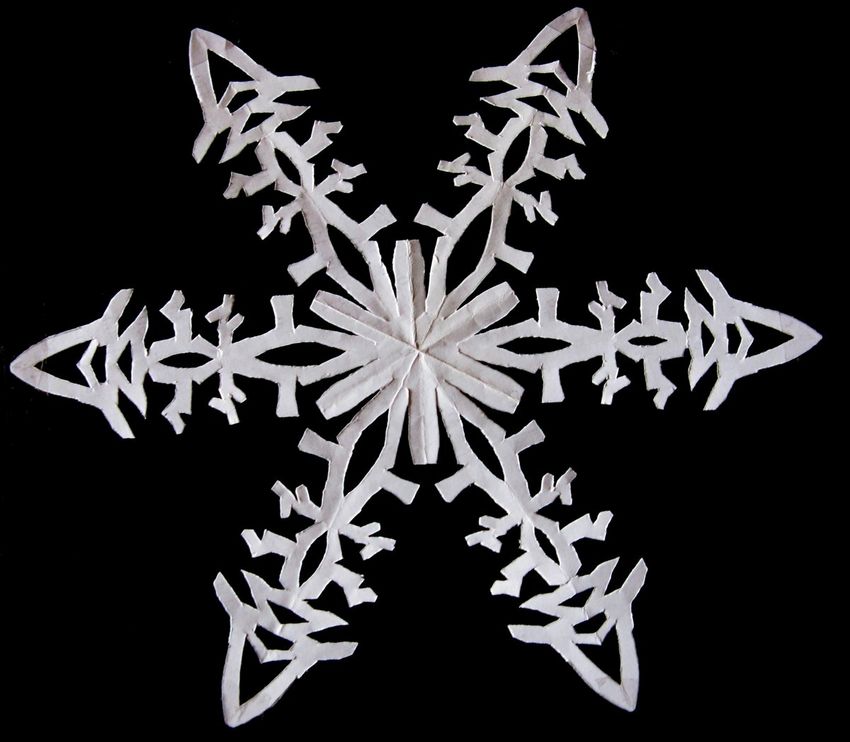
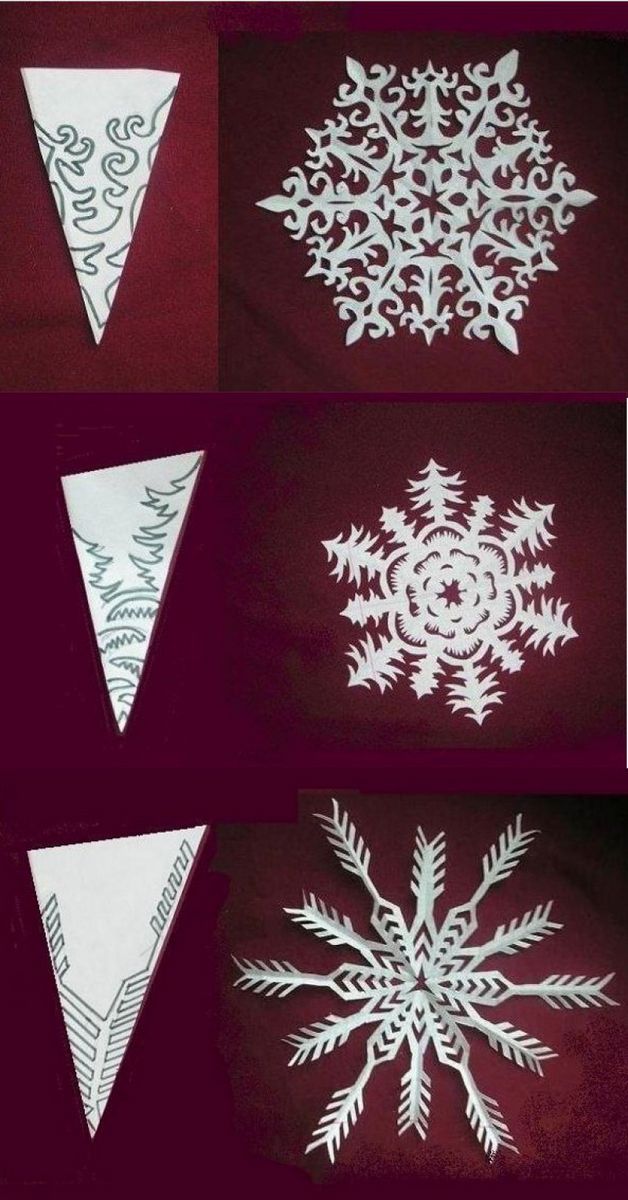
One simple way - to fold a sheet of five times. The first four times fold in half, and the last time - a triangle. Cut out an ornament and unfold the craft.

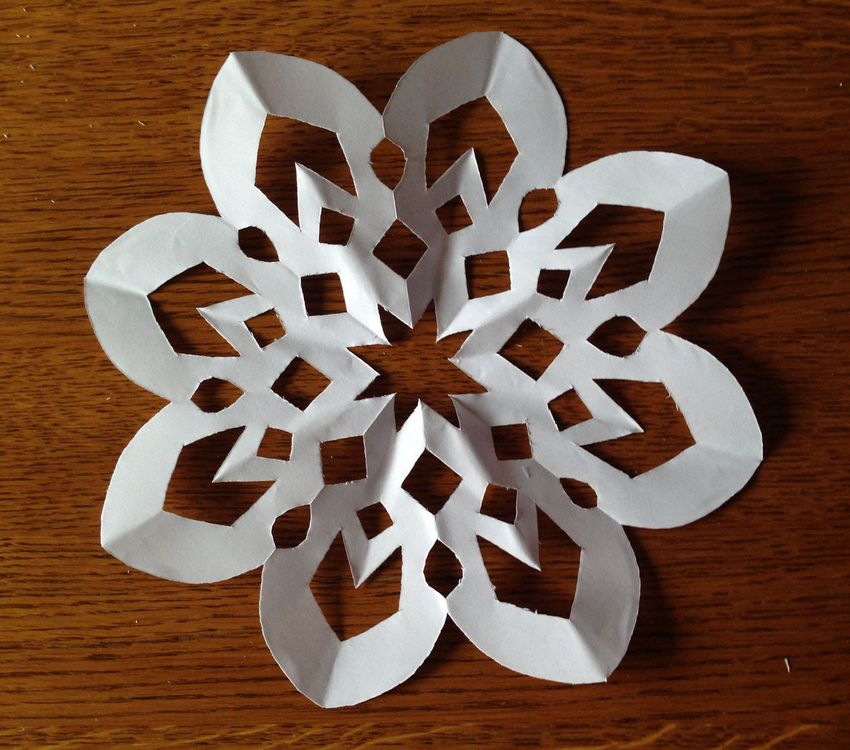
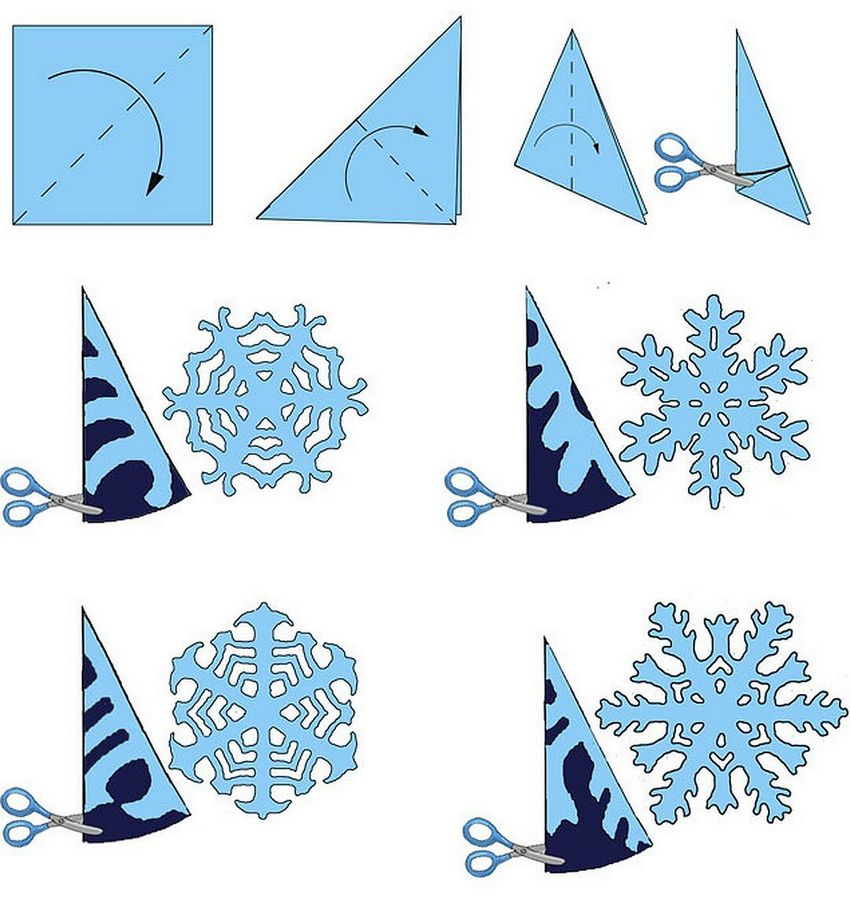
Another option - to create a snowflake out of a square. Take a square and fold it diagonally. Fold it again. On the workpiece to draw an ornament and cut it out.

Snowflakes for the little ones.
It is necessary to cut white paper into strips and fasten them in the form of a star. After that, each strip should be decorated, with sequins, rhinestones, stickers or colored with pencils.
Another option for snowflakes for preschoolers is a handprint craft. Cut out six palm prints, glue them together, and color them with colored pencils or felt-tip pens.

It is possible to cut out a handicraft from twisted paper strips. To do this, you need to twist six strips on pencils for a long time. Then take them off, join them together and decorate the middle to hide the staples.
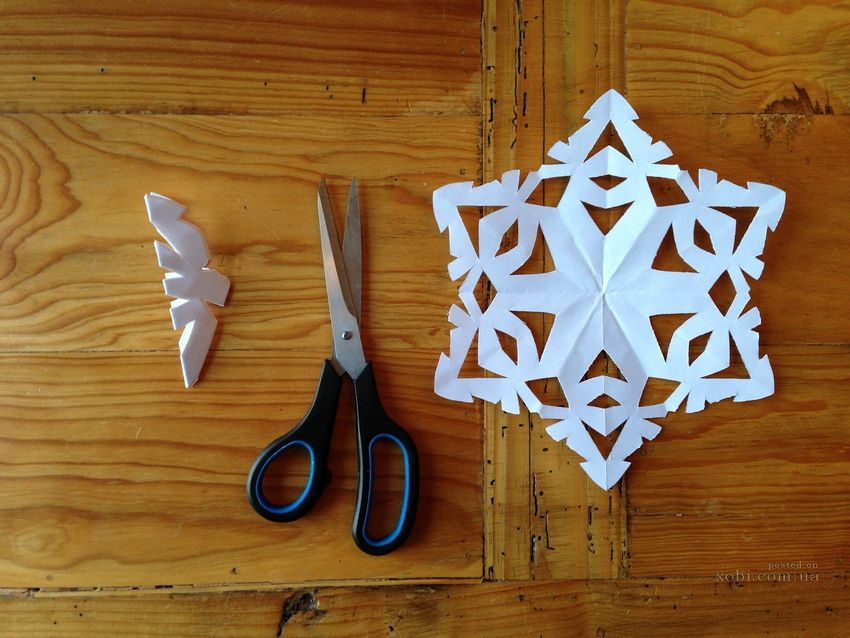
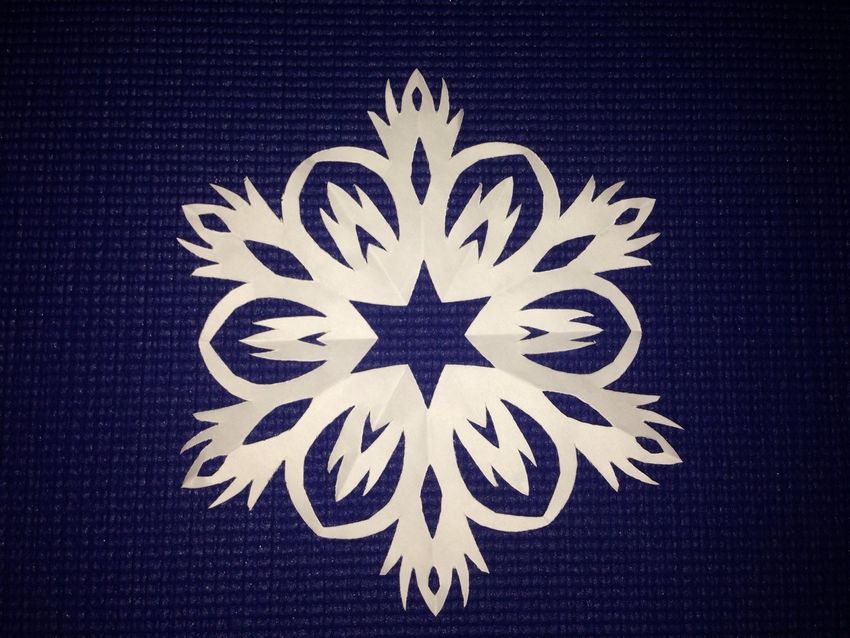
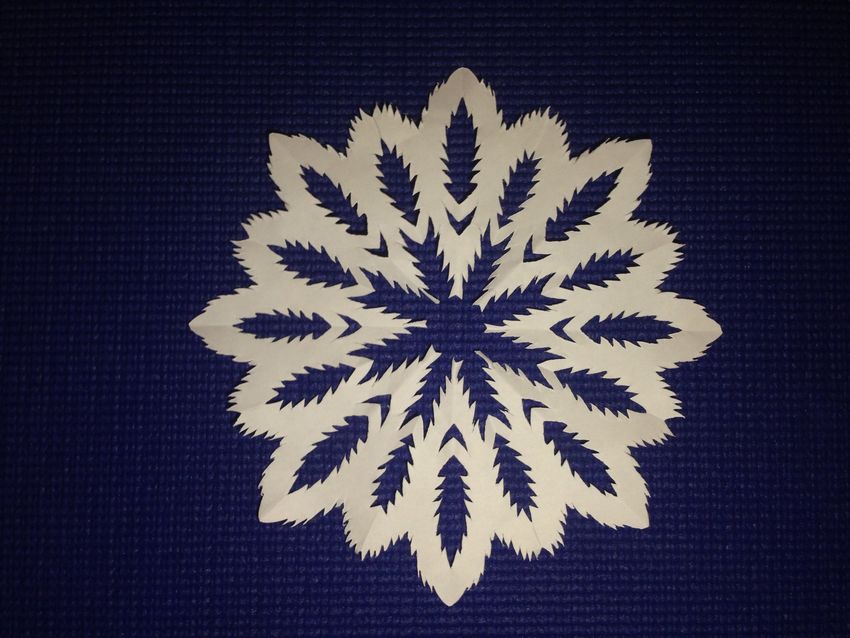
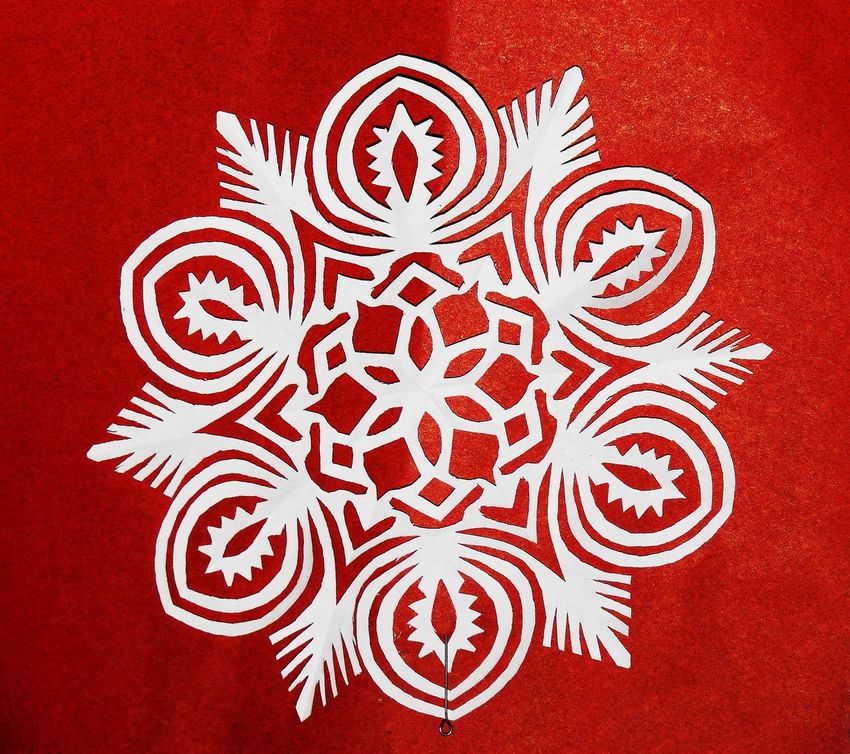
Another of the simple ways - to fold a square sheet or a napkin triangle, and then cut a fancy pattern, unfold the napkin and get an openwork craft.
On the Internet there are many ways to make a snowflake out of paper with their own hands. There are many options for creating not only a patterned flat snowflake, but also its volumetric version.

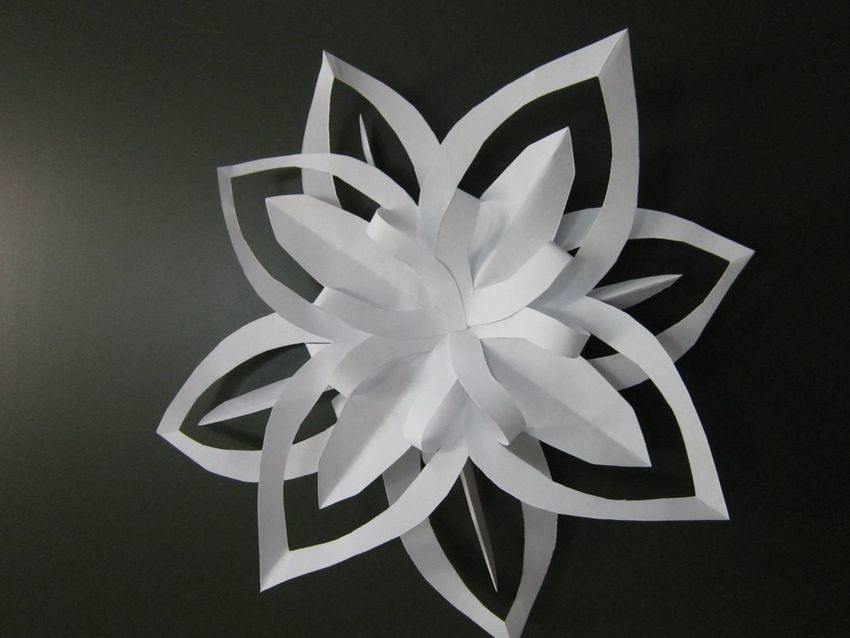
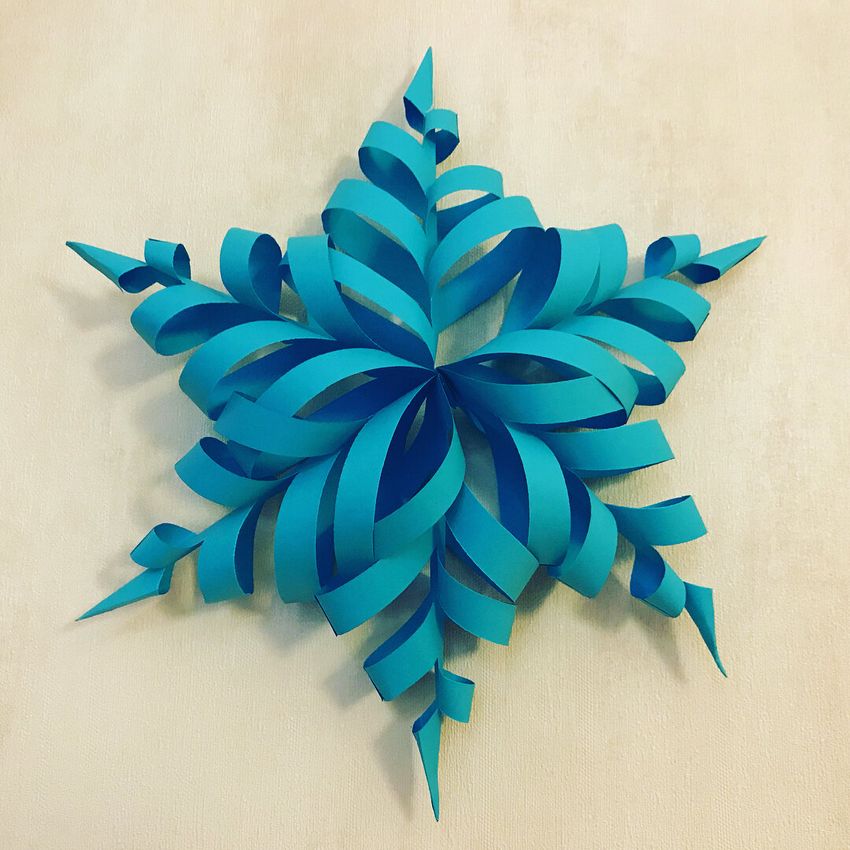
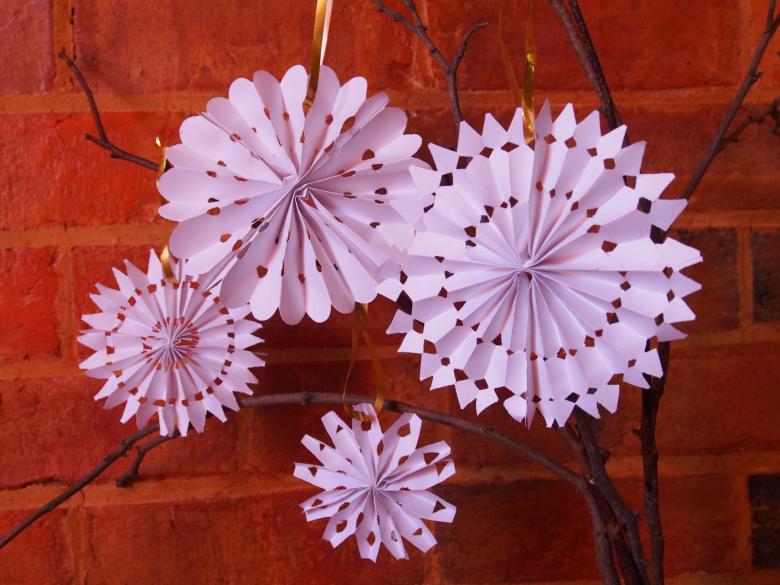
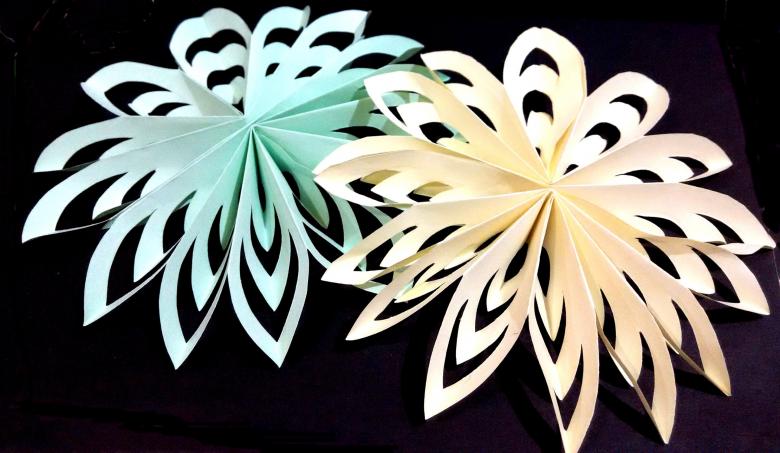
Three-dimensional snowflakes
Such products look artful, and it will not be difficult to create them. A large number of master classes will help to make a volumetric snowflake from paper with your own hands.
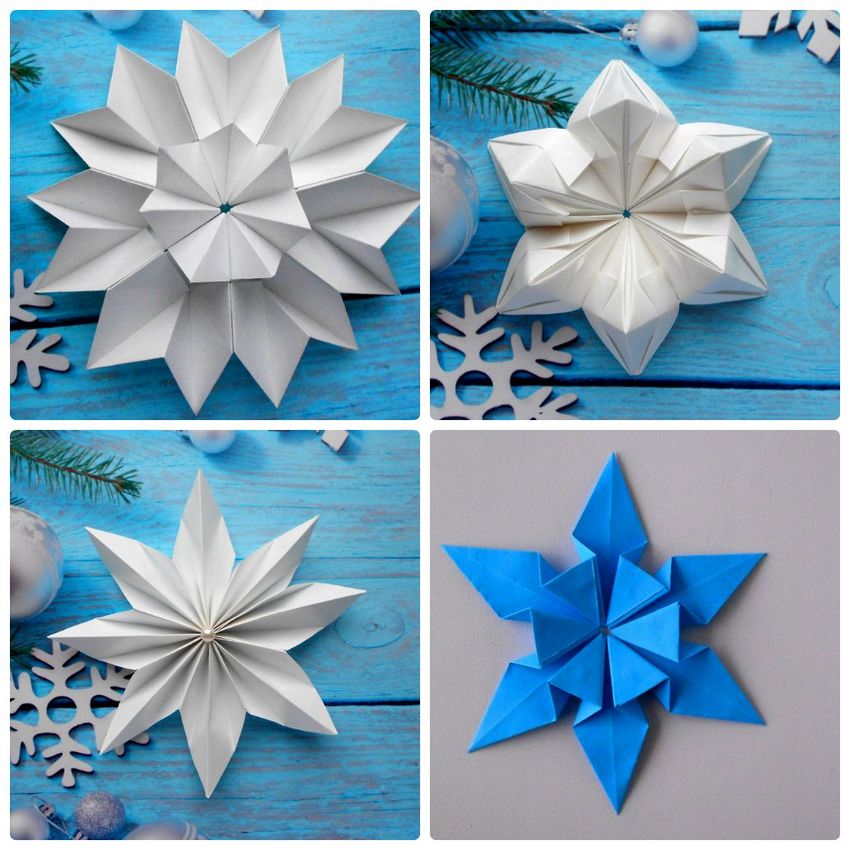
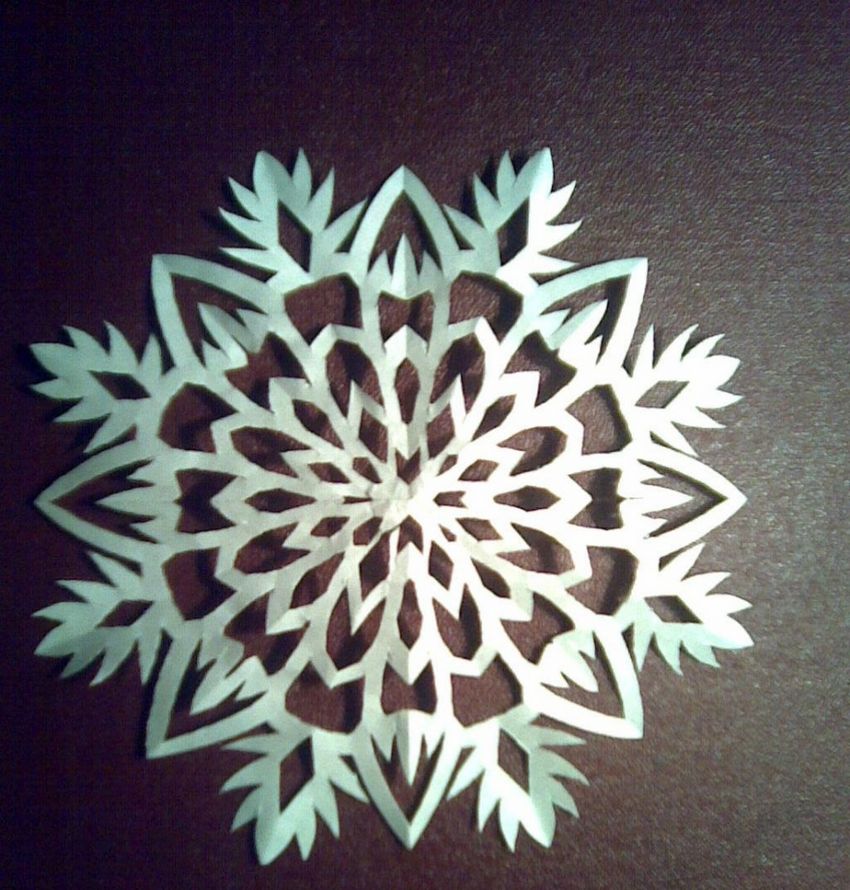
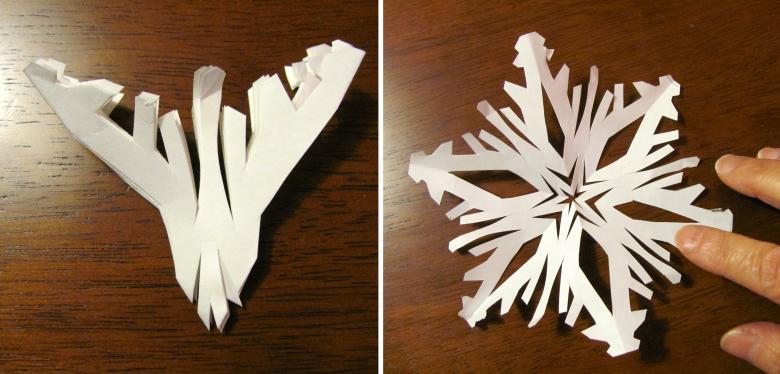
In the art of kirigami
When making a craft, it is necessary to take:
- Colored paper.
- Pencil.
- A ruler.
- Scissors.
From the paper you need to cut a square and fold it into four. Then make a diagonal fold and cut off the top triangle and the sides of symmetrical triangles. Make two cuts on both sides of the acute angle and another cut on the right or left. After that, unwrap the paper and in any order bend the corners up and down.
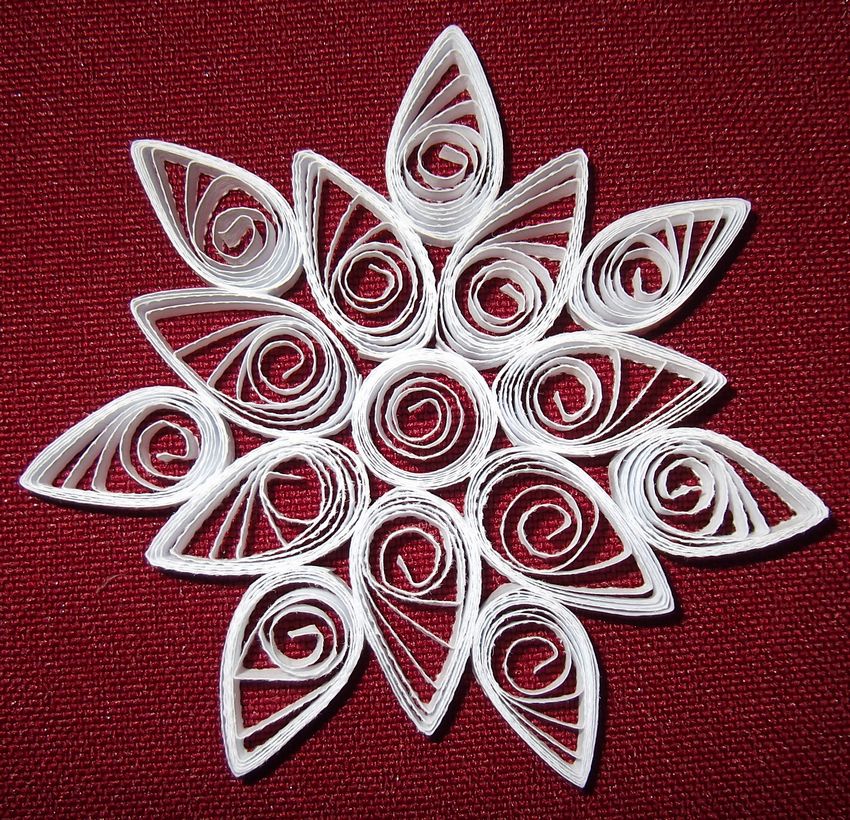
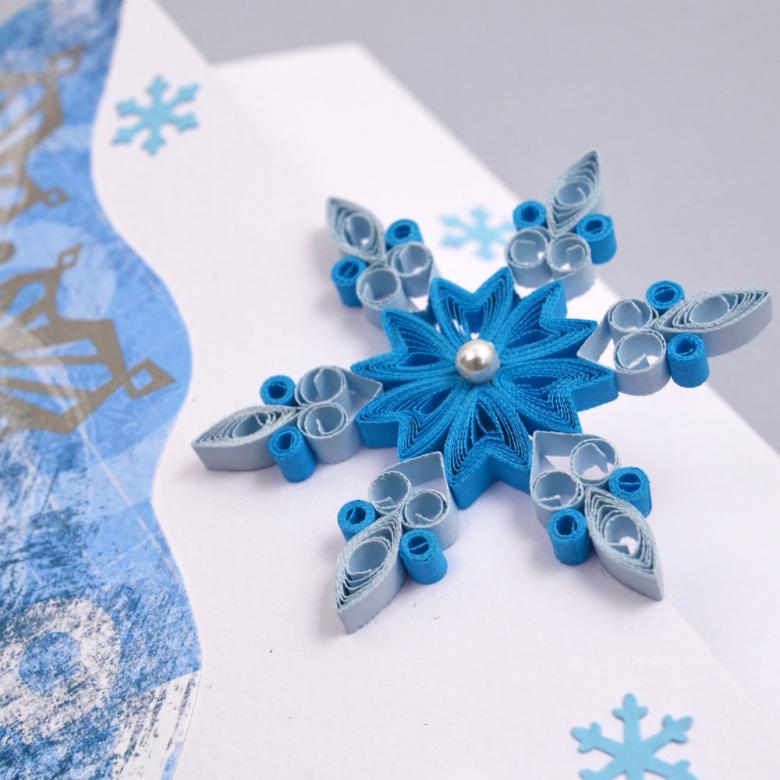
In the technique of quilling
- 1.Using a ruler and pencil to draw equal strips, cut them.
- 2.Twist the strips onto an awl, then glue the end to the resulting roll and remove the awl.
- 3.Make several of these rolls, but the rest should be flattened slightly on both sides.
- 4.To the very first roll glue six rolls.
- 5.Make six more rolls and glue them between the other rolls of the product.
- 6.Make six more rolls to be glued to each end of the craft.
- 7.Glue six more rolls of long strips between the small rolls.
- The next six rolls bend so that they look like squares, and glue their corners to the large rolls.
Handicraft ready!
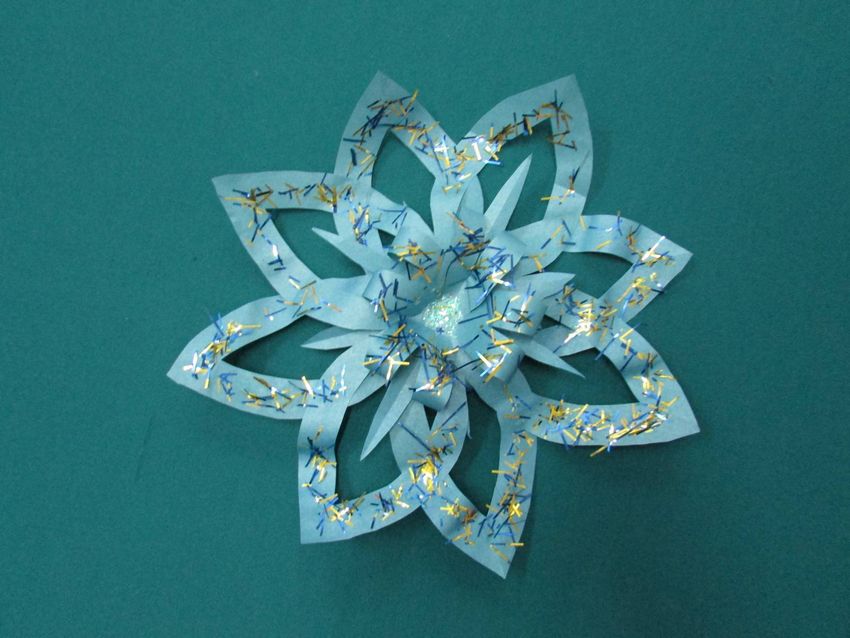
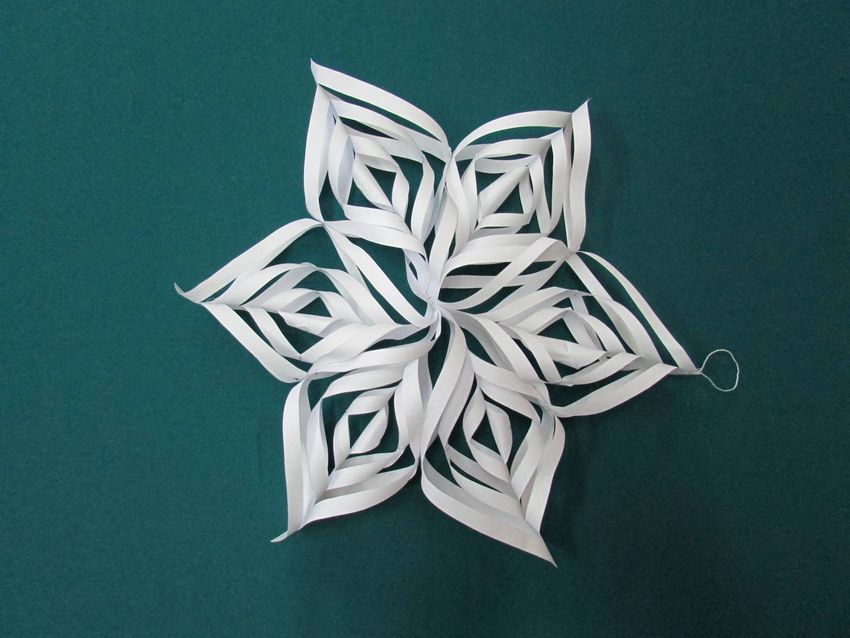
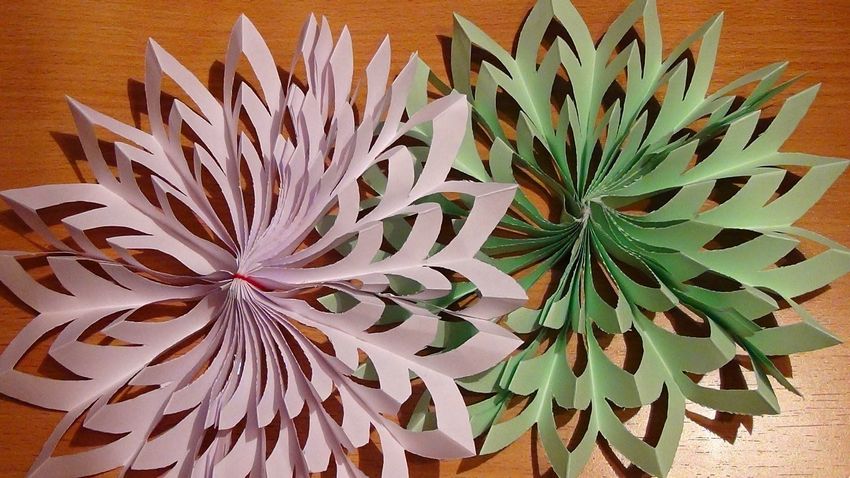
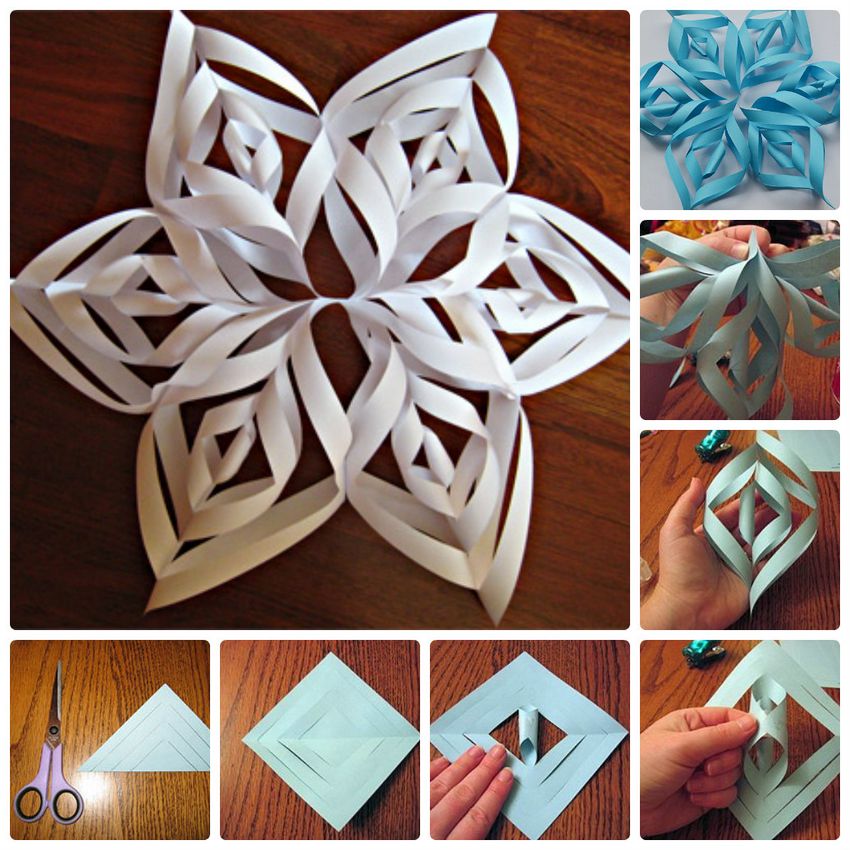
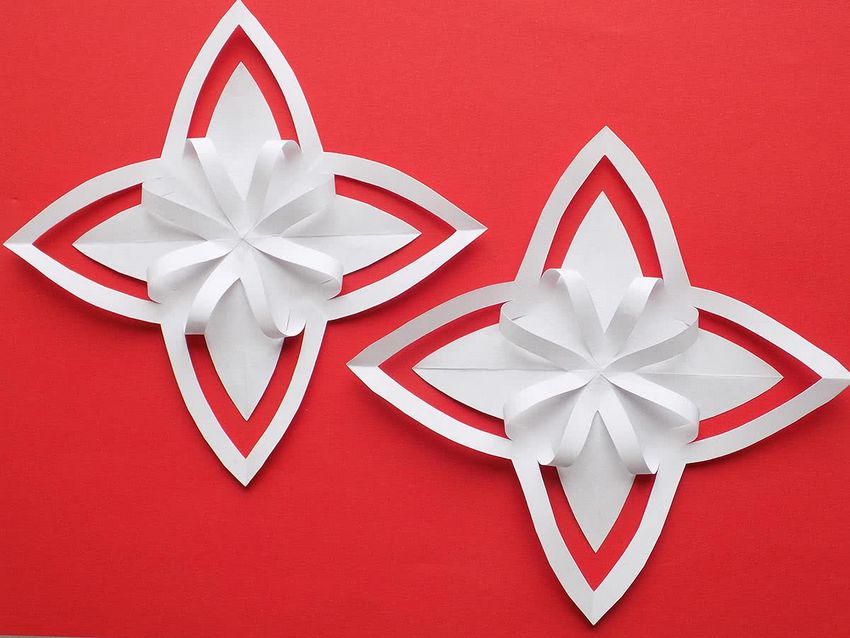
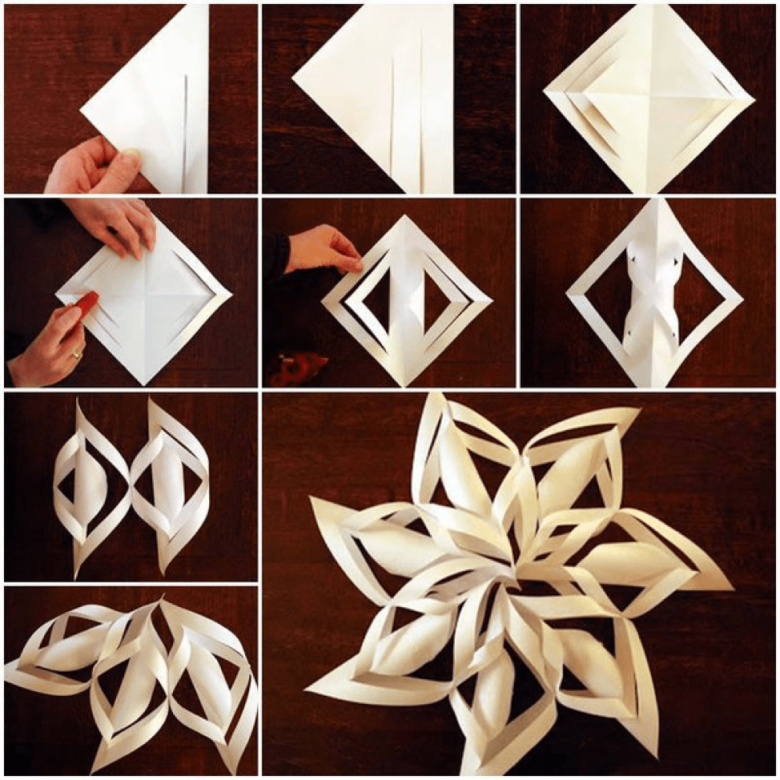
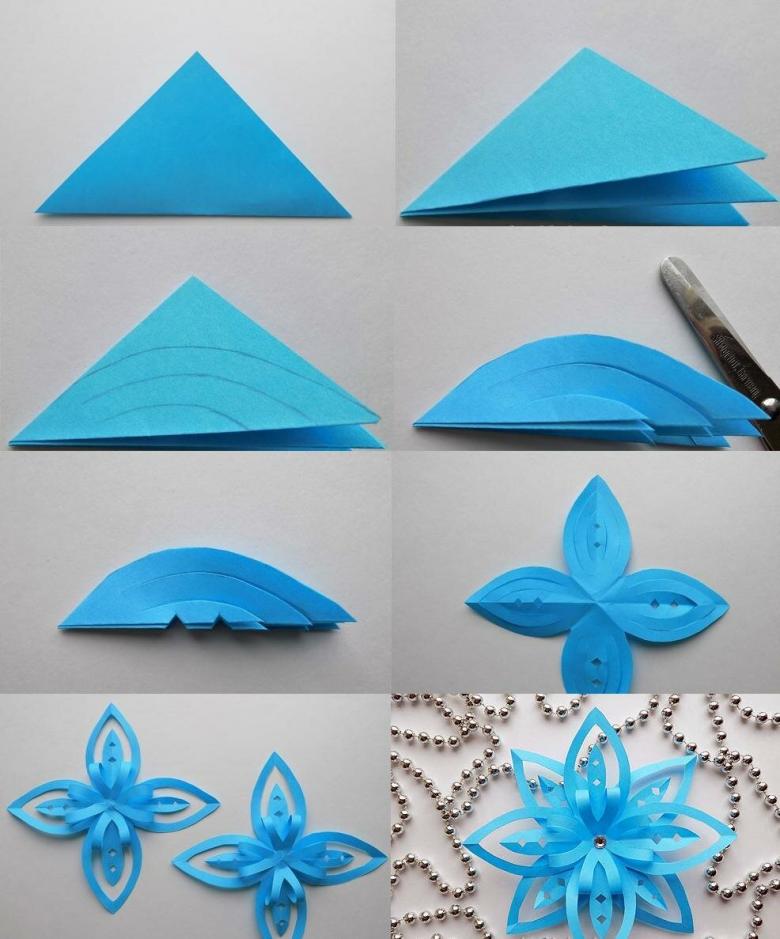
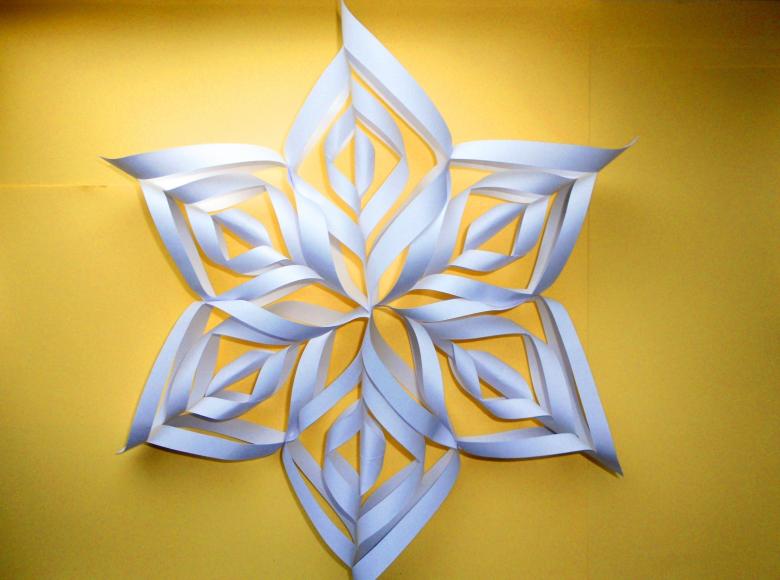
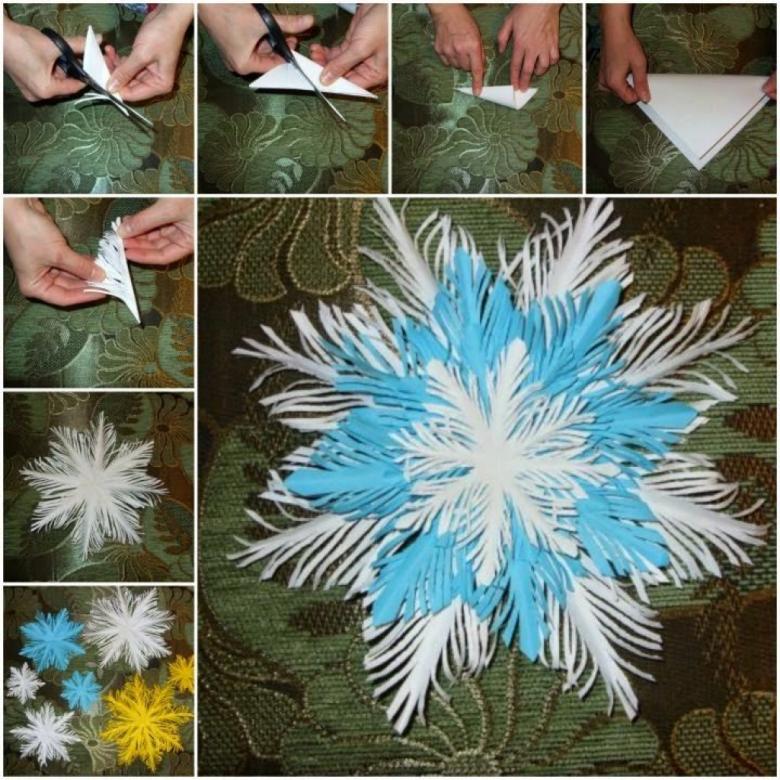
Three-dimensional snowflake
- For her to make six equal squares.
- Bend the squares into triangles and make three cuts on each side.
- Arrange the squares and twist the two nearest edges into rolls. Glue together with tape.
- Unfold the workpiece and connect the next two strips.
- Make a craft to turn and connect the third row of strips.
- Last stripes also staple.
- Six squares staple three pieces, turned the same way.
- Glue the two parts into a single figure.
- You can fix the sides of the craft with glue.

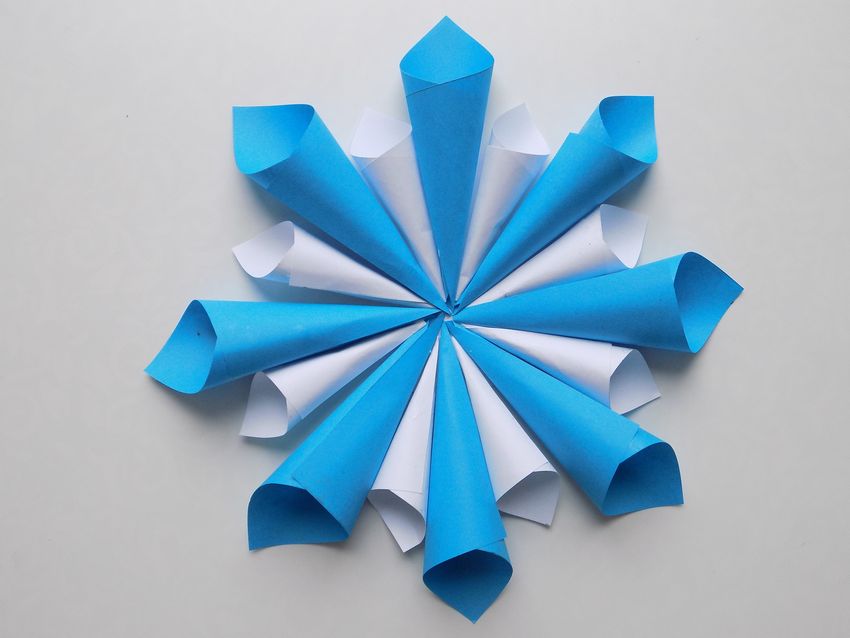
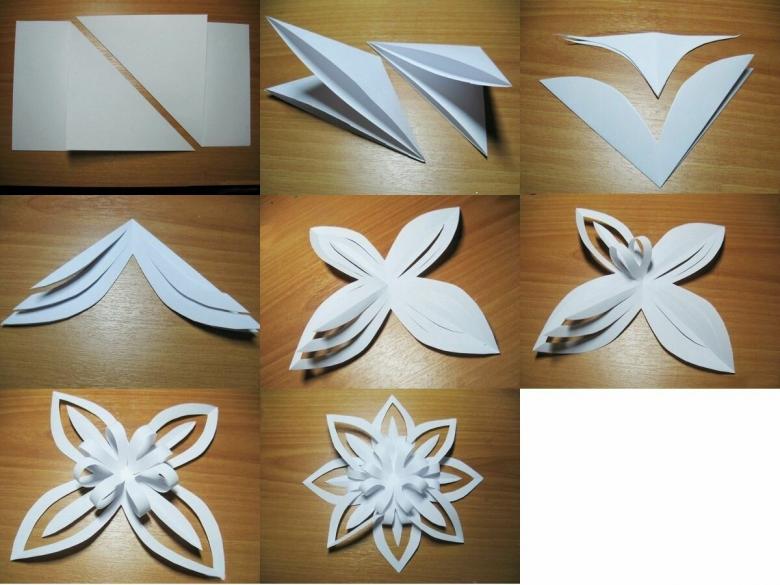
Snowflake-flower .
For the product will need six strips of paper, stapler, a large bead as a decoration. Each strip should be twisted into a cone and fasten it with a stapler. After that, connect the tops of the cones, and place a bead in the center.
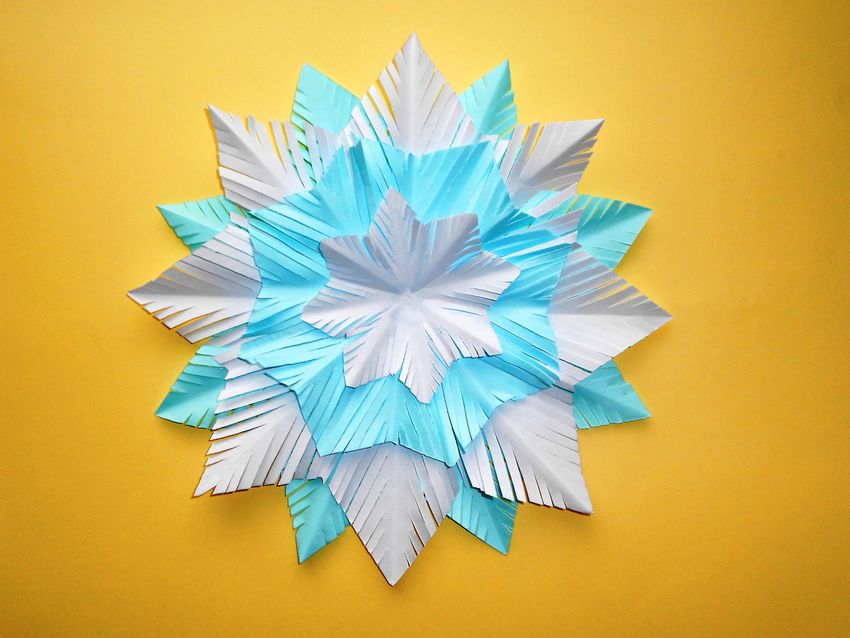
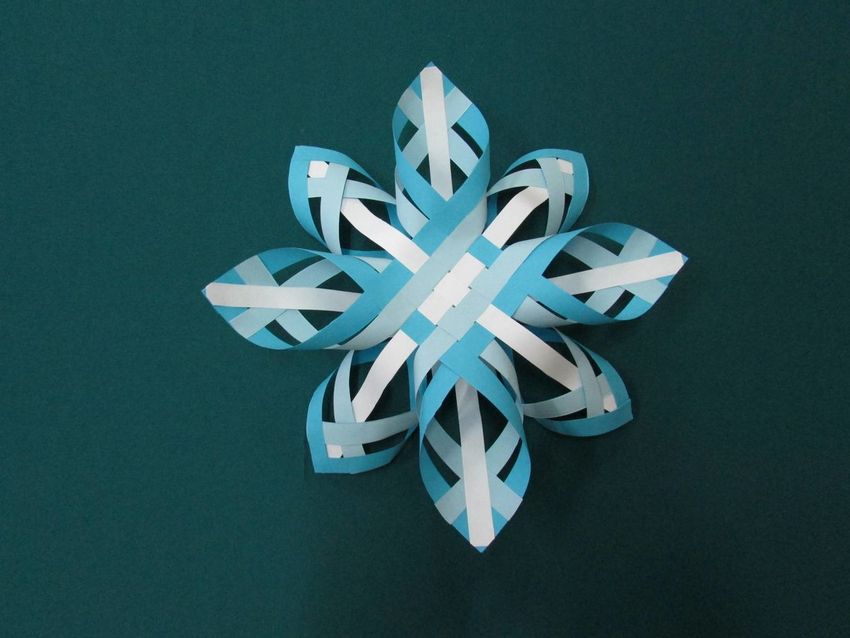
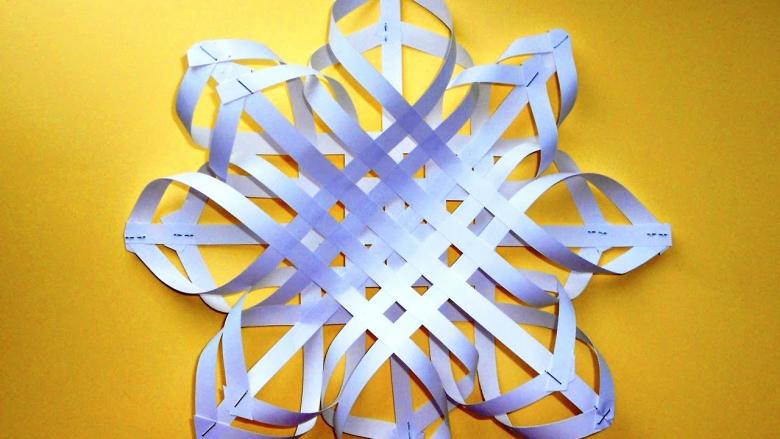
Snowflake with thin strips
It needs ten thin strips. It is necessary to put five of them in front of you, and the rest pass perpendicularly through them to get woven "carpet". The closely spaced ends should be smeared with glue and connected to each other.


Connected ends will resemble leaves. Similarly, make a second craft and connect them together: unconnected strips of one to glue in the "leaves" of the first snowflake.

Garmoshka snowflake .
For her to fold a sheet accordion, then draw an ornament and cut it out. We get a strip of several identical patterns. The last step - take the resulting blank in the ring and fix it.
On the Internet there are many schemes of how to make a three-dimensional snowflake out of paper. In addition to the proposed, there are three-dimensional geometric snowflakes, origami crafts, three-dimensional snowflakes and many others.

felt for crafts
A favorite material of mistresses is felt. It is used to create any crafts, including snowflakes. Good look products in the form of snowflakes, Christmas balls with a variety of embroidery, or any toys embroidered with these beautiful crystals.

Popsicle sticks crafts
They are designed for the little ones. To make them is very simple - you need to connect three sticks with glue and decorate them. Here you can use your imagination, and you can use sequins, rhinestones, buttons, tinsel, sequins and more.

Chenille wire crafts
chenille or fluffy wire is considered a good material for creating fancy snowflakes. Due to its flexibility, this wire can take any shape, and the fluffiness will make the handicraft three-dimensional, which allows you to do without the additional snowflake decoration.

The only component
For this snowflake, you need different lengths of wire. The long pieces are good for the base, and the short pieces are good for the rays. Binding the pieces together, you can create a three-dimensional New Year's Eve craft, which does not need additional decorations.

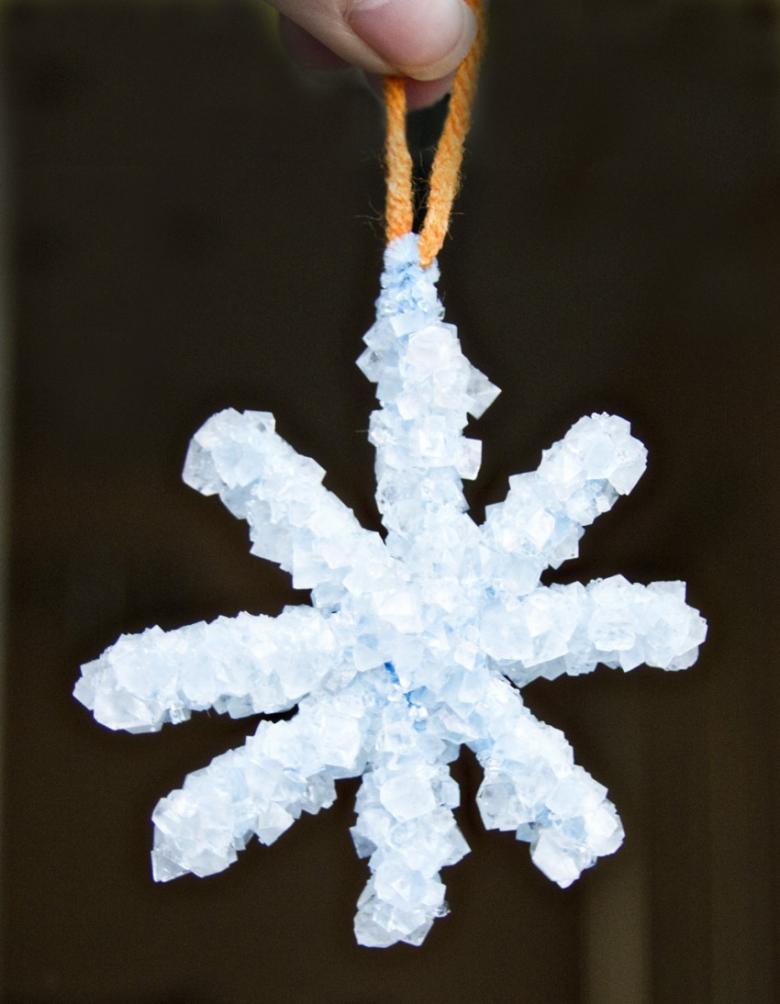
Crystals as a decorative element
First you need to make a product out of chenille wire. After that, dip it into a solution for growing crystals and wait a few days. After the crystals have sprouted, the craft is ready.

Salt as a decoration
Apply glue and sprinkle salt on the made snowflake. In this case, the salt can be used together with glitter, so that the handicraft shimmered in the sun in different colors.
Decorations made of tubes
To create the "rays" of the craft, cocktail straws will work well. As a basis, you can use cardboard. To do this, connect the straws together and take two circles of heavy paper or cardboard. Glue the circles on both sides of the product.

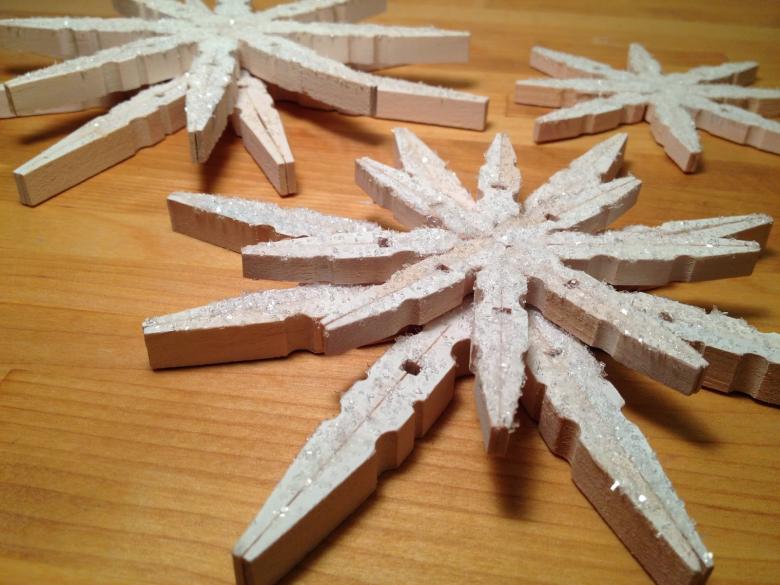
Decorations from clothespins
A good material for snowflakes are clothespins. You need to take out the middle of them, and then glue the wooden halves in the form of a star. You can make a complex snowflake from two parts of different sizes. You need to make two crafts, and then glue them together. Decorate such crafts are best decorated with glitter.
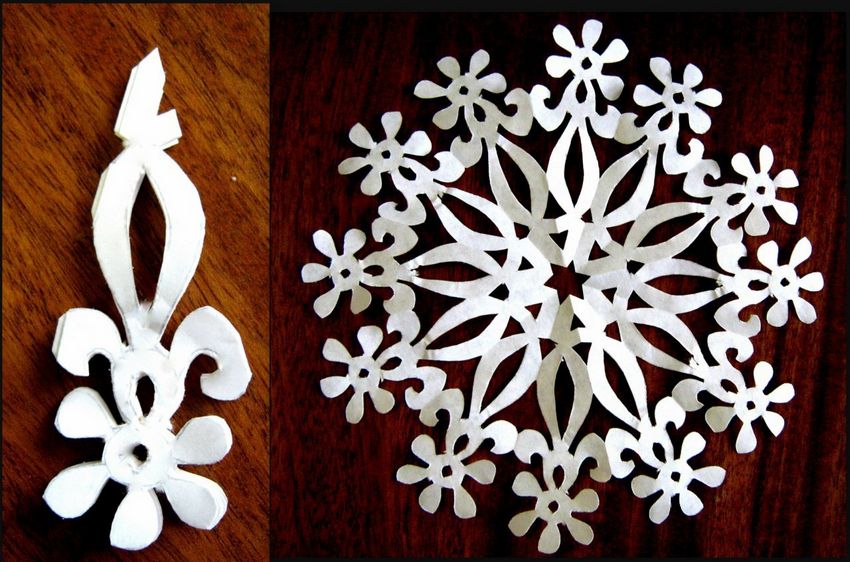
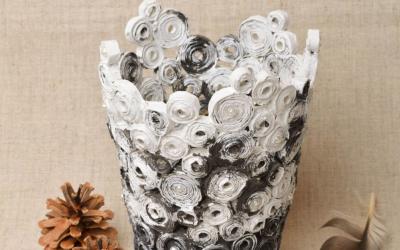
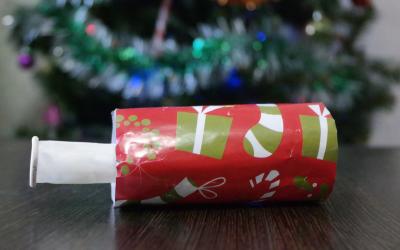
Handicrafts made from toilet paper sleeves
Original crafts are made from the sleeves of toilet paper. The hub should be cut into several rings of the same size in width. Glue six of them together. In each ring can be glued folded in half rings. Finished products are better decorated with sequins.

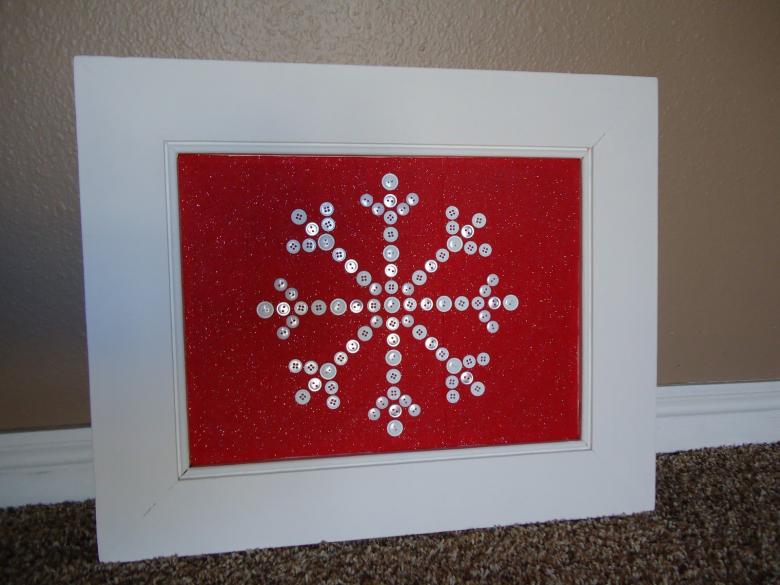
Paintings with snowflakes
You can create a picture-applique. For it you need plywood, fabric, beads. Plywood should be glued with material, and on this peculiar "canvas" to glue beads, giving them a snowflake shape.
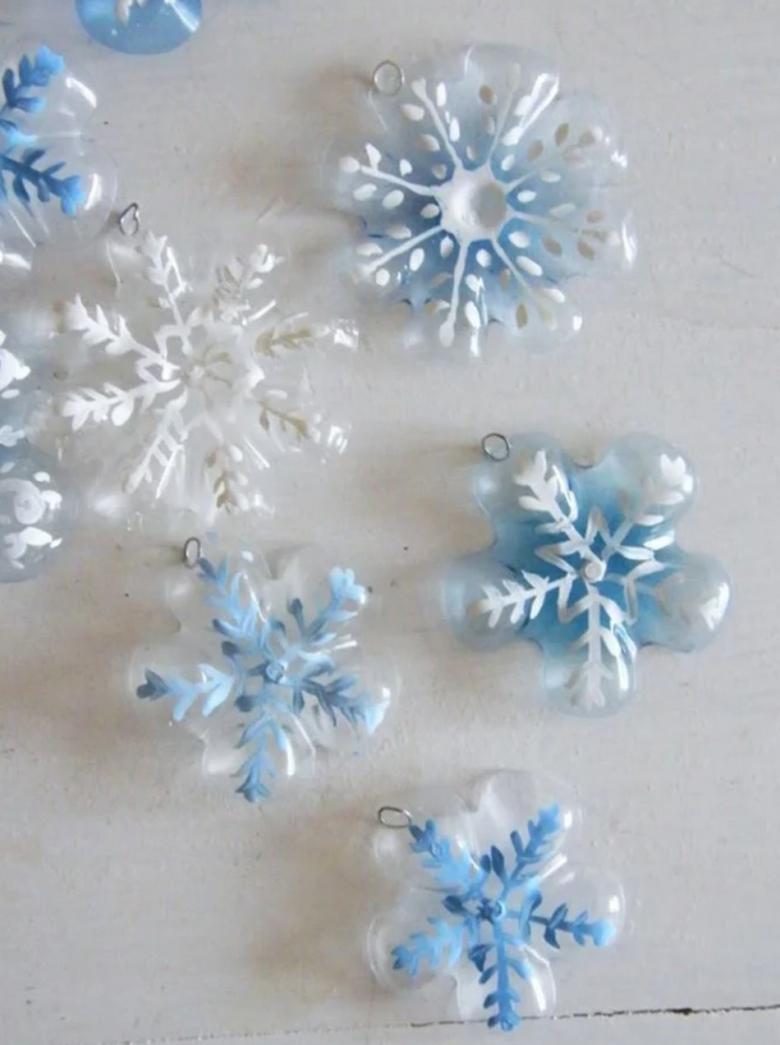
Plastic bottles as a material for work
Such handicrafts will not only decorate the interior, but will also suit those who think about the pollution of the environment. Cut the bottoms off the bottles and paint or decorate them with glitter. The crafts are ready!
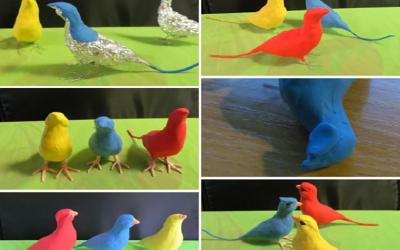
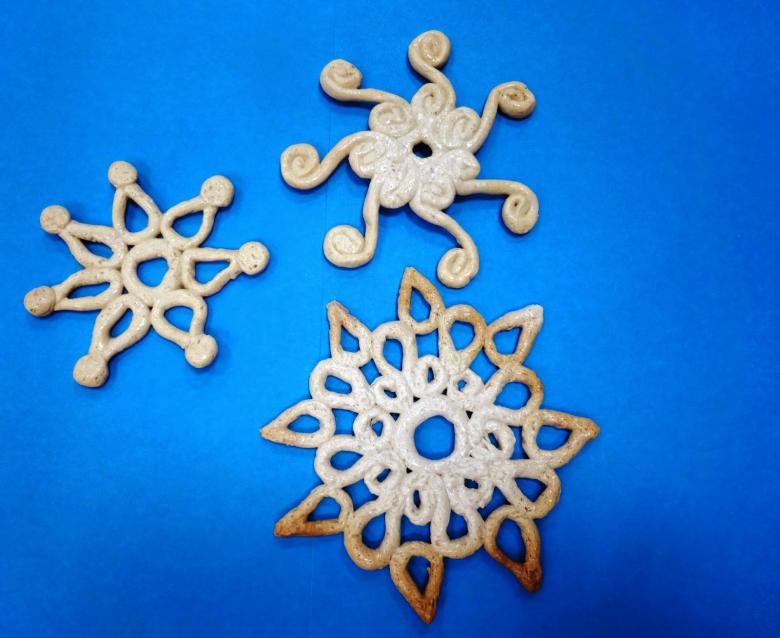
Puff pastry snowflakes
Make dough in a 1:1:1 ratio (flour, water, salt). Cut snowflakes out of it and paint them, or decorate them with beads or glitter.
In addition to all of the above, the material for the craft can be anything, even cotton swabs, beads, bottle corks, pine cones, cotton balls, mosaic parts, and more.
Photo ideas of homemade paper snowflakes