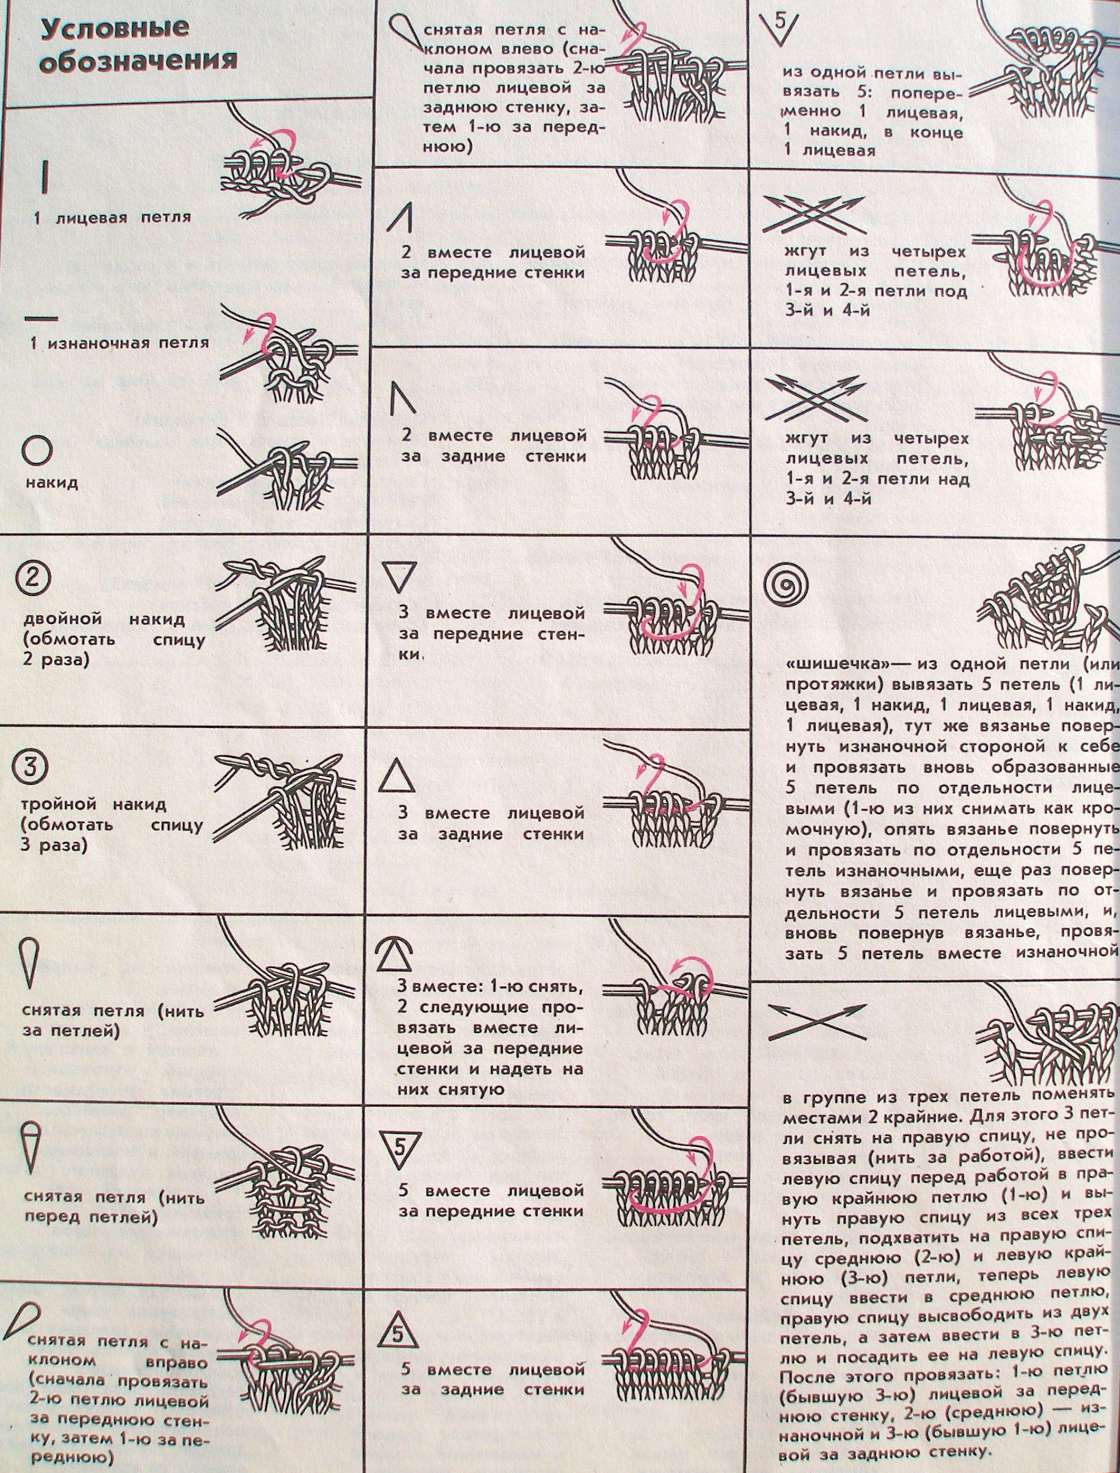
How to knit a tunic by Scissors and Crochet: a detailed overview of different knitting techniques for beginners
The first tunic appeared in ancient Rome. It had a simple form similar to the bag. Vested with openings for the arms, neck and waist. Later, it was divided on the basis of social status. Young girls were entitled to a higher version, and married women much lower than the knees.
But the tunic was universally worn by all inhabitants of ancient Rome, including soldiers, gladiators and slaves. It differed in fabric quality and size. The collar was never used. Later sleeves appeared as a sign of the delicacy and dandyness of girls and some young men.
In modern times, this type of clothing has not changed much. It has become, often, knitted, rather than simply sewn together two pieces of fabric, as was done on the basis of the first instances.

In our time, this type of clothing has not lost popularity, as it is convenient and easy to make needlewomen. Next, let's figure out how to knit a tunic by needles for beginners schemes with descriptions and examples. But we will focus on the female version, modern men in contrast to the ancestors are not particularly inclined to wear a tunic.

Popular types of knitted tunics
Most of the connected tunics are created with two tools:
- Crochet.
- With spitzes.
Texture Differences:
- Smooth patterns are the most popular.
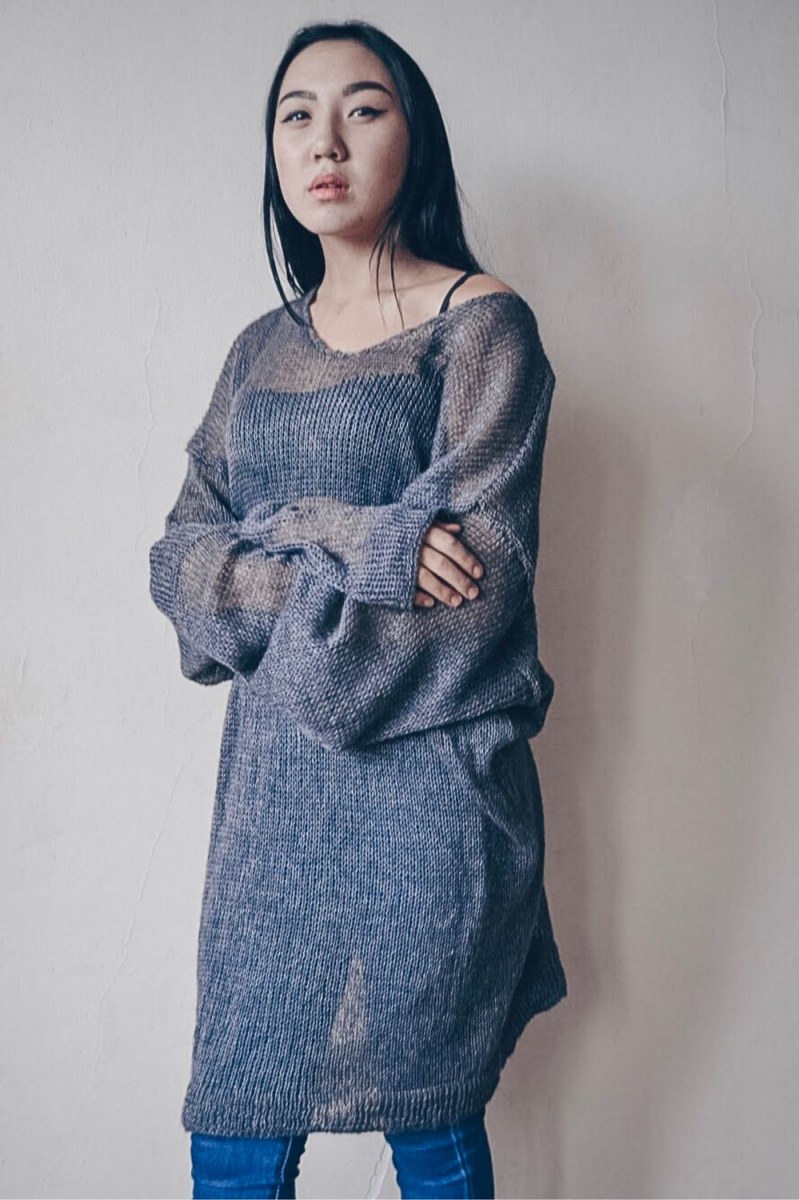
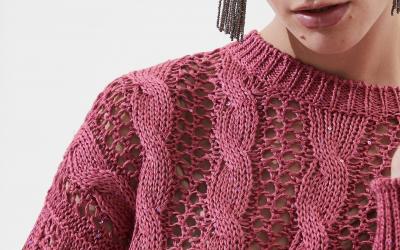
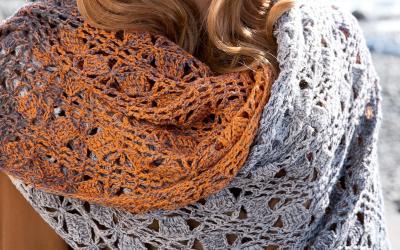
- Openwork ones are distinguished by the presence of a knitted pattern based on through-holes.
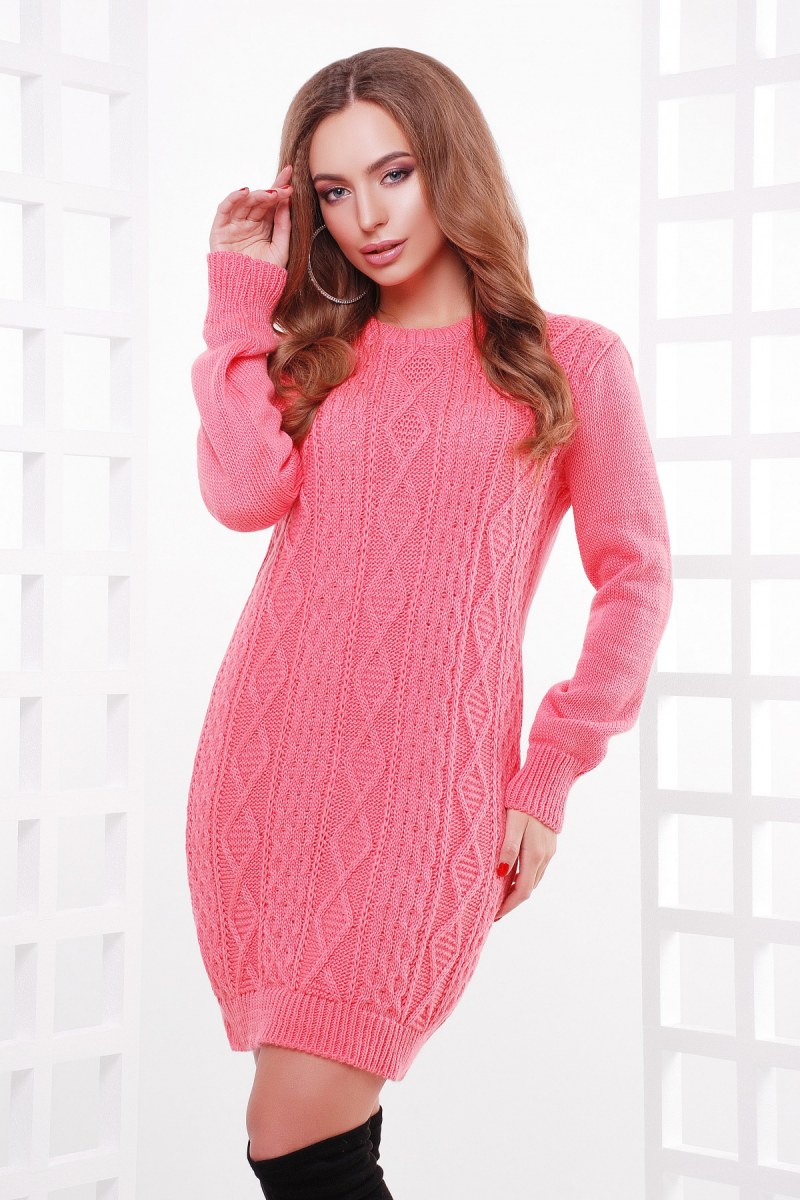
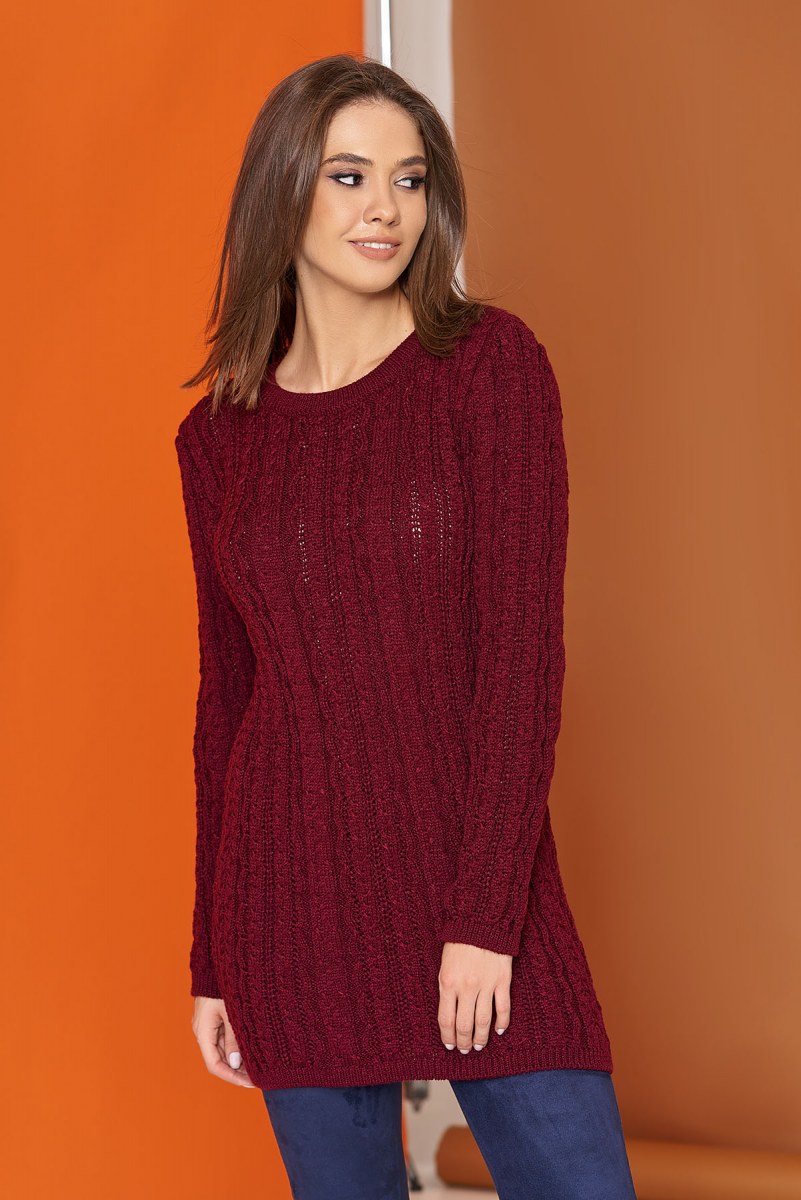
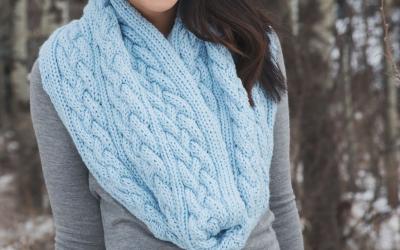
- Some models are provided with a bas-relief pattern in the form of a cone, pigtails and other forms of convex pattern.
Popular tunic colors:
- Monochrome model.
- A combination of colors based on the chosen pattern.
- There are tweed and melange versions.
Seasonal differences:
- There are summer types.
- There are winter models.
Differences in style:
- Straight variations are popular.
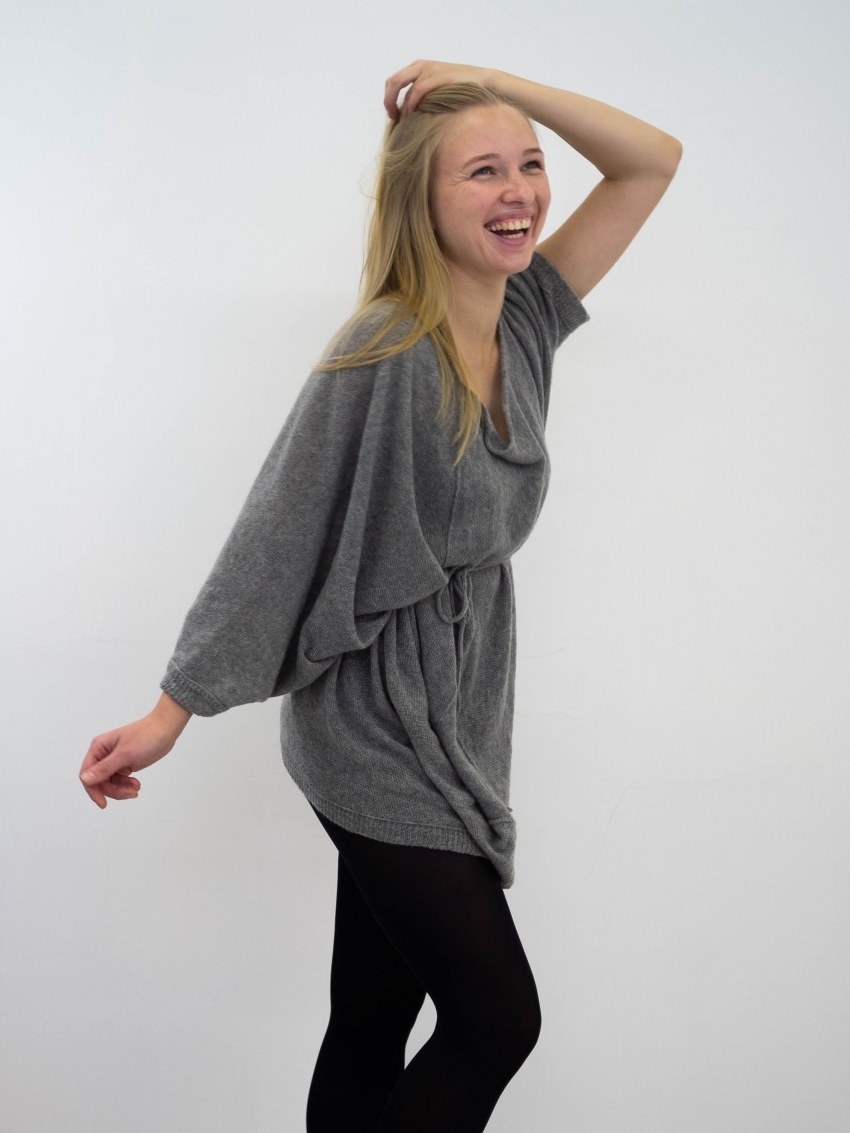
- Flared models are created.
- Use a fitted or tight around the waist.
What model to tie a beginner.
To understand how to knit a beautiful tunic, you need to understand all aspects of the case. It is important to understand what and who will use a thing? Based on this, you should use a suitable yarn. It should match the season, taking into account the possibility of stretching or sagging after improper washing.
A beginner to experiment and work out the skill of knitting should buy a few different diameters of needles and hooks. They will be used to work with different types of yarn and variations of the product. It is more profitable to start with the simplest models.
Where to start?
Before you start, it is necessary to rely on the starting actions. Without them, it will not be possible to knit a tunic for a particular female figure.
What to do:
- Measure the figure. This may be its own or another in the case of working to order. To do this, the readings are taken with a flexible meter;
- The size of the chest is fixed;
- Waist size;
- Girth at the hips;
- The length of the sleeve from the start of the upper shoulder point is measured;
- The total length of the future product;
- Selects a scheme for knitting a tunic.

Let's create a simple tunic by scissors
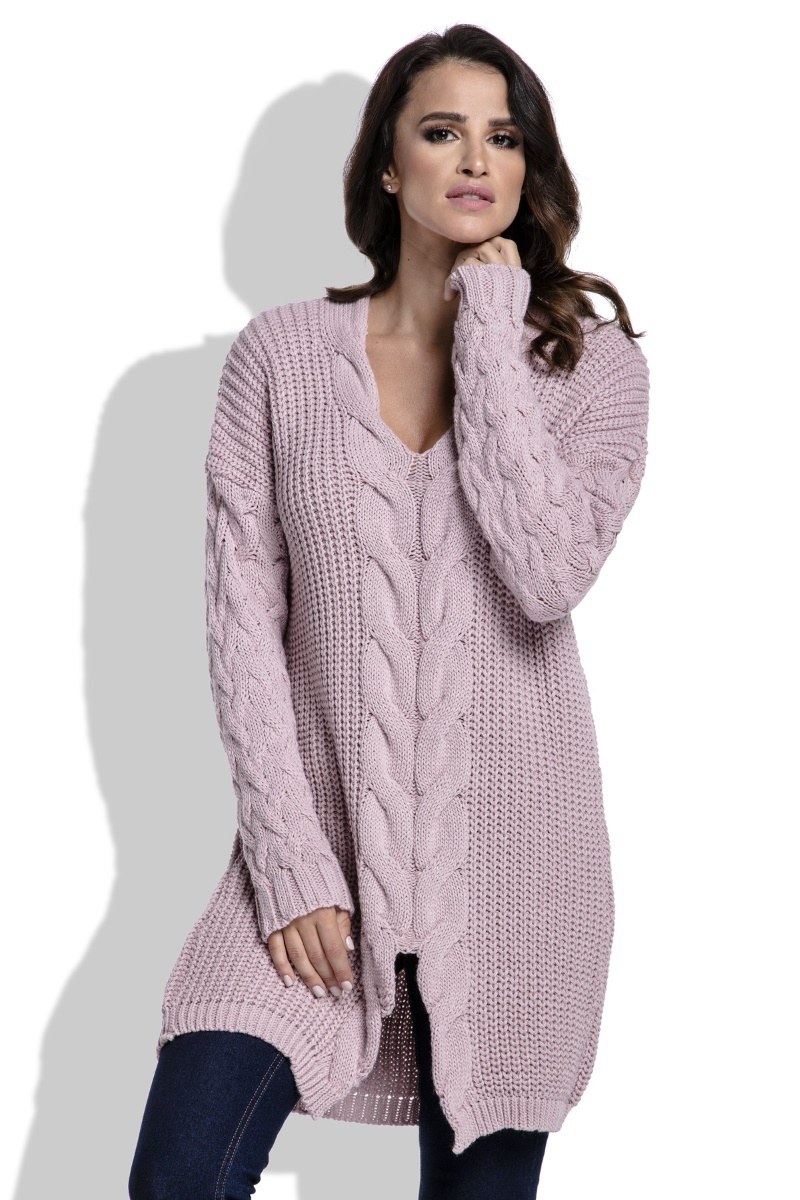
Our simple version is created in a monochrome variation for use with jeans. For this, we use 500 grams of yarn with the calculation for size 42 - 48. It is advantageous to rely on a pure version of cotton on the basis of a medium-thick yarn. A straight version of 6 - 8 number needles will work for this. The choice depends on the preference of the knitting strategy and density of the novice master.
Using the pattern requires knitting skills, thanks to the back and front loops. We rely on 17 rows with 15 loops in each new row. To begin, a 10/10 cm pattern is created. This is necessary to make sure that the chosen working strategy is accessible.
After completing the simple tunic. It is worth soaking the product. Drying is carried out on a light towel, the product as much as possible spread out on its surface.
Important: It is forbidden to hang on a rope, as deformations and stretching are formed.
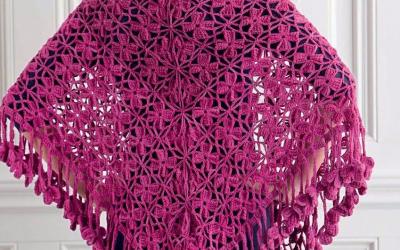
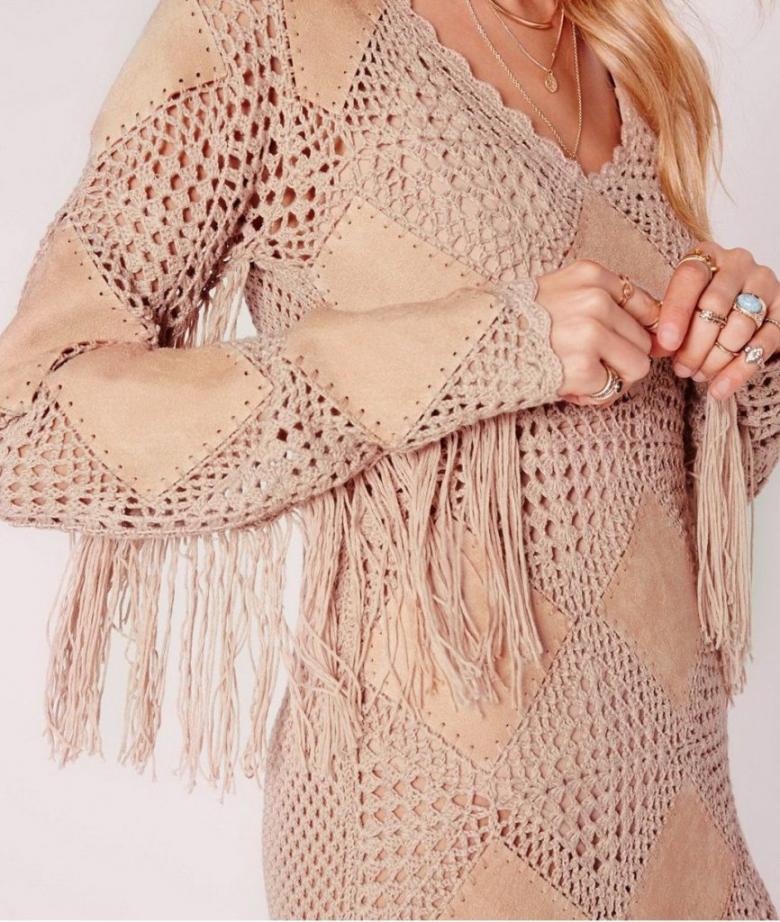
Beach square tunic by crochet
The look of this tunic relies on the addition of new large patterned squares. It is capable of being a treasure for a period vacation at sea. Unbleached cotton is used for it. A size 3.5 crochet hook will be needed.

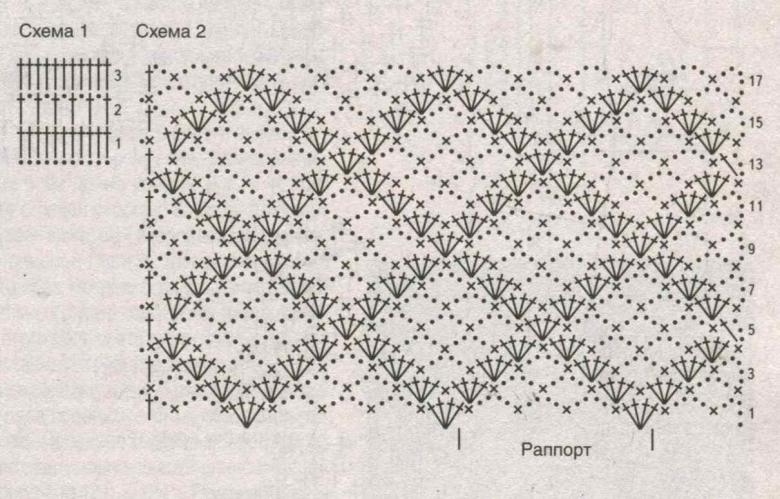
Scheme of work:
- Create a chain based on 8 air loops. They are connected, thanks to 1 corresponding column. Begin to create a pattern;
- Add a triangle to the tunic. For this we use 8 air loops, the shape ends with 1 connecting column. Continue adding geometric shapes to the product;
- All new circular rows start with the indicated number of air loops and end with a connecting column, if necessary, thanks to it the beginning of a new row is allowed;
- Squares are created with a size of 11/11 cm;
- For knitting the front and sleeves use a minimum of 31 and a maximum of 38 squares and just 2 triangles. The connection is made with 6 columns without using a stitch. Arches are skipped, but the addition of 3 air loops is required;
- The back is knitted in the same way;
- An assembly is added along the edge of the sleeves and bottom. This is done using 2 circular rows in all cases with columns and the use of the stitching technique;
- The neckline is created with two options: 3 or 1 air loops with a lift. Next, it is tied with 2 circular rows and columns without the stitching technique. The rows are finished with connecting columns.
Now we realize how to knit a beach tunic with a beautiful shape and elegant patterns based on a simple example.
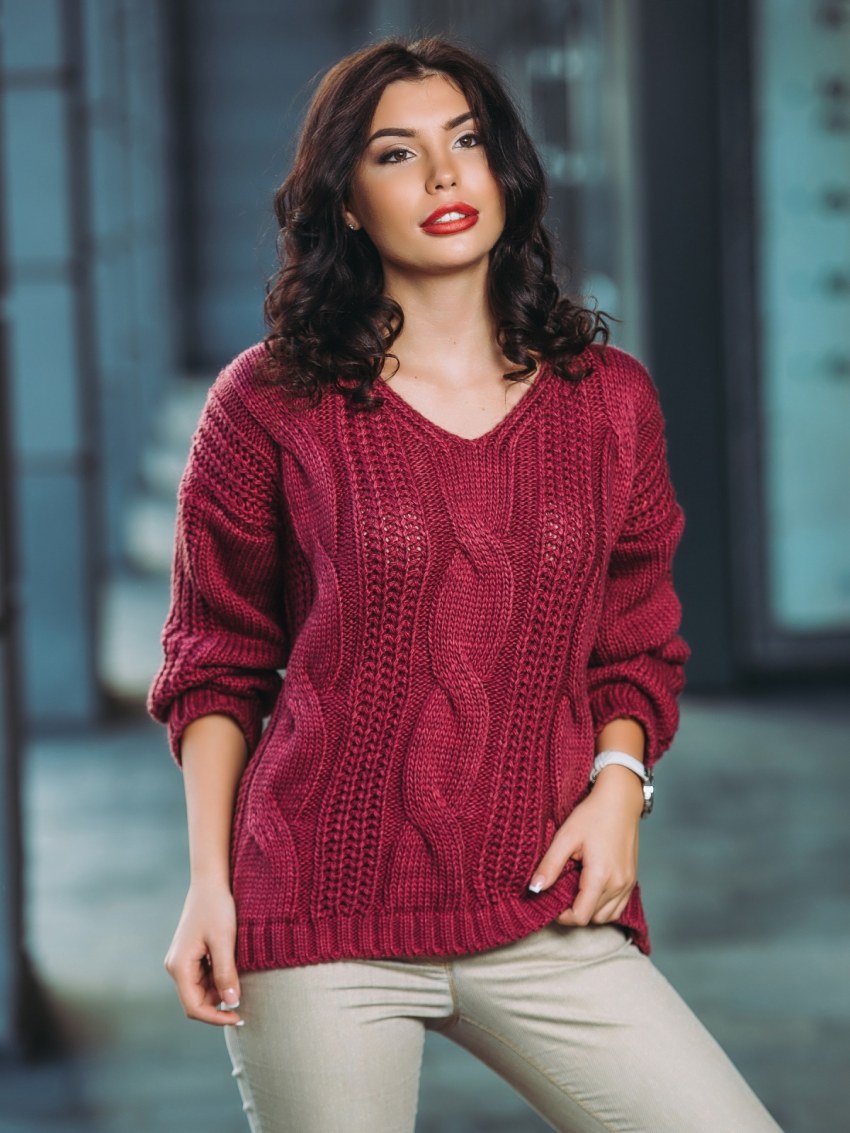
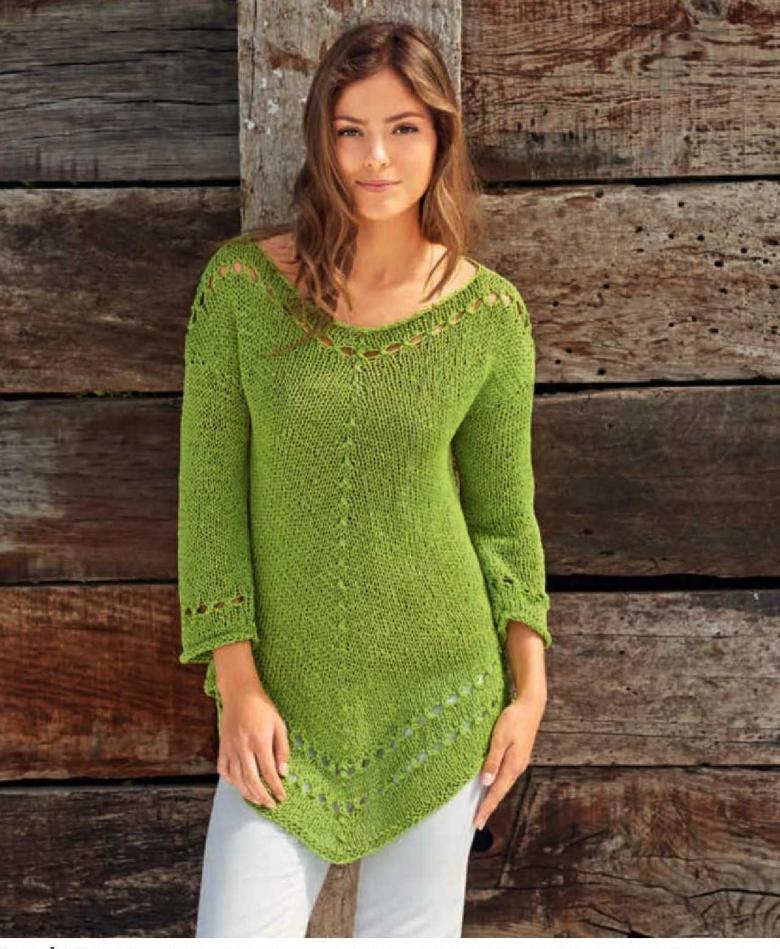
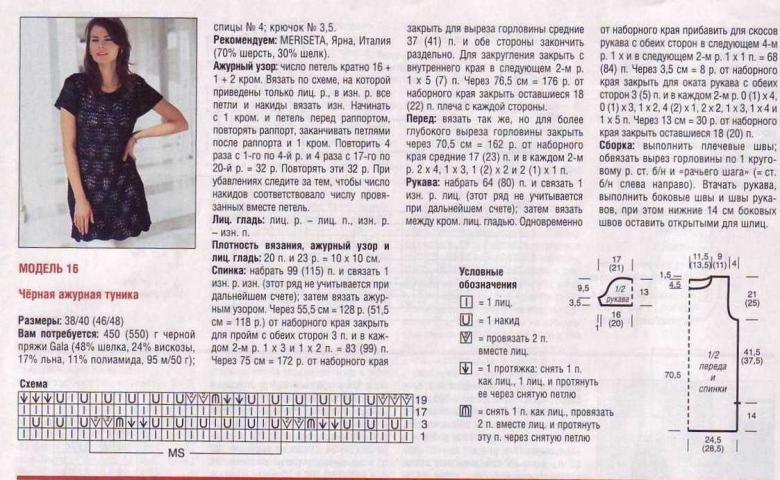
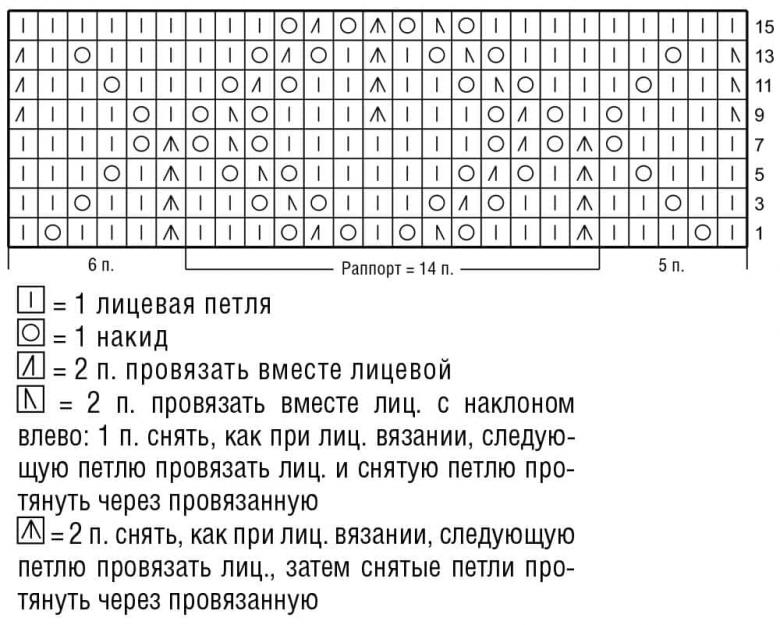
Openwork model for summer
A pure cotton or blended version of yarn is used to make this product. About 320 grams will be needed for size 42. We rely on a needle and crochet respectively with numbers 5 and 4.
We start by knitting a pattern. This uses 14 loops based on 20 rows. A 10/10 cm square tunic is formed.
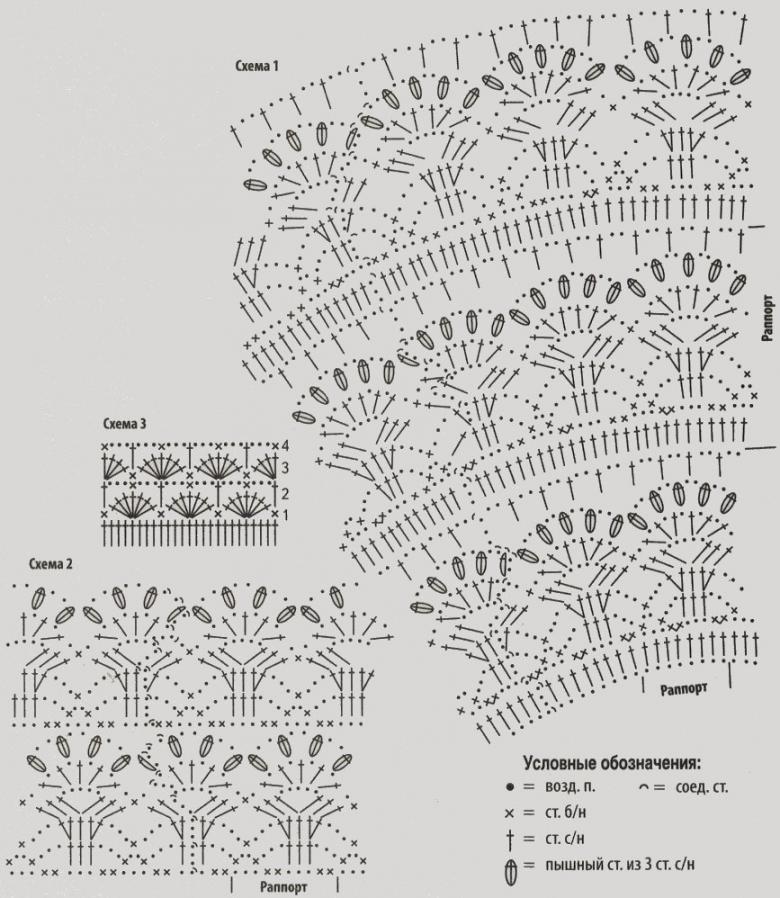
After that, we knit cones based on the pattern. We create a ring of the starting row, thanks to 6 columns without the use of stitches. The second row is formed by 12 columns without the need for a stitch. For rows 3 and 4, 18 columns without the need for a knitting technique is applied. Row 5 requires 12 columns without the need for a knitting technique. Row 6 requires 6 columns without the use of a stitching technique.
Now the loops are pulled together and stapled. The rest of the tunic is created on the basis of the scheme. After completing all the elements of the product is humidified or, performed washing, drying, thanks to the straightened and horizontal positioning. If observed wrap fabric on the edges it is pierced with needles with special ears.
Now you can do the assembly. To do this, a seam is created, thanks to the needle on the basis of the side parts and shoulder seams.
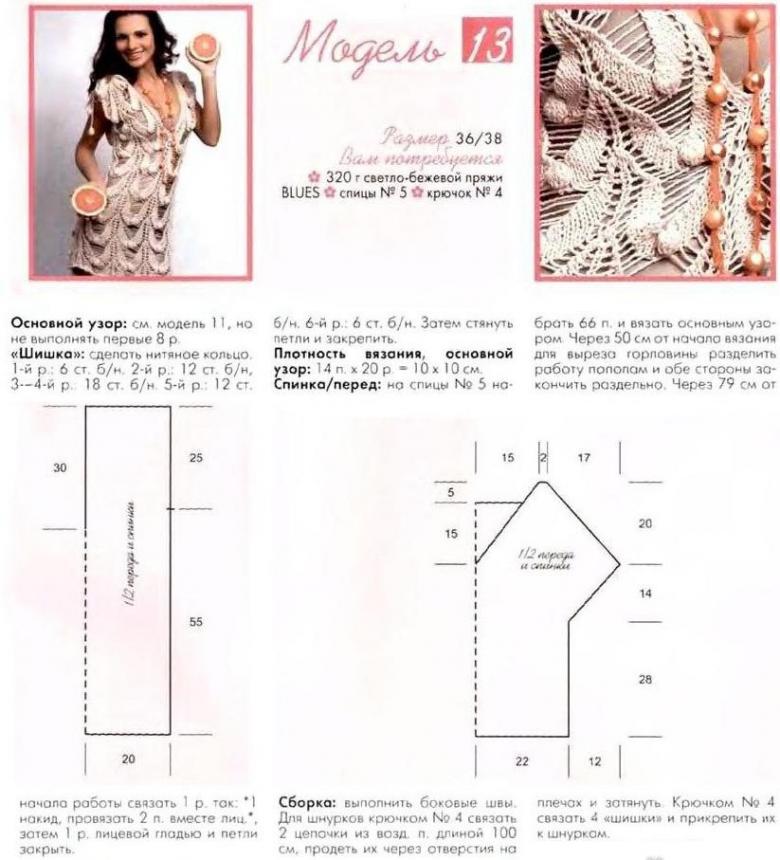
It is possible to knit laces. For this part of the product, a hook with number 4 is used. Two chains are recruited on the basis of the air loop of a meter each. They are created in a tight form, so that they hold their shape well.

Laces are threaded through the holes on the shoulders and securely fastened. Cones are attached to the ends and other decorative elements are added. The whole product can be used for its intended purpose.
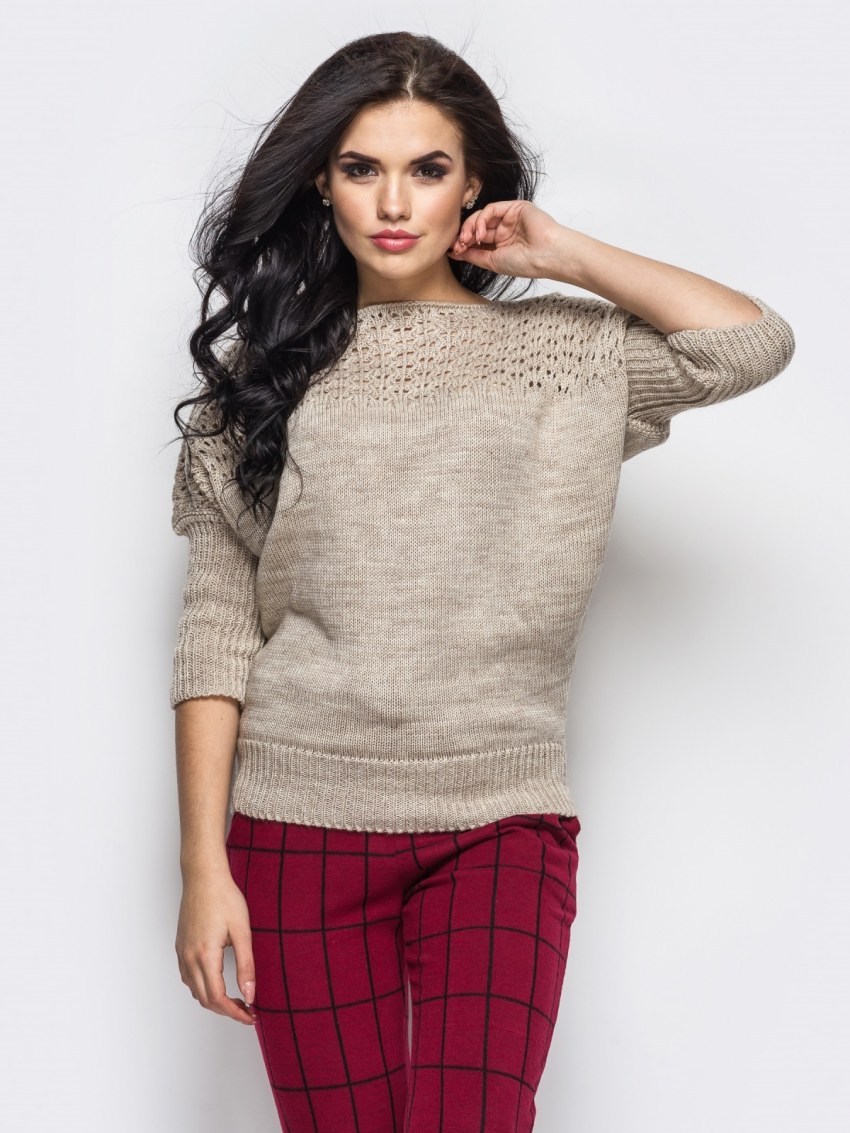
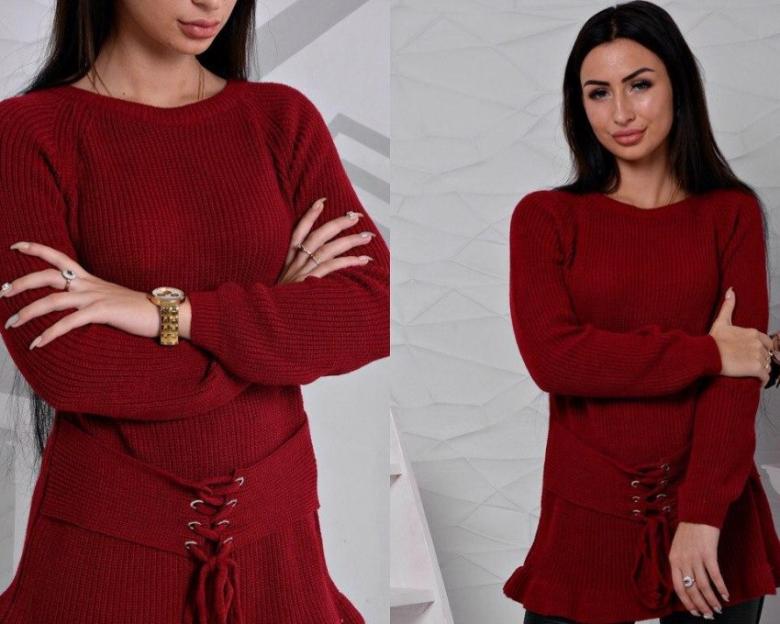
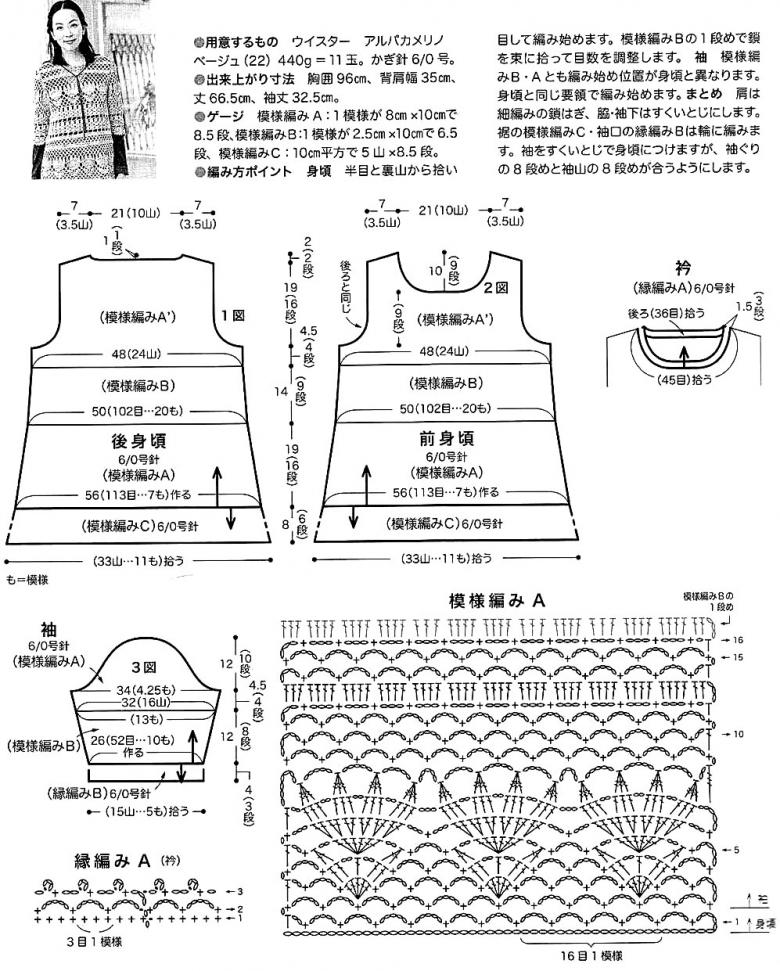
Create an elegant summer tunic
We use cotton with 100 grams per 180 meters. For this purpose a needle with numbers 3 and 4 is suitable. To start, 17 stitches are picked up and 24 rows are knitted. A square of 10/10 cm is formed. This will allow you to realize the density of the upcoming work.
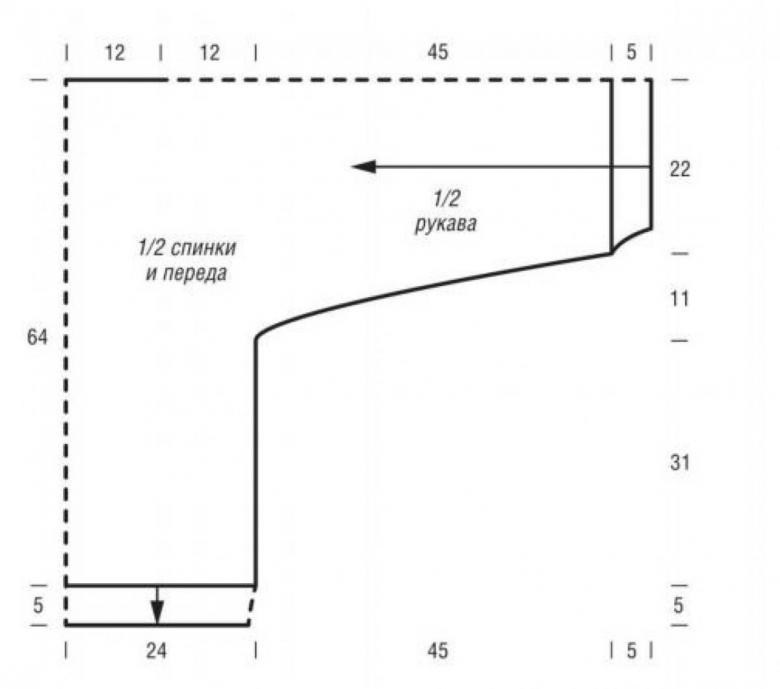
This version is made from sleeve to sleeve and that is its uniqueness. We will be guided by size 38. We use 40 loops on the basis of circular needles. Knitting is done, thanks to the basic pattern. After tying 16 cm on the length of the product, you need to make an addition on the left side on the basis of at least 83 loops. But the number can be adjusted for individual size.
After that, the main pattern is knit for about 43 cm. This will form the width of the tunic around the front and from the back.

An identical number of loops is used for the closure. This makes it possible to reach the armhole of the other arm. The knitting is done at 16 cm and the loops can be closed.
In this way the first half and the back are knitted. It is allowed to moisturize and use an iron after this procedure.
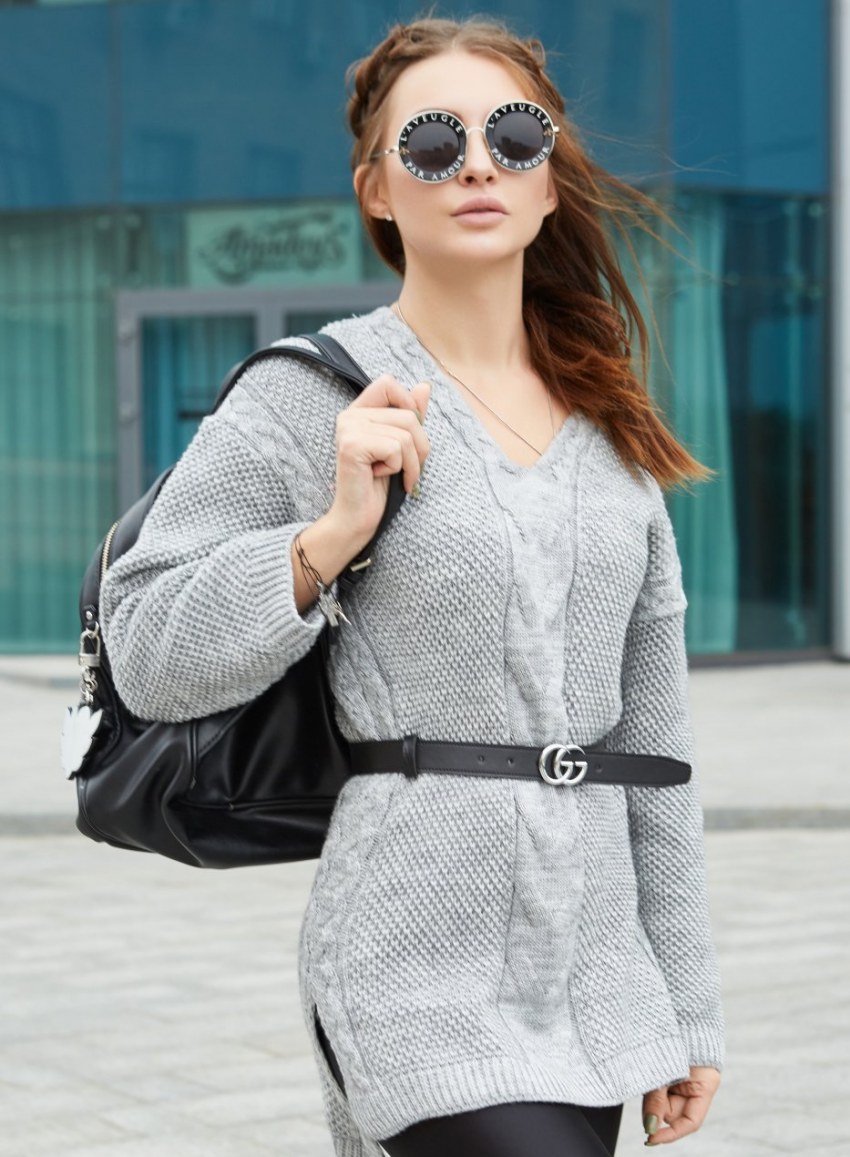
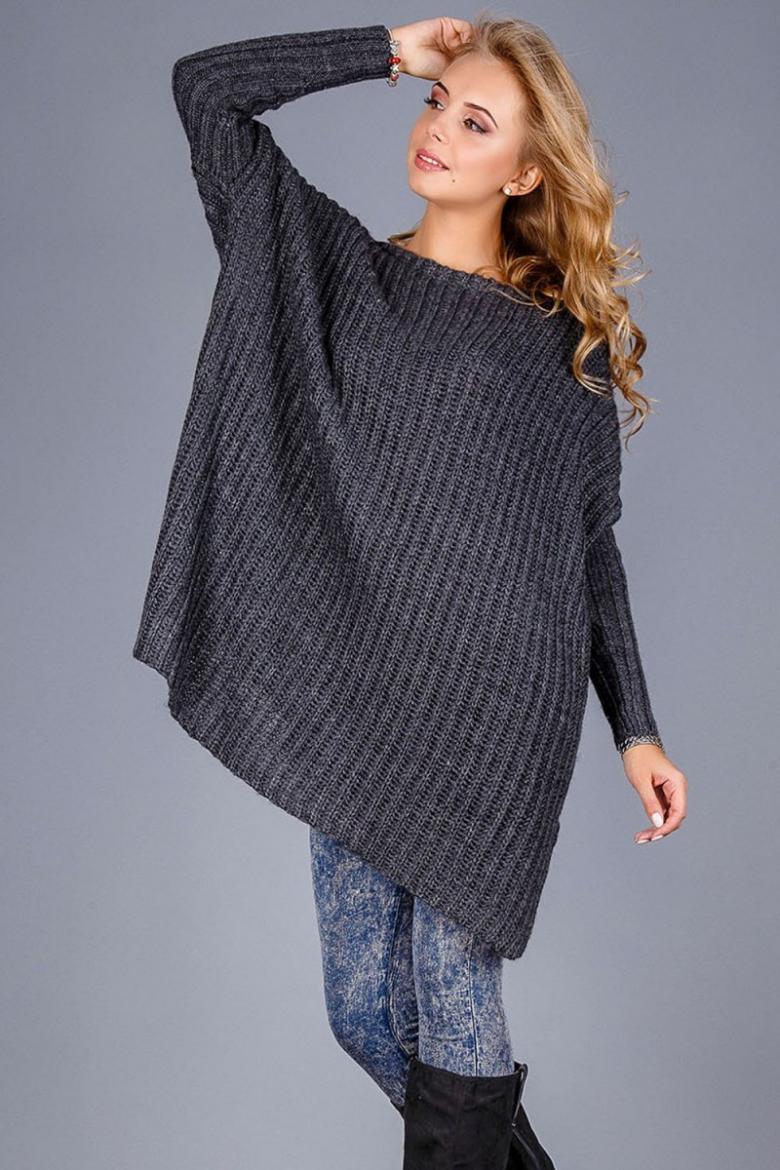
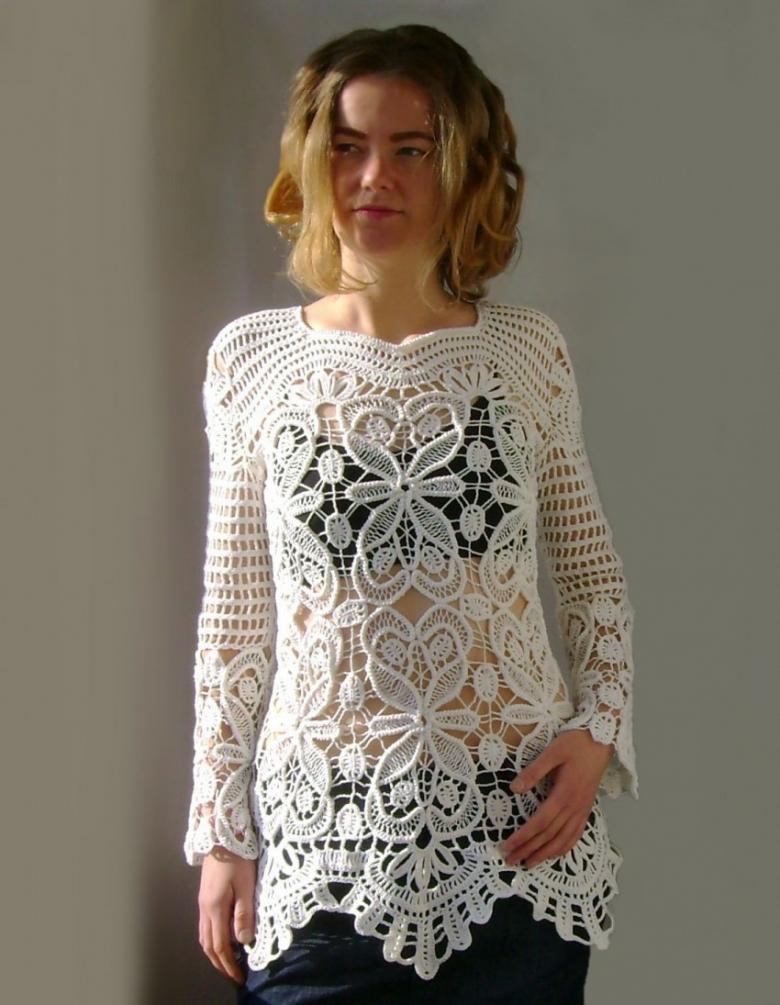
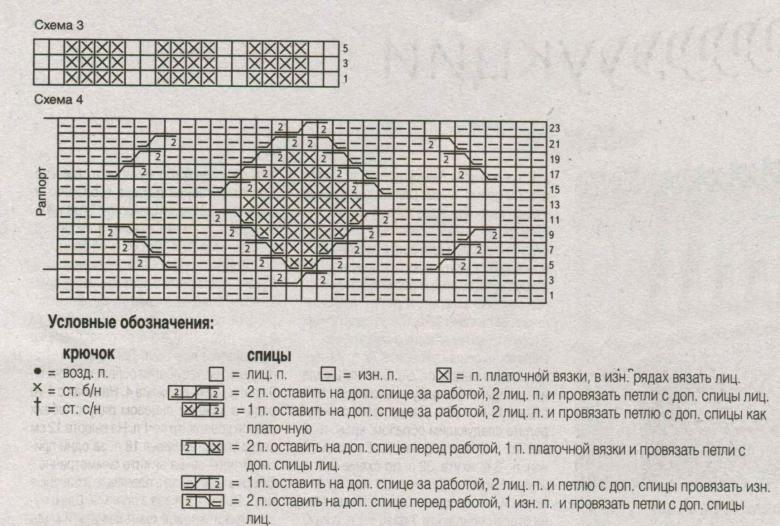
Tunic for full women
To realize how to knit a tunic by needles for a full woman, it is necessary to master simple techniques. In this case, we will rely on a straight cut and a simple scheme based on a beautiful pattern and attractive inserts in the form of "spiders". Thanks to this technique, it is easy to make napkins or bedspreads.
Stages of knitting:
- 12 initial loops based on the rapport are used;
- During the set of loops it is advantageous to use markers. They are attached after every 20 stitches. This will make it easier to count in case of an error;
- The next row starts from a new skein of thread, thanks to the first stitch. This helps to adjust the length of the chain before completing the next row;
- Don't forget to crochet the "spider" pattern.
In general, this scheme is not difficult. To work you will need 600 grams of cotton yarn and a little patience in conjunction with a good mood to create a great tunic with patterns in the form of "spider".
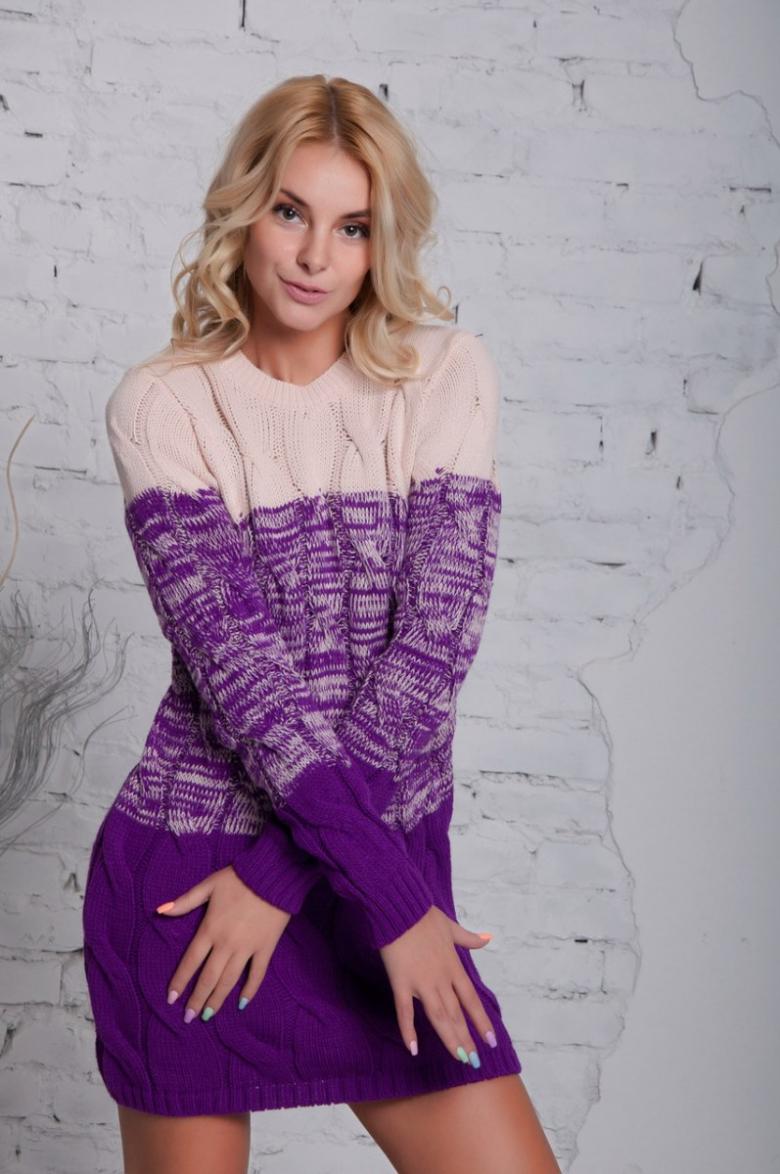
We have considered a few summer versions, as they are not as bulky as the winter ones and are easier to perform by beginners. Warm versions will require wool or angora.
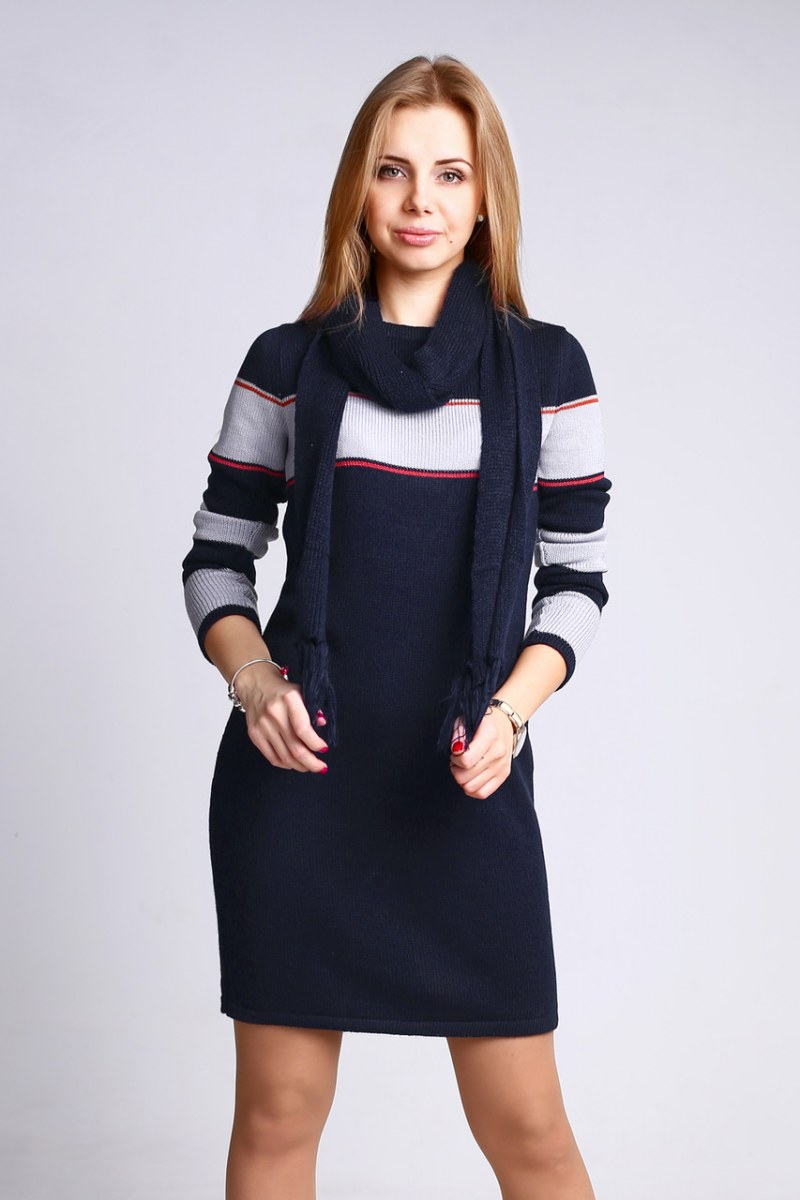
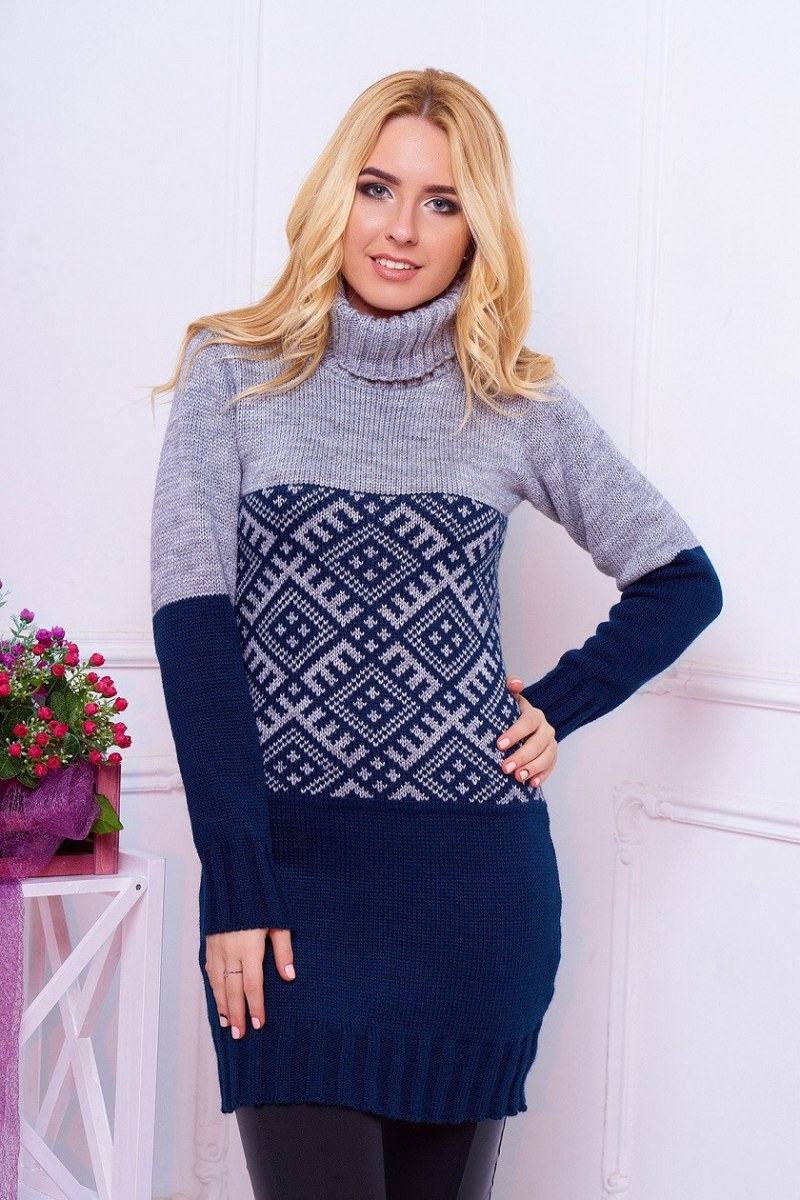
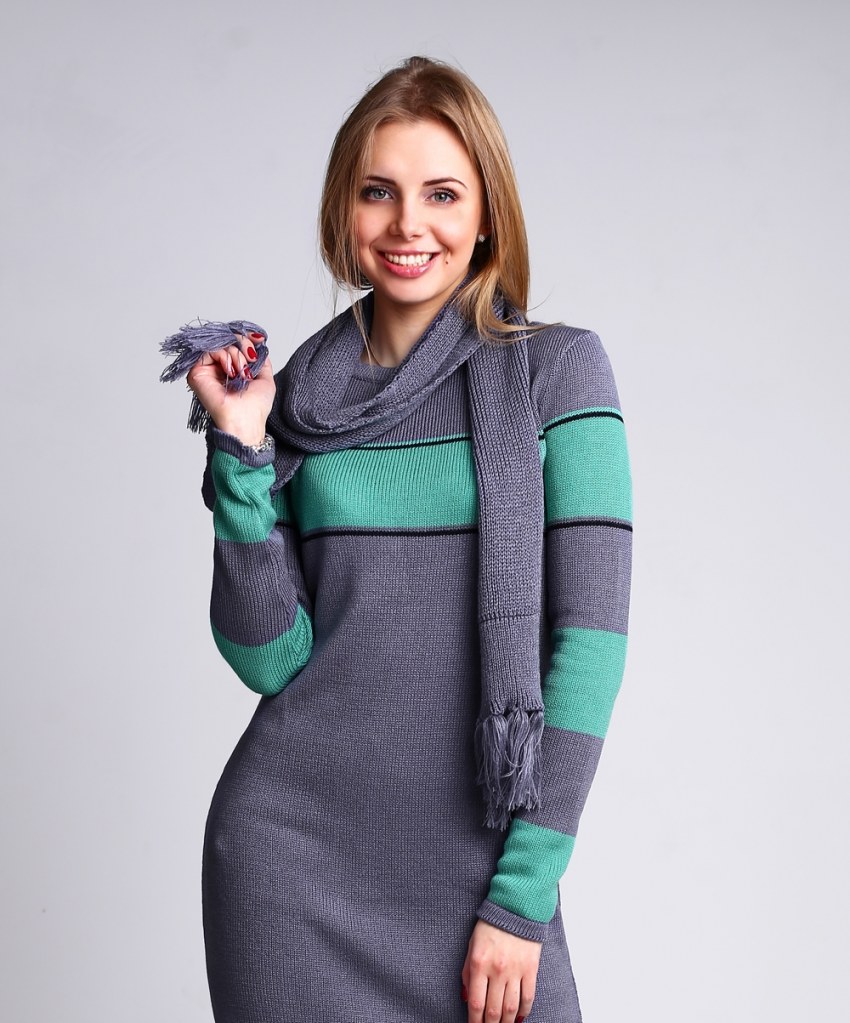
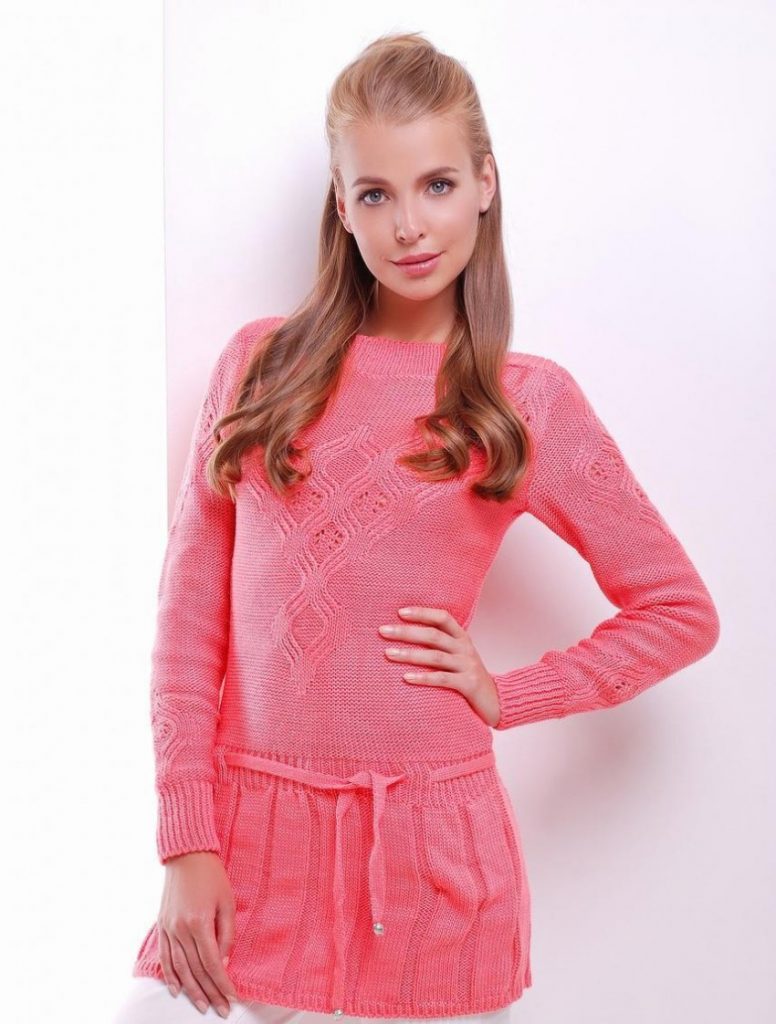
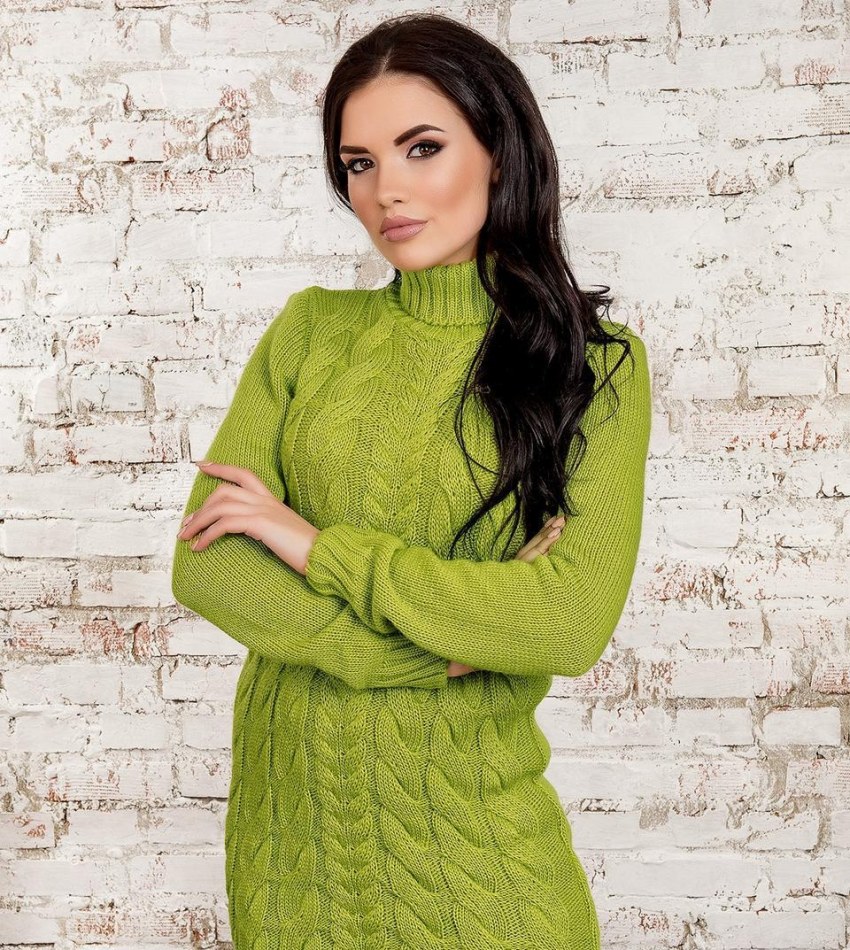
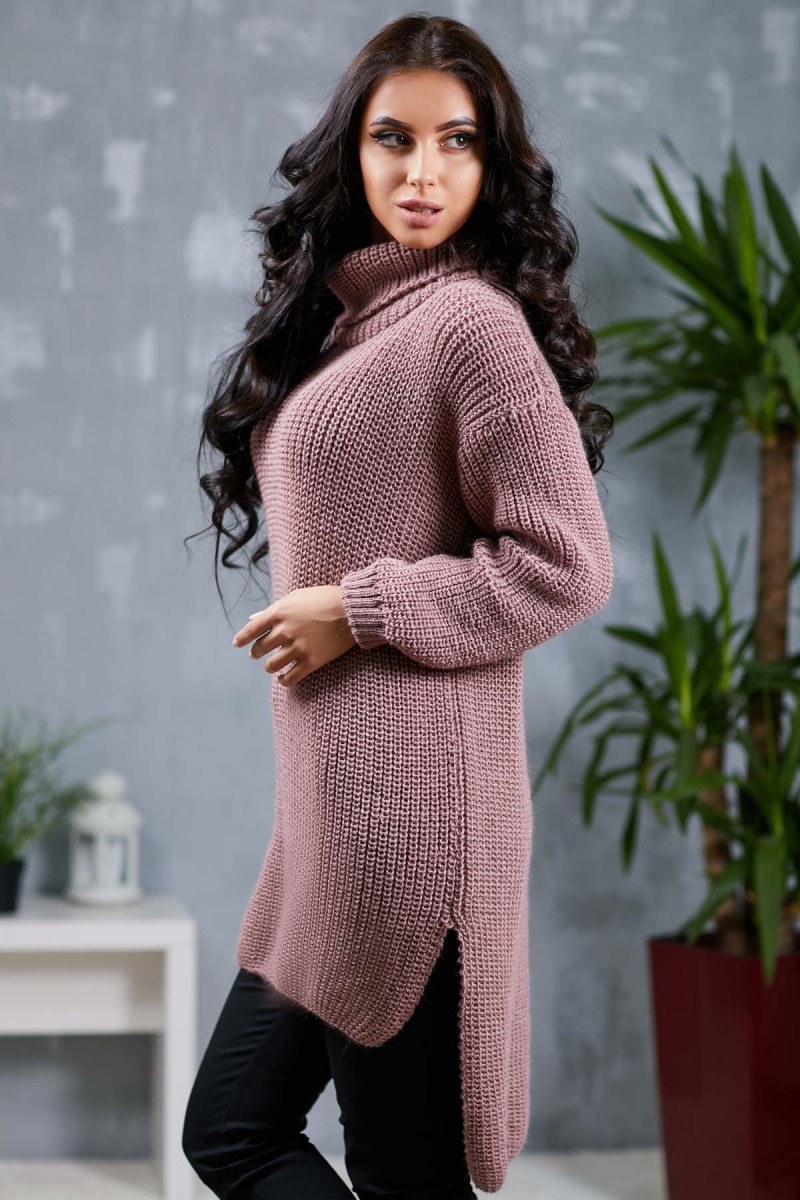
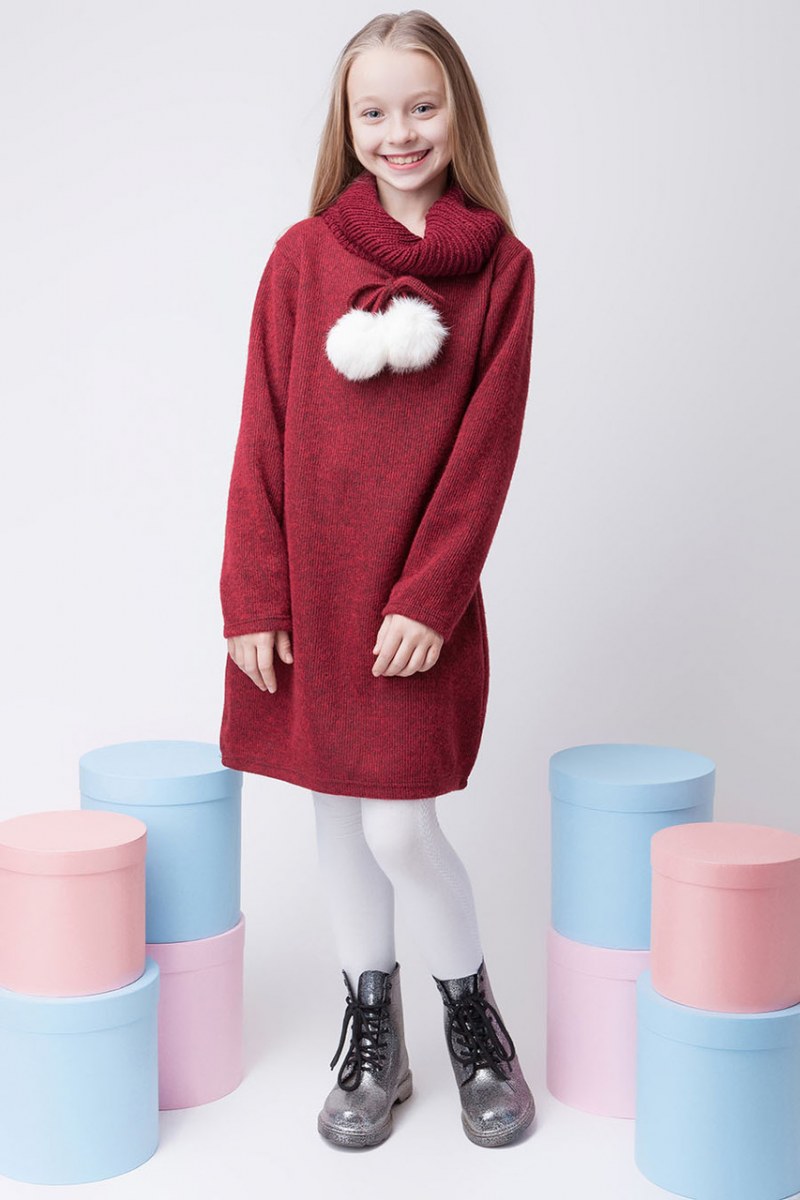
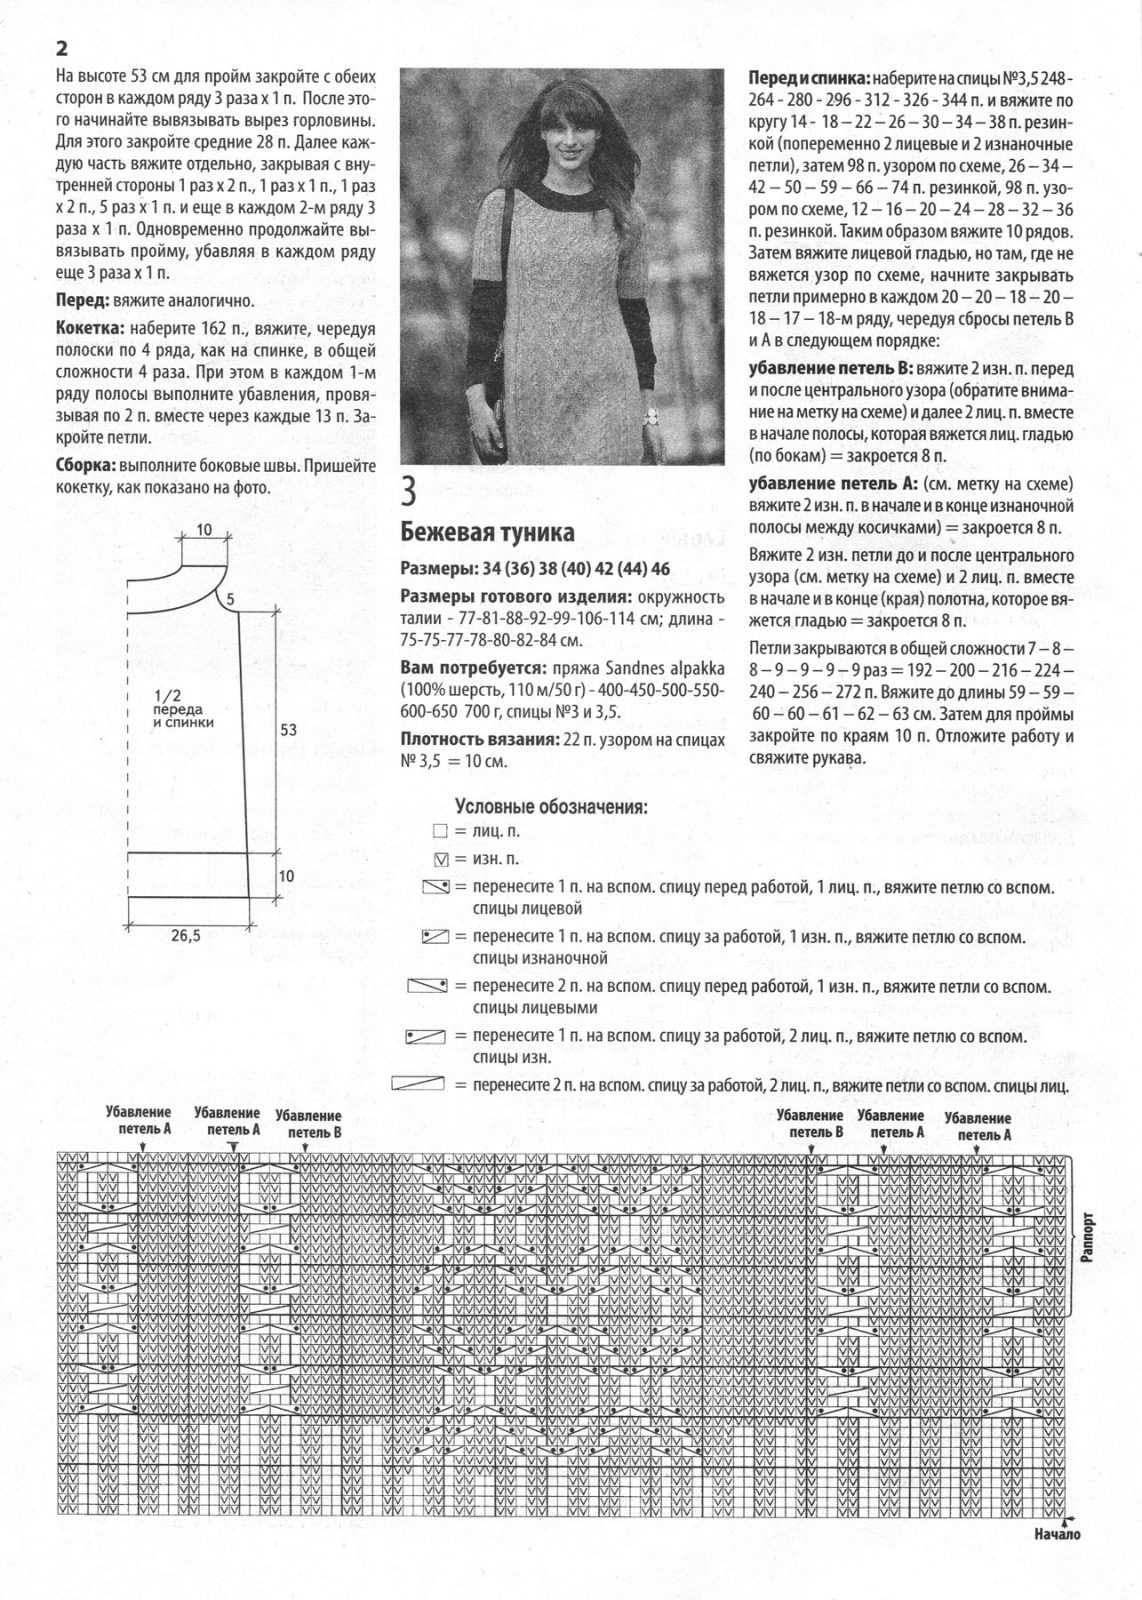
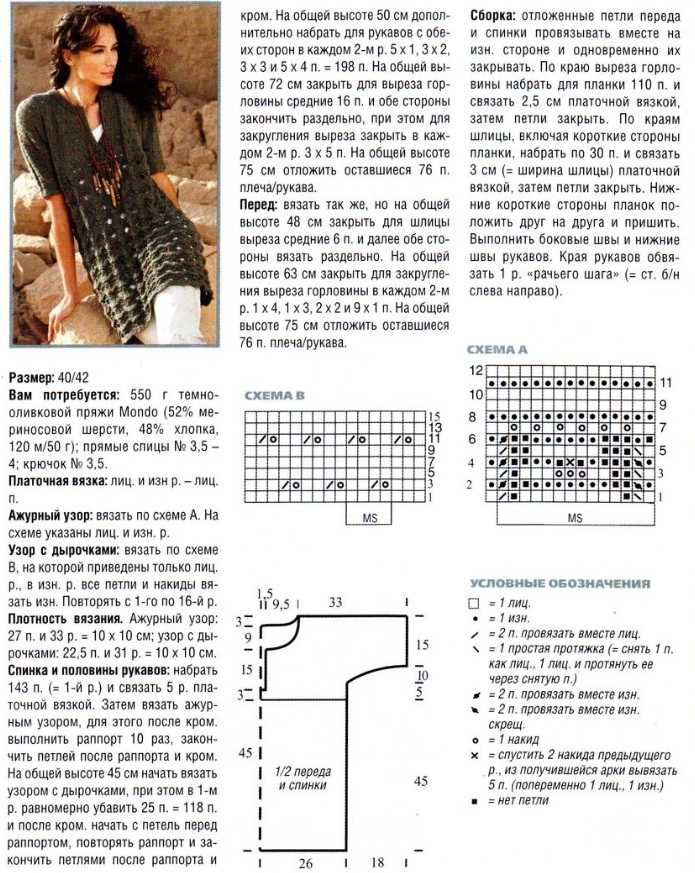
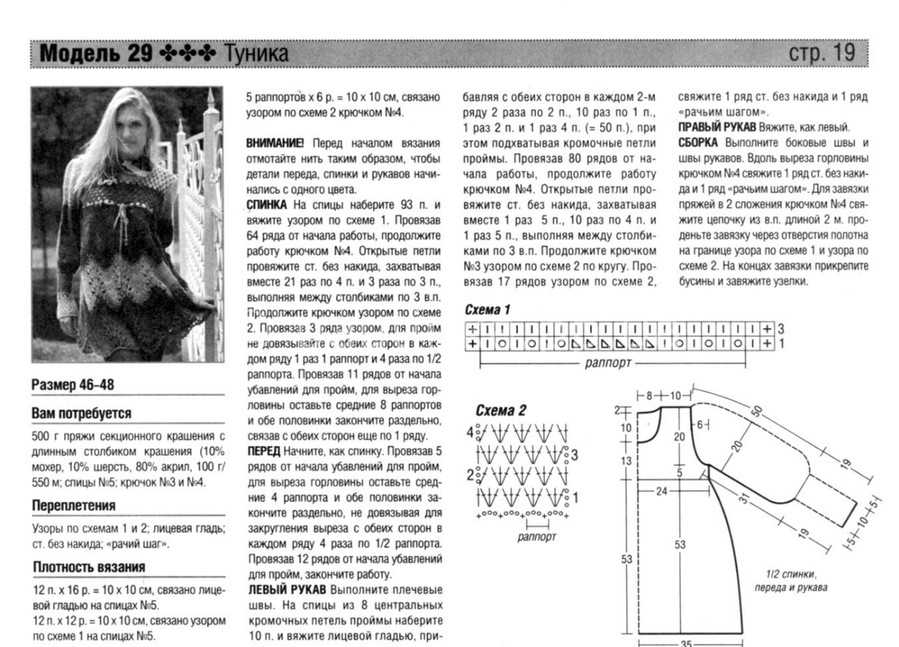
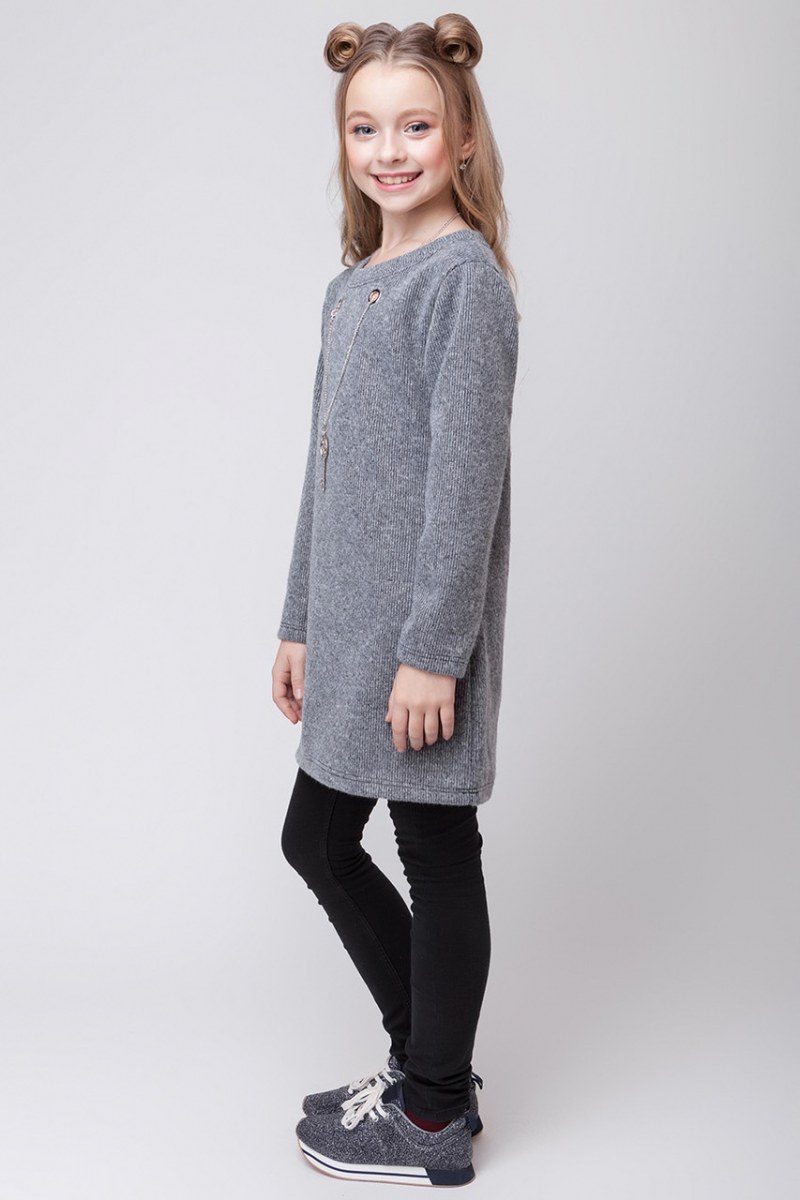
Photo examples and patterns for knitting tunics