Crochet Scheme for beginners - simple patterns and detailed step by step descriptions
To master the techniques of crochet, you need to spend enough time and effort to practice the basic elements. For beginners, crochet patterns with detailed descriptions of techniques will be a real practical tool.
Over time, knitting unique things with your own hands will bring you not only material values, but also great pleasure and relaxation.
Crochet usually creates crocheted items of closet, interior or miniature figurines for decorating rooms. The advantage of crochet fabric is that it is less susceptible to warping and stretching.
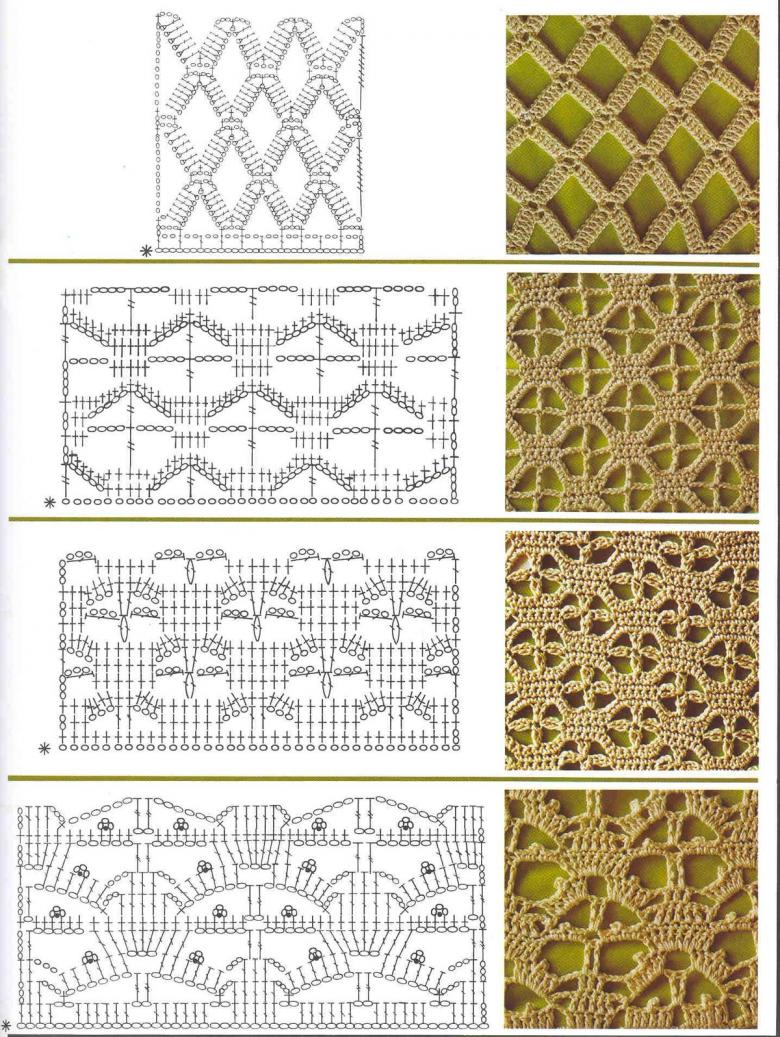
Simple crochet patterns
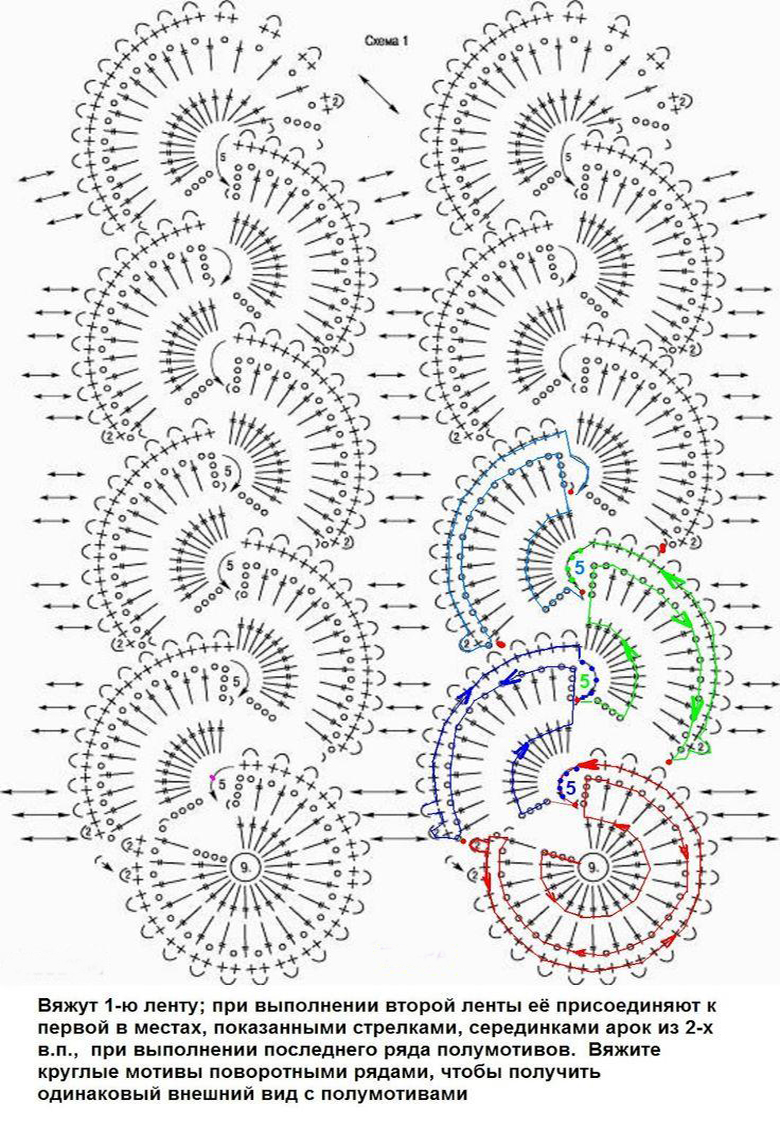
As a rule, the finished thing is created from several separate repeating elements. In this way it is convenient to dial the desired size of the product. Patterns are created by a special method that allows you to continue crocheting from almost any point of the already connected part of the product.
To learn how to properly use the schemes of crochet patterns, you need to know a number of rules for working with them. Consider the main ones:
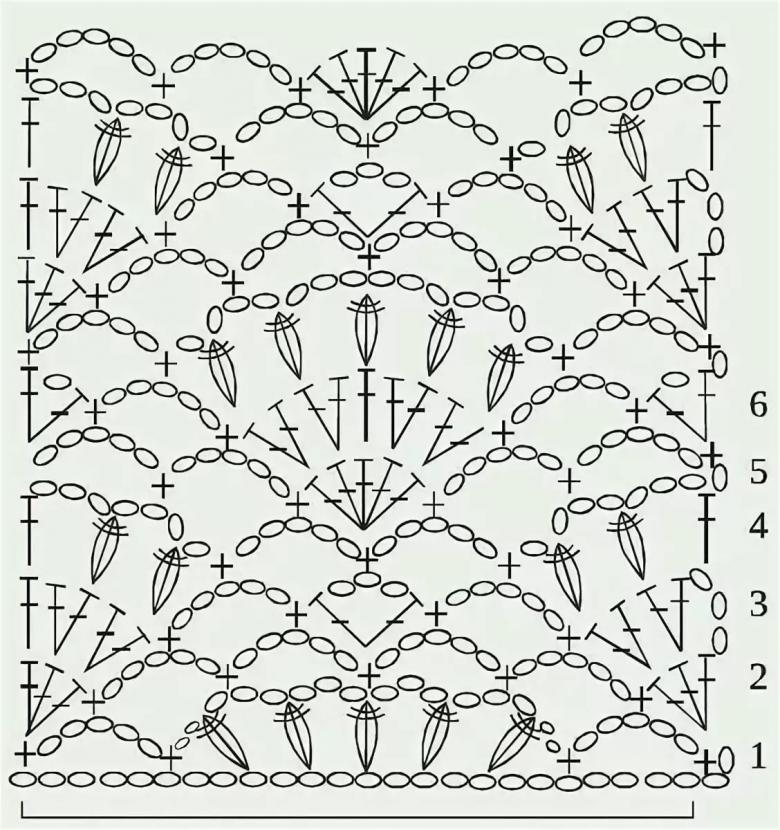
- The knitting scheme is customary to read from right to left the first and all odd rows, from left to right - the second and all even rows. The pattern, according to the diagram, starts from the bottom up.
- A repeating element in the pattern is called a report. It is highlighted in the diagram by asterisks. While making the pattern, repeat the pattern as many times as necessary to get the desired width of the product.
- To knit three-dimensional objects, it is necessary to determine the density of knitting specifically chosen crochet, yarn and pattern. To do this, knit a square sample of 5-10 centimeters high. Knowing your density of knitting is easy to calculate the starting number of loops for the product size you want.
- Yarn should be chosen according to the size of the hook. The larger the hook size relative to the thickness of the yarn, the more openwork and free knitting will be. Dense cloth knit with hooks of smaller diameter.
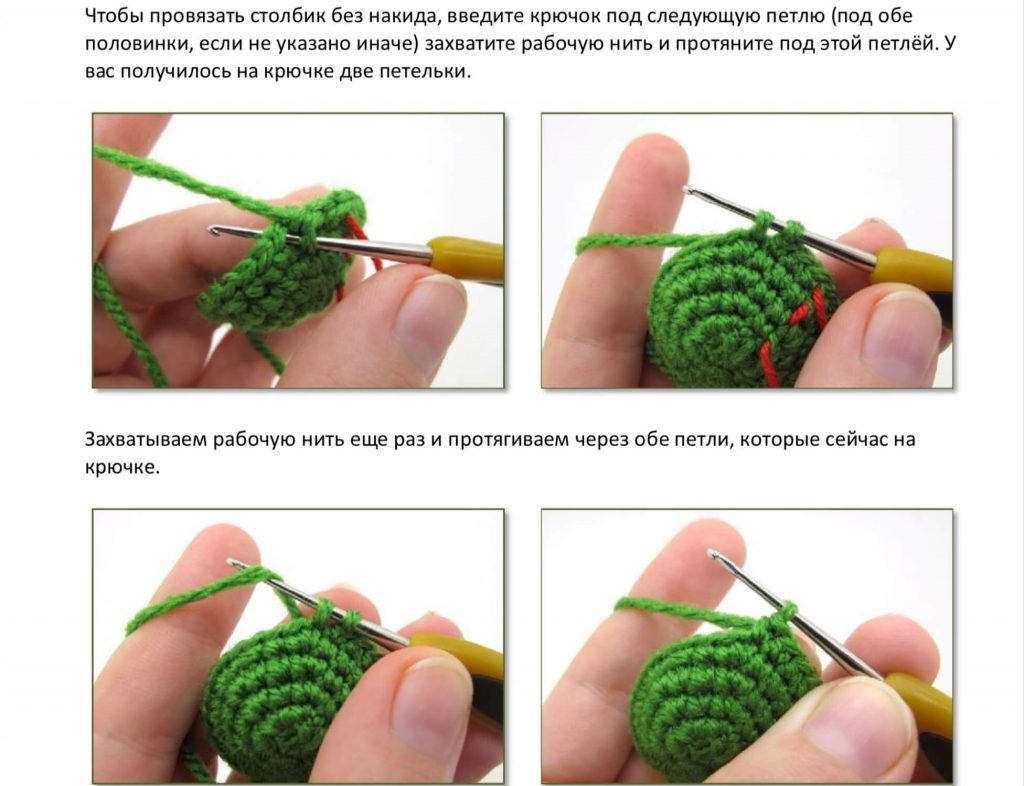
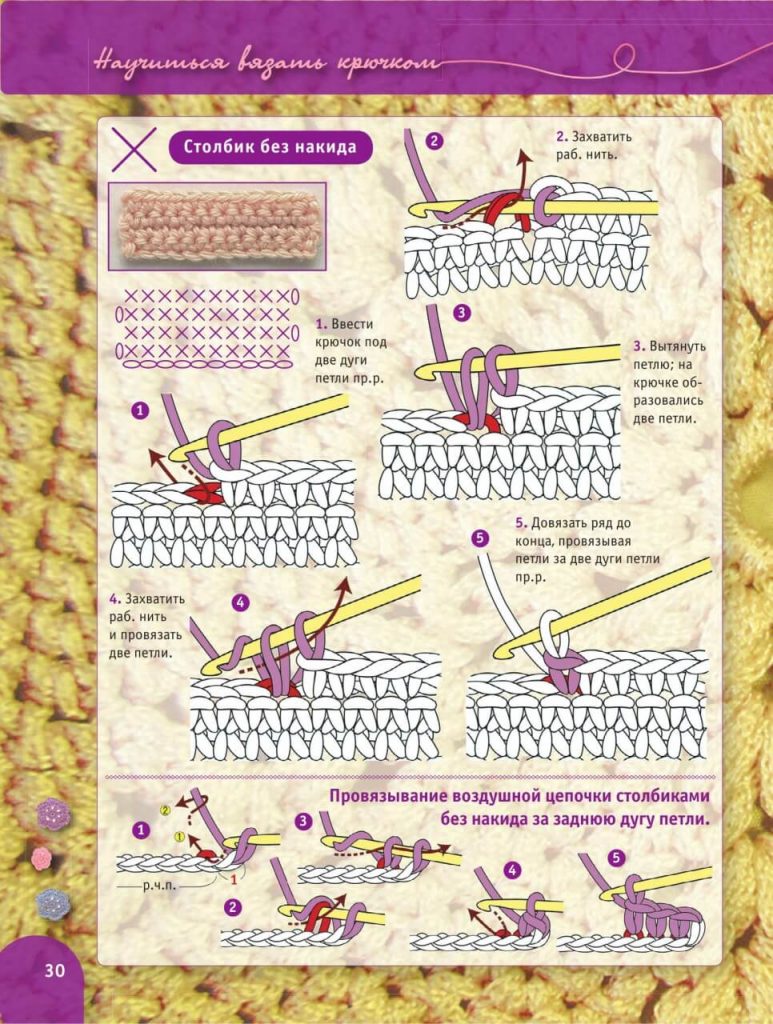
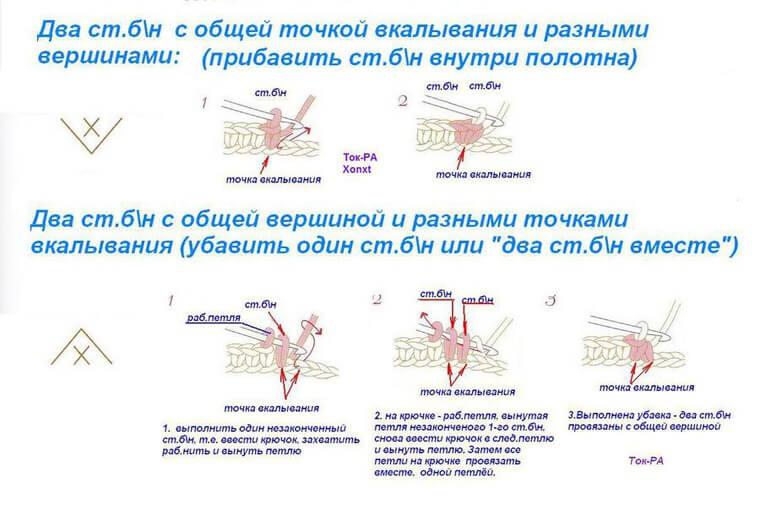
- The basic element in the crochet technique is considered to be a column - a loop with a foot. The pattern is formed by columns attached to the previous row by different methods: for the front side of the loop, the back wall, for the arch (the thread between two columns), in the loop, in the foot.

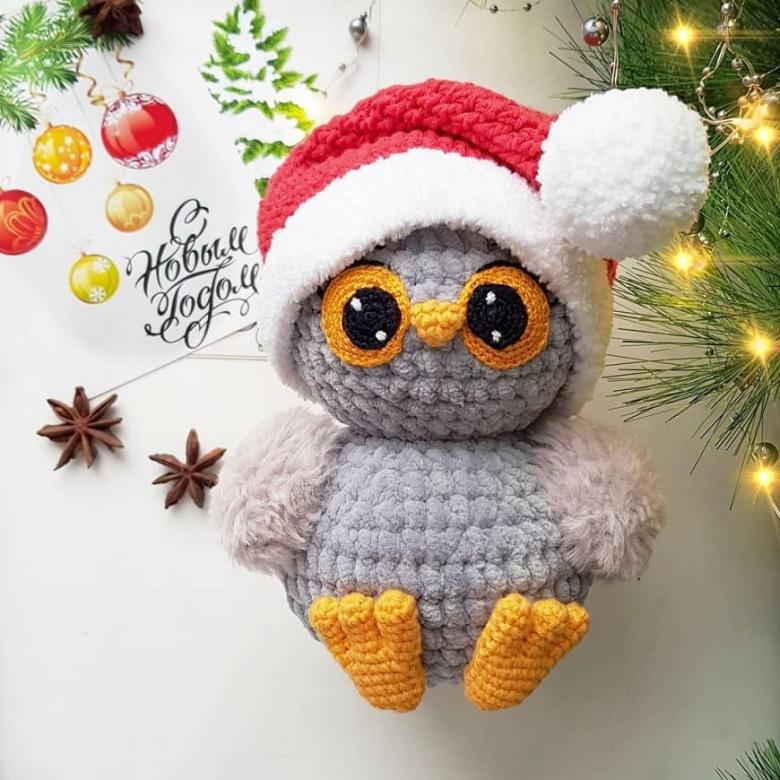
Soft toys with crochet for beginners
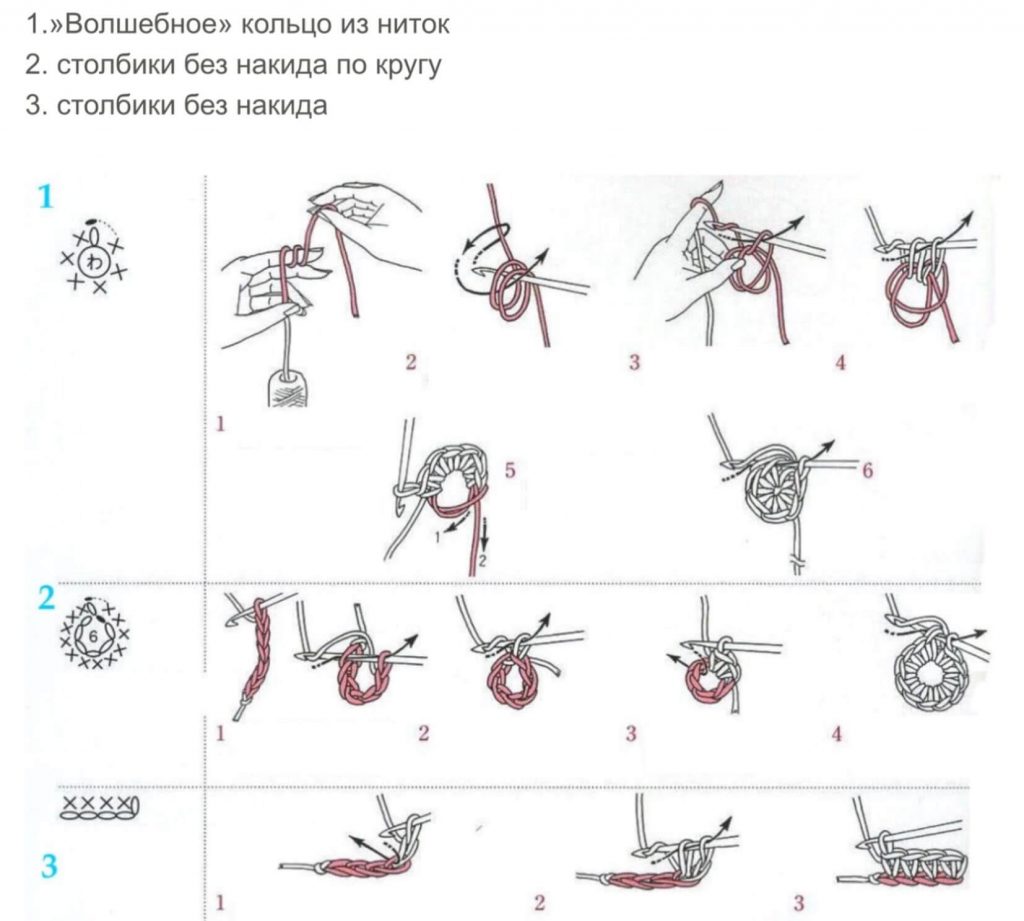
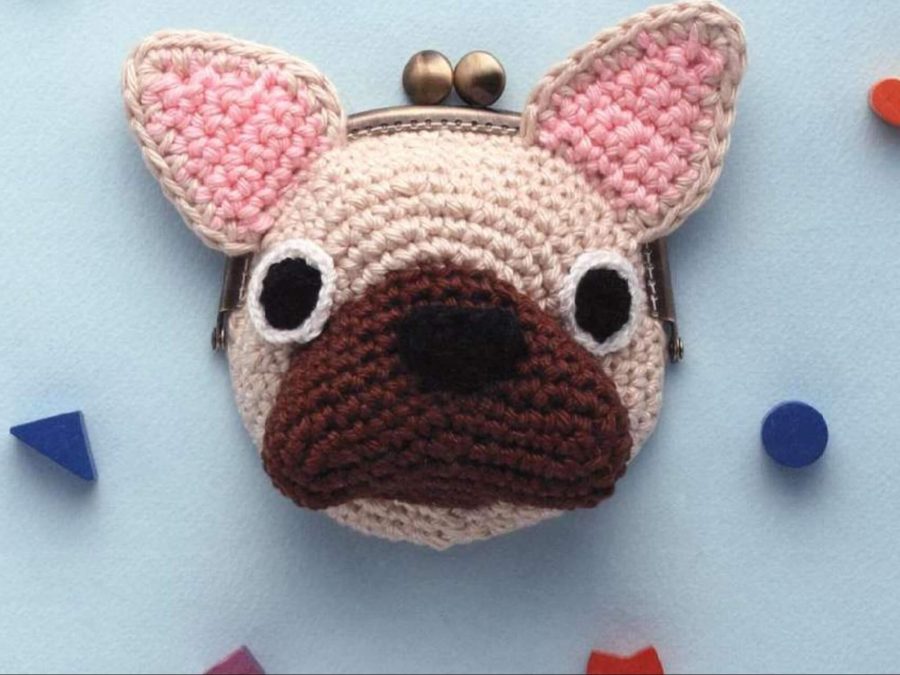
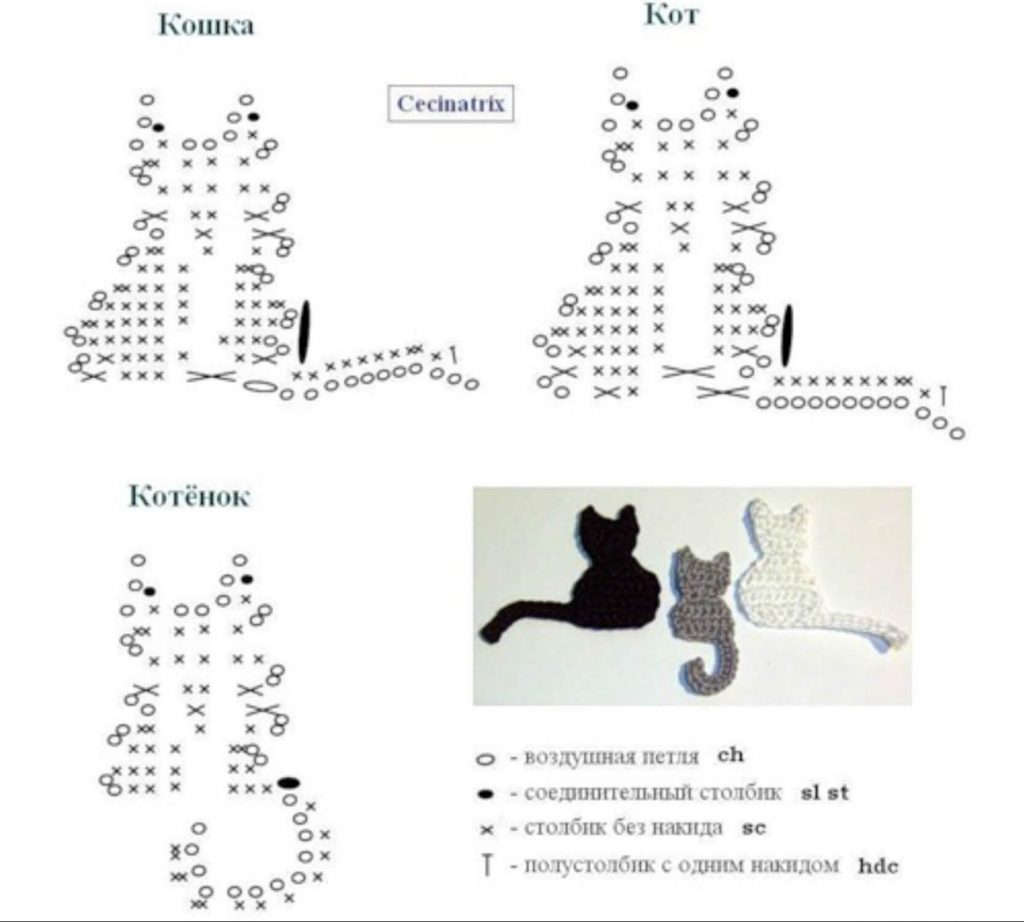
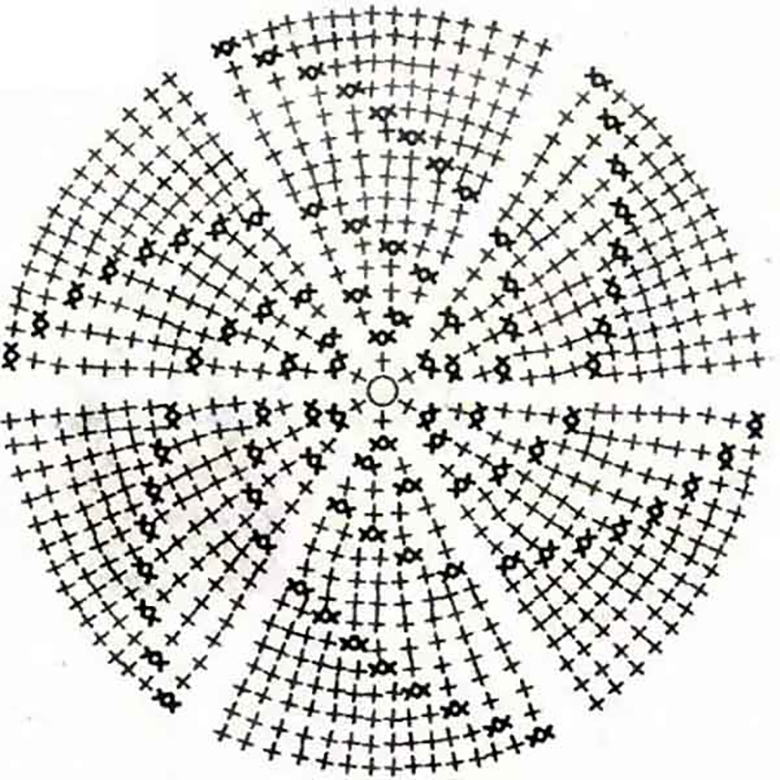
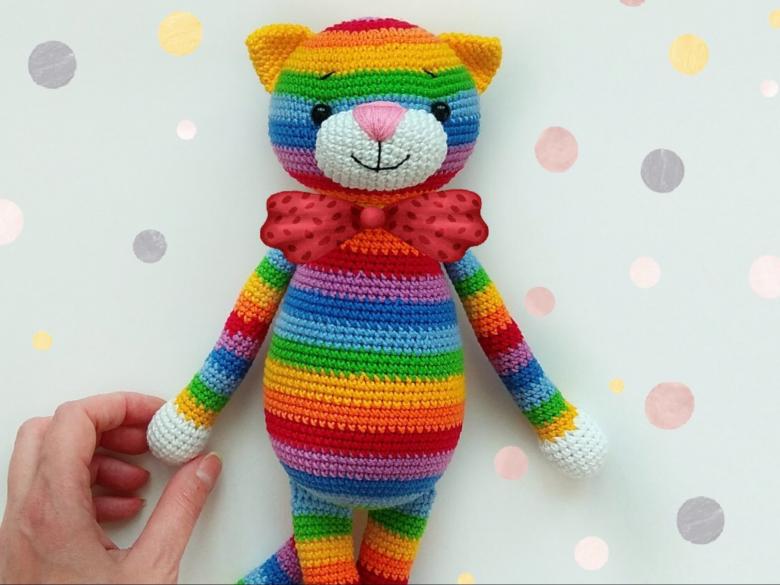
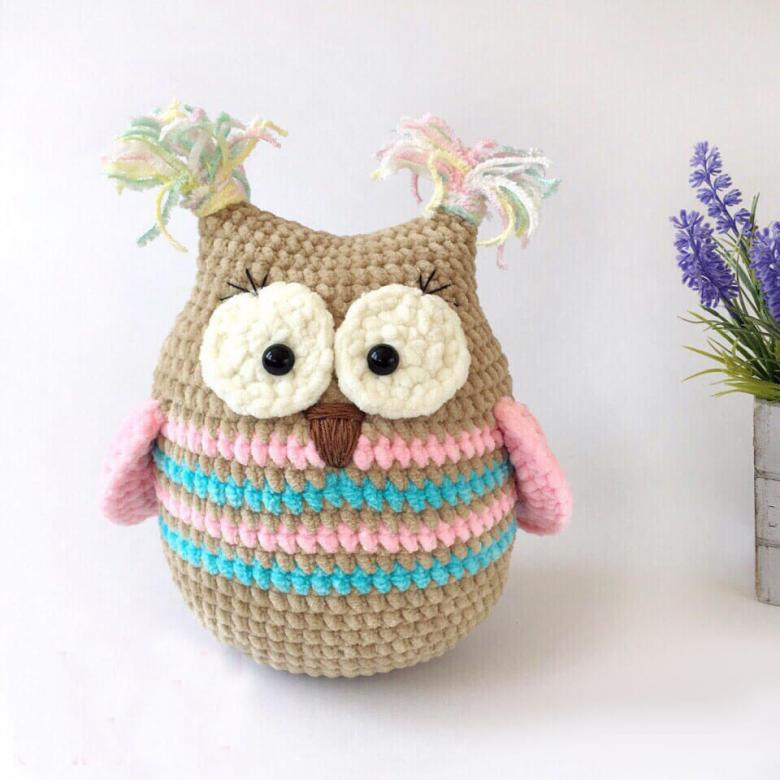
To practice crocheting, you can try to create cute soft toys created with the technique of crocheting in a circle, without joining individual elements. This method comes from Japan and is called amigurumi.
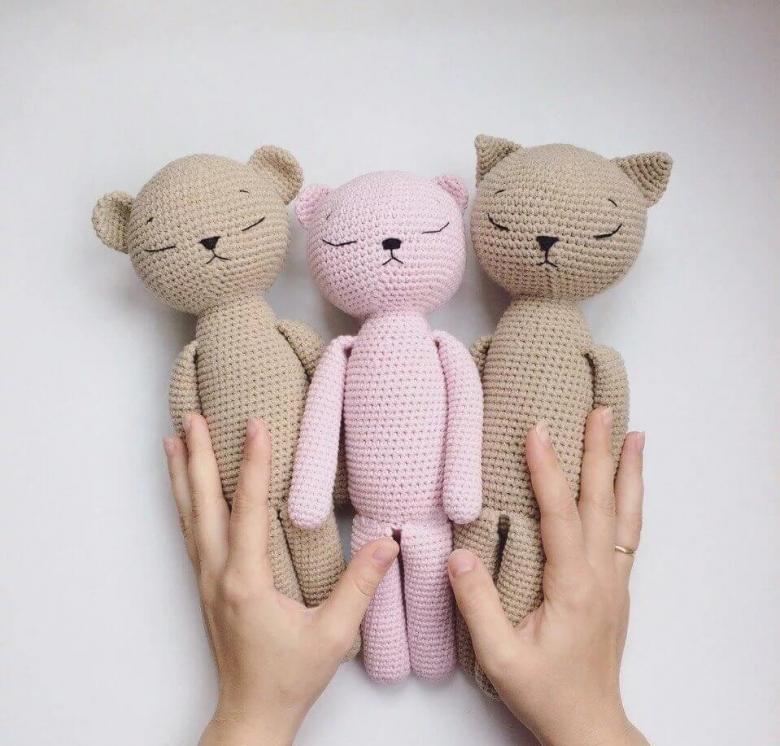
This method is usually knit soft toys and small souvenirs. To crochet a toy you need an example for beginners with detailed schemes and descriptions.
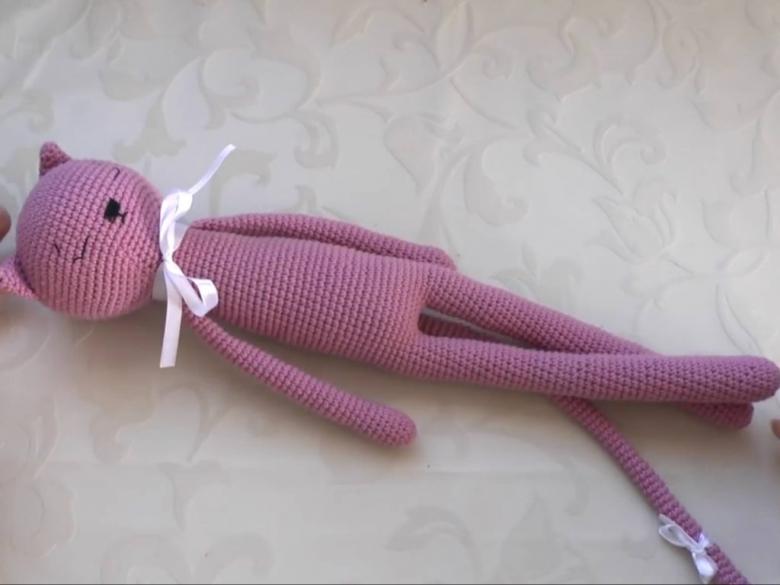
Let's try to crochet a toy:
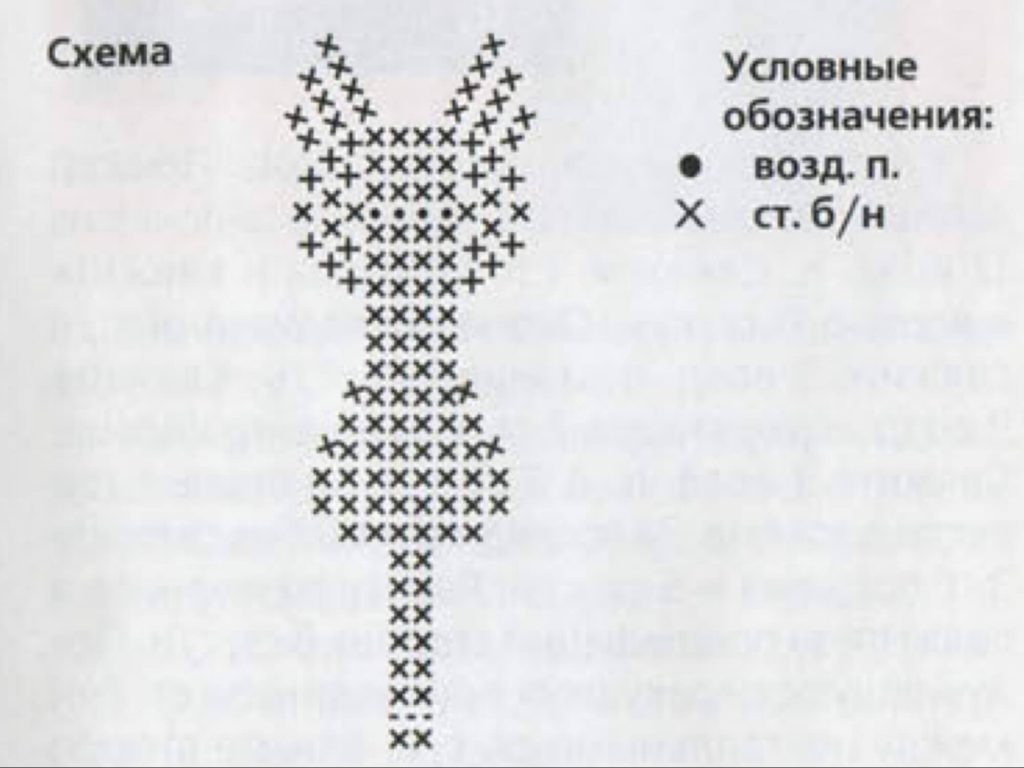
- Dial 12 air loops.
- The 1st row knit 12 simple columns, then turn the product and knit another 12 simple columns.
- Repeat the scheme of 1 row through 5 inclusive.
- Take a thread of a different color. Knit 2 more rows similar to the first.
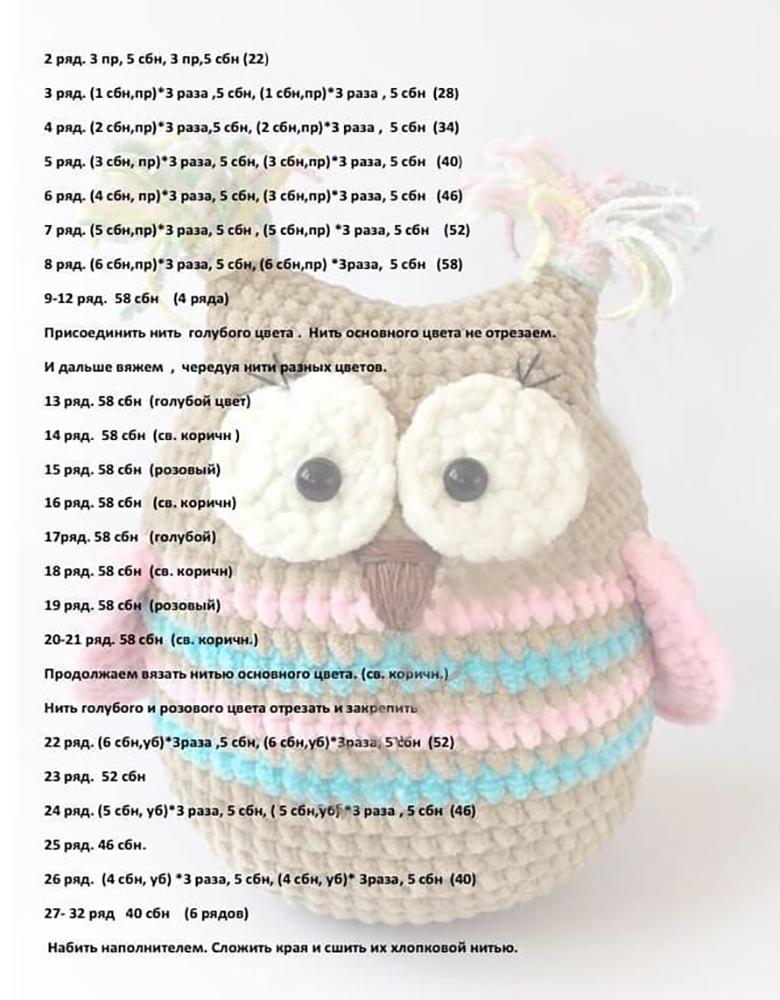
- In row 8 we knit 6 stitches: 3 no-sewing columns and an extra stitch.
- In row 9 we knit 30 columns without a stitch.
- In row 10 repeat 6 stitches: 4 no stitches and an extra stitch.
- Then change the color of the thread each row.
- From 11 to 13 rows - 36 columns without a stitch.
- In row 14 repeat the pattern 6 times: 4 columns without a stitch and a trim.
- In row 15 there are 6 stitches: 3 no stitches and a ducking.
- In the 16th row 6 passes: 2 no-neck columns and a ducking. The future owl is filled with absorbent cotton or padding to hold its shape.
- In row 17 repeat 6 times the pattern: a column without a stitch and a slash.
- Row 18 is knitted with 6 contractions.
- In row 19 we close all the stitches.
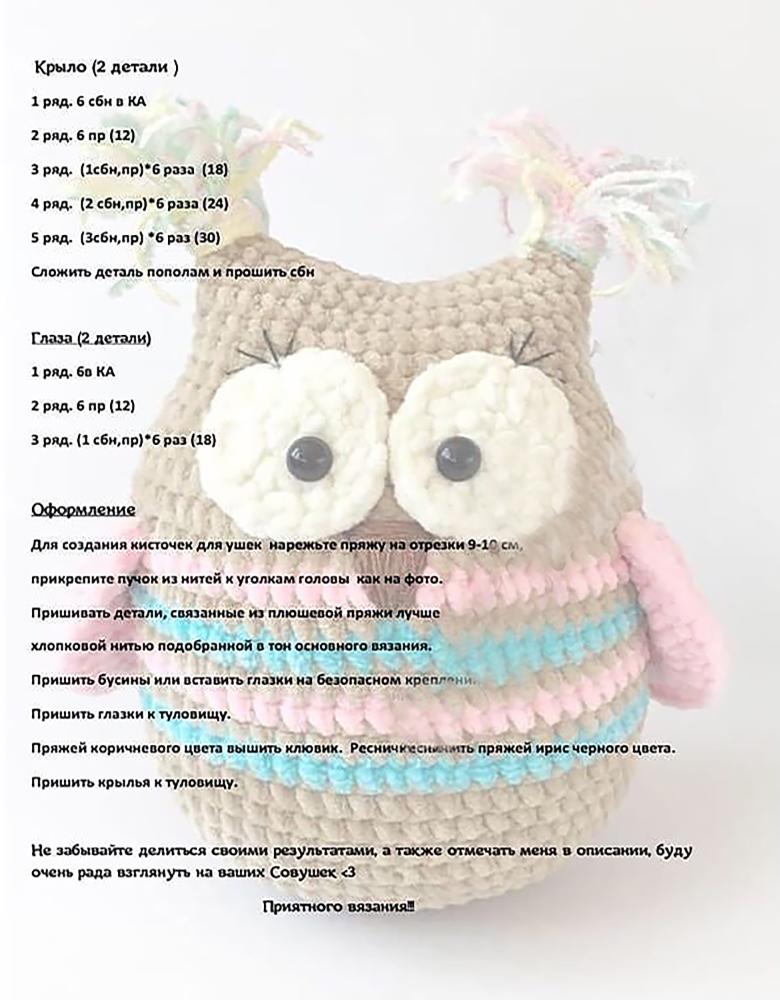
Knit owl eyes of two identical elements:
- We knit a black circular row of 2 air and 5 simple columns (all into the second loop)
- White circular row create from 6 additions.
- Yellow circular row of 6 rasps: a no-squeeze column and an addendum.
- We close the knitting, leaving the yarn to sew the eyes on the owl.
Knit the wings of the owl from two identical elements:
- A circular row of 2 air and 5 simple columns.
- A row of 6 additions.
- A row of 6 rasps: a no-sew and an addendum.
- We close the knitting, leaving the free thread.
Knit the paws of the owl:
- 2 air, 5 no-neck columns in the second loop,
- A row of 6 additions.
- 3 rasps: a column without a stitch and 3 air ones. At the end of the row is a connecting column.
- We close the knitting.
Sew eyes, wings and paws onto the owl. Beak owl can be cut out of felt. Owl ready.
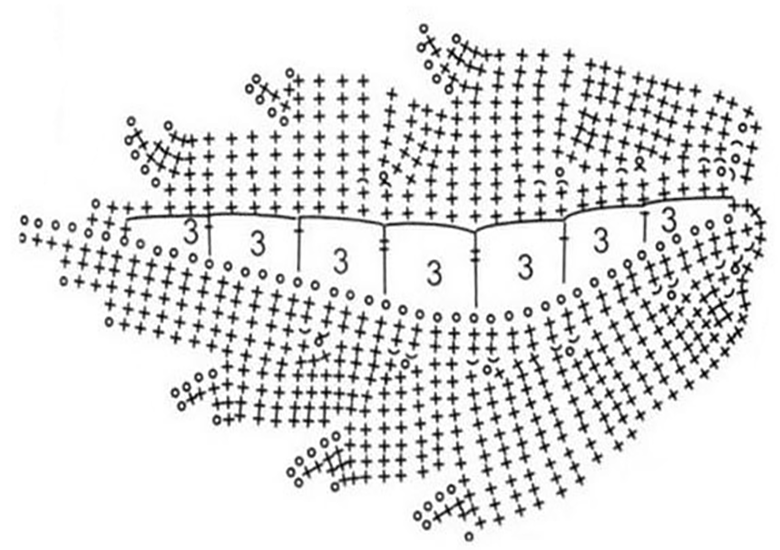
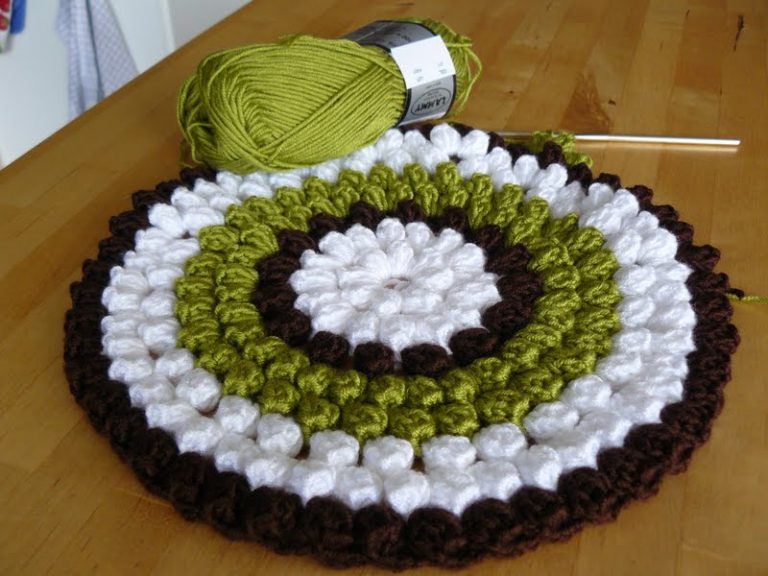
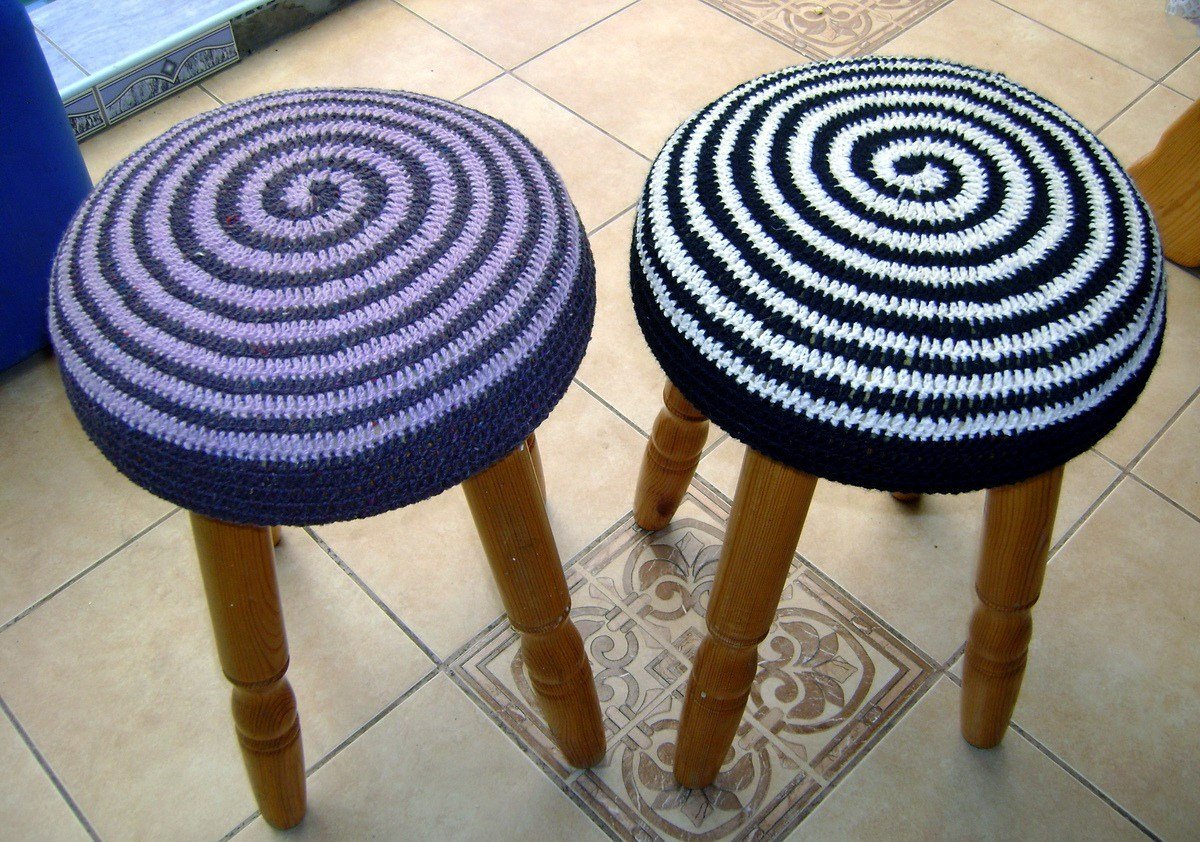
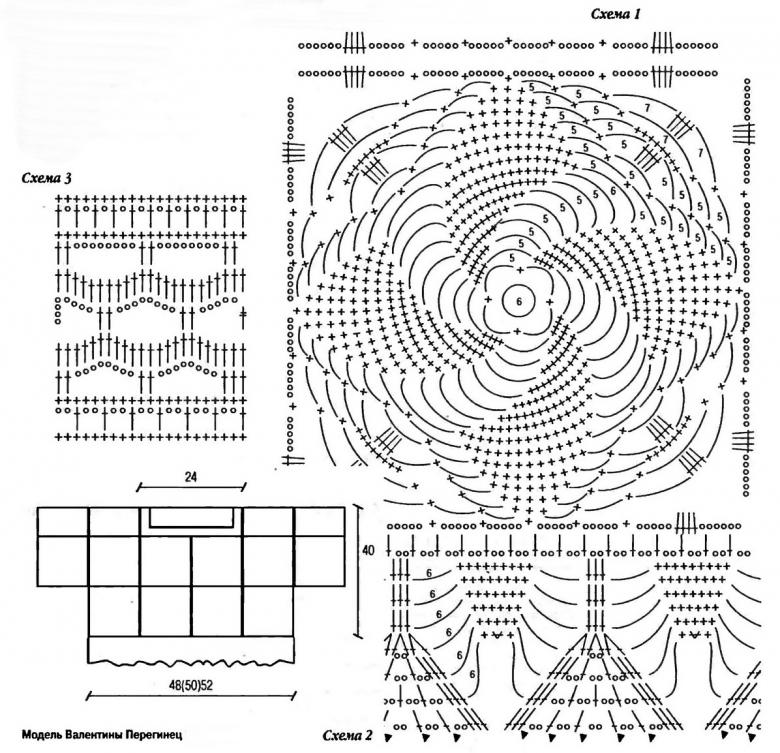
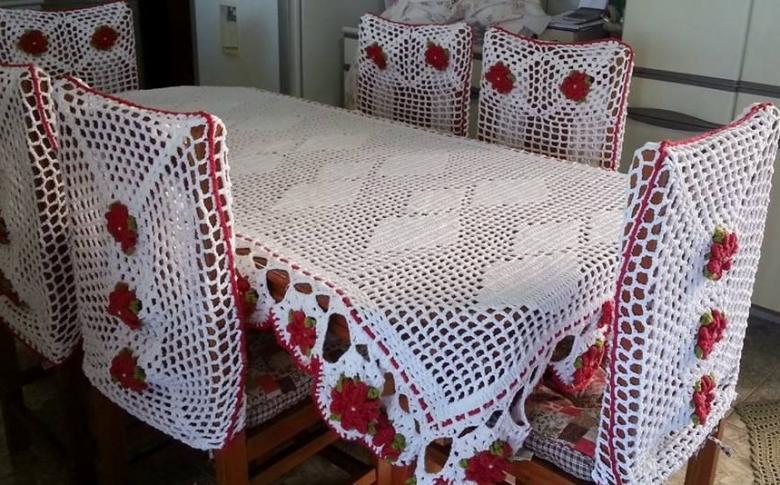
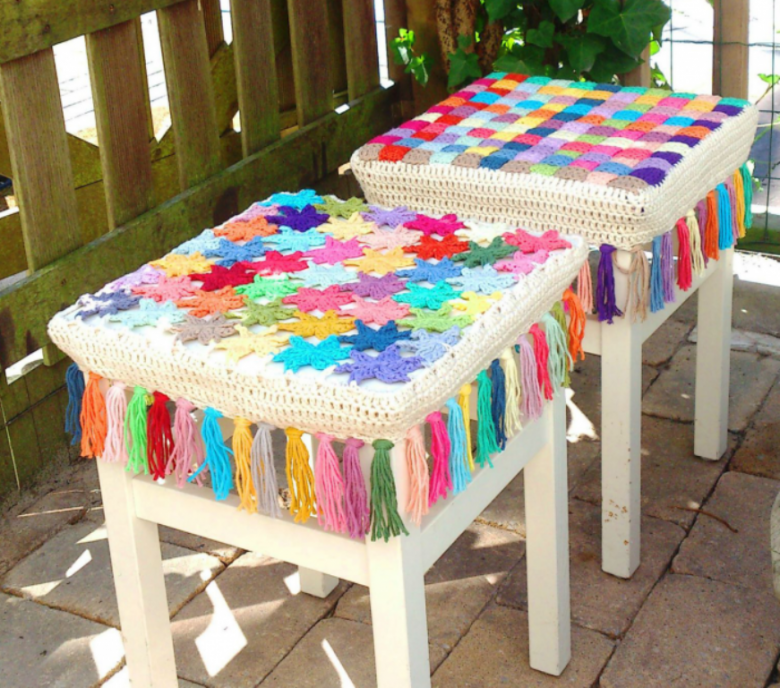
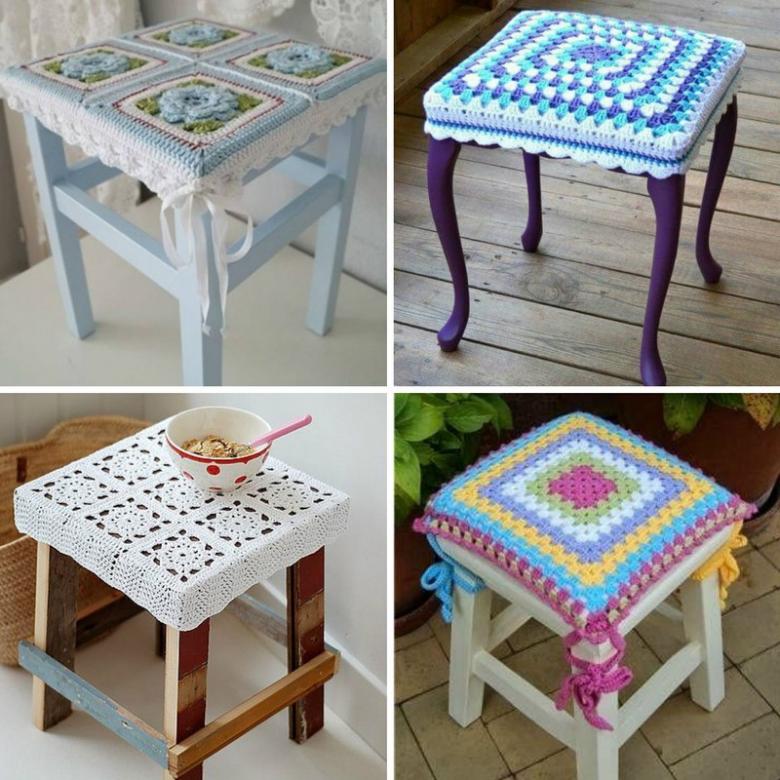
Crochet capes on chairs and stools
Having practiced crochet on cute toys, you can move on to the creation of more practical and useful items. Consider a crochet scheme for crocheting a chair or stool seat for beginners.
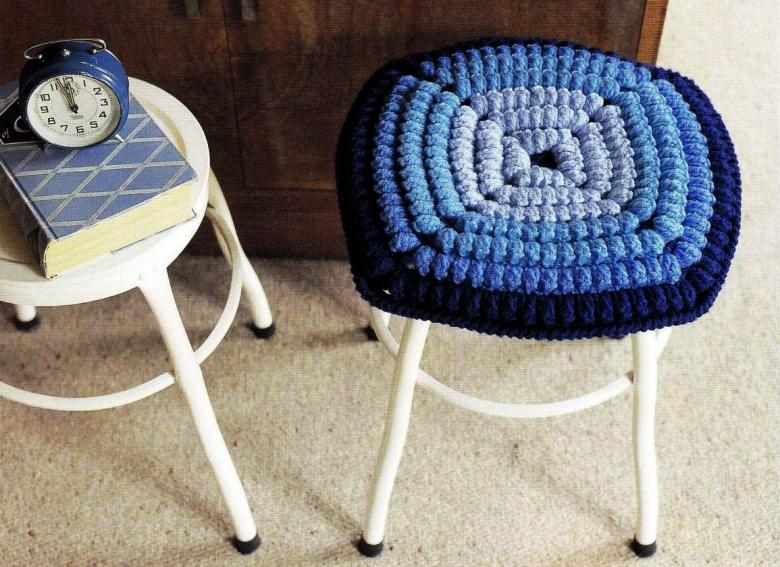
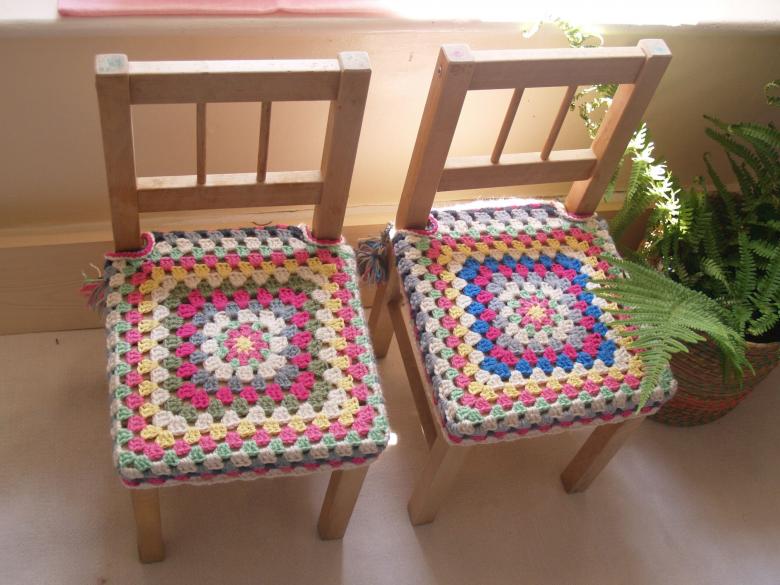
One of the easy to perform options, this is a square seat of their dense yarn. Knits are very simple: you need to create a square canvas of the right size.
There is no need to use complex patterns, because such knitting is already quite textured and does not require additional decorative elements. All you need is to choose bright colors of yarn and an appropriate thickness of yarn hook. Each row can be knitted with a new color.
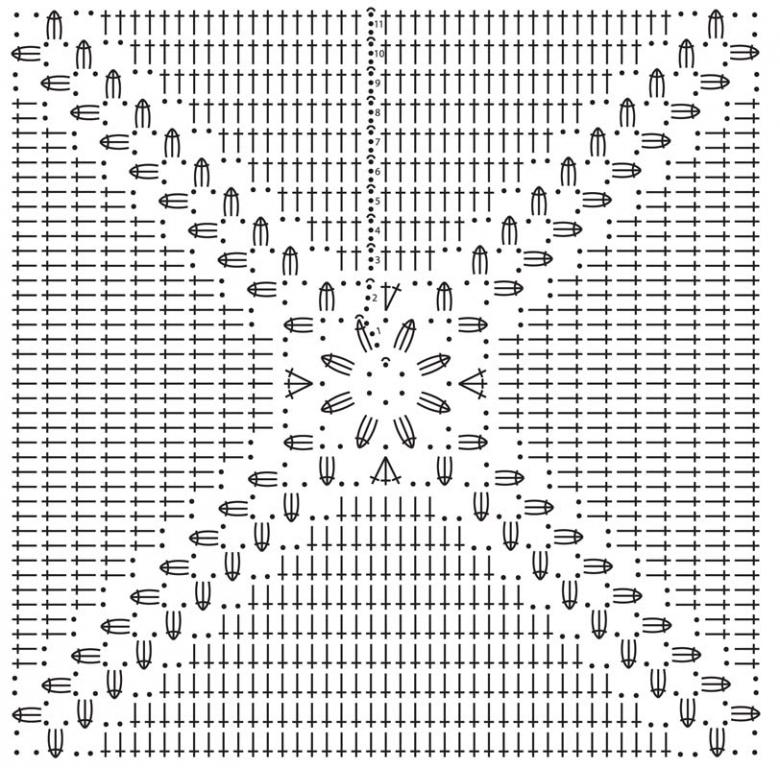
Procedure:
- Dial a chain of the desired length.
- 2 air loops, followed by a column with a stitch in the first loop.
- Knit the row by rasp: 1 air loop, then knit together 2 columns with a stitch.
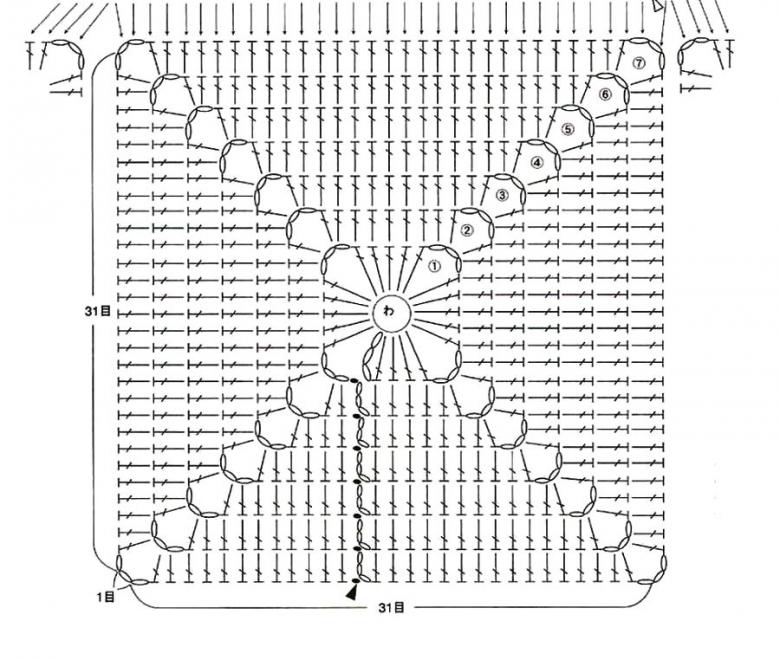
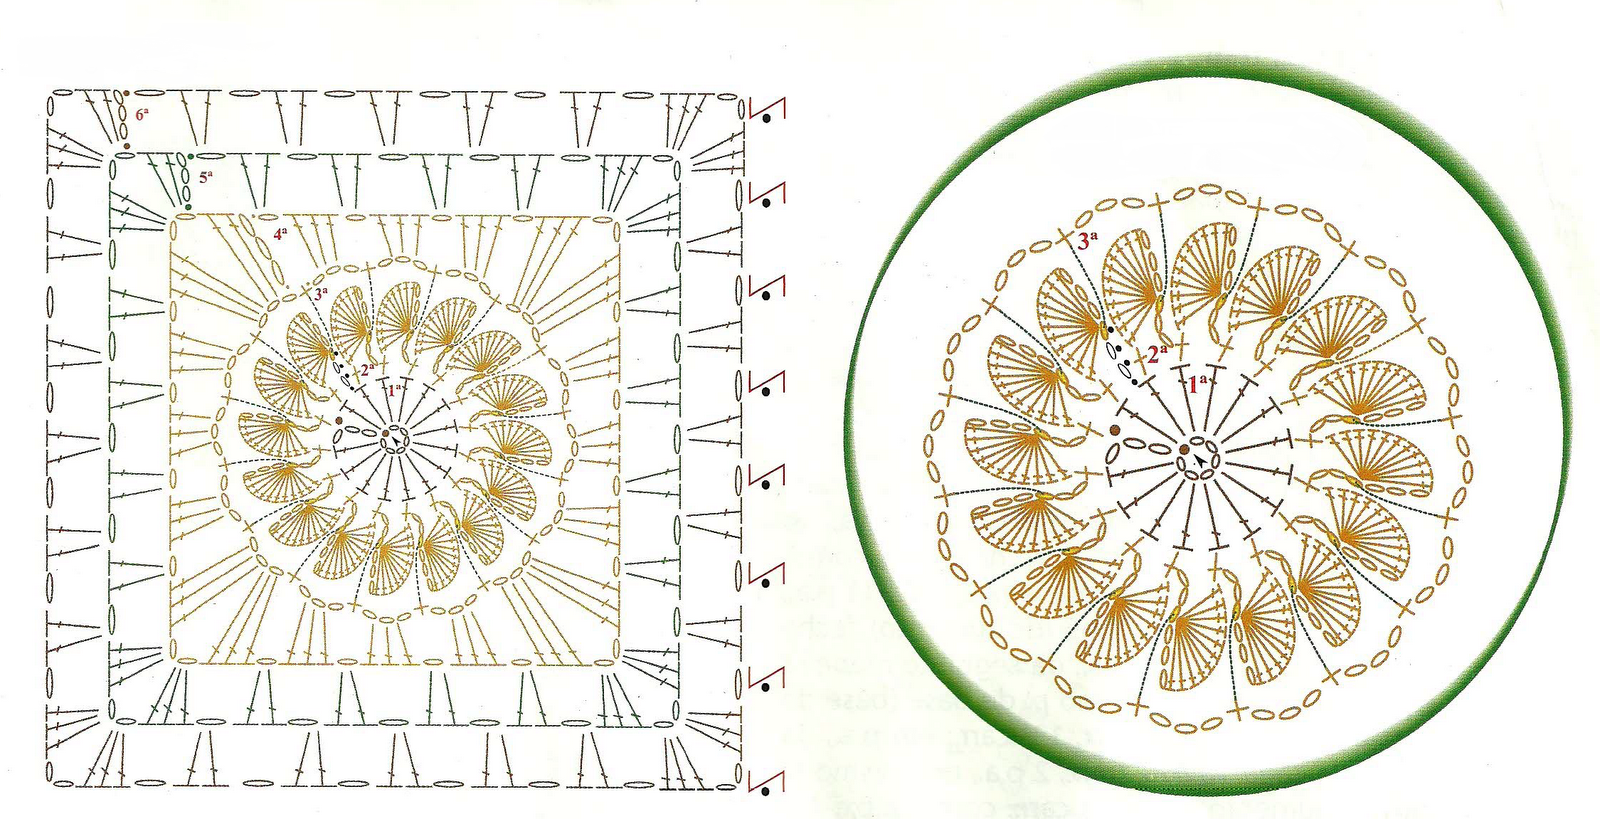
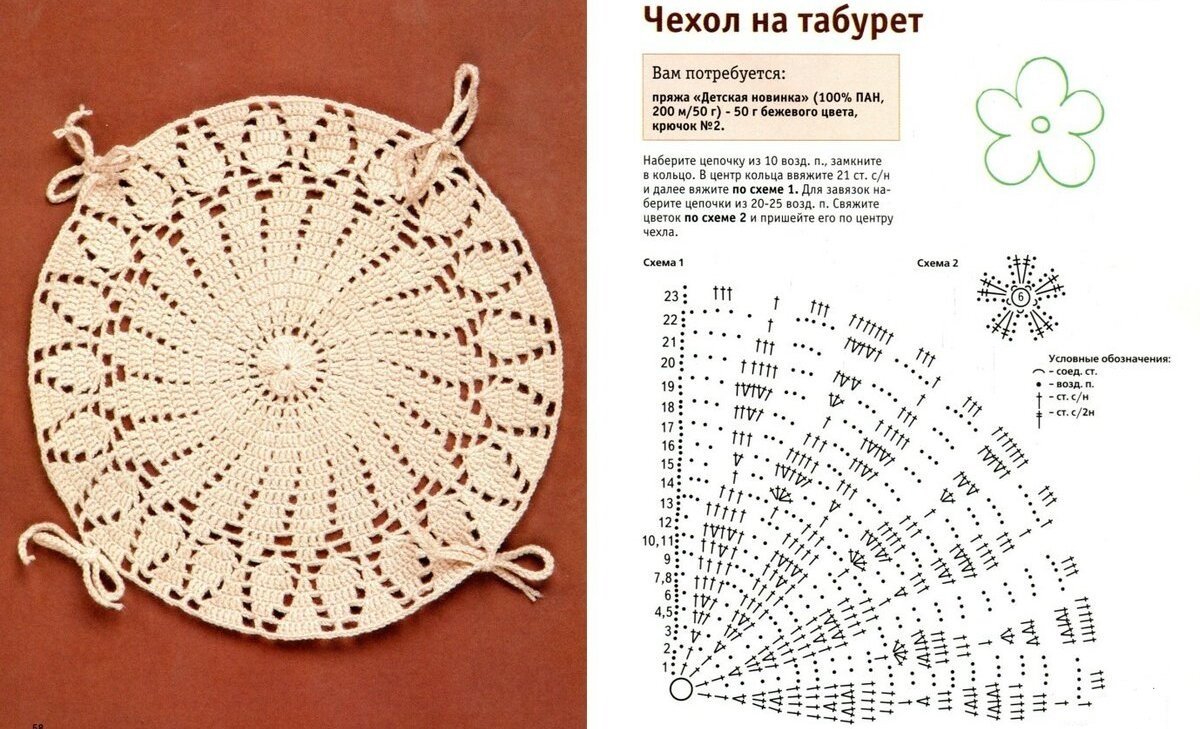
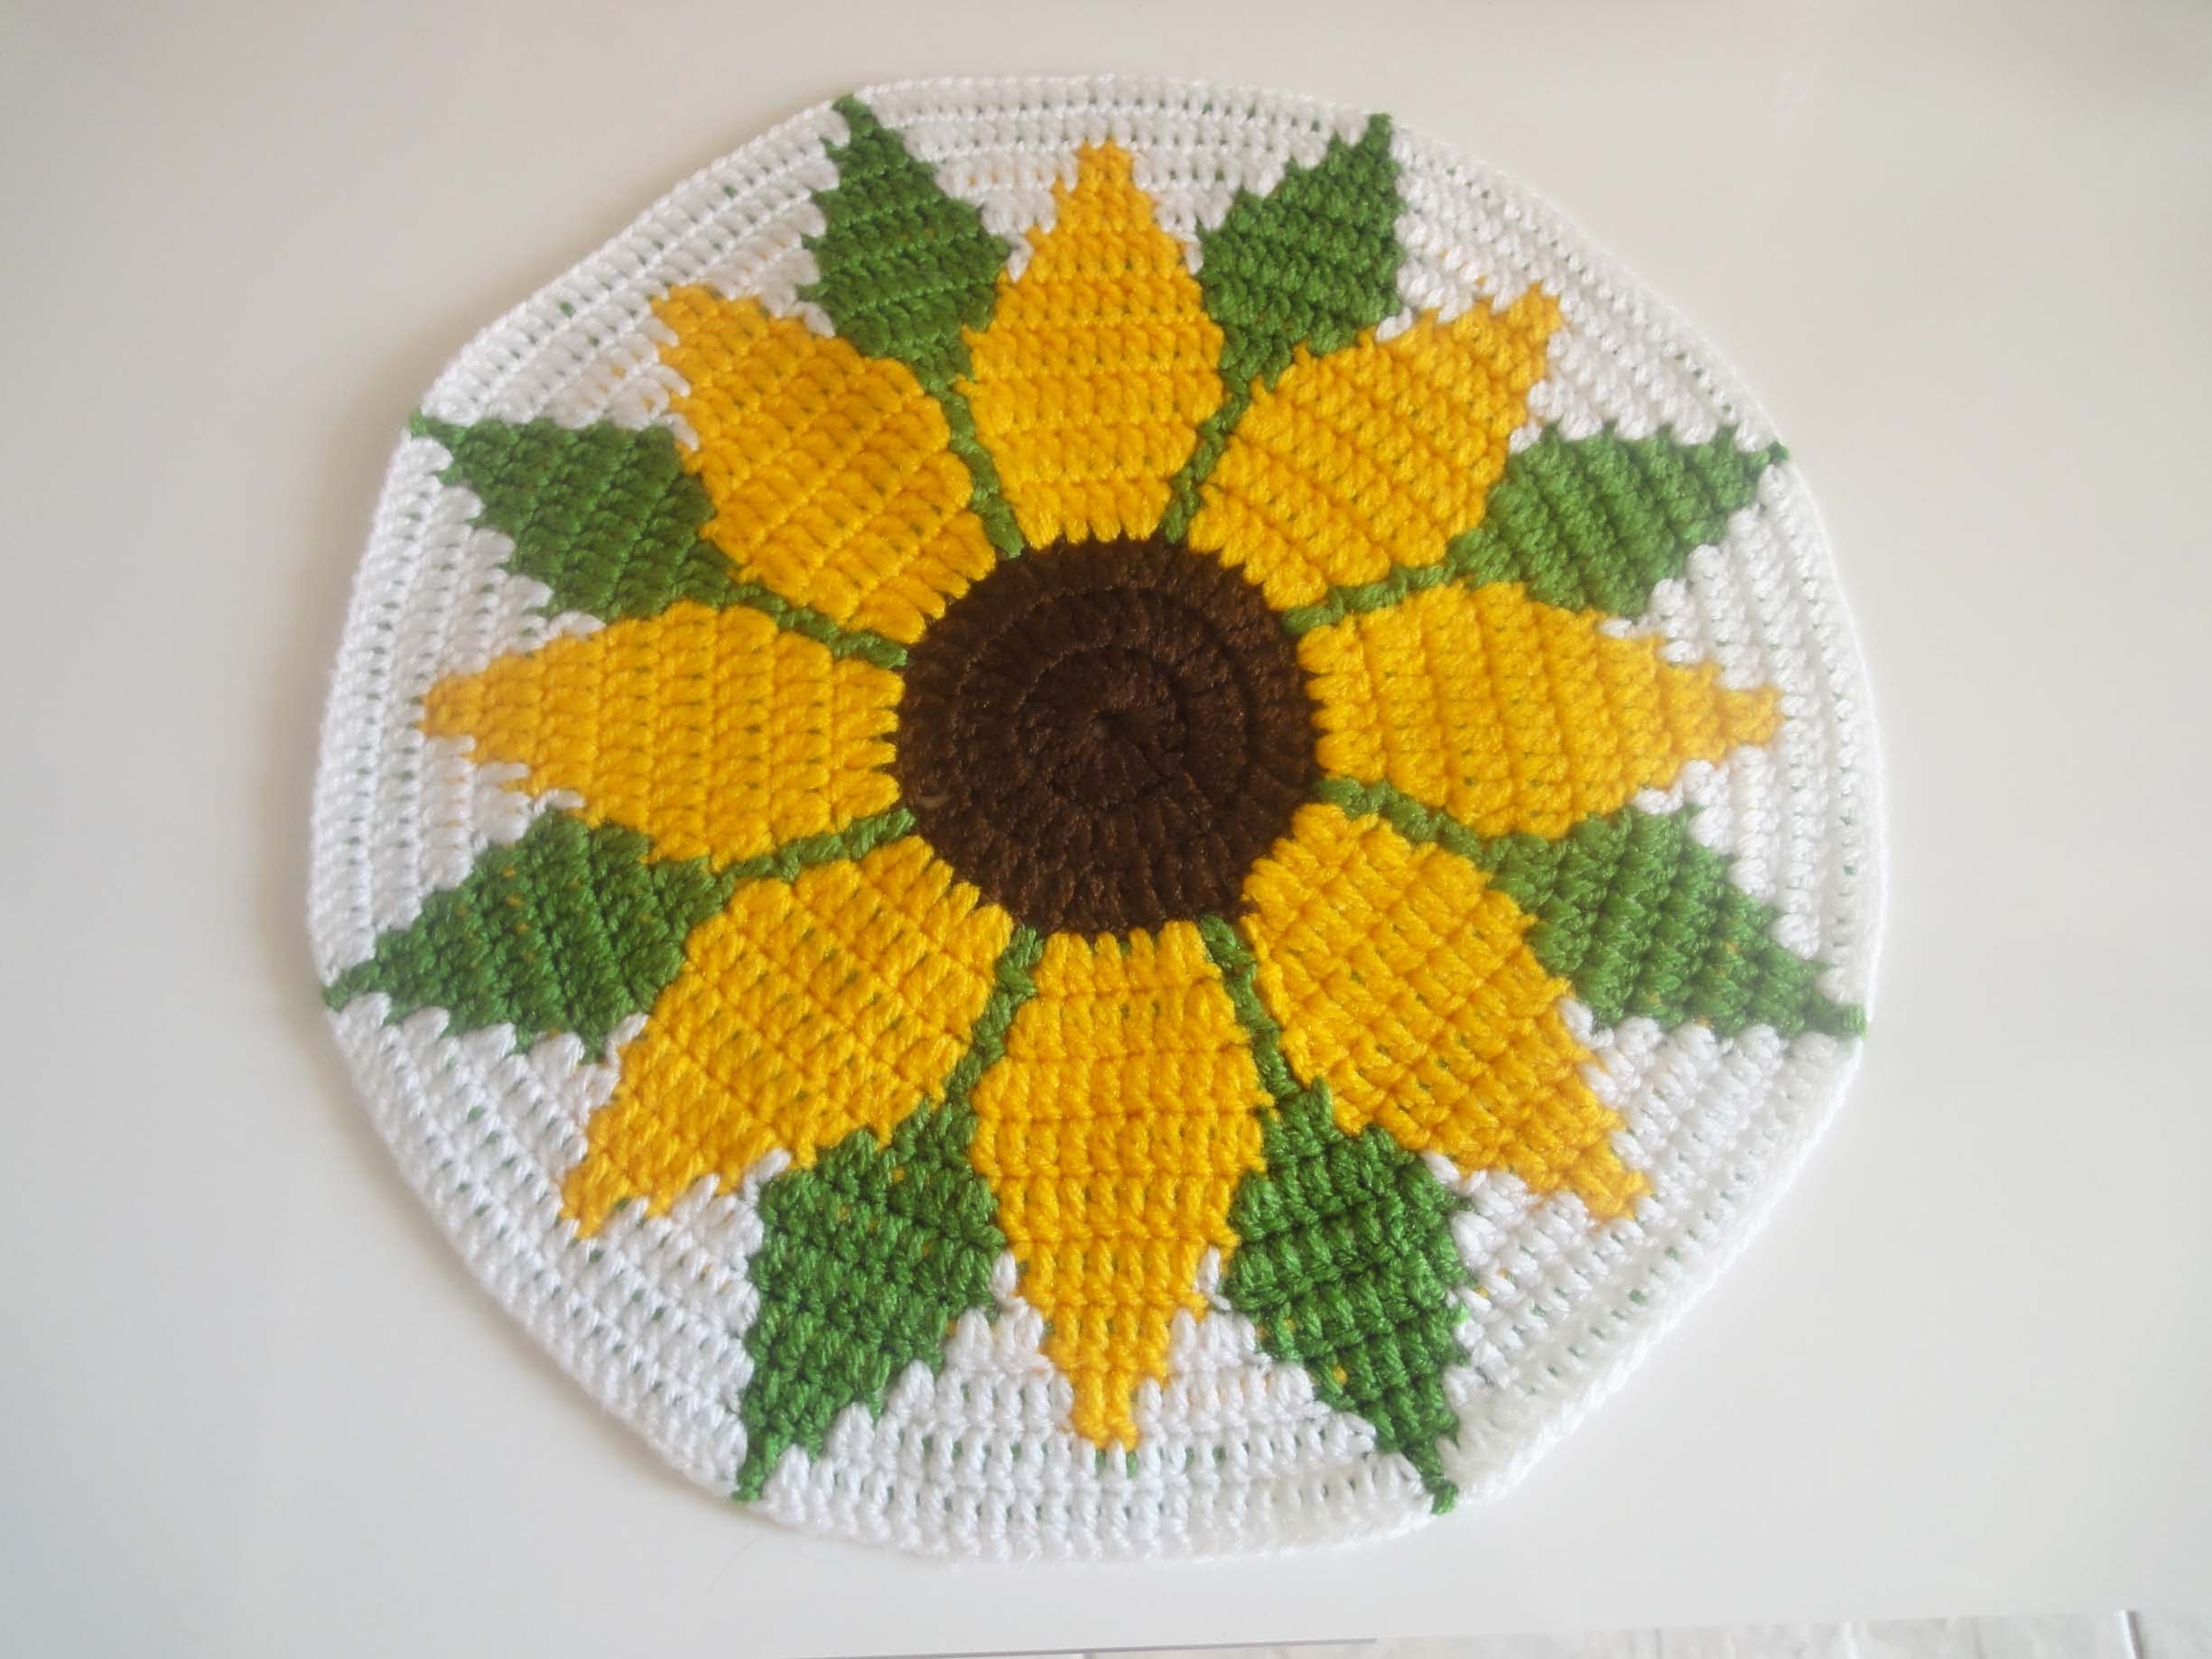
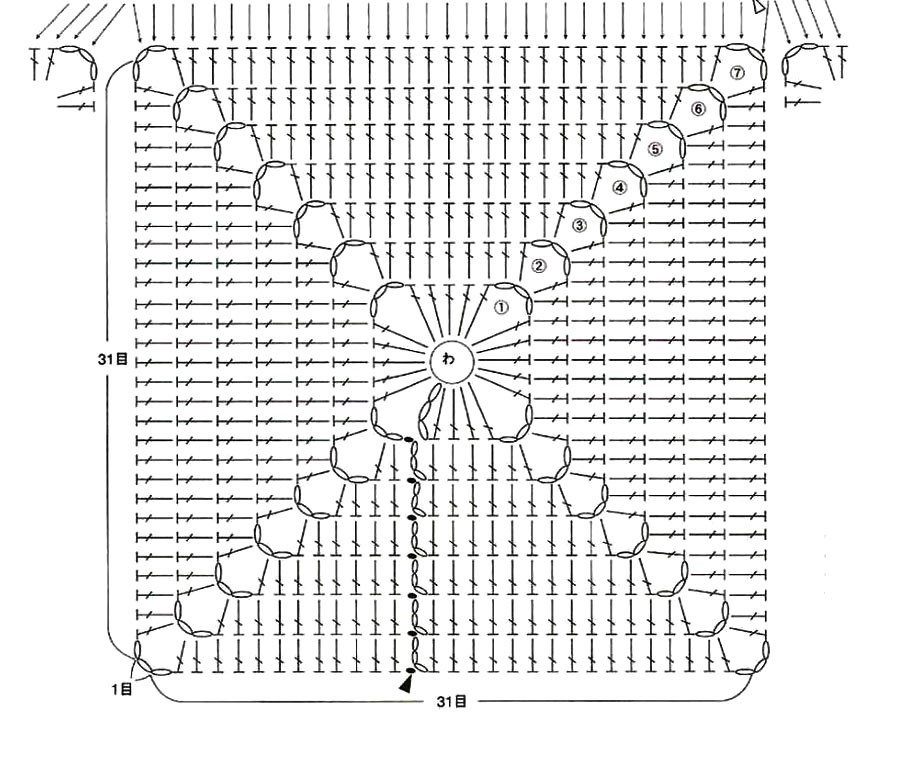
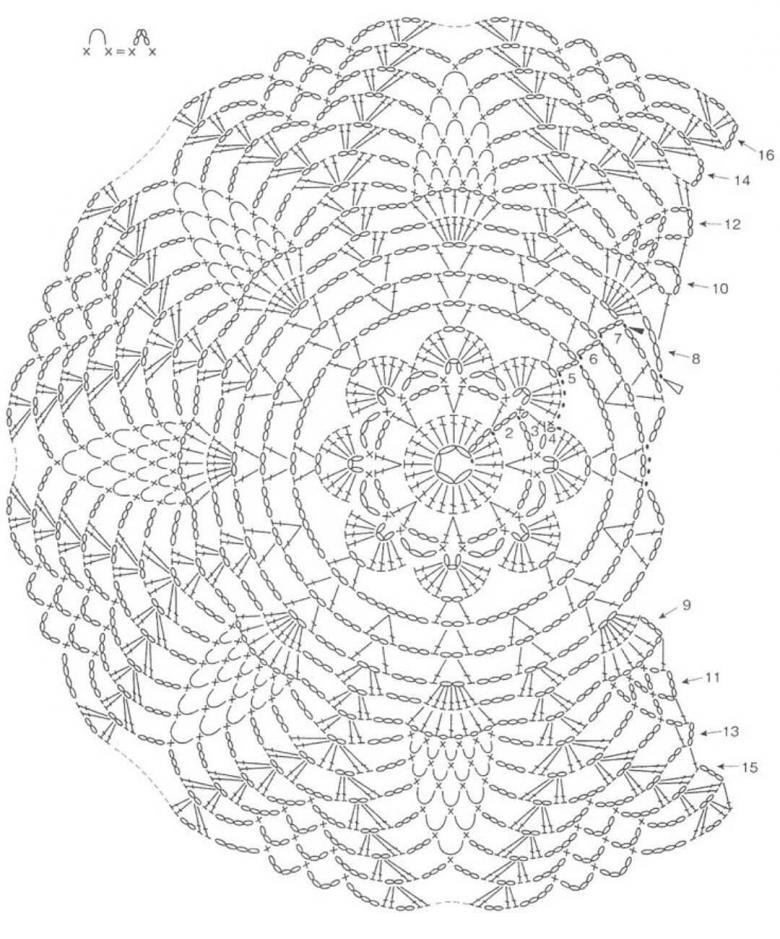
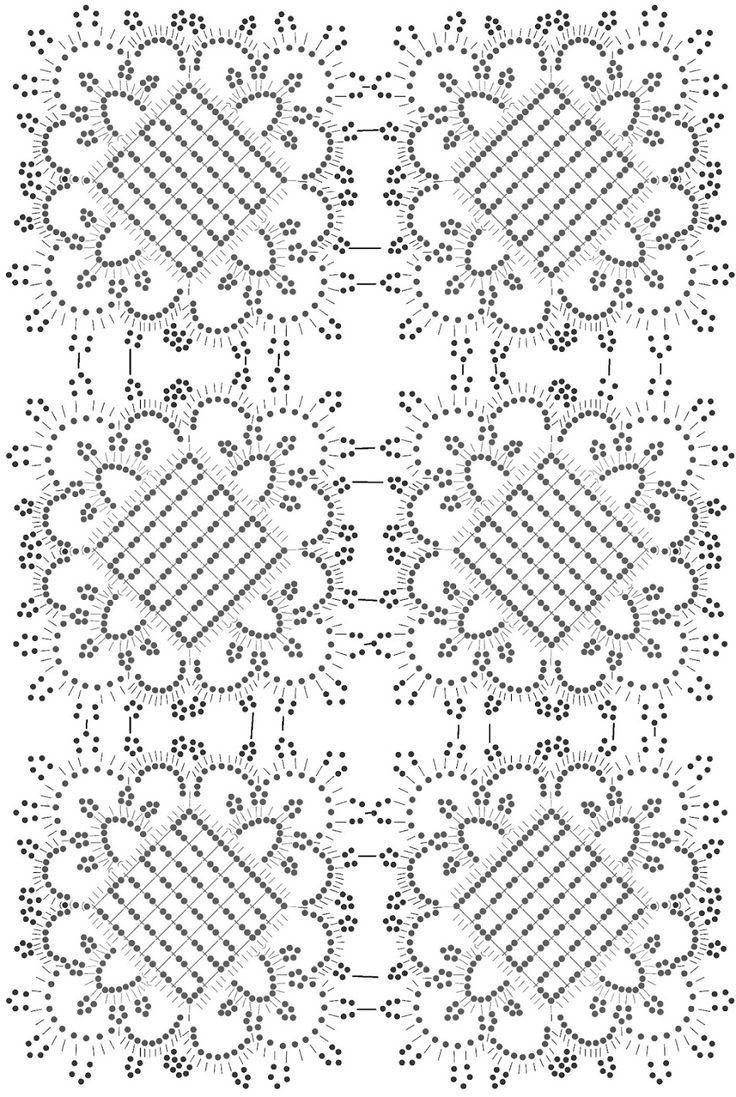
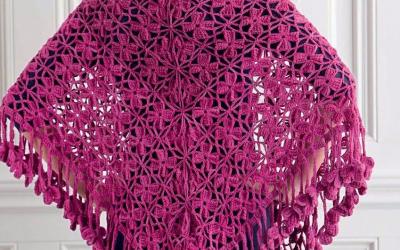
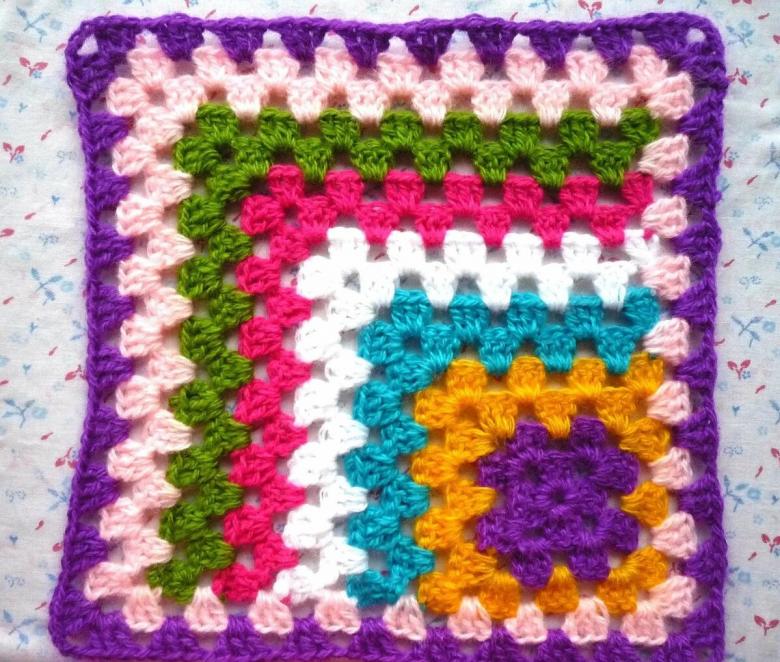
Knit capes and seats for chairs can be knitted in different ways: as a square, a circle, a cover with sides, etc. If you want to knit a more complex pattern of capes, you can use the scheme, the so-called grandmother's square.
Use it not only for chair covers, but also to form a few squares of larger things: rugs, plaids, pillowcases, etc. In order not to get confused in the pattern, you need to take as a basis a simple scheme of crochet granny square for beginners and strictly follow the instructions.
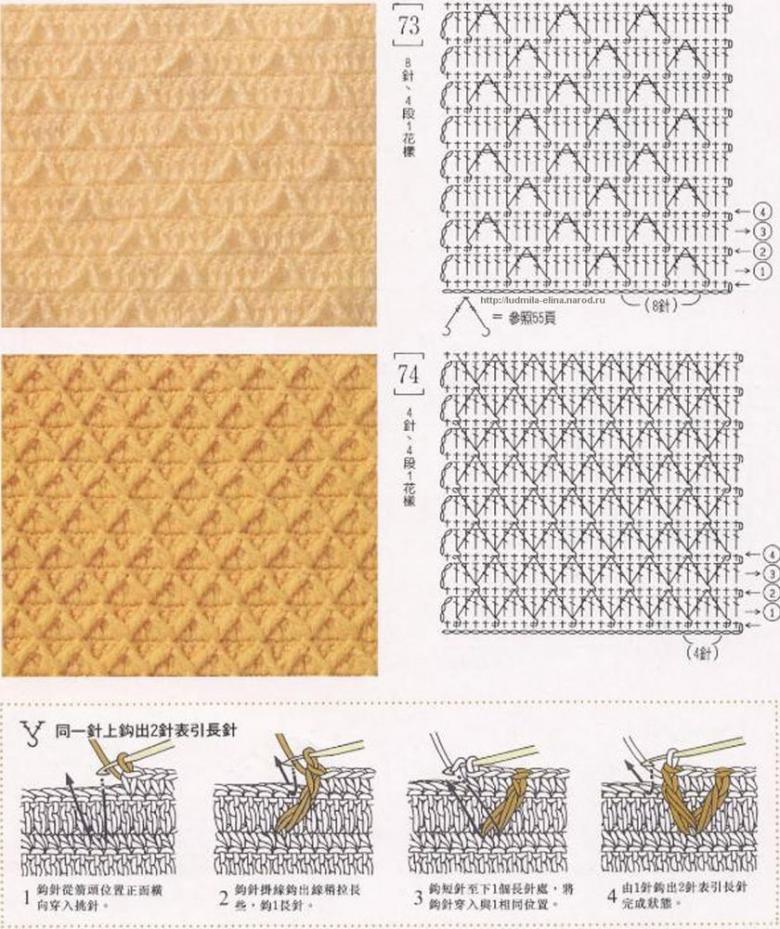
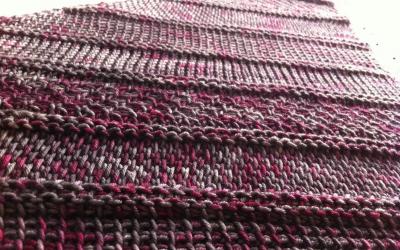
Scheme of Tunisian crochet
Dissecting the different crochet techniques, it is impossible not to mention the Tunisian crochet method. This method resembles something between crochet and needle crochet. But its connected things are very dense, almost not deformed and practical to use.
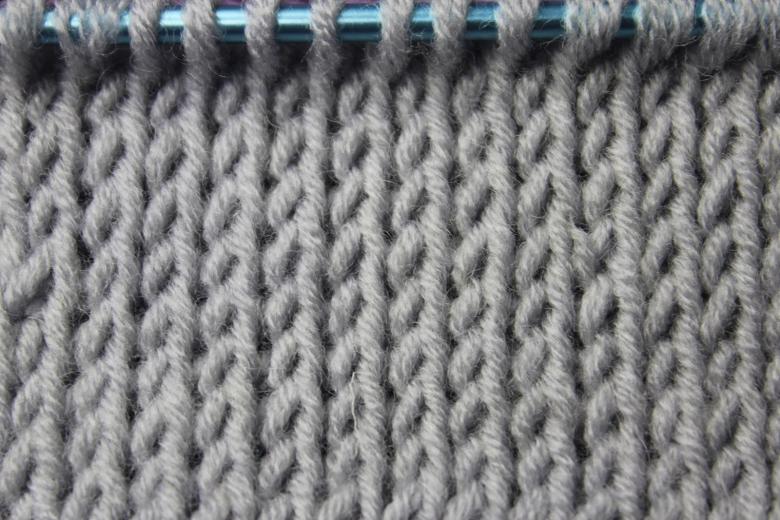
Consider the schemes with detailed descriptions of Tunisian crochet for beginners:
- Dial a row of air loops.
- From each stitch of the zero row we hook a new stitch. Leave all the stitches on the hook.
- With the hook, take the thread and pull it through the 2 stitches that were on the hook. Once again take the yarn with the hook and pull it through the 2 stitches that were on the hook. Continue through the row to the end.
- In the next row, we take the stitches through the arches, and again take a row of stitches on the hook.
- Alternate rows with a set of loops and loops from the hook.
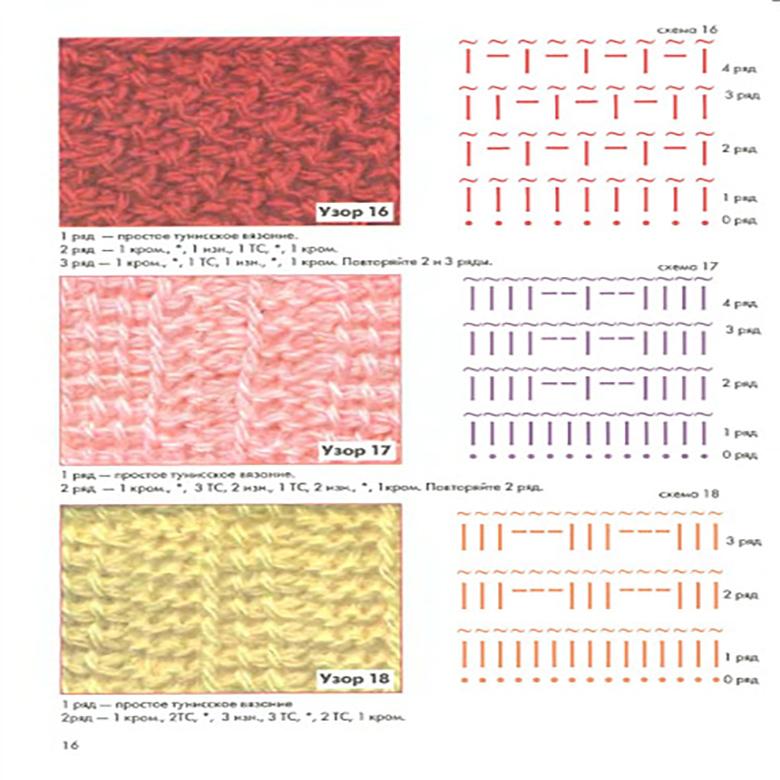
At first glance, the technique may seem complicated, but after spending a little time on it, it becomes convenient and simple. There are a lot of Tunisian crochet patterns, you just have to choose your own.
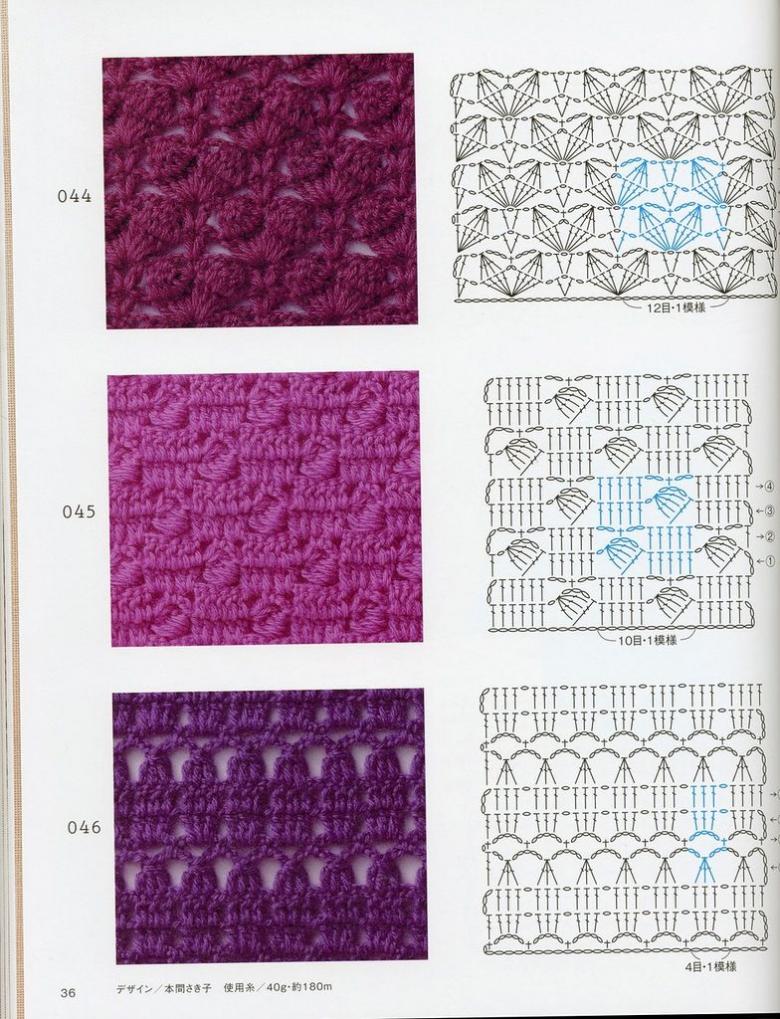
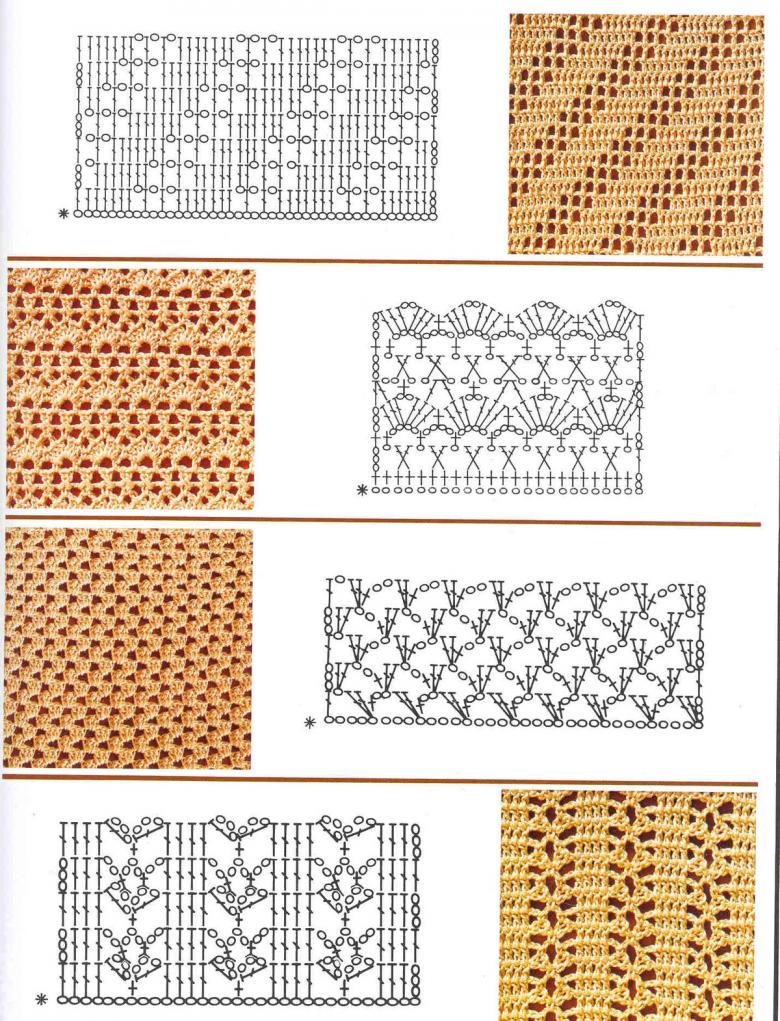
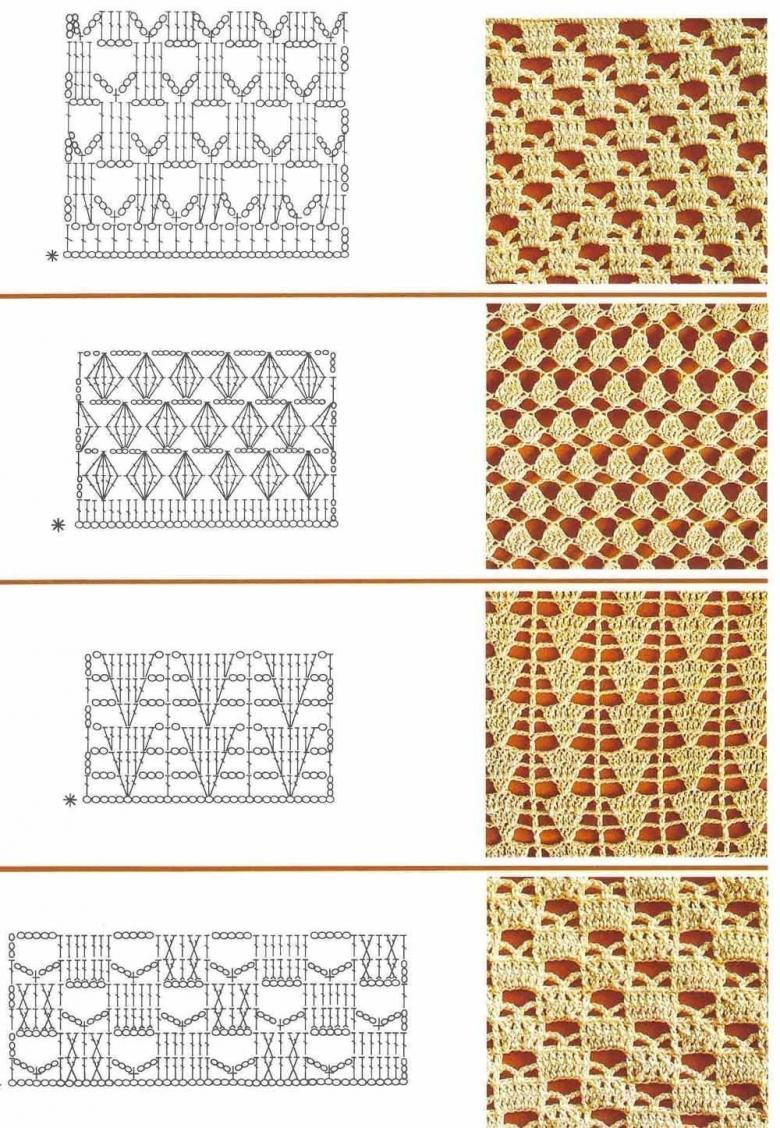
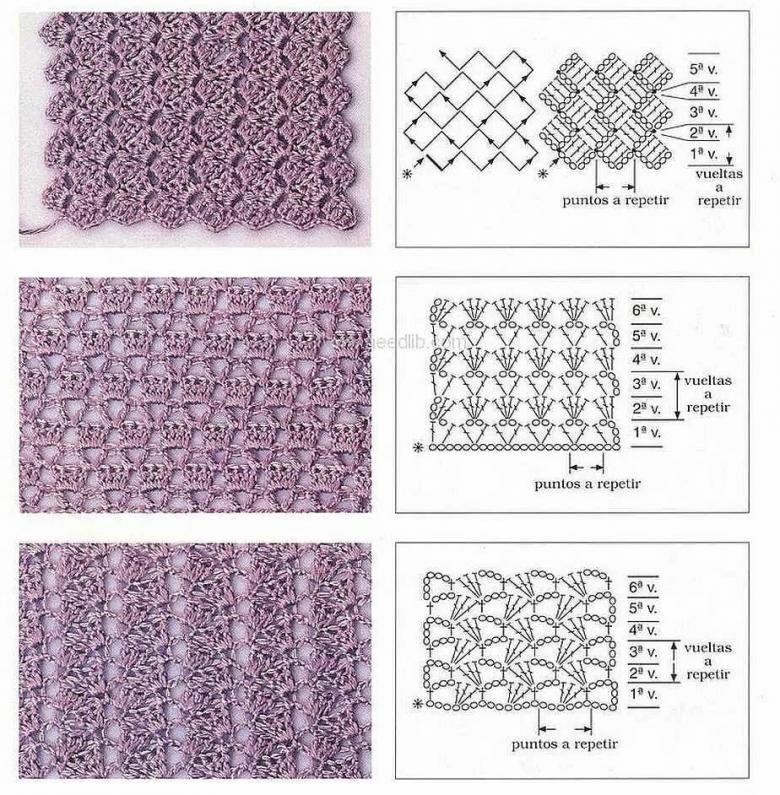
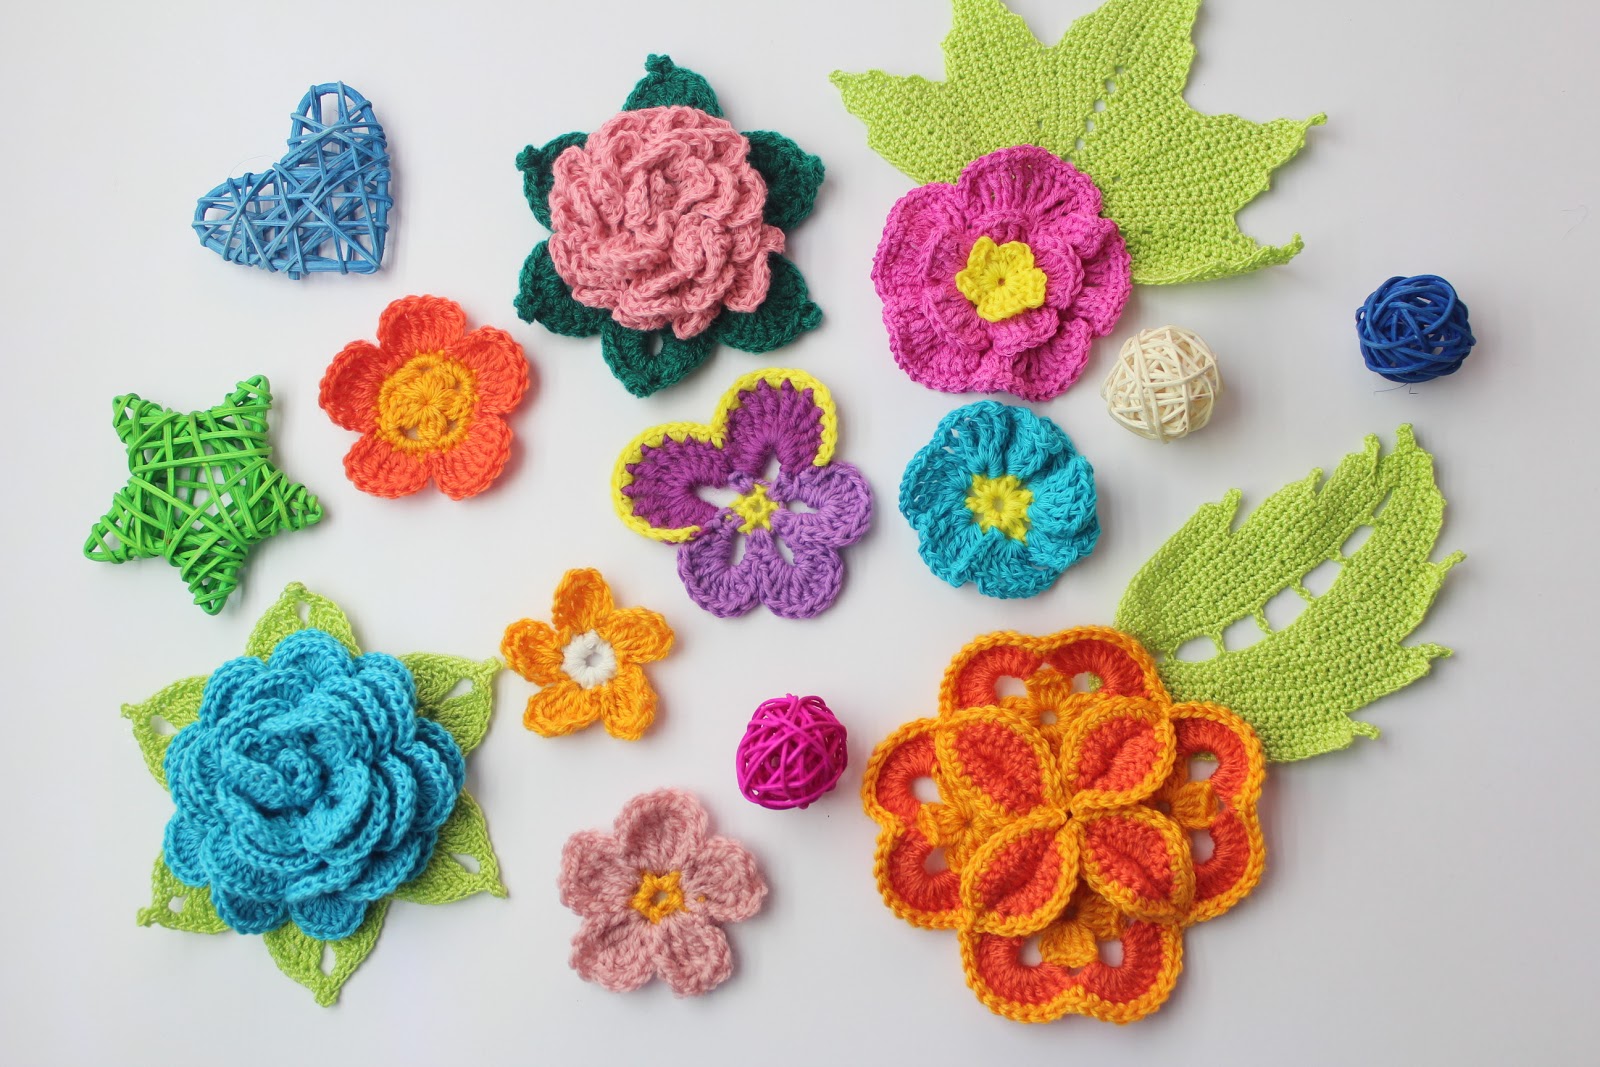
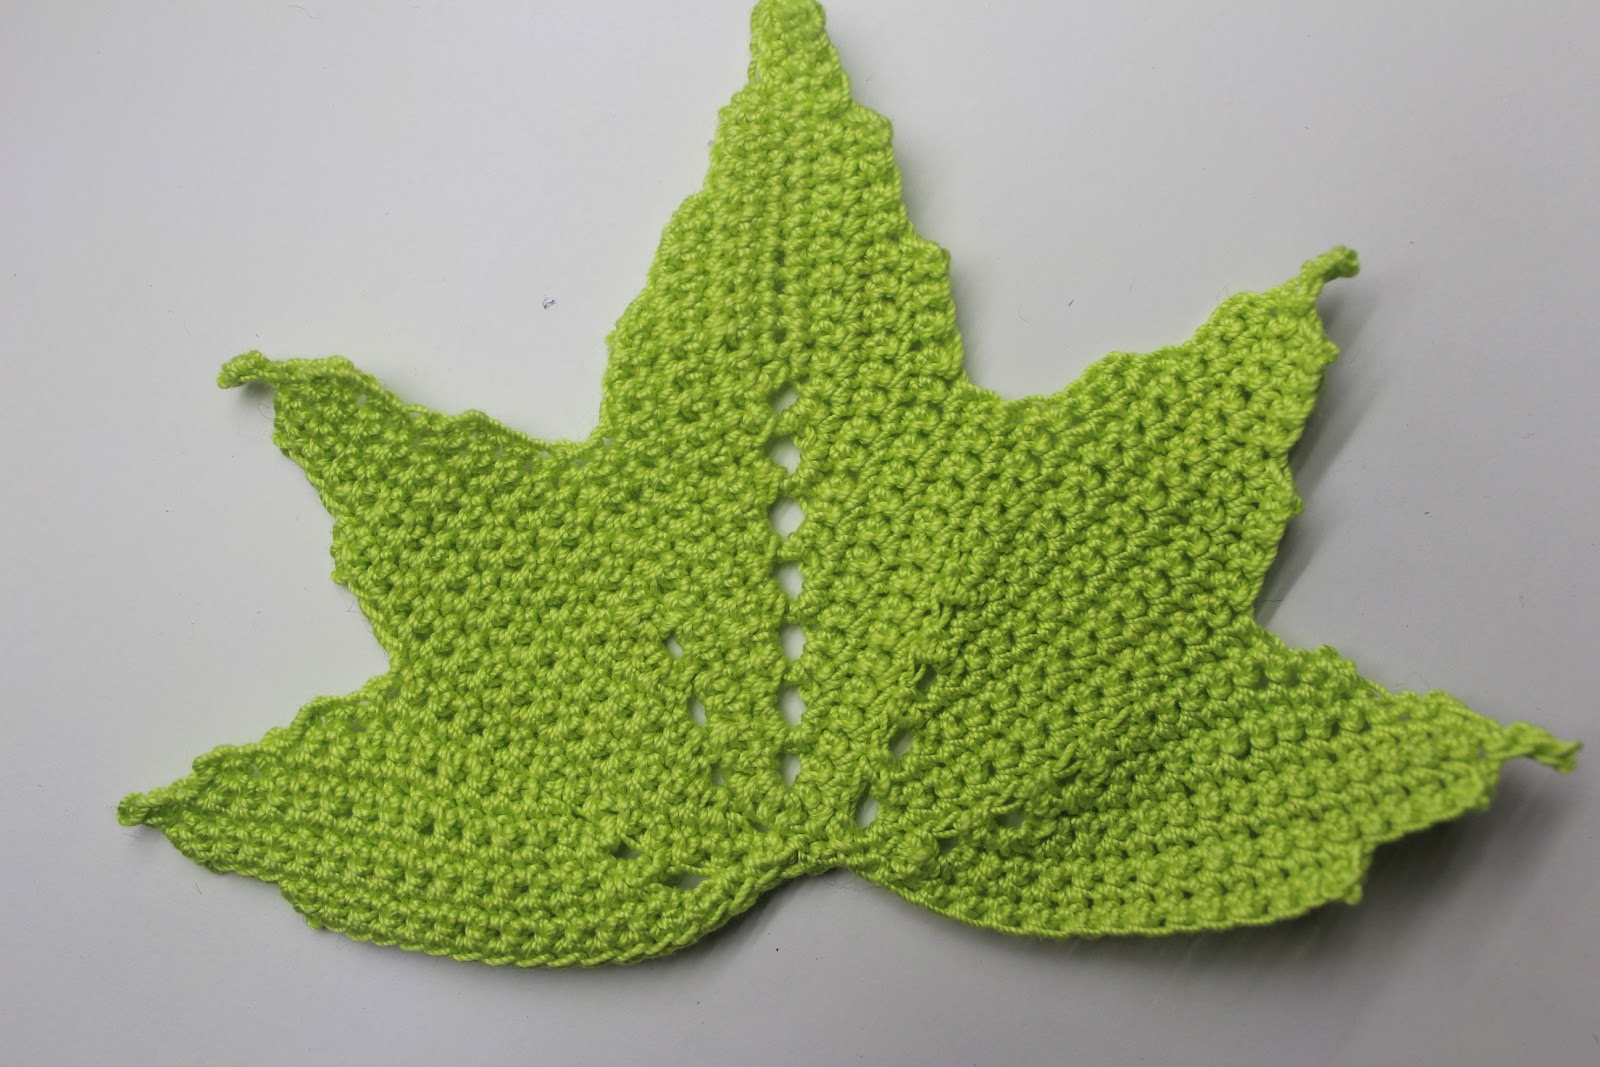
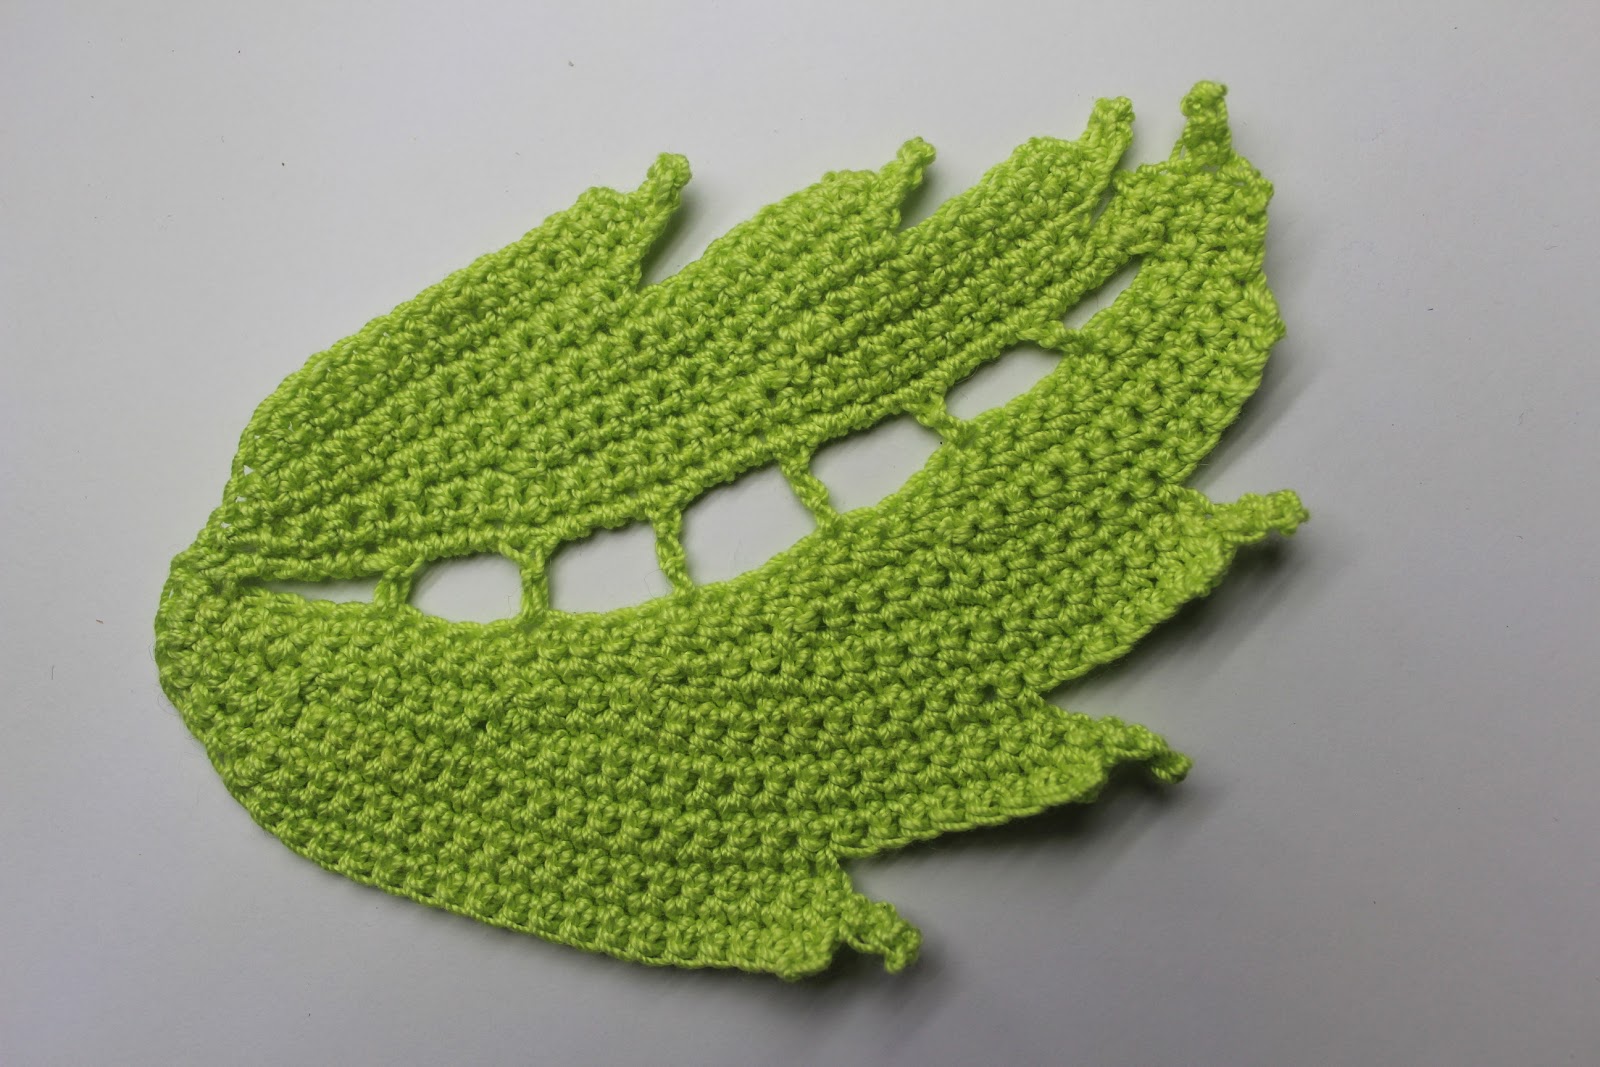
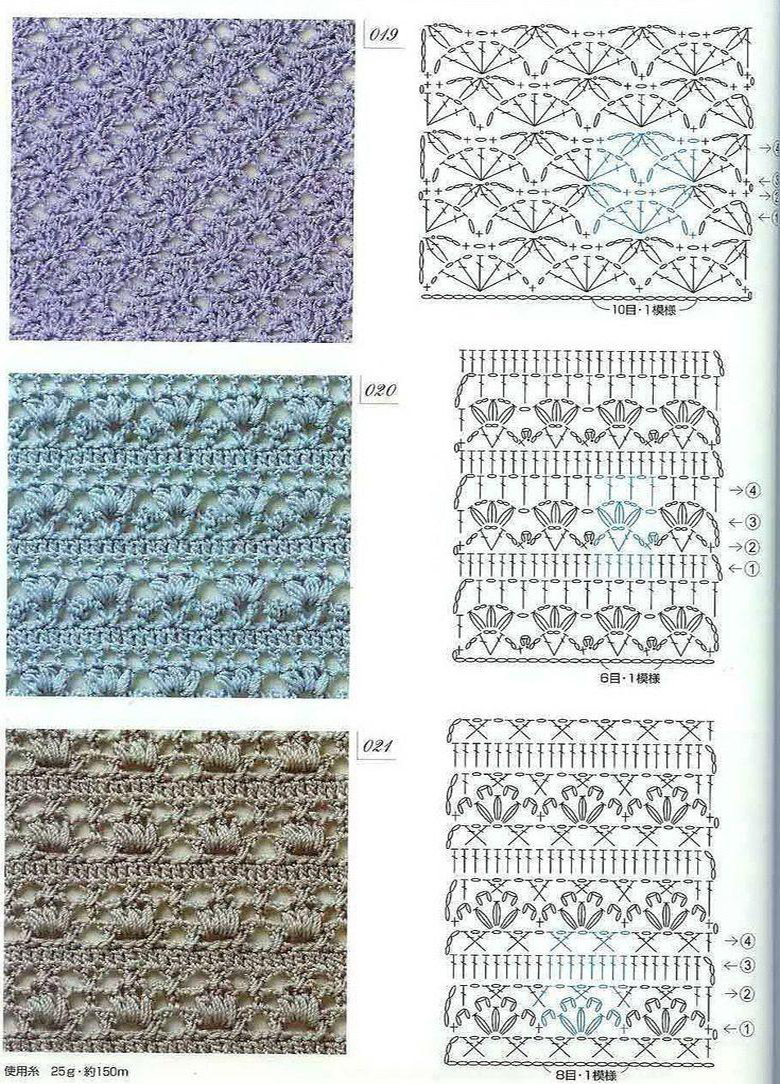
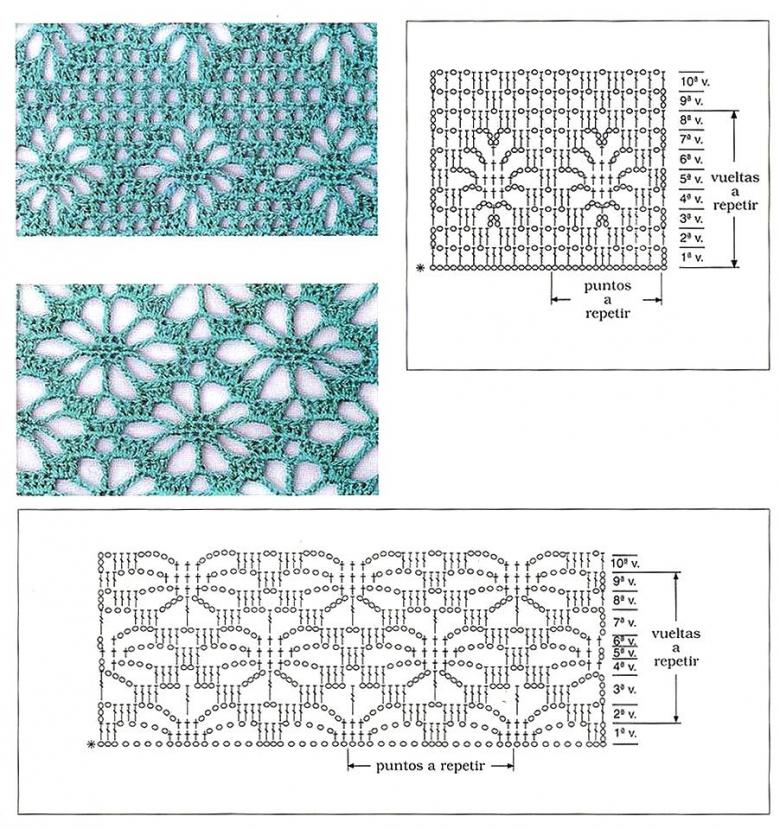
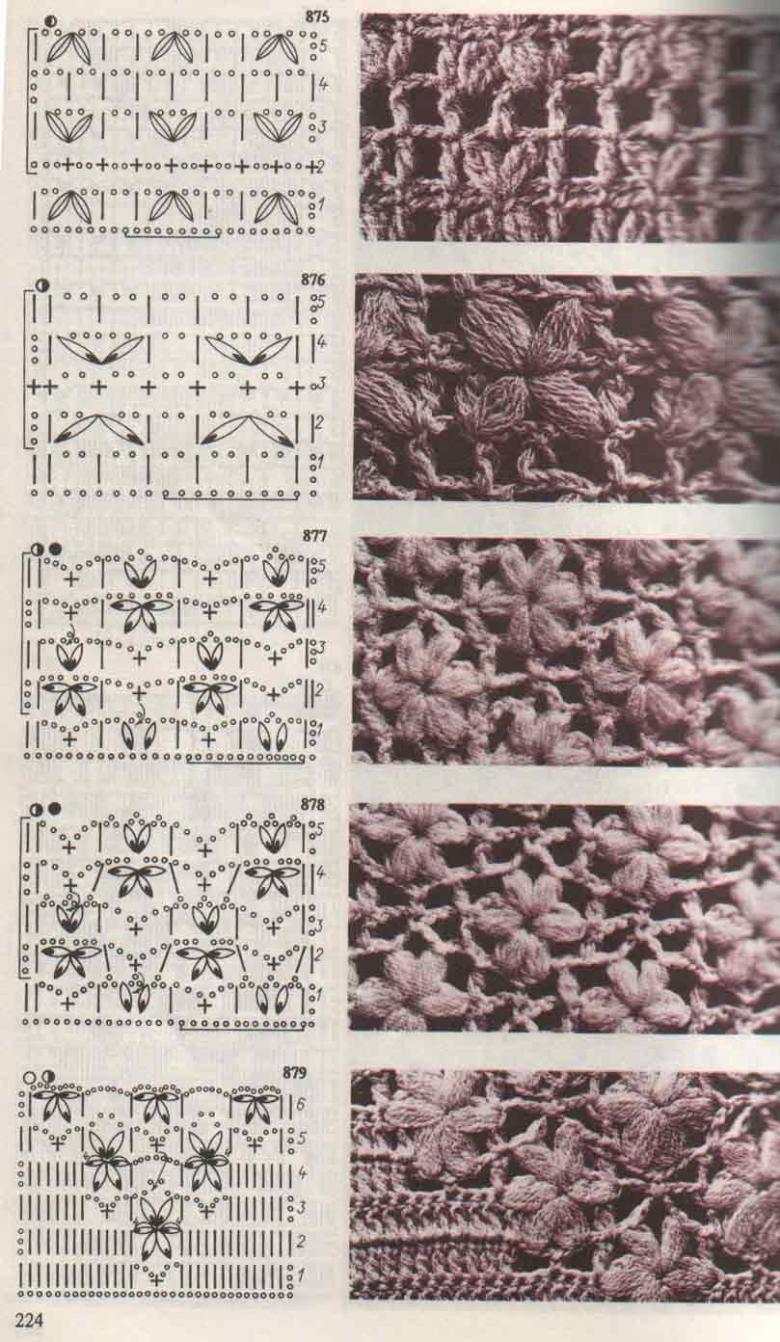
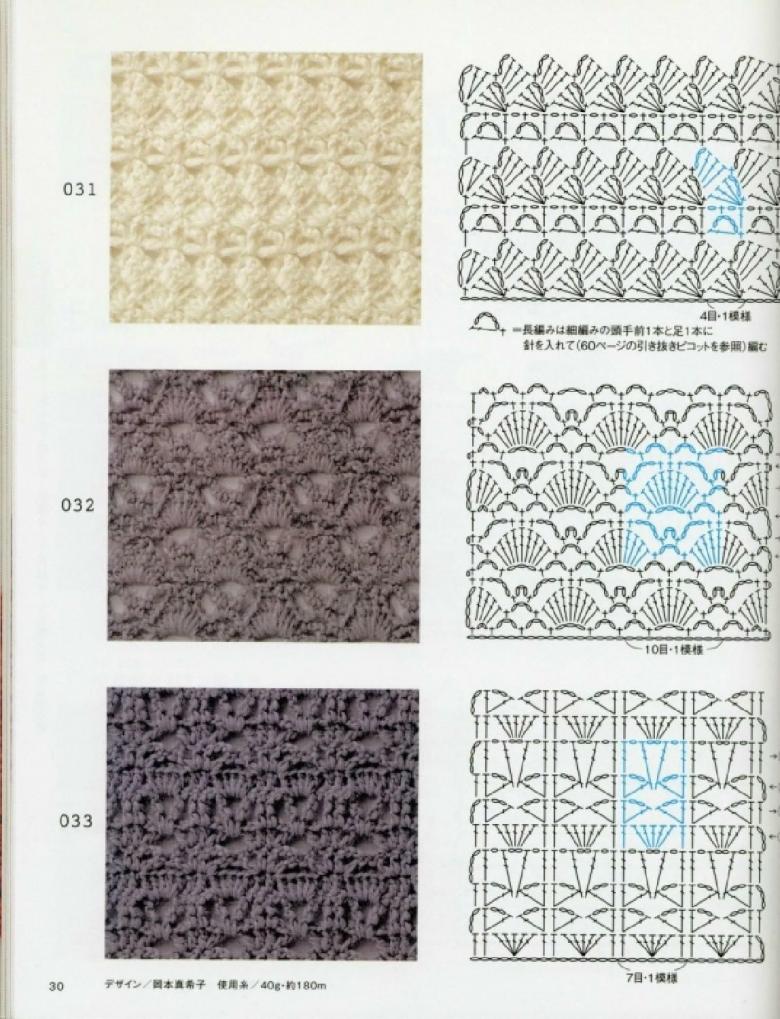
A selection of easy patterns for crochet