Handicrafts of natural material: handmade products for children
The perception of nature, communication with it gives us endless joy and inspiration. Since ancient times, nature has inspired human creativity: poets and writers praised it in their works, composers composed beautiful music, artists transferred the magical colors to the canvas.

From an early age it is worth introducing children to the proper interaction with nature, to see the beautiful, to treat it with care, and to be able to use its rich gifts. It is very appropriate to recall the words of the great Russian geographer D.L. Armand, who said that when you come to visit nature, you should not do what you consider improper behavior as a guest.
Children's creativity plus natural material
It is absolutely not difficult to make crafts from natural material with your own hands. It's important - pick the right range. Acquaintance of a child with the gifts of nature can happen all the time, it is only necessary to focus his attention on this. Natural blanks for the implementation of fantastic ideas of the kid should be made in advance.

The natural material is:
- Cones (fruits of coniferous trees).
- Coniferous needles of firs and pines.
- Chestnuts are amazingly shiny and pleasant to the touch fruits.
- Nuts and acorns.
- Seeds and inflorescences of various plants.
- Tree bark.
- A variety of seashells.
- Wonderfully shaped pebbles.
- Fancifully shaped branches, roots, leaves of trees and many other treasures of nature.

Working with natural material will help the child to get acquainted with certain qualities of certain components, as well as develop their imagination and translate it into reality.
What is needed for work
In the process, you will need additional materials such as paper, glue, colorful scraps, fishing line, foil and more. Before starting the process, you should take care to have everything you need for creativity on hand.

Beautiful crafts for kids
With the onset of spring, relaxing in nature, you can, together with your child, weave magnificent wreaths of yellow dandelions.

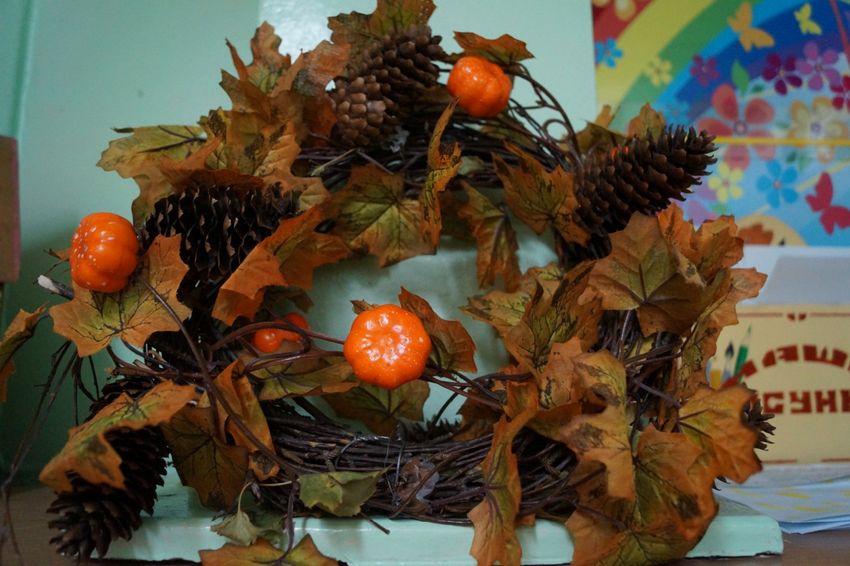
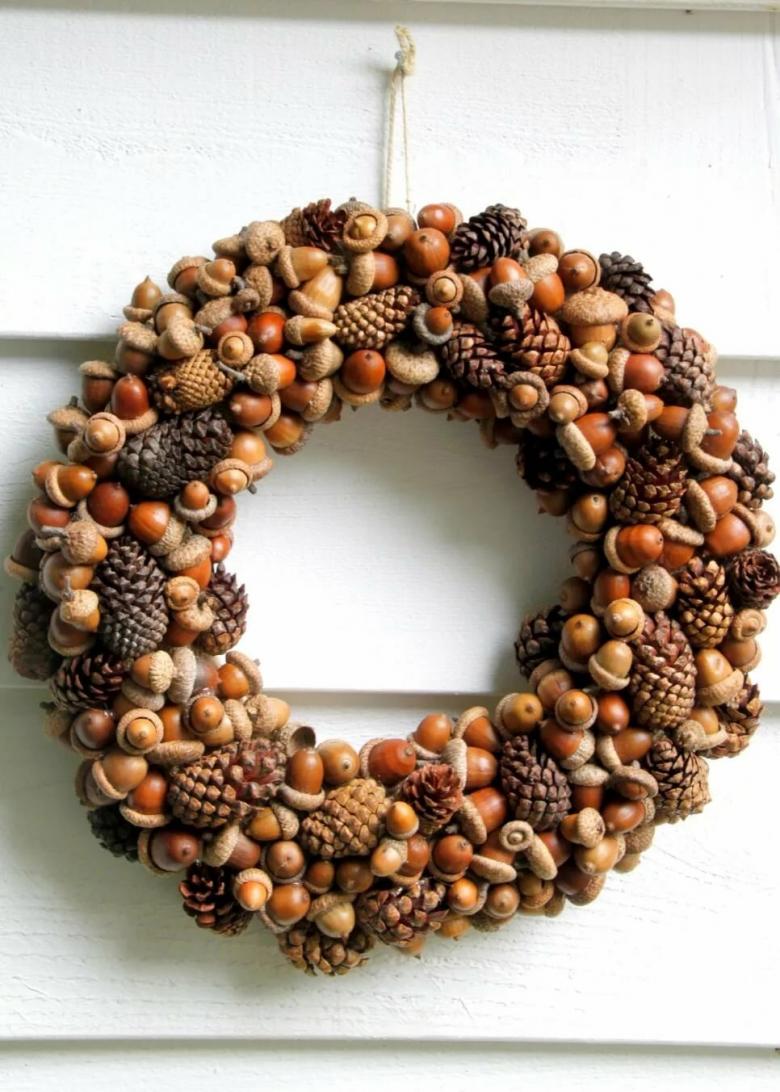
Wreath made of acorns for the front door
Material:
- acorns;
- moss;
- cardboard;
- glue.

Order of making:
- Cut a ring out of heavy cardboard of the required diameter.
- Grease the base with glue, and attach the pieces of moss (your child will be happy to do this step).
- Allow time to dry and decorate the green rug with acorns. Your child can create a pattern of oak fruits, and it is up to you to glue the elements. It is more reliable to use a glue gun.
- Decorate the ring with beautiful braid, and mount it on the door.
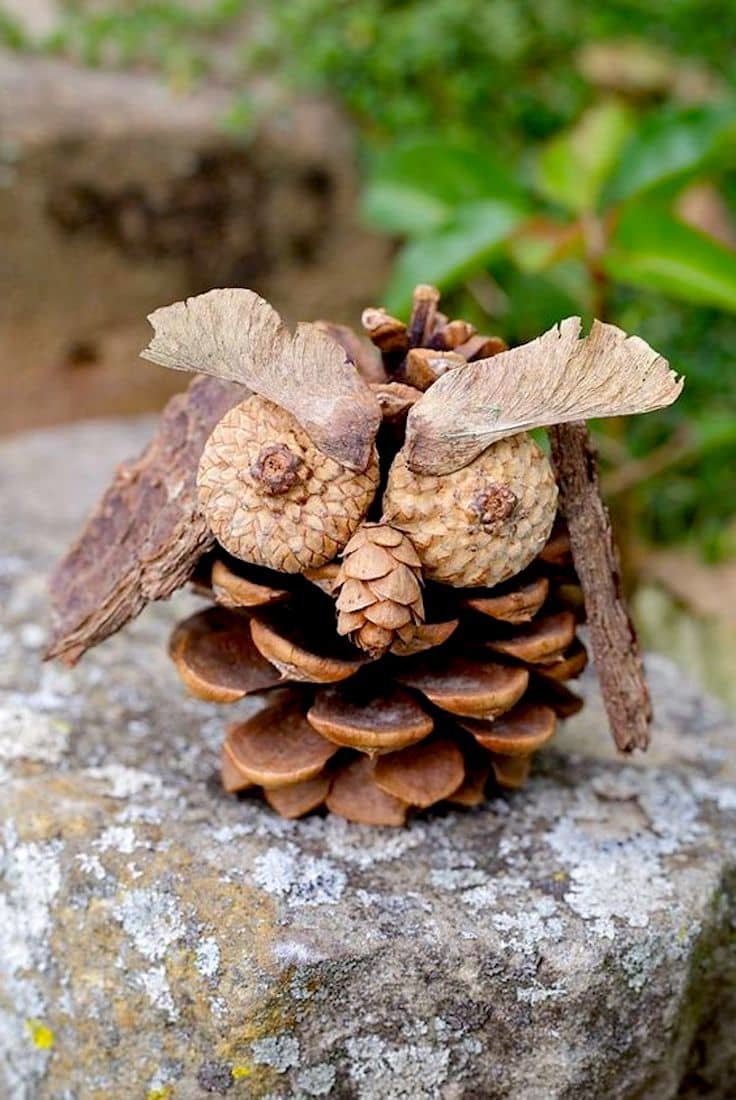
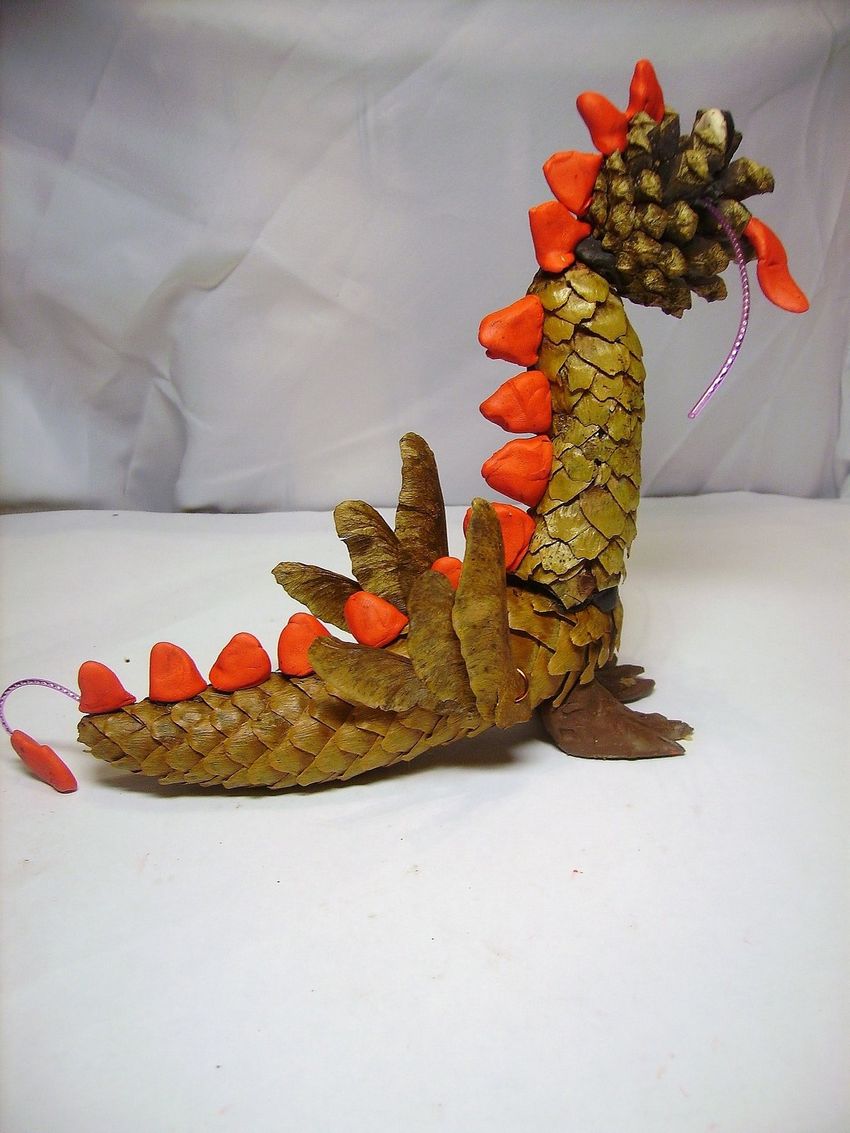
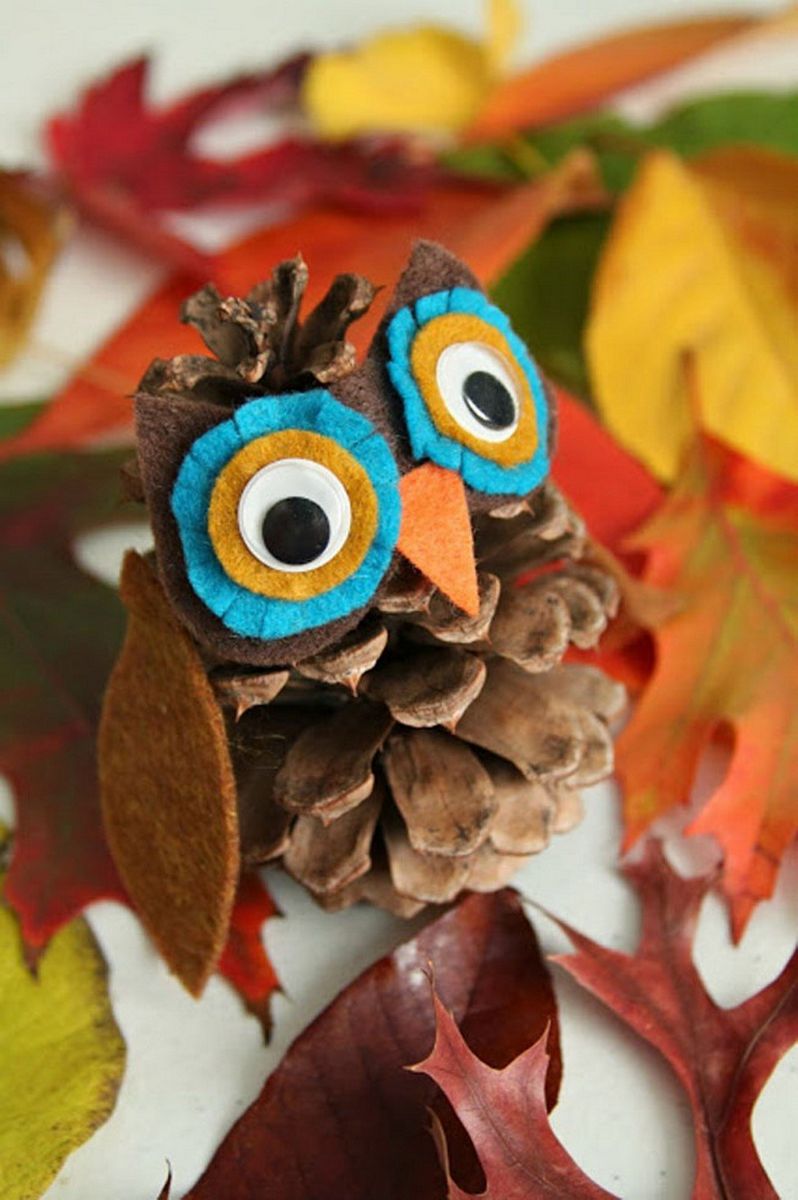
Cones - the basis of cute crafts
Cones of different colors, shapes - a great ingredient of natural material in creating crafts for children.

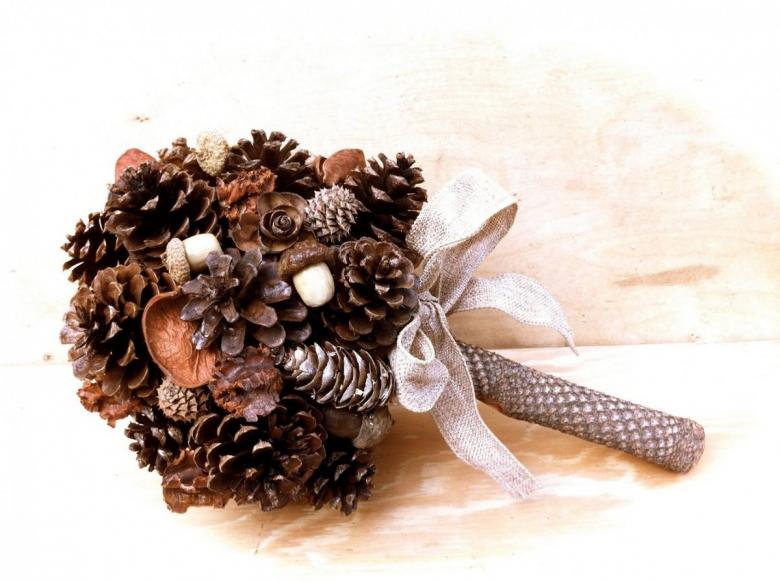
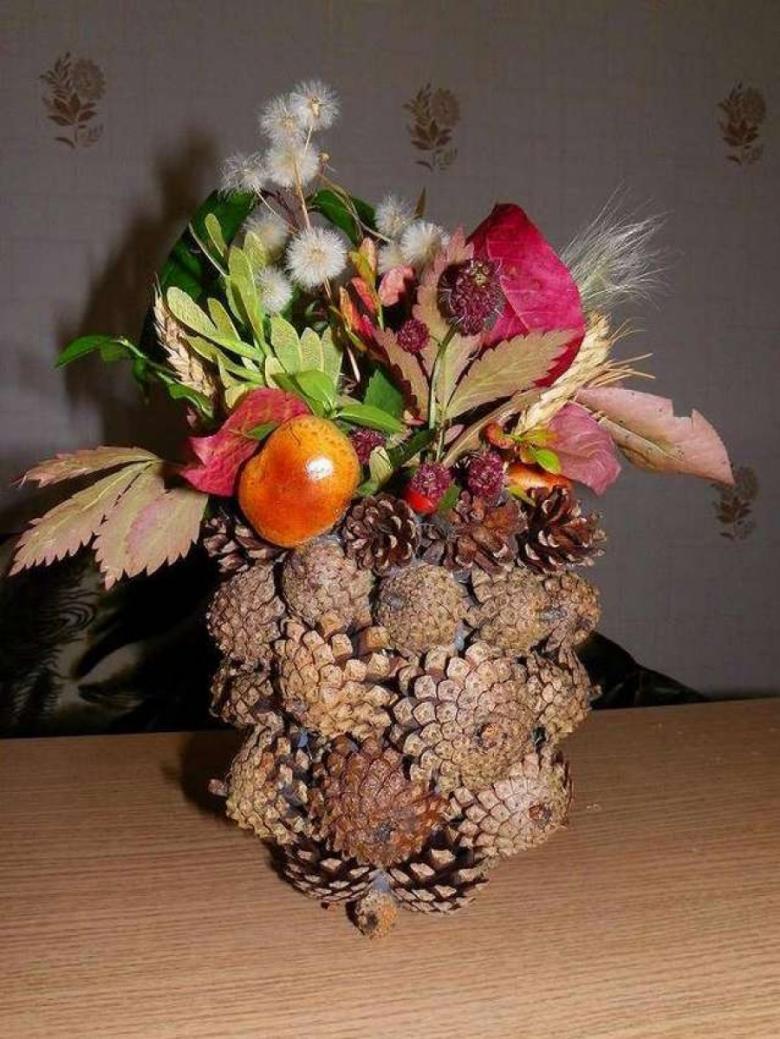
A wonderful bouquet
You will need:
- A flower pot (preferably ceramic);
- green moss;
- a variety of cones;
- glue.
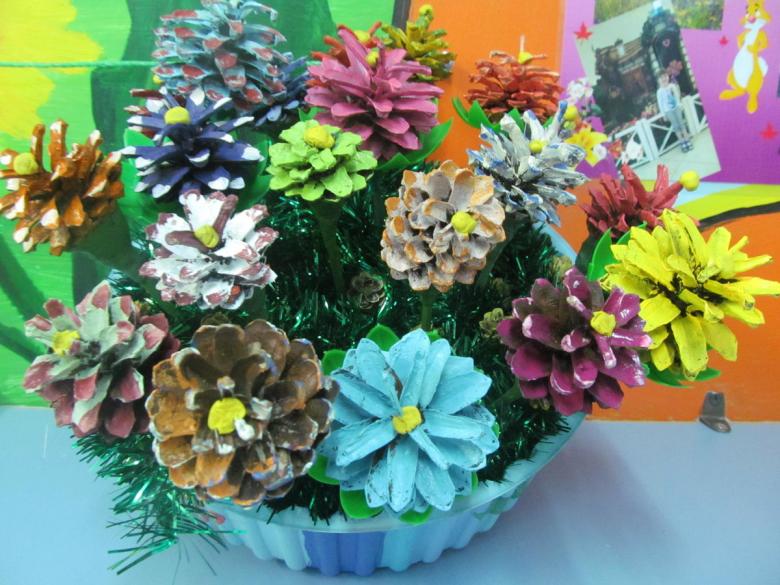
Step by step execution:
- The pot is quite densely filled with moss.
- Carefully insert the cones on top of each other so that you get a bouquet (a small hill).
- To fix it, use PVA glue.
- The space between the cones is also filled with moss (you get the leaves of the bouquet) with glue.
- The pot can be decorated by gluing the seeds of cones.
Such a bouquet would look great on the window in the kitchen.
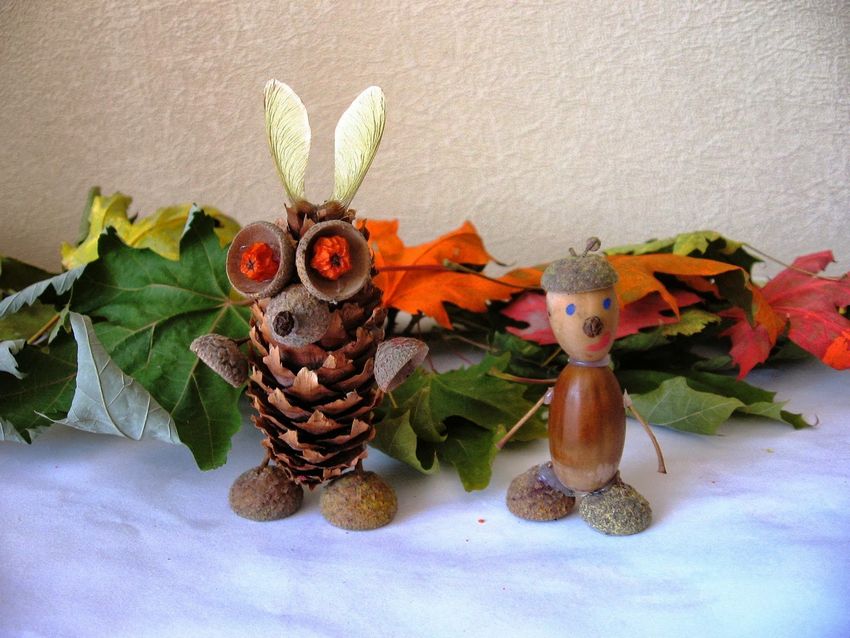
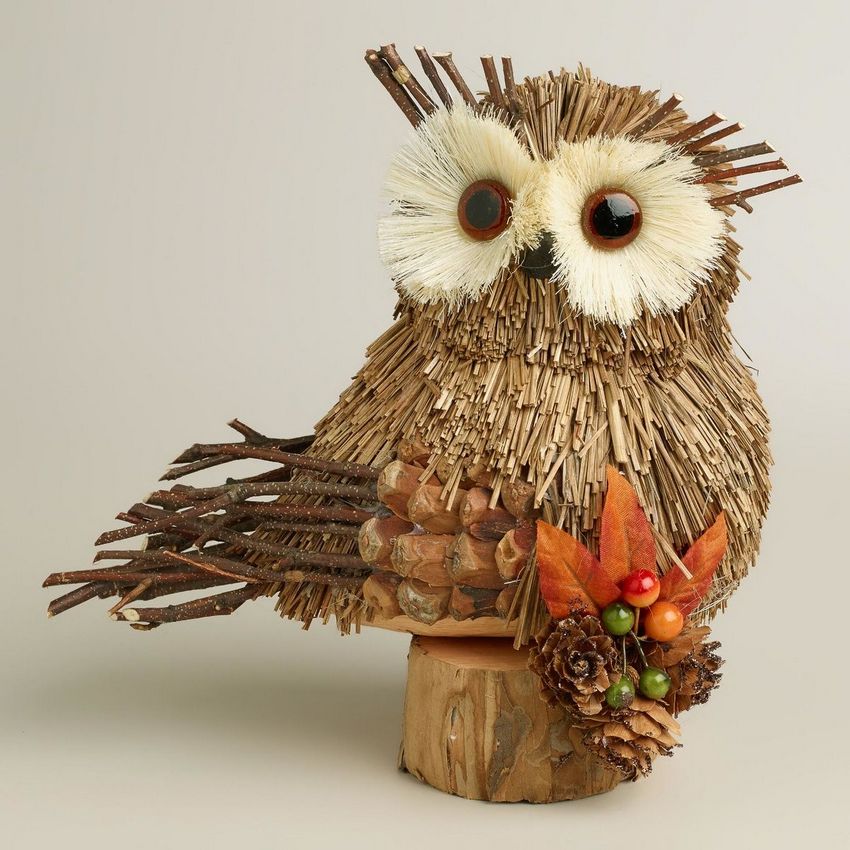
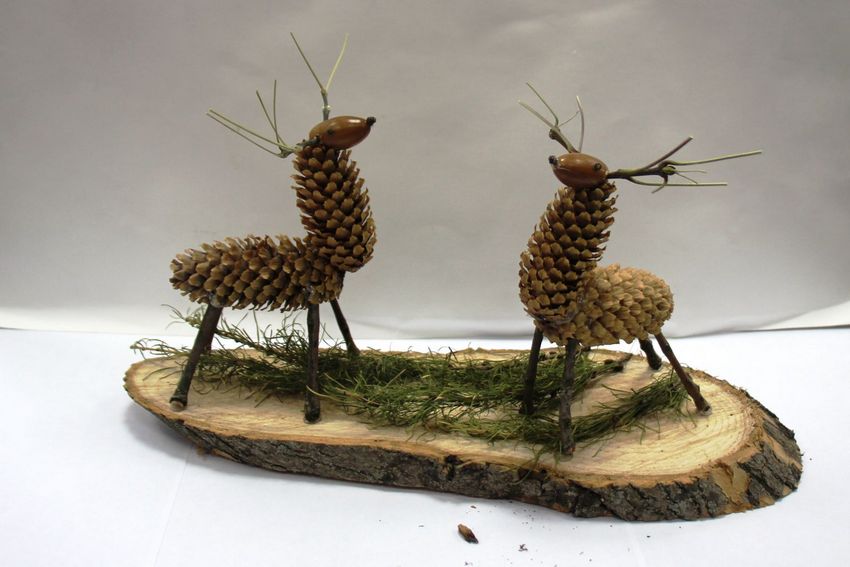
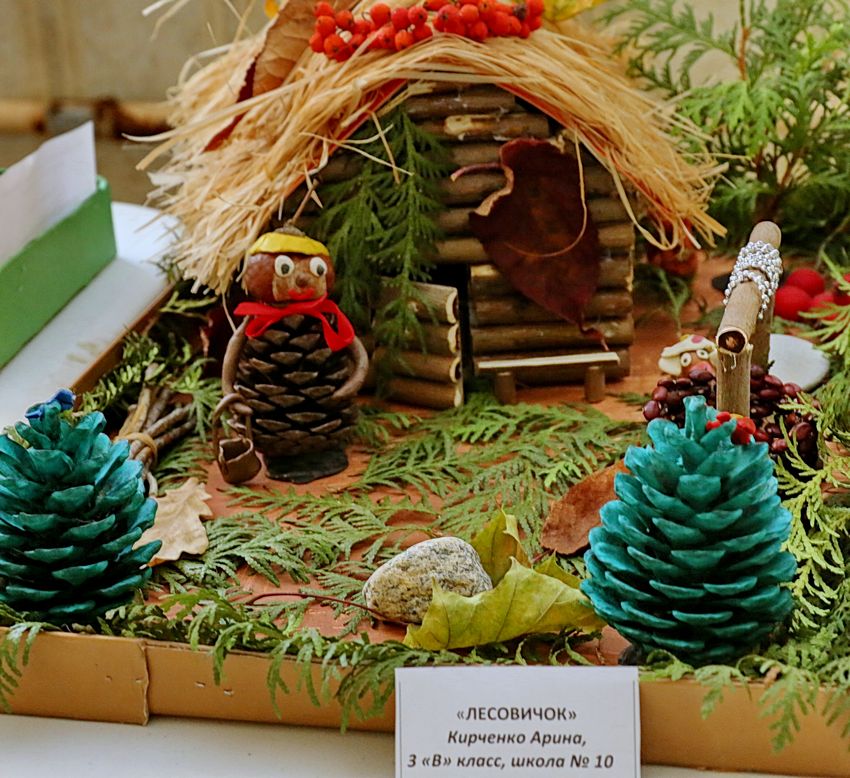
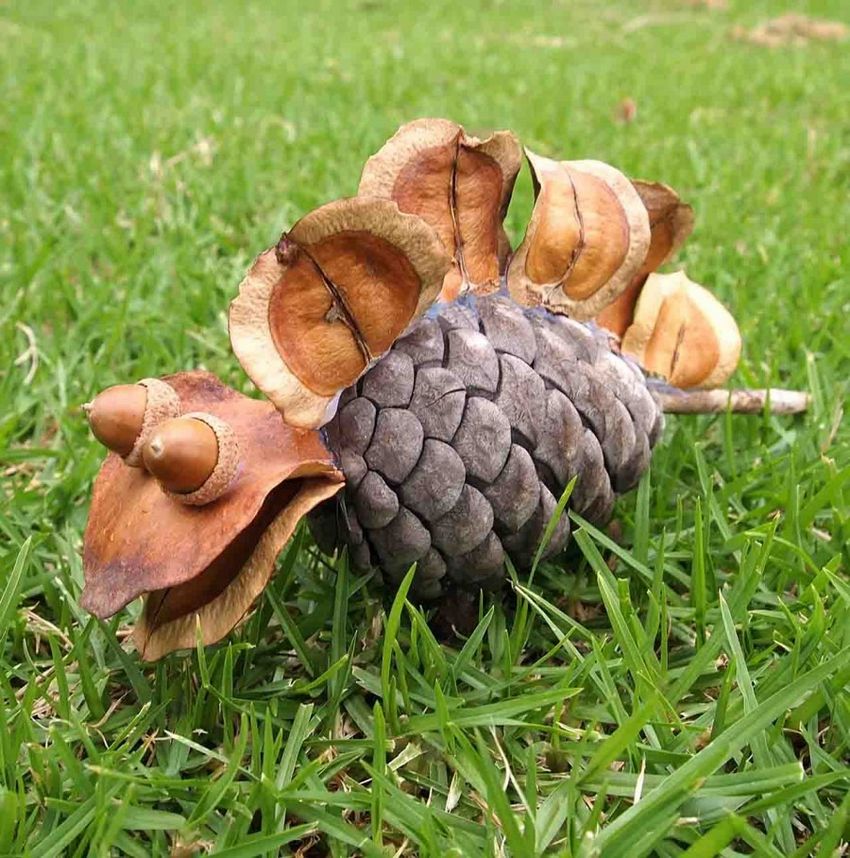
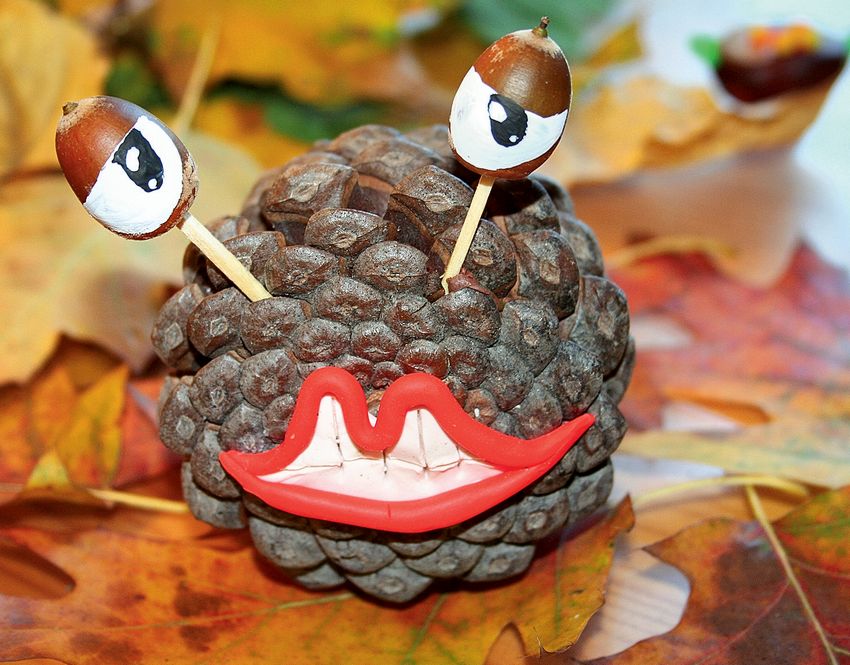
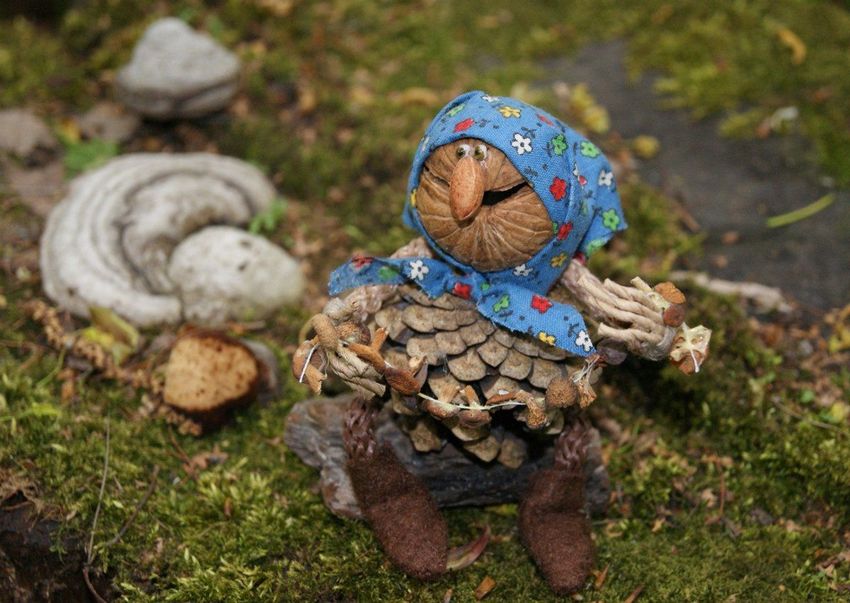
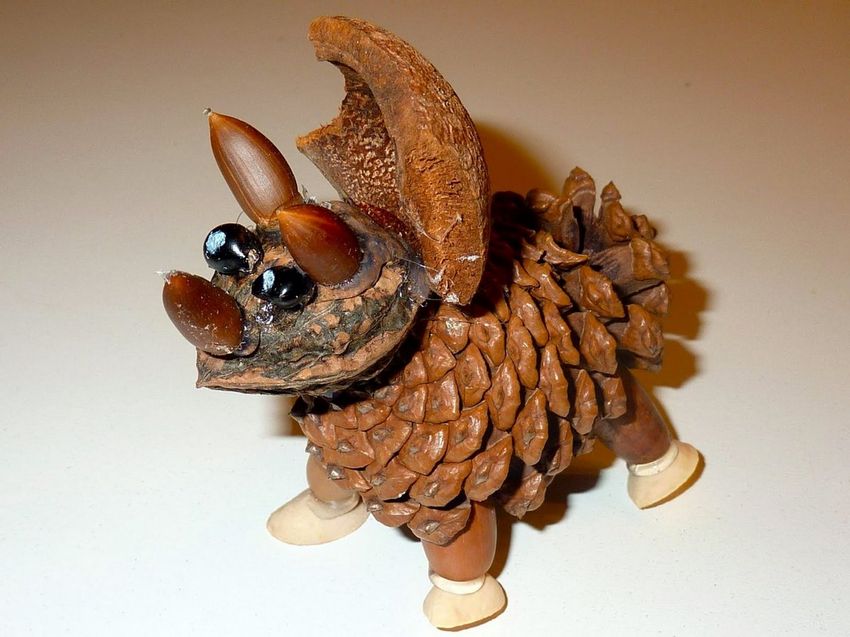
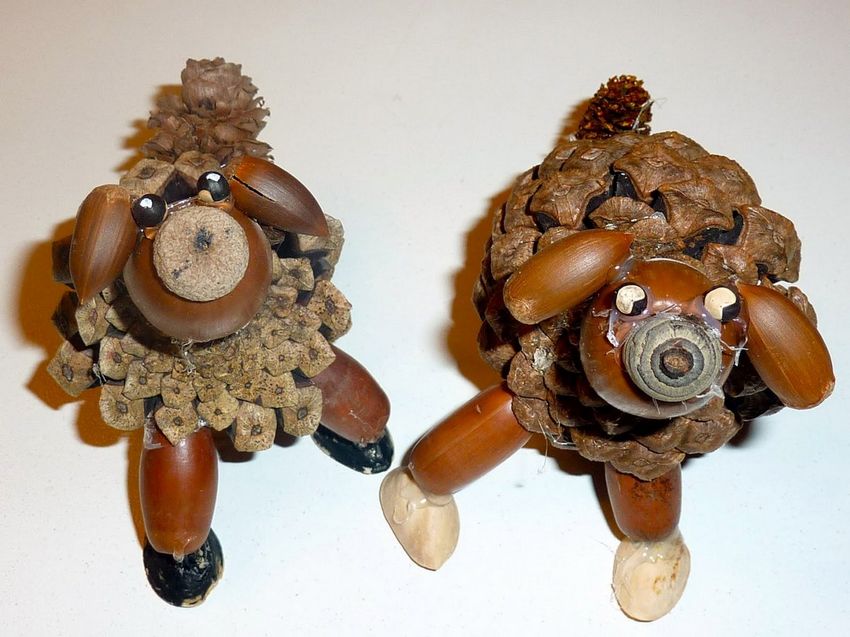
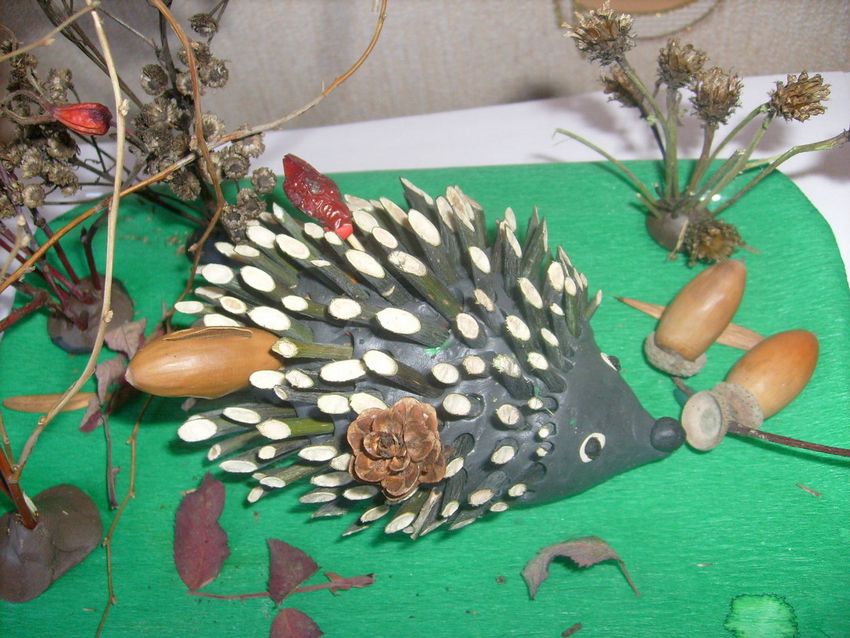
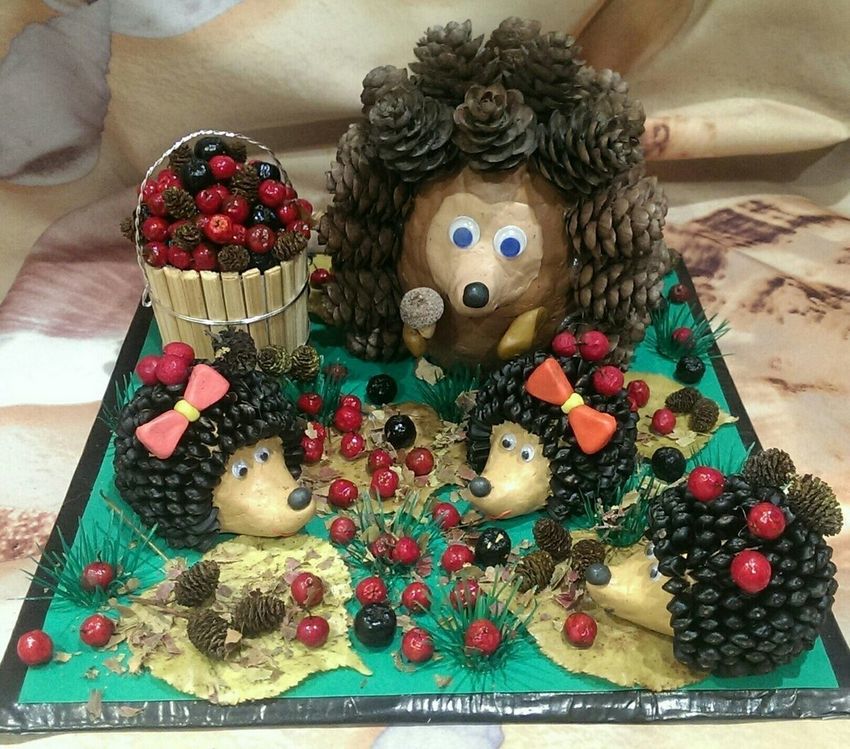
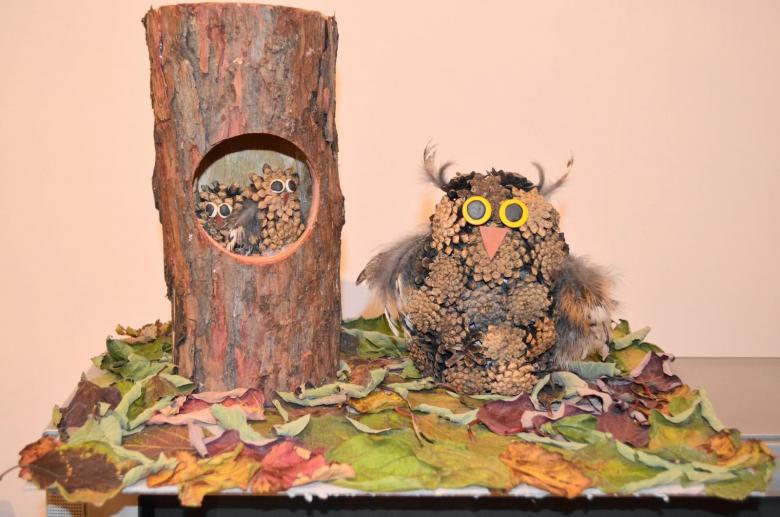
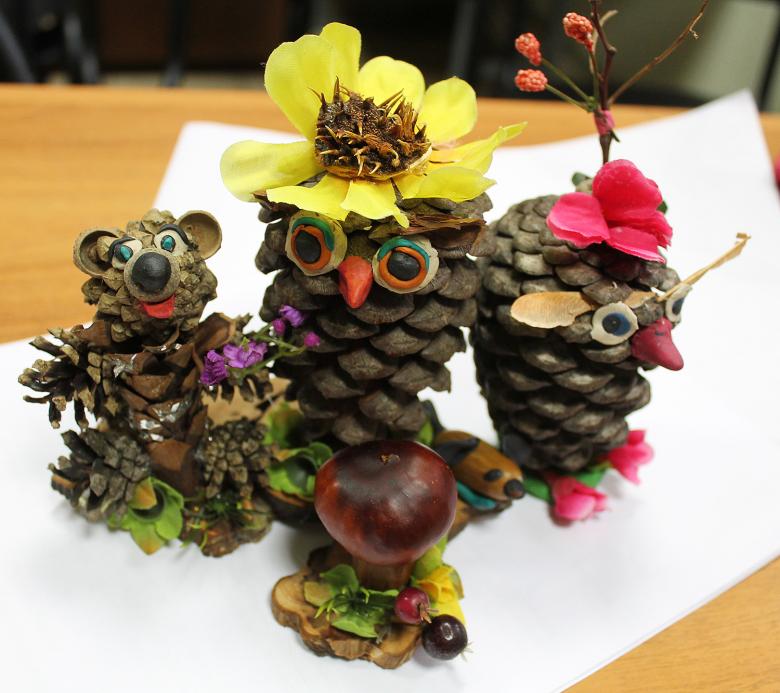
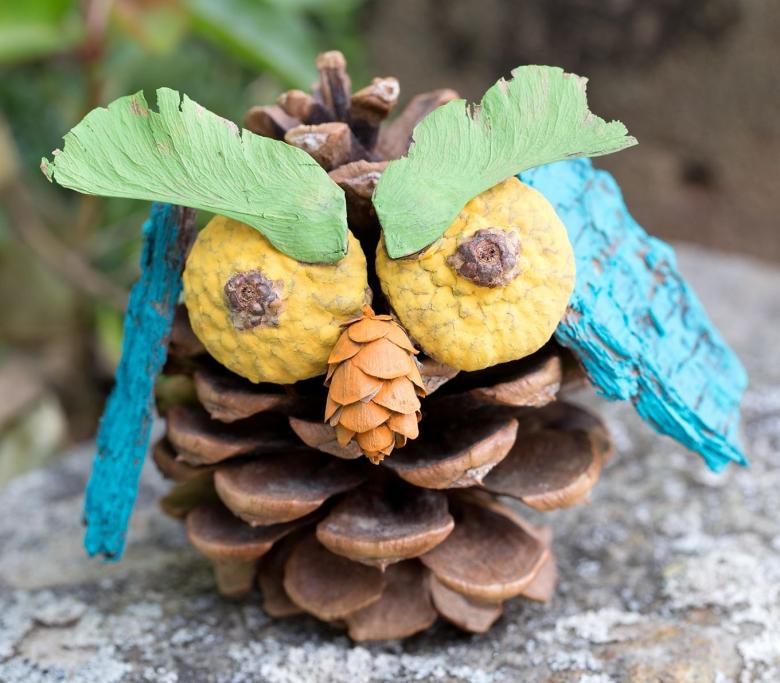
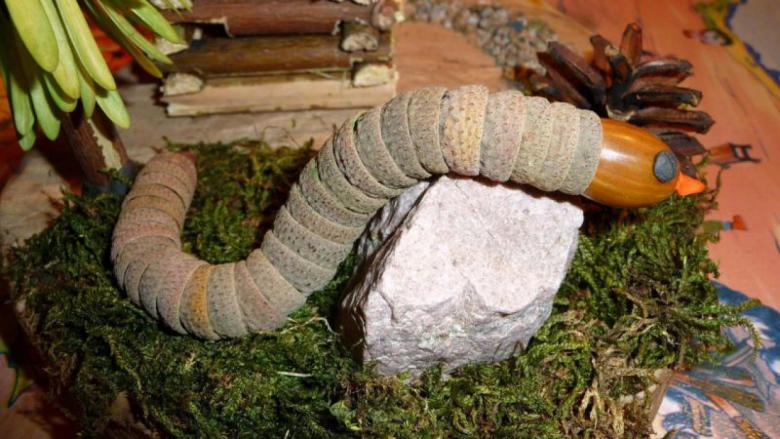
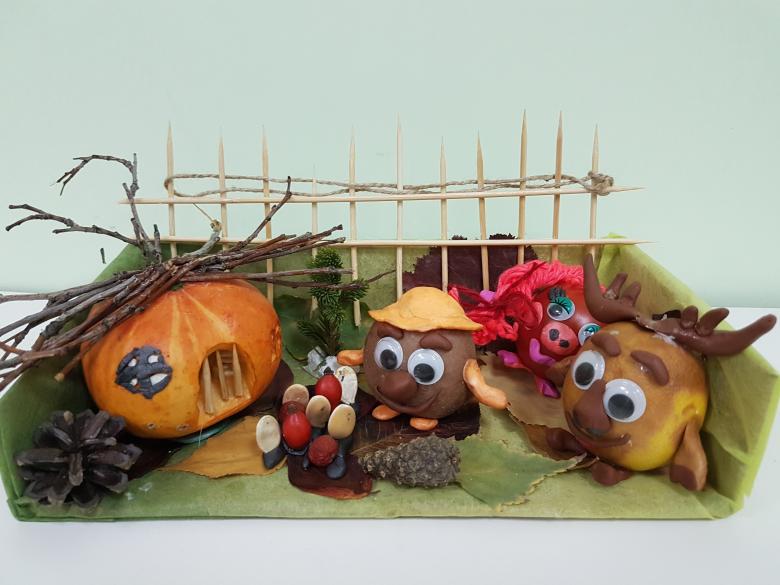
Amusing cone animals
These works use the principle of combination, as well as a game of contrasts. So you can teach a child to adhere to certain rules in the creation of a handicraft, focusing on the components of the product.

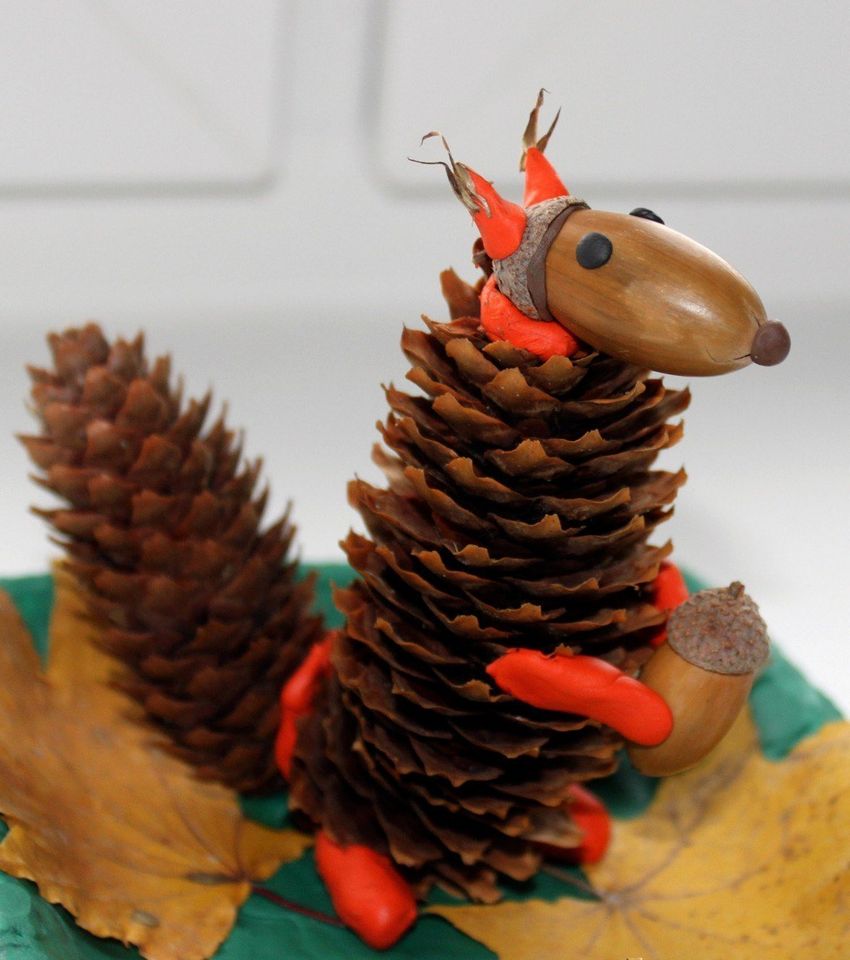
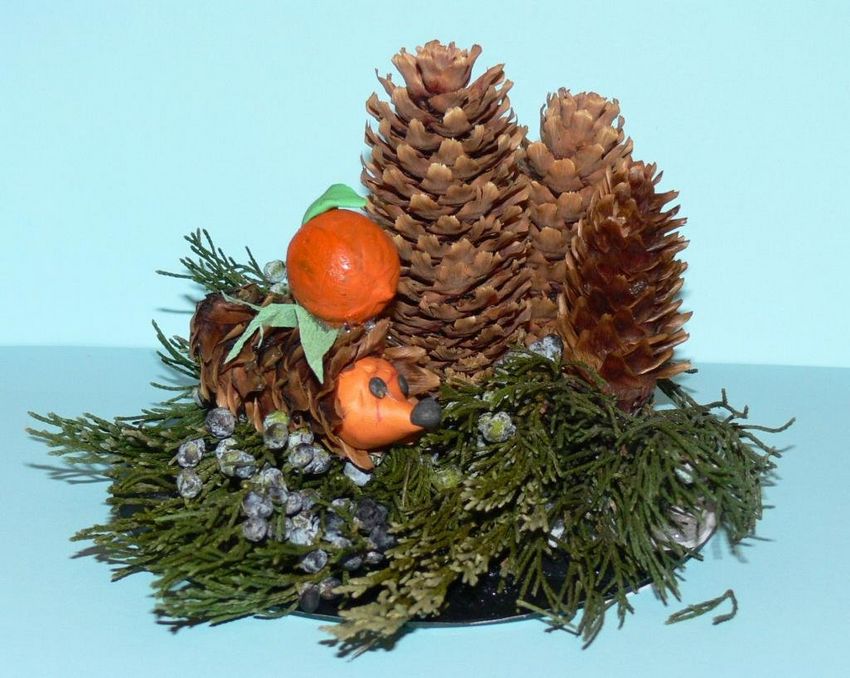
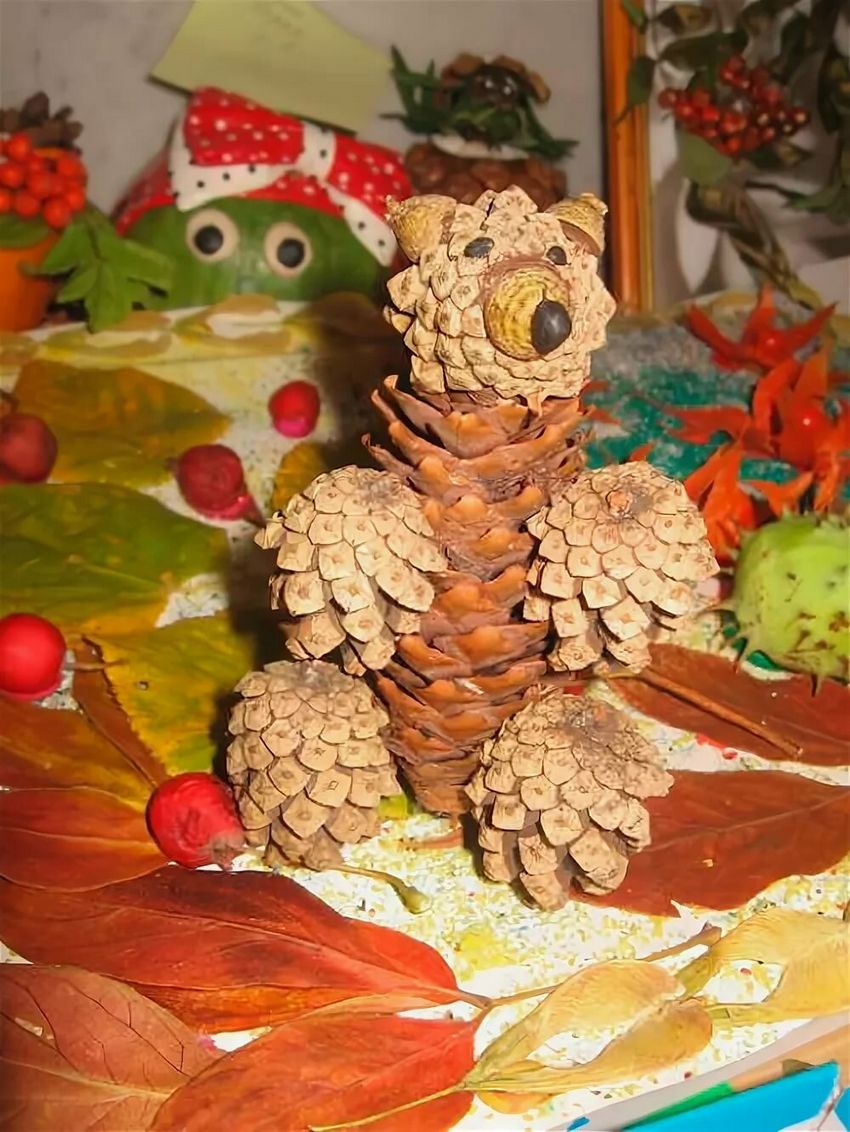
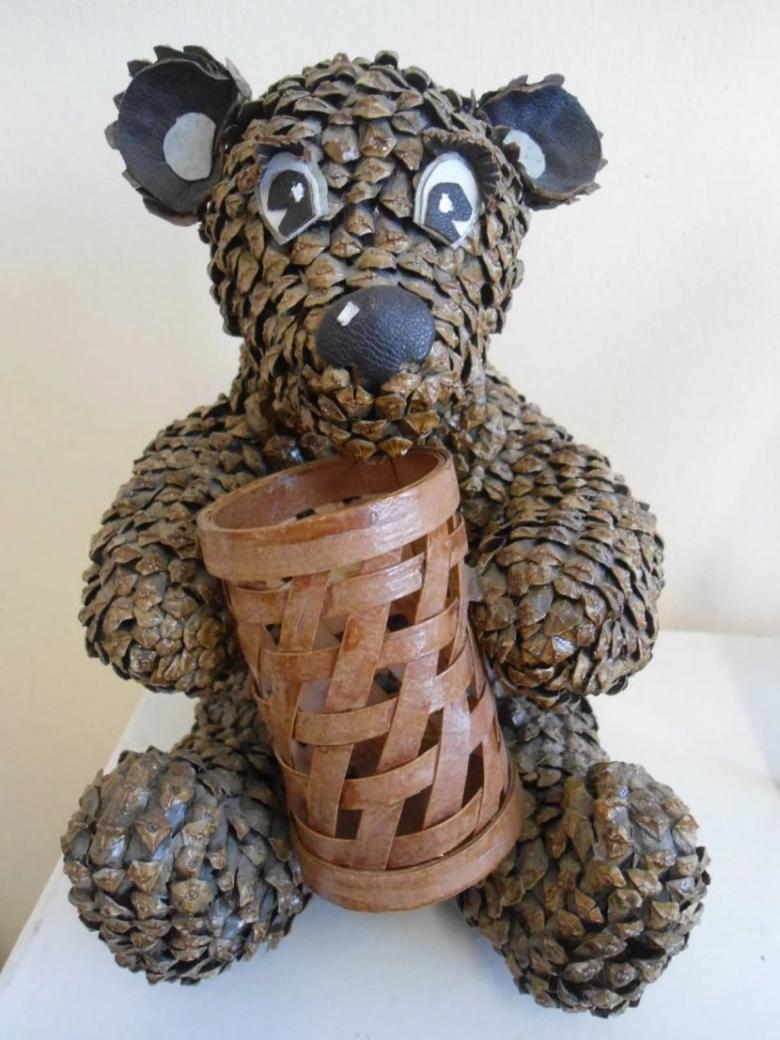
Cute bear cub
It is worth stocking up:
- pine cones of different sizes;
- One large open cone, preferably with a round top;
- Acorn caps;
- small seashells;
- cones of alder.
Tools you will need scissors and a small awl, as well as glue.
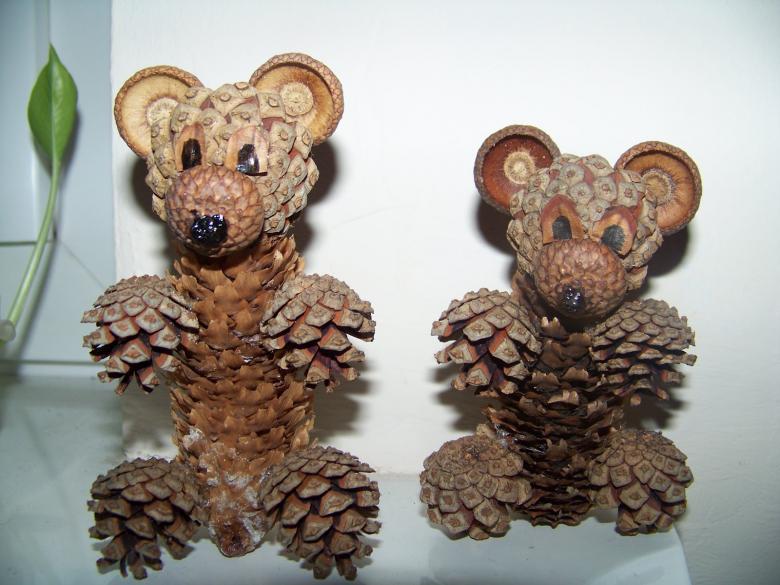
Creating a bear cub.
- A cone of oblong shape is used for the body. If there is no material of sufficient length, two cones are glued together
- Next, the paws are glued to the bear cub with a club foot. Cones for the front legs use a smaller size, and for the back legs larger.
- Round pine cone will serve as the head of the forest beast.
- Ears and nose are acorn hats.
- Two shells should be turned with a notch, glue peas, thus forming the eyes.
- Convex side of the shell to make a bear's nose.
Making a child with such figures, you can show the story-play "Three Bears".
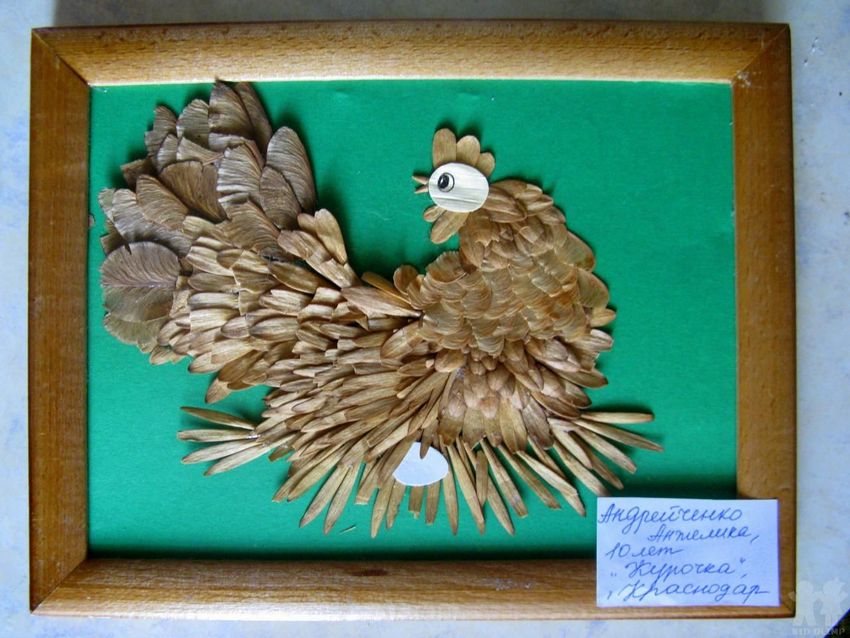
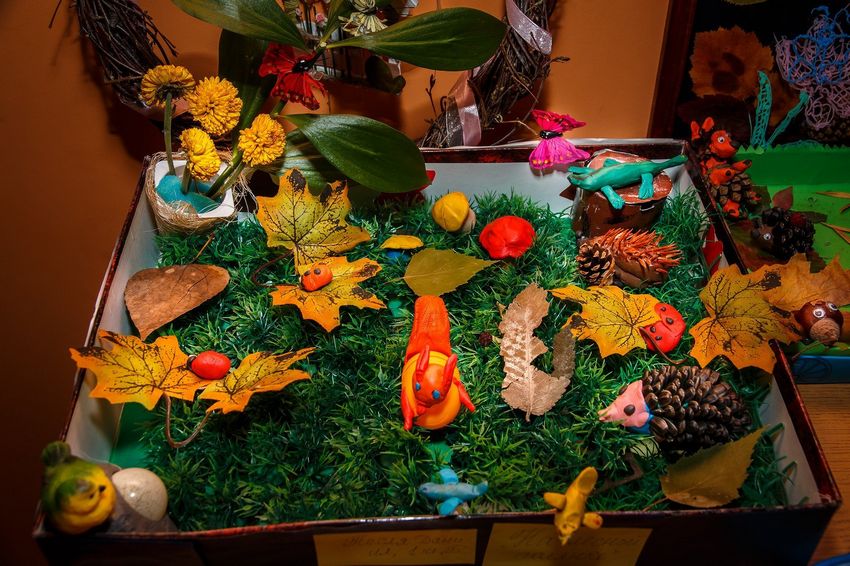
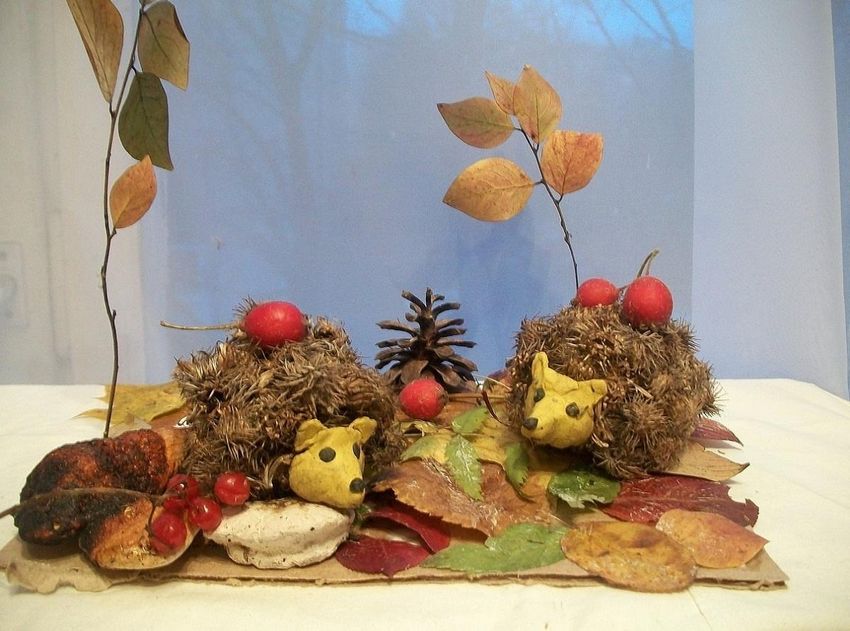
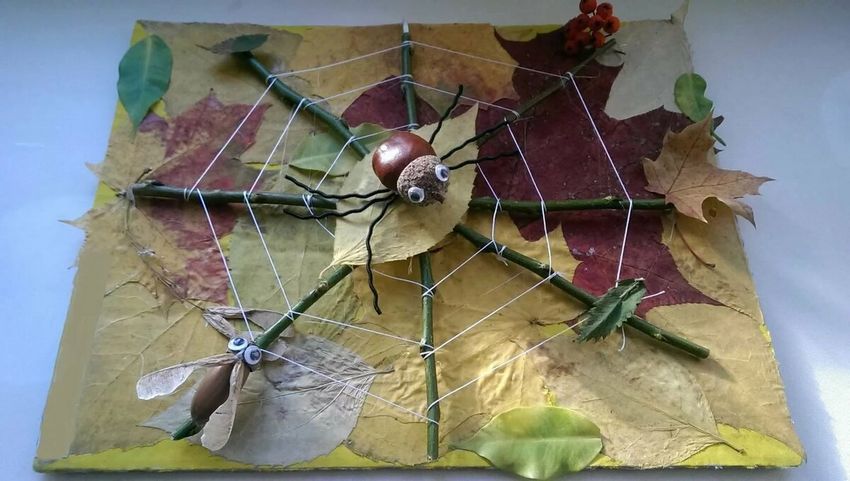
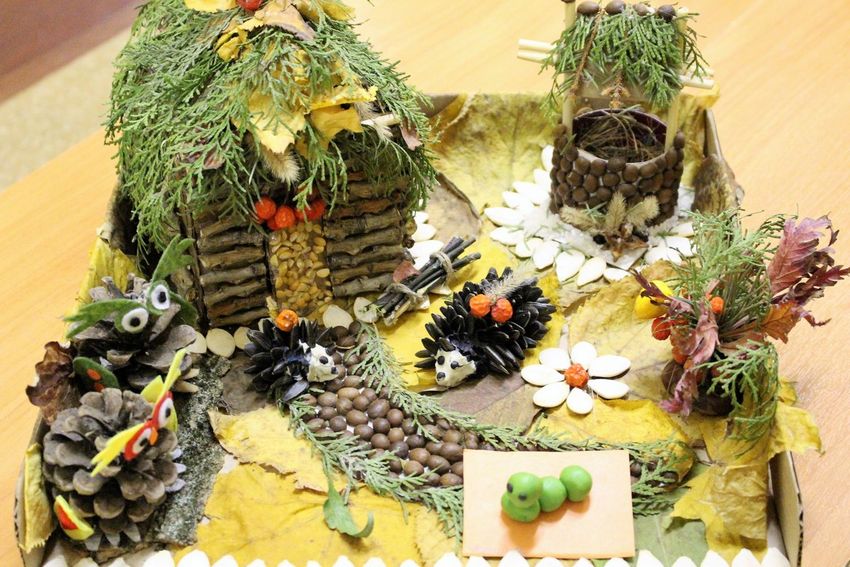
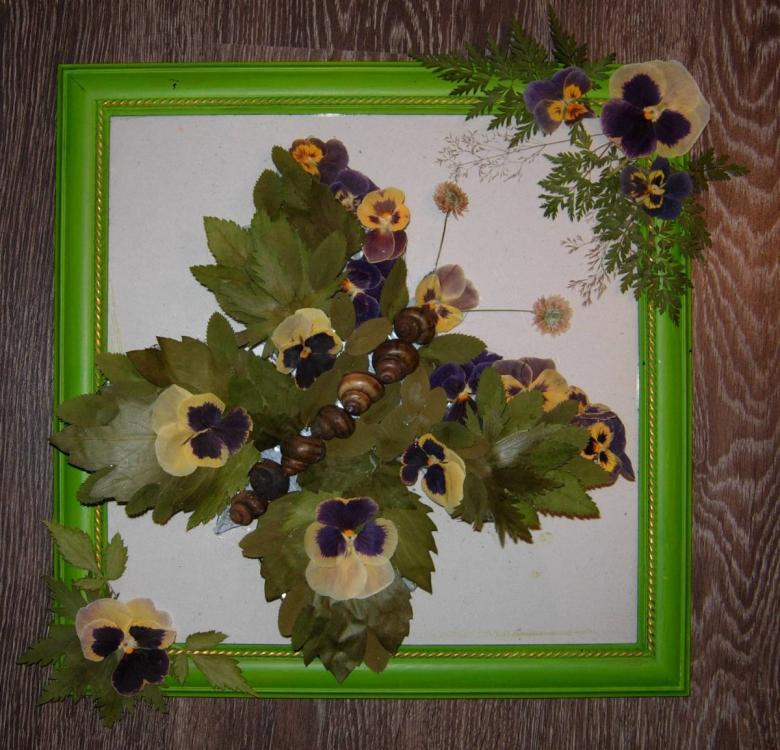
Unique pictures of leaves
The school year is coming to an end and your schoolchildren will probably want to make a gift for their class. For beautiful natural material crafts for elementary school, leaves from various trees are perfect. To create a small masterpiece, you should take all the leaves collected during the year, a little imagination and a unique picture - ready.
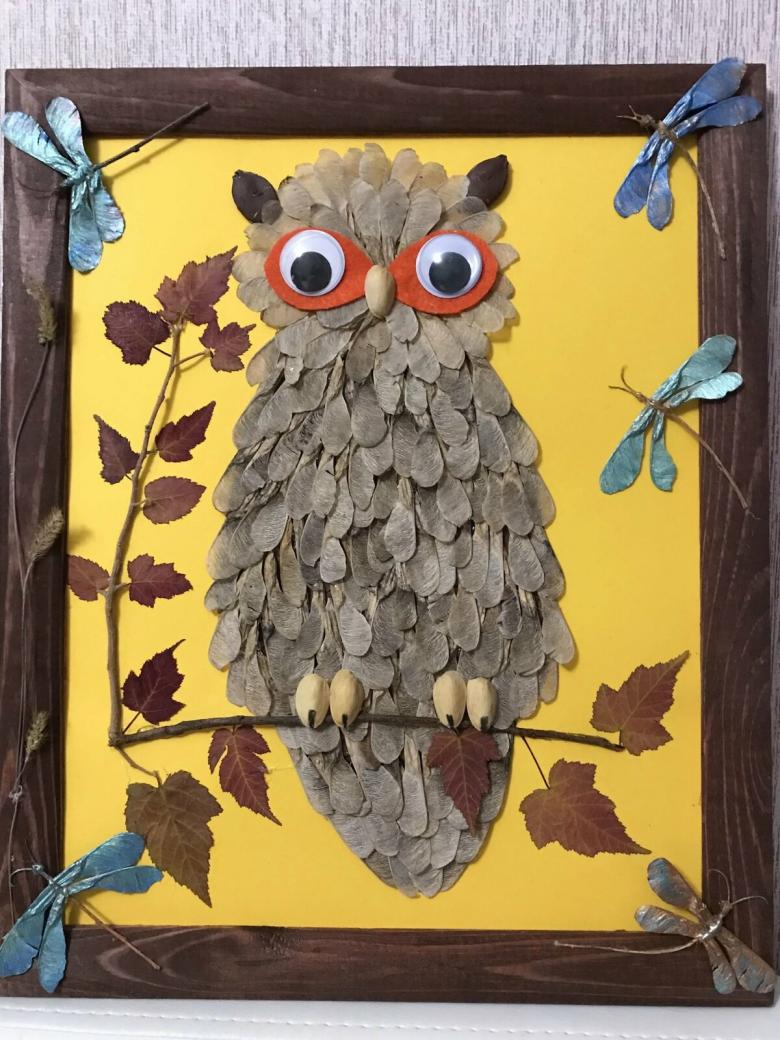
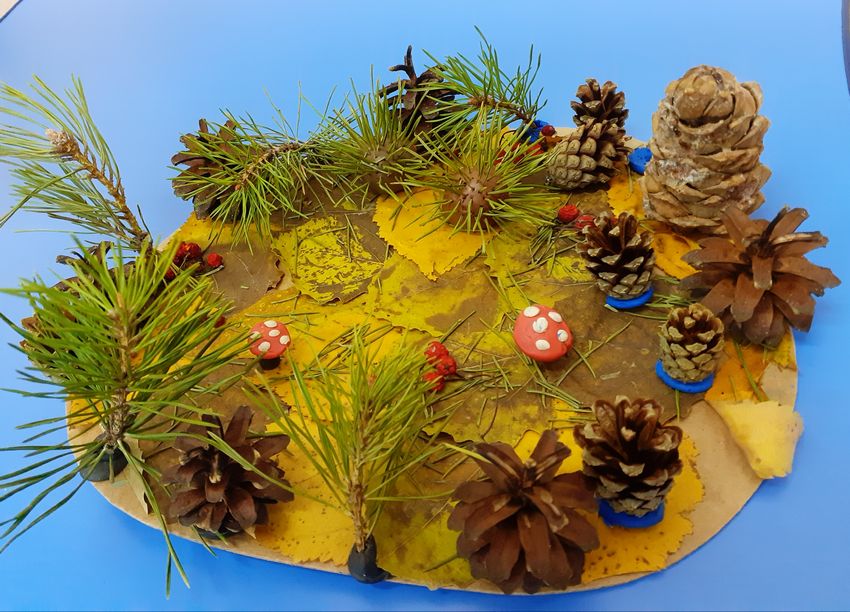
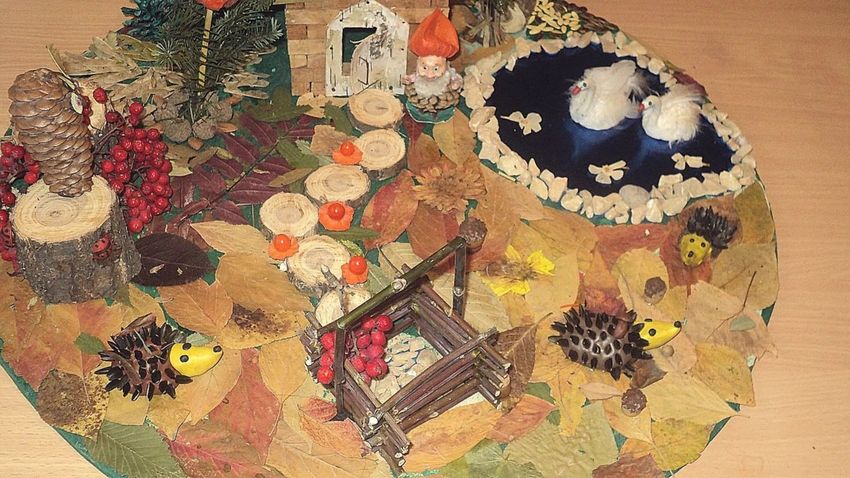
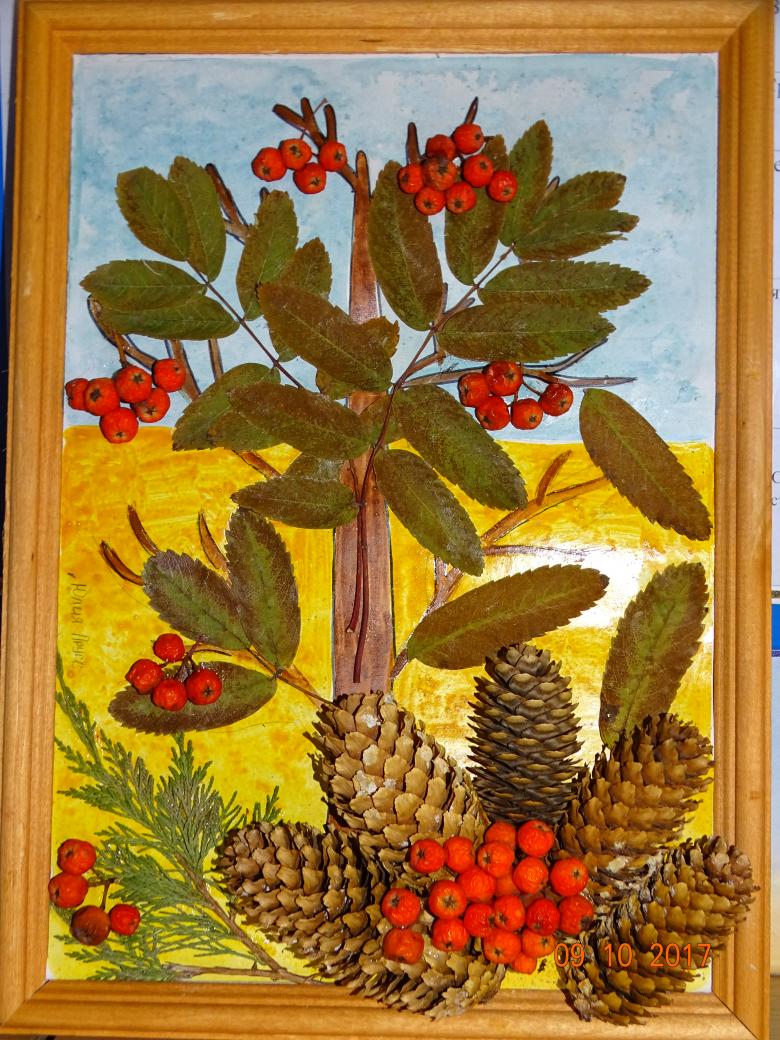
Autumn landscape
Necessary materials:
- prepared leaves;
- A thick white sheet of paper;
- scissors, PVA glue;
- watercolor, brushes.
Step by step execution:
- Create a background, using blue paint for the sky, green and yellow paint for the fall grass;
- Blur the boundaries of the colors, making the transitions of tones as smooth as possible;
- Allow time for the background to dry completely;
- Place the largest leaves on the horizon line and glue them down;
- to create color contrast and expressiveness to the trees, small leaves should be placed and glued slightly below the horizon line;
- Cut the fern leaf into separate segments and glue them onto the grass
- the edges of the foreground of the picture should be decorated in the same way and in the same sequence (large leaves, small leaves, grass);
- you can add mushrooms of leaves under bushes, and in the sky draw a wedge of migrating birds (it's better to draw with a felt-tip pen).
Your first grader will be proud to present his masterpiece to the teacher.

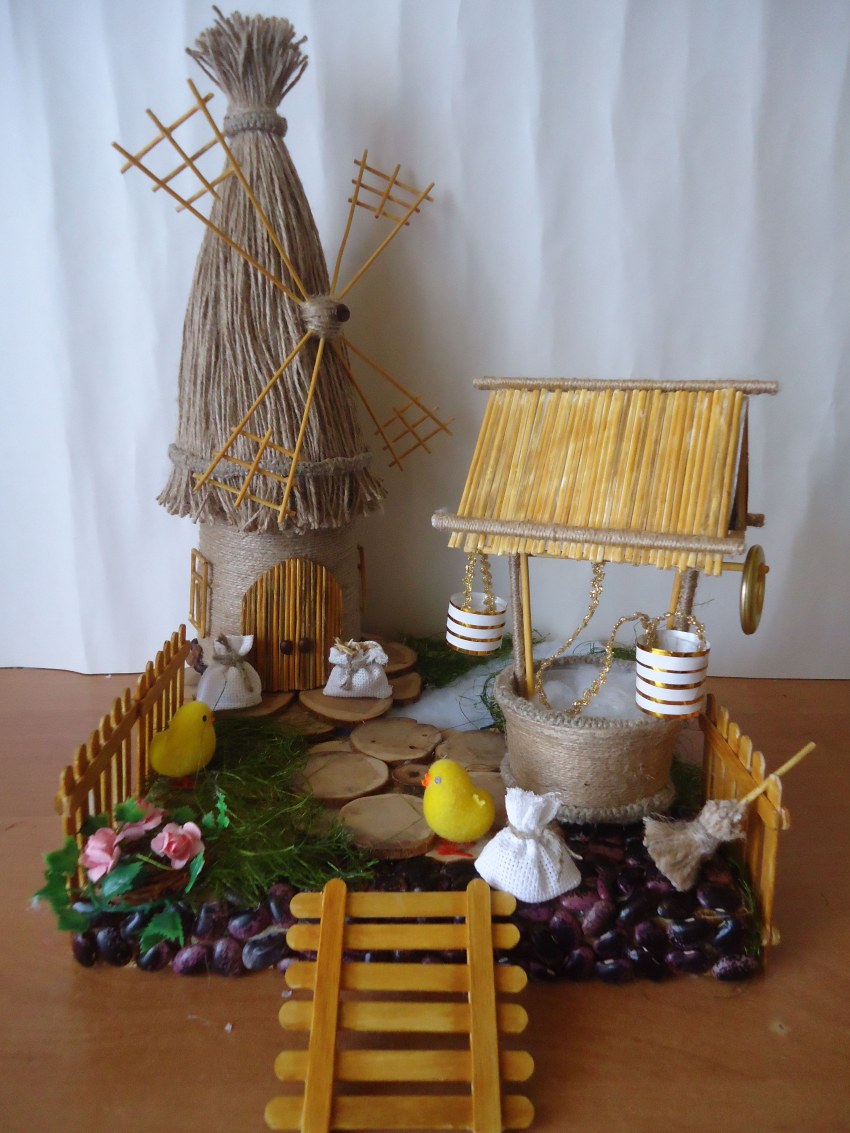
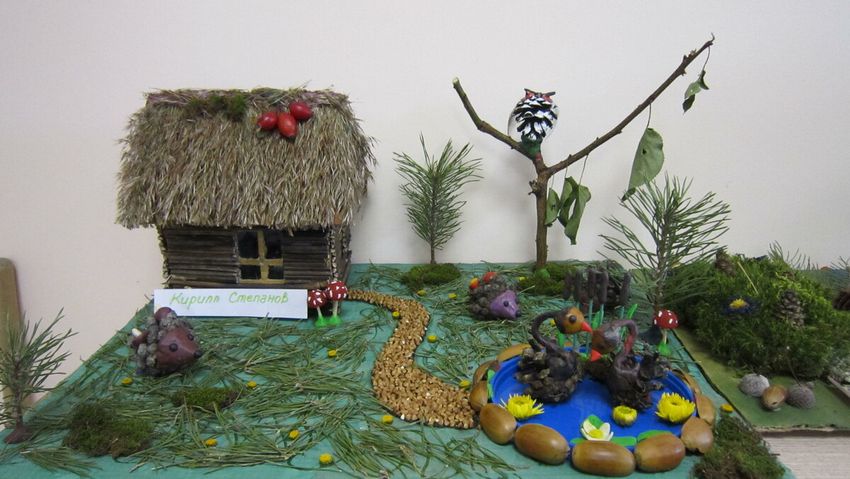
Handmade wood crafts will perfectly decorate the interior of the house, the site landscape, the territory of the playground. Roots, branches, and tree bark can easily be found even within the city limits. Both soft wood (evergreen conifers) and hard wood (deciduous species) are good for making crafts.
The process of making things together is extremely bonding for the family. It is possible to make the simplest things, having at hand various parts of wood (sawn wood, solid wood, bark, branches, roots, stumps), stationery and, most importantly, interesting ideas, inspiration and desire.
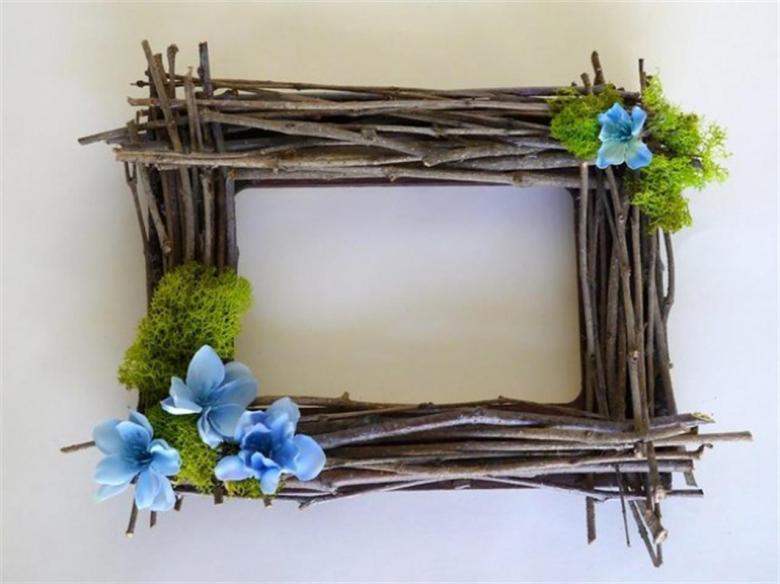
Beautiful photo frames from tree branches
The basis of the frame can serve as a rectangle cut out of plywood. The main thing is to decorate it. This process is absolutely uncomplicated - pre-dried and varnished thin branches are glued to the base of the frame. A little nuance - you should start gluing the product from the long sides of the frame.
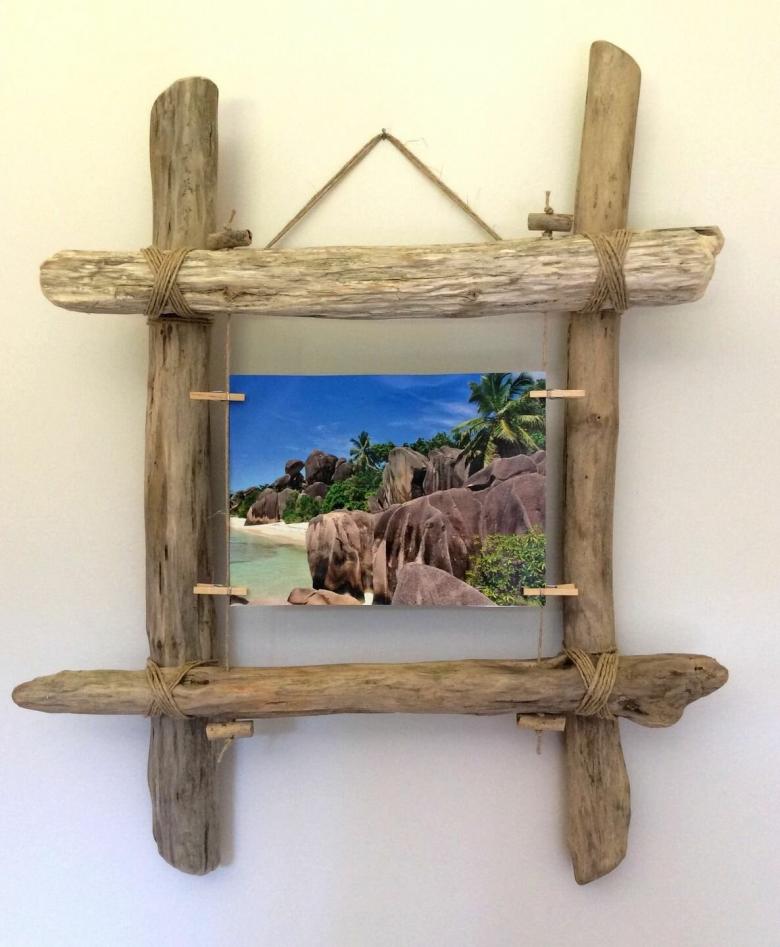
The branches can be placed crosswise or buttwise in the corners of the frame. Children's imagination suggests many ways to decorate such a photo frame.
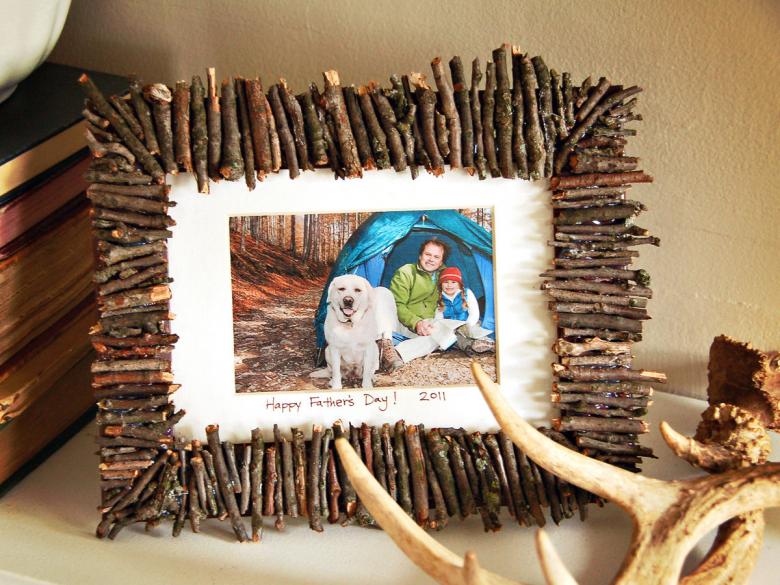
Small cones, leaves, moss, flowers from seeds are used. All the elements are neatly glued, if you want, some parts can be painted and varnished. A family photo in such a frame will be a reminder of a wonderful vacation in nature.
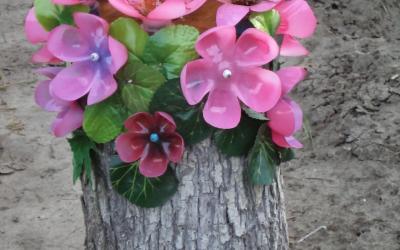
The original vase
To give originality to flower pots, tree branches are used. Preliminarily it is necessary to give the source material the same size. Selected branches are cut on all sides, then laid in a row on an even surface and carefully tied together with twine at the top and bottom of the product.

Thus the construction will be stronger. It turns out a kind of track of twigs. Flower pot should be covered with burlap and wrap the resulting decorative element. The ends of the twine is tied at the top and bottom with a bow. You can paint the product. Succulents look beautiful in such pots.

Amazing material for children's creativity can serve as ordinary pebbles, sea pebbles, cobblestones. Working with this natural material is very interesting, and the masterpieces created by your child's hands with your help will be an irresistible decoration of the house or plot.
Interesting mosaic
While vacationing by the sea, lake or other body of water, open an art gallery right on the beach. For this purpose, collect with children pebbles of different size, shape, color, and shade. Each prepares his or her own painting for the exhibit. To do this, draw the outline of a future exhibition piece (a fish, a small sailboat, a sun, a tree, etc.), review the base with your child, decide on the colors and sizes of the pebbles. Your child will be happy to start laying out his or her own picture.
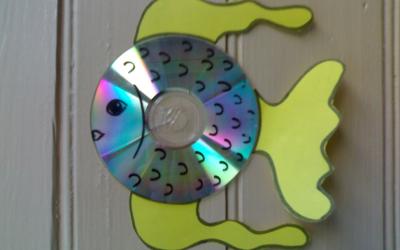
If you vacation at sea, a great material for all kinds of items will be sea, green, clear pebbles glass. On a sheet of plywood (cardboard) are laid out pictures of the underwater kingdom, beautiful patterns or figures, and glued. A little nuance - the glue must be white to leave the transparency of the material. Such souvenirs will be a great gift for your friends.
Among children, pebbles with a hole are very popular. "Chicken God": to find him on the beach - the most cherished desire of a child. Such a pebble on an elegant string pleases not only children, but also adults. By the way, it is not superfluous to tell your kid about its history and the history of Slavic traditions.
Grandiose things are made by grandiose means. However, nature makes great things with a gift. We should not forget these wonderful words of the Russian writer, teacher, philosopher A. I. Herzen.
Photo ideas of unusual crafts from natural material