Birch beading with my own hands - the basics of beading and creating complex crafts
The birch tree is one of the symbols of Russia, and such a product of beads will be a good element of decoration and a wonderful gift. Made with your own hands, it will be appreciated, because everything created by your own hands, is valued higher.

Instructions for beginners
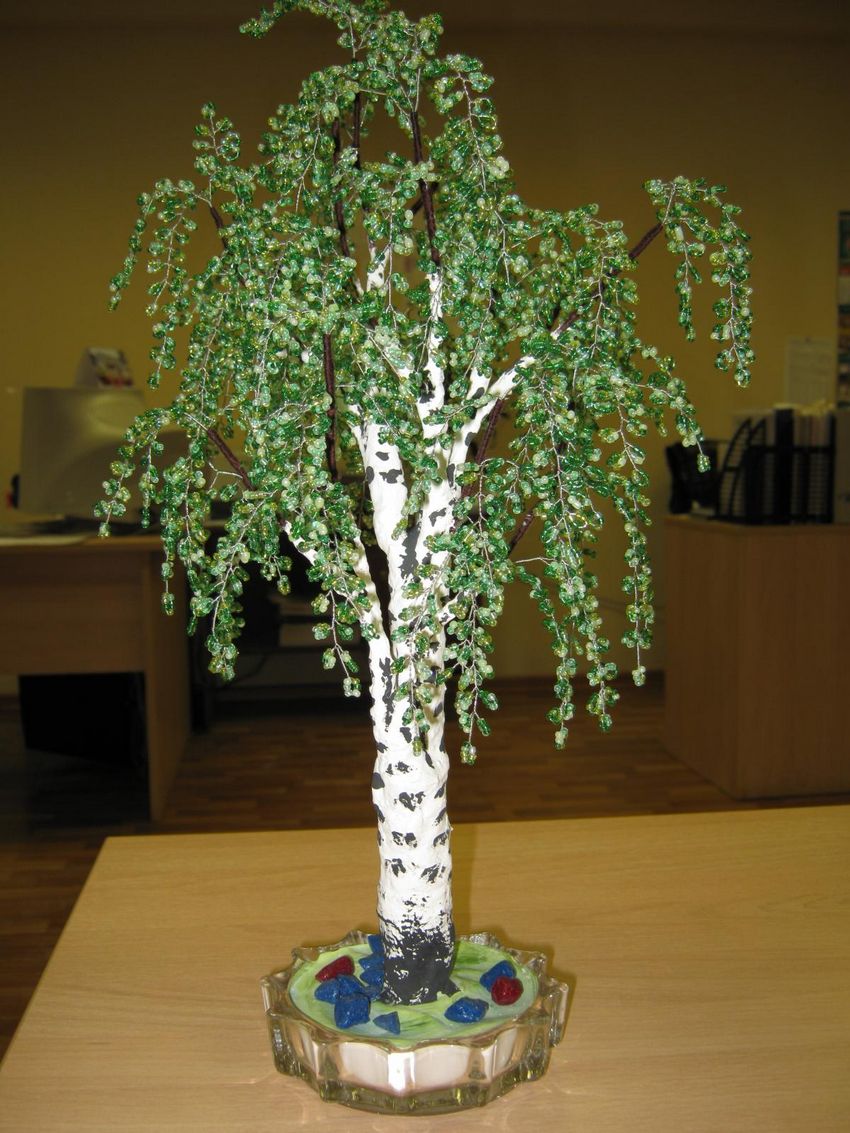
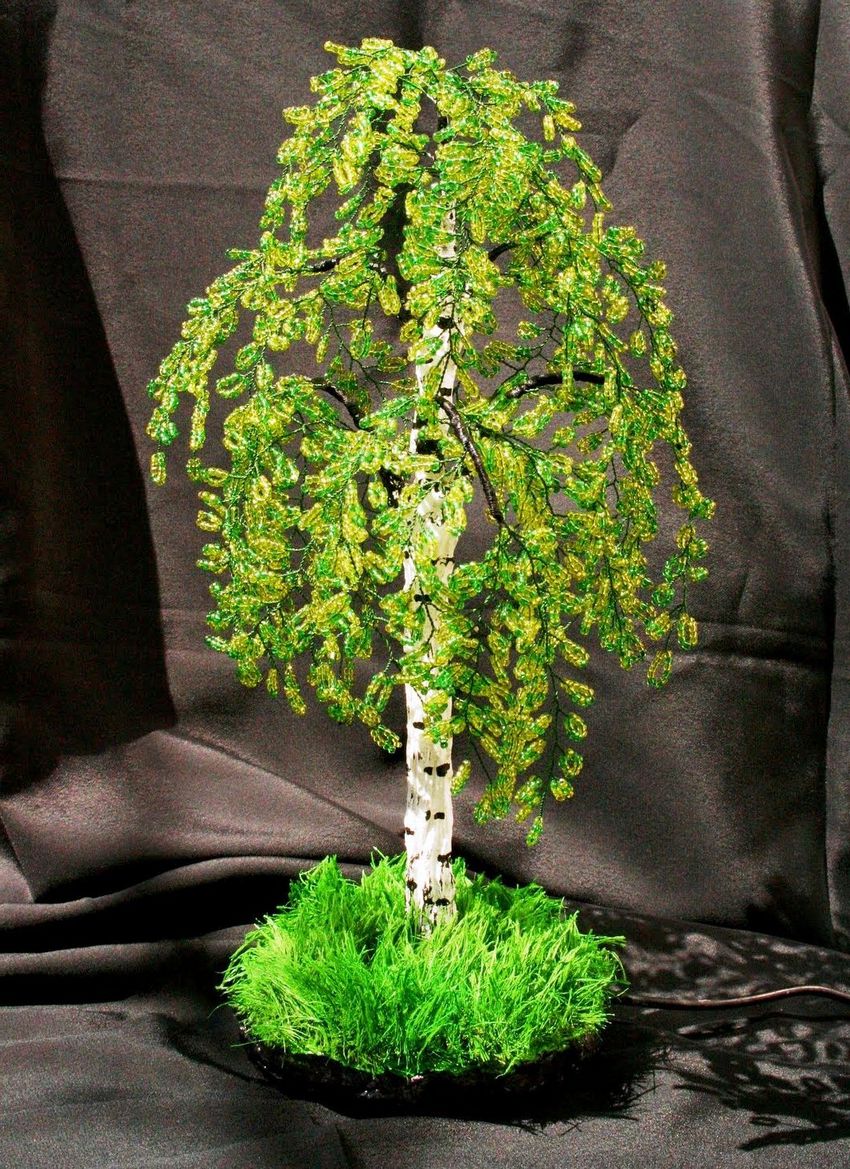
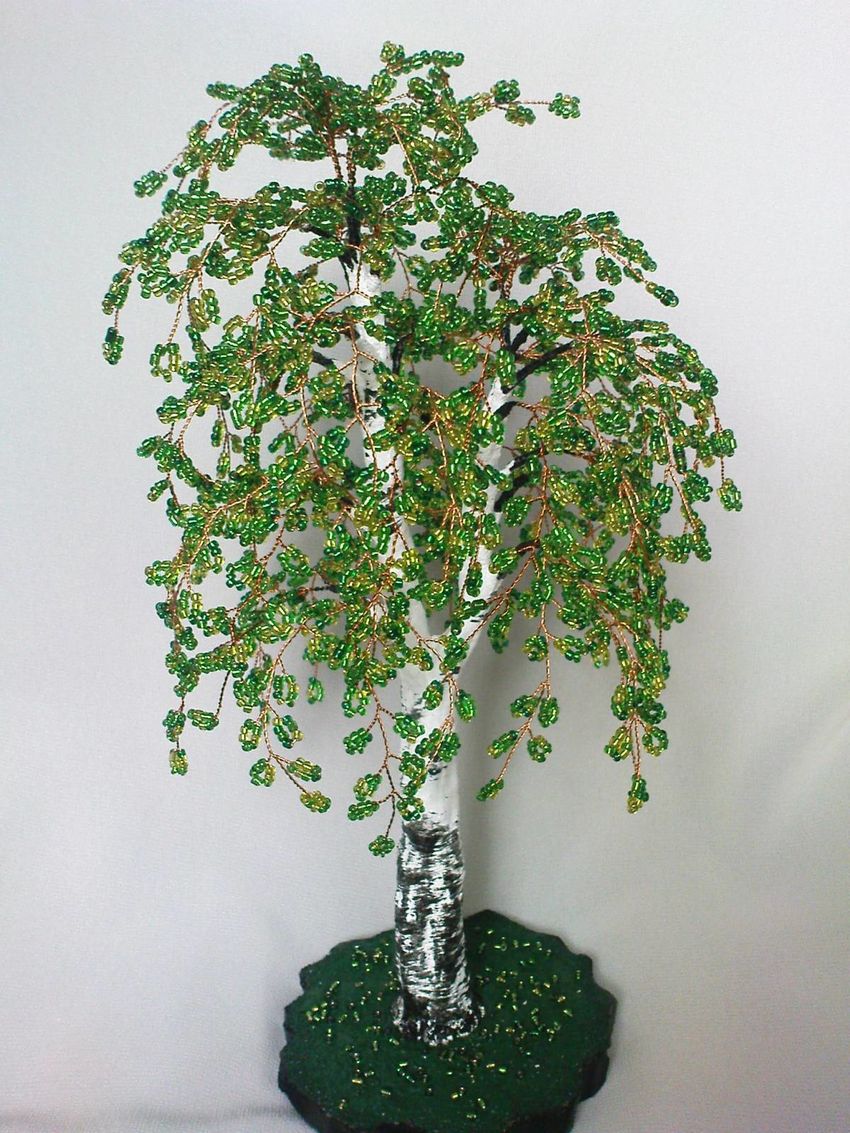
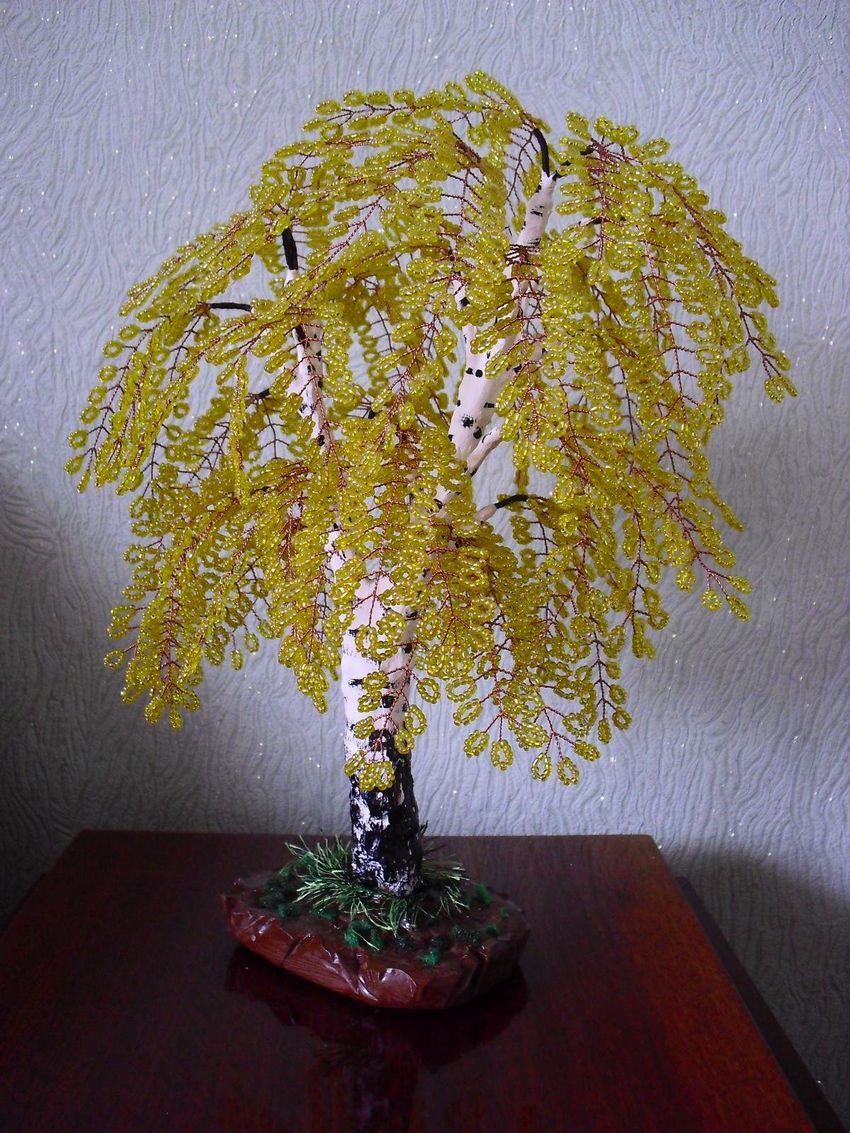
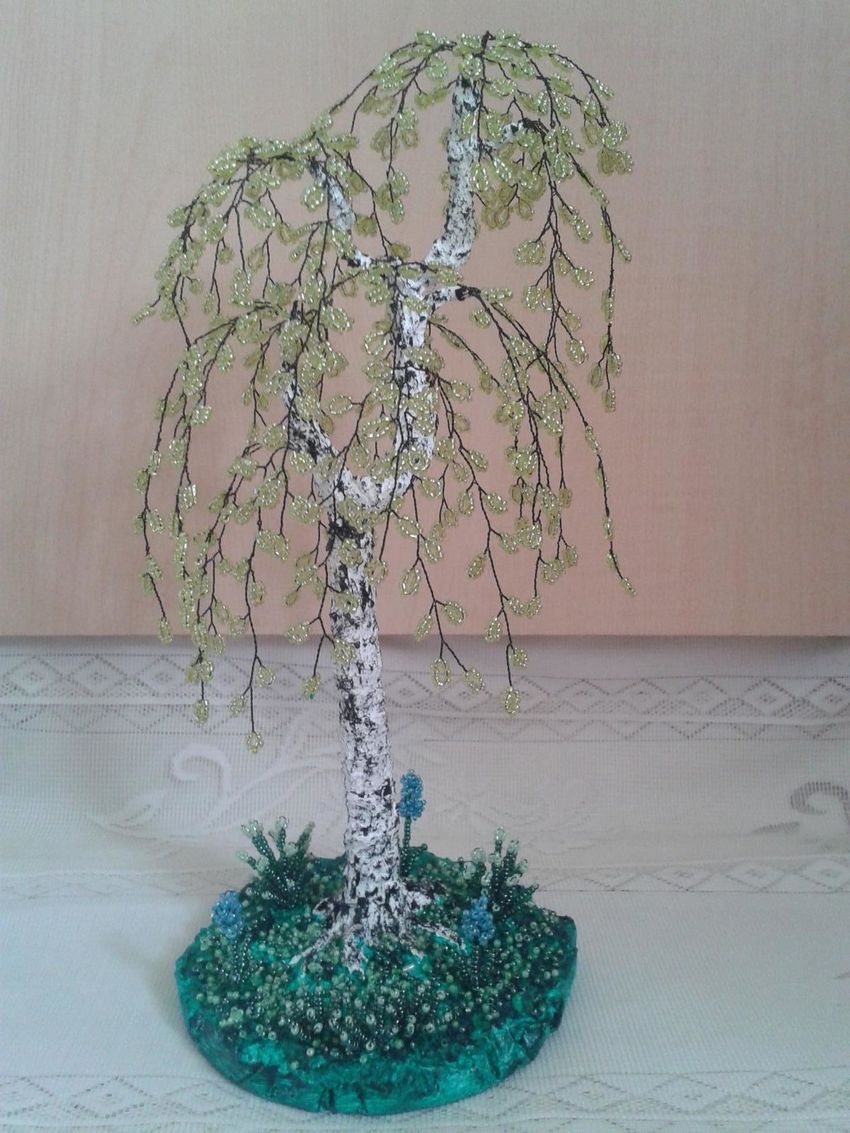
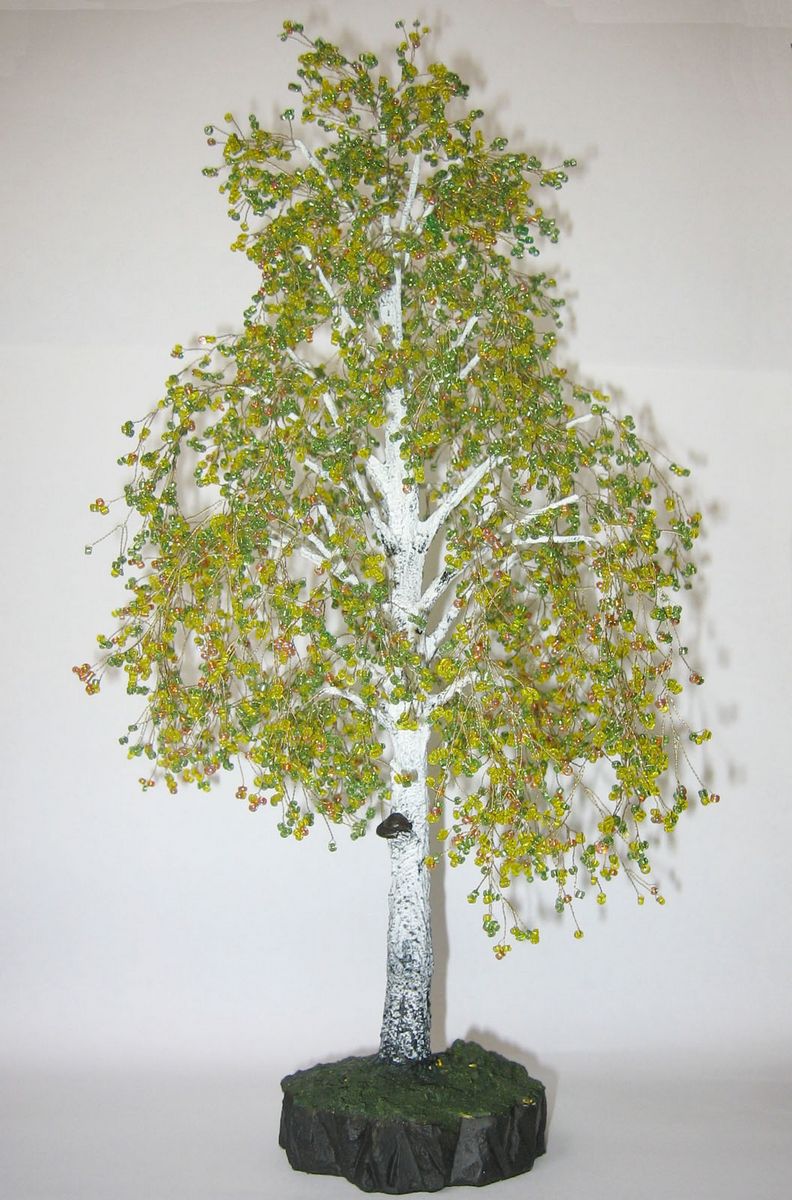
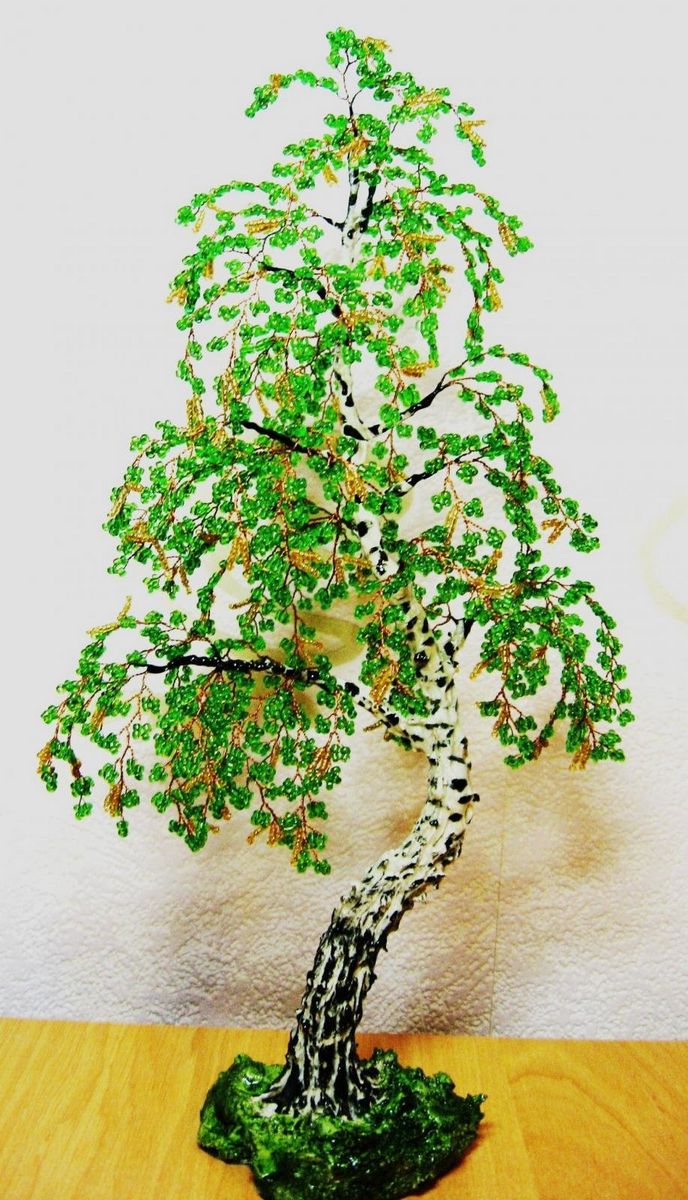
There are several varieties of creating such a tree: autumn-spring, winter or summer version. This master class on the creation of the summer version, both for beginners and for more experienced craftswomen.

Preparation for work
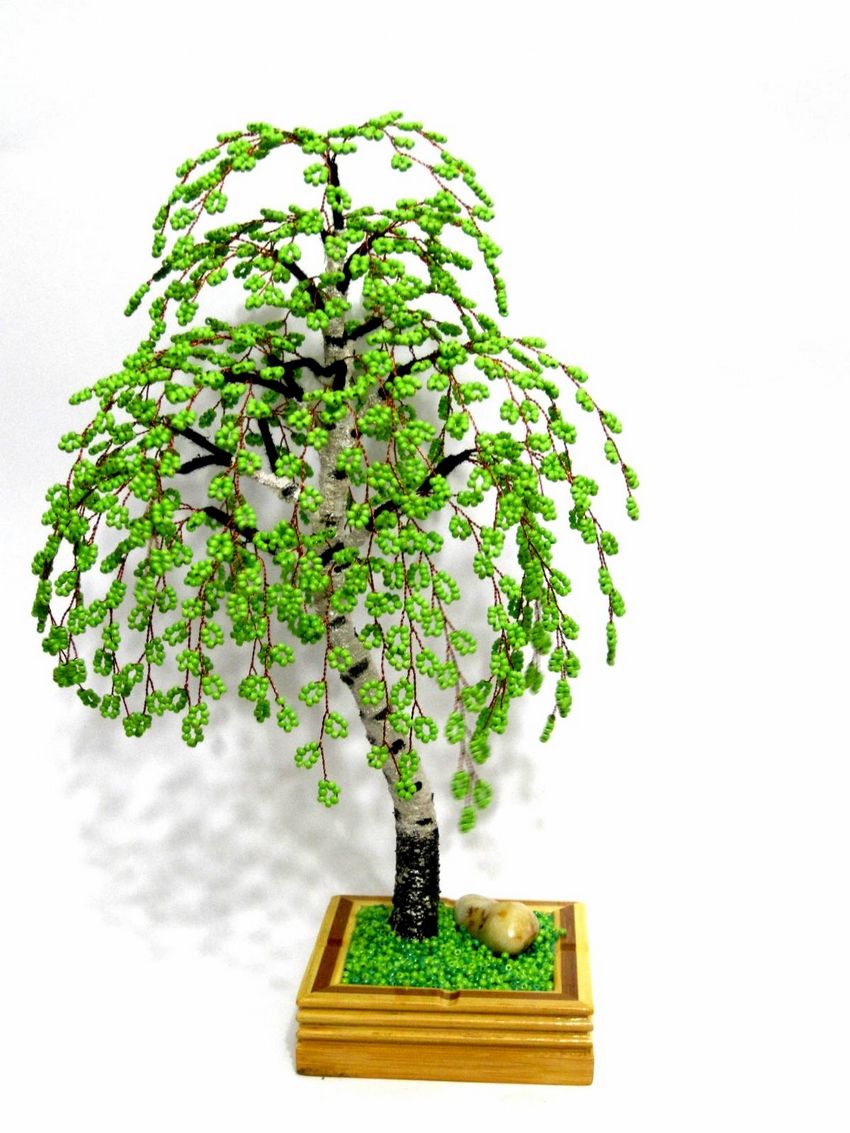
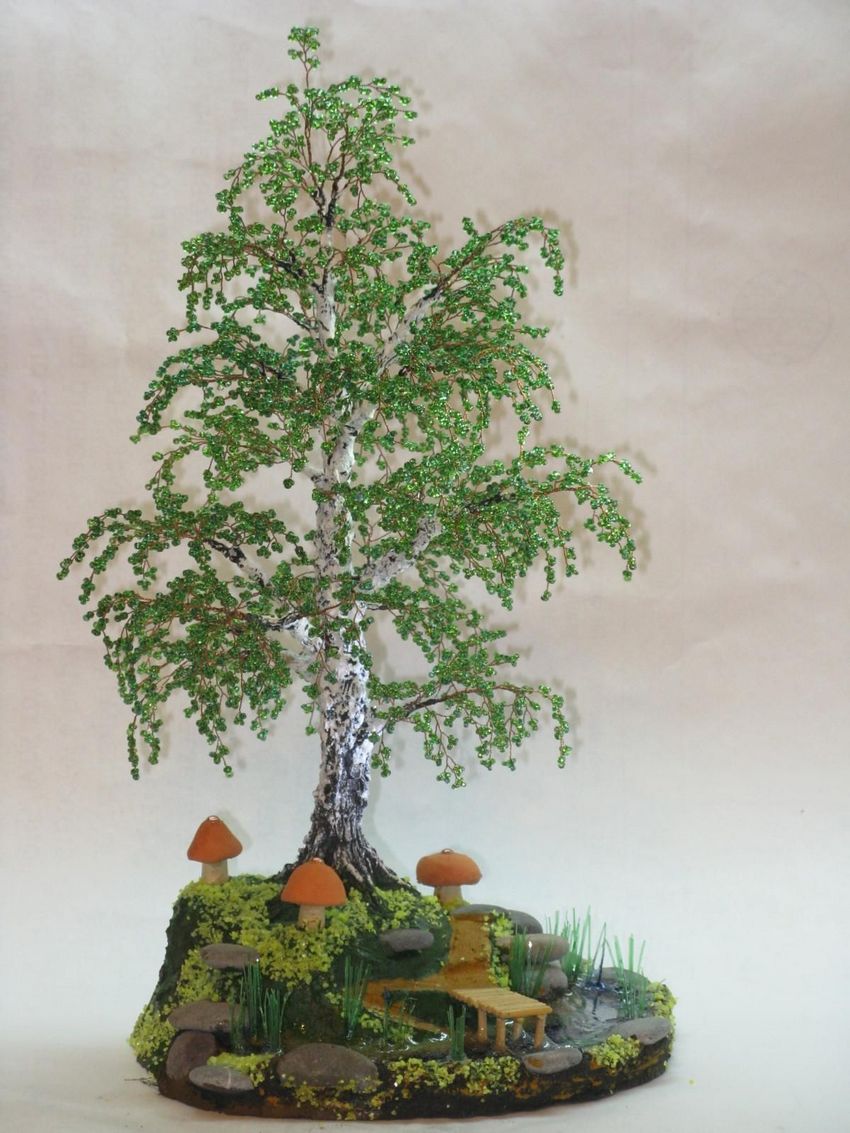
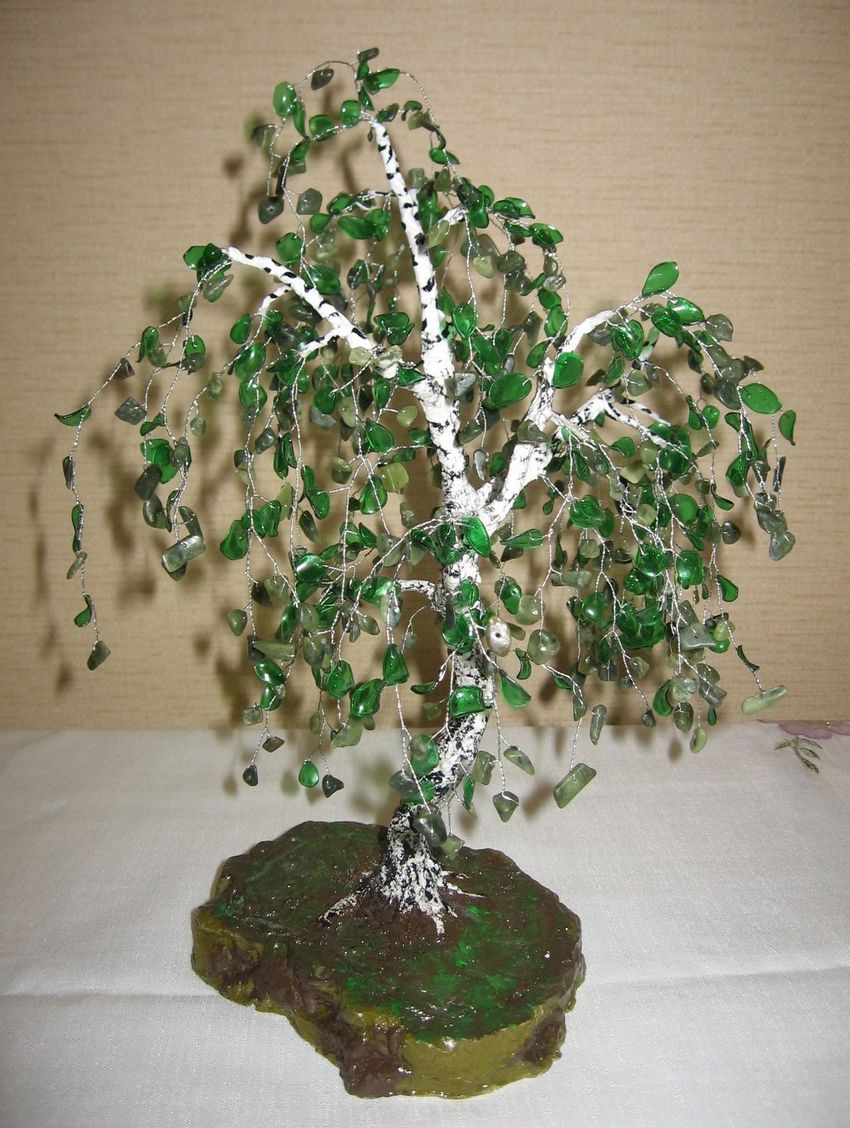
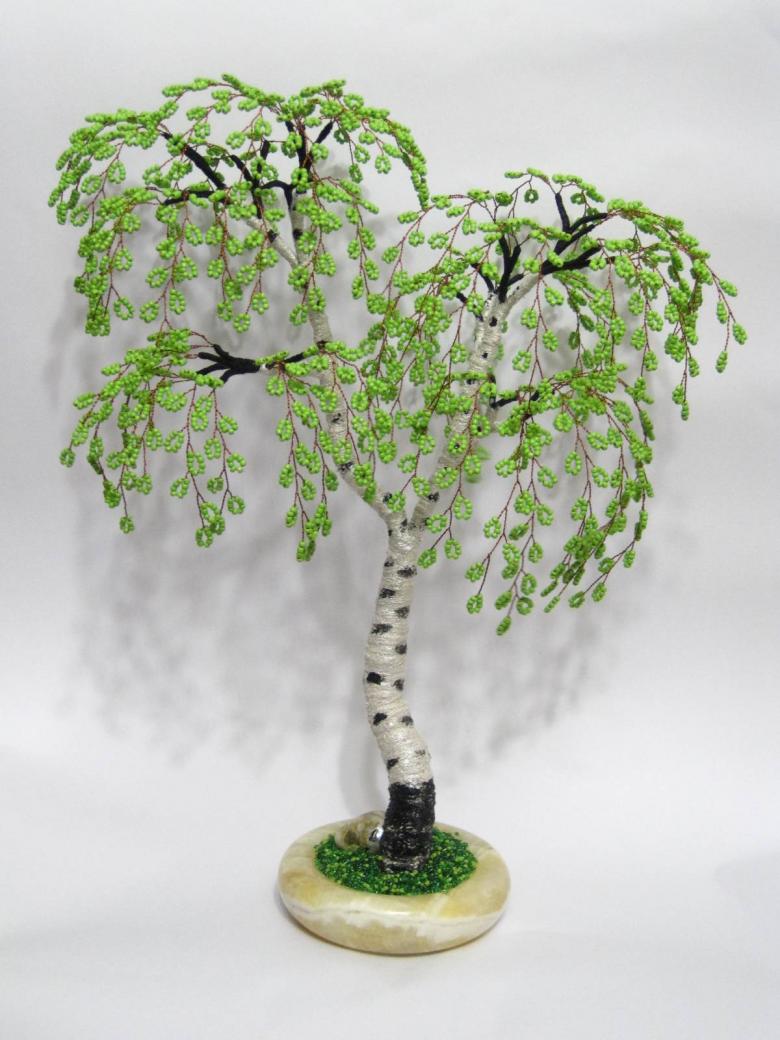
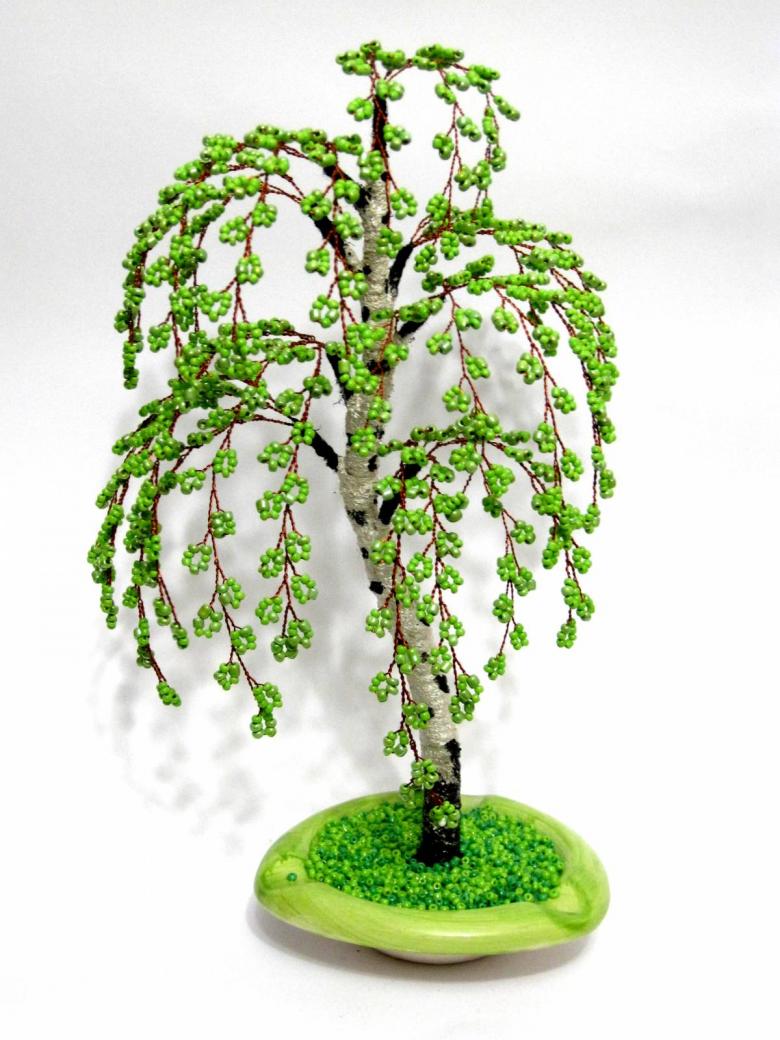
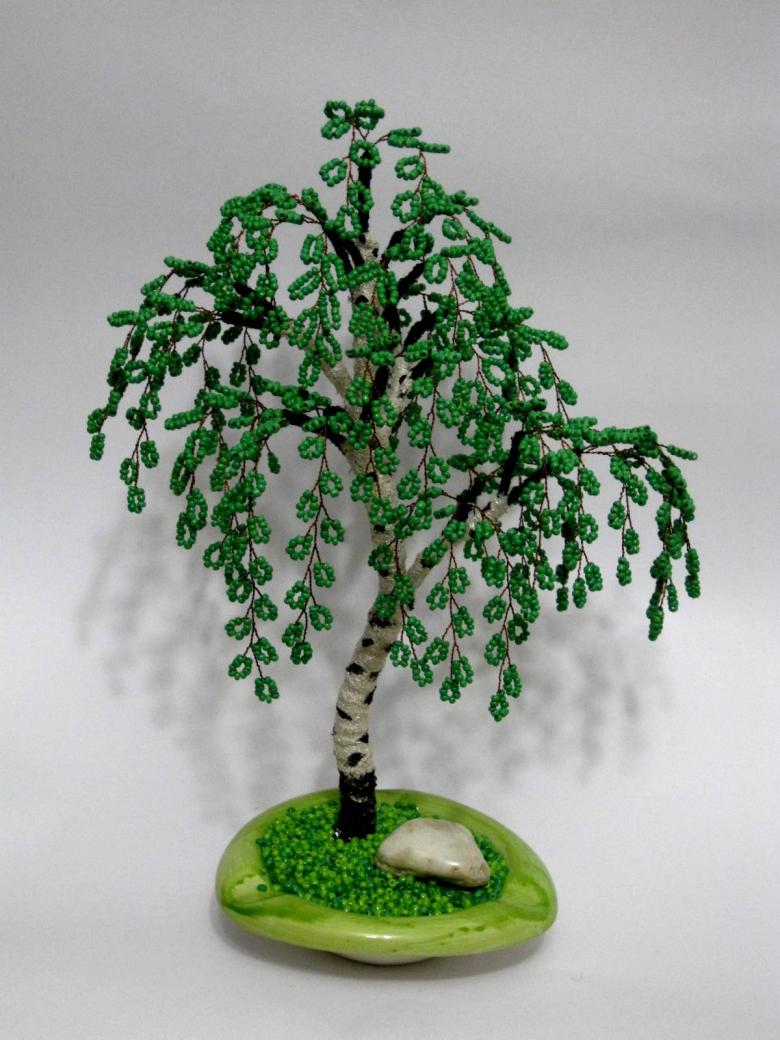
The presented materials are designed for a product with a height of about 25 cm. The birch can be made in any size, the most important thing is to calculate the materials correctly.
- Light or bright green beads.
- Yellow and pink beads to decorate the parts of the tree.
- Thick copper wire for the trunk.
- Thin wire, 0.3mm.
- Black and white paint.
- Primer.
- Green floss.
- Glue PVA.
- Alabaster.
- Decorative Base.
- The gypsum.
Getting Started
- The first thing you need to do with beads is to make the branches of the birch. To do this you need to cut the wire into pieces of length from 30 to 40cm.
- Next, you need to thread eight beads on the wire, make a loop of wire and twist it into several turns.
- After that, again thread eight beads on the same wire and twist, connecting the first leaf.
- Continue until you have the desired number of leaves. When the leaves are ready, you need to twist the wire at the ends and cut off any excess. Continuing the work, make the necessary number of branches, but their number must necessarily divide by three.
- When the branches are ready, you need to make them into large branches, connecting them to each other by three.
- From the large branches you need to make the top of the birch. Twist the triple branches together.
- The trunk is done as follows: fold a thick wire in half and screw it to the ends of the branches of the tree top, then twist it to the end, creating a trunk rod.
- Screw the remaining branches to the base. It is better to screw them closer to the top, so that the tree looks more luxurious.
- Next, create and screw in another top a little lower than the first top.
- Make one big branch: join the five small branches into one, and attach it slightly below the first two tops.
- All remaining branches are twisted five at a time and attached to the base of the tree.

Creating the stand and decorating the product
- Mouliné threads should be smeared with glue and wrapped around the trunk and branches. There should be no gaps between the threads.
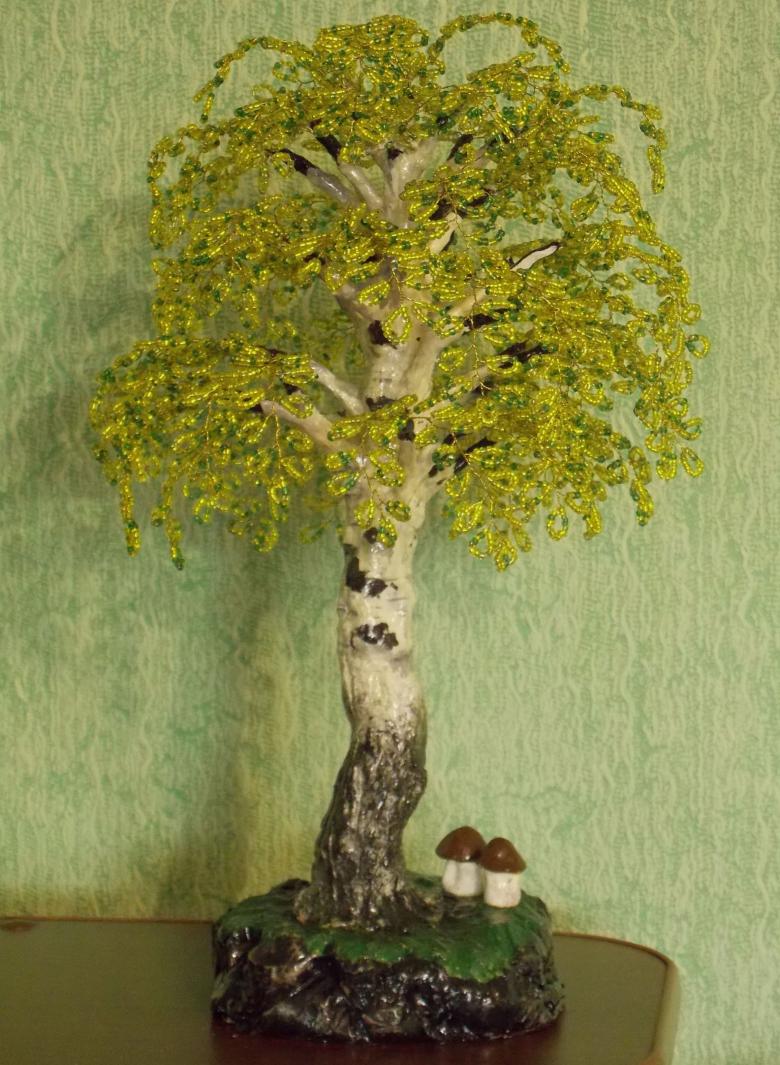
- Next, take gypsum cardboard and cut out a stand of arbitrary shape, it is better not to make it too small. Apply primer, then plaster, and in the middle put the resulting tree.
- When the plaster dries, cover the wire with plaster.
- Next, mix the plaster and PVA in proportions of 1: 1 and add a small amount of water. This solution is applied to the trunk of the birch.
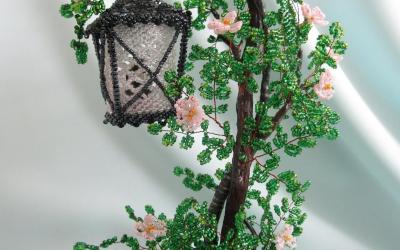
- When the product dries, apply black paint first and then white paint. Apply a little glue and pour beads on the stand. You can make small holes in the stand and insert the flowers of pink beads there.
From yellow or brown beads you can make earrings. To do this, put one bead on a wire, 25 cm long, and twist in several turns. Then put a few pieces at both ends and twist. The resulting earrings are attached to the twigs. The product is ready. It can be a good decoration and a wonderful gift.

Master class on making a birch out of beads
For those who got the previous version, you can try another, more labor-intensive, but no less interesting in the process. On the Internet you can find a master class on how to weave a birch from beads with Olga, or use the variant presented below.

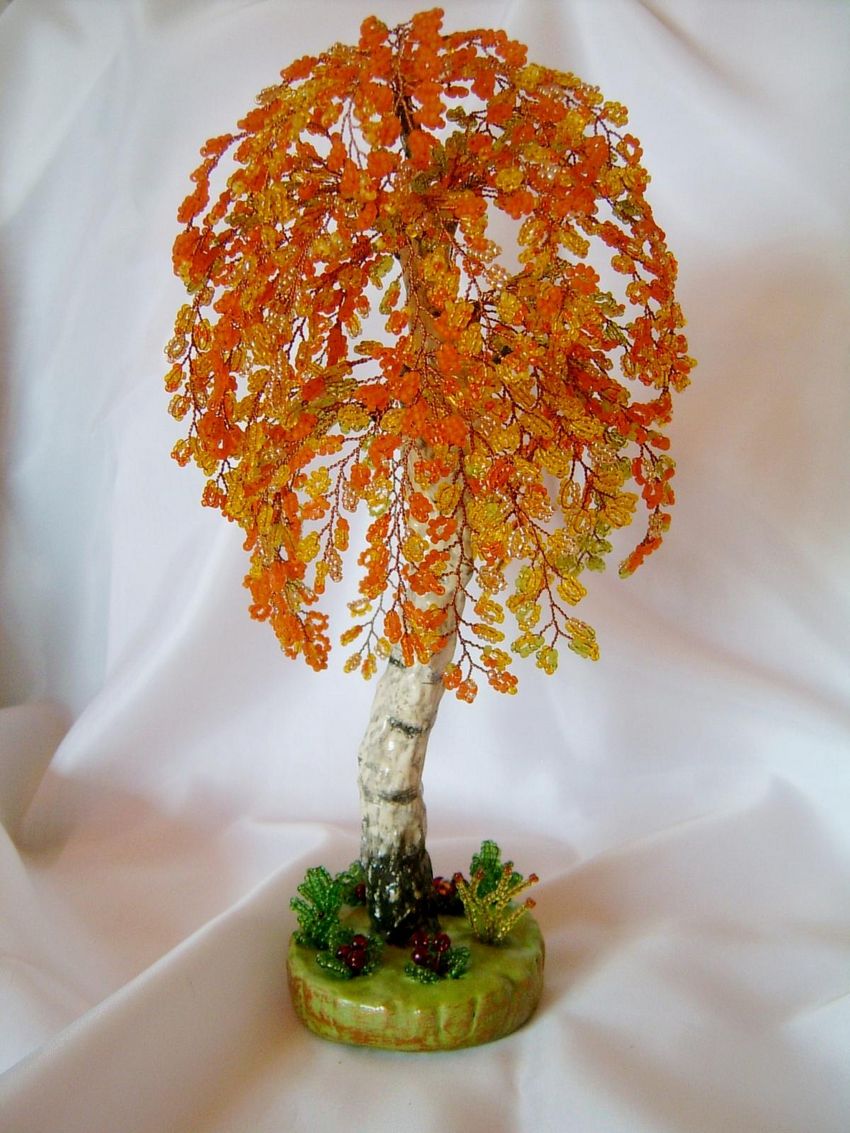
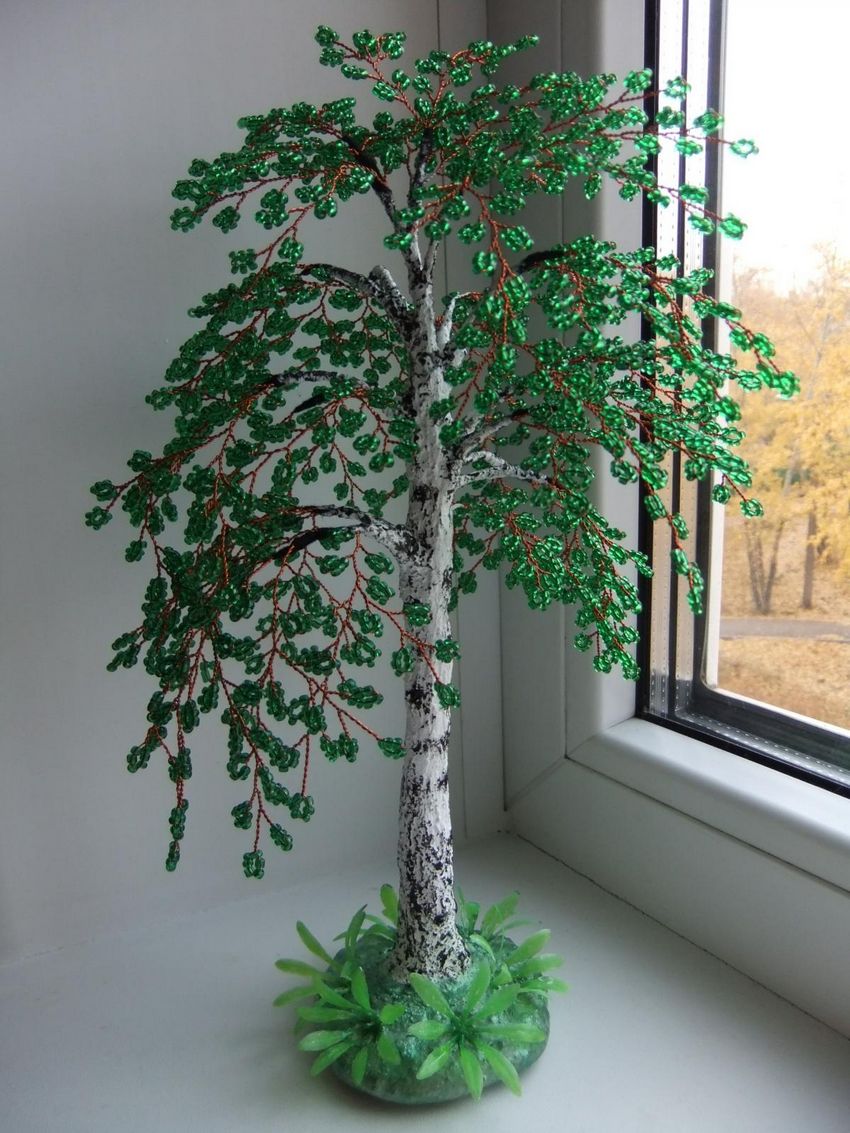
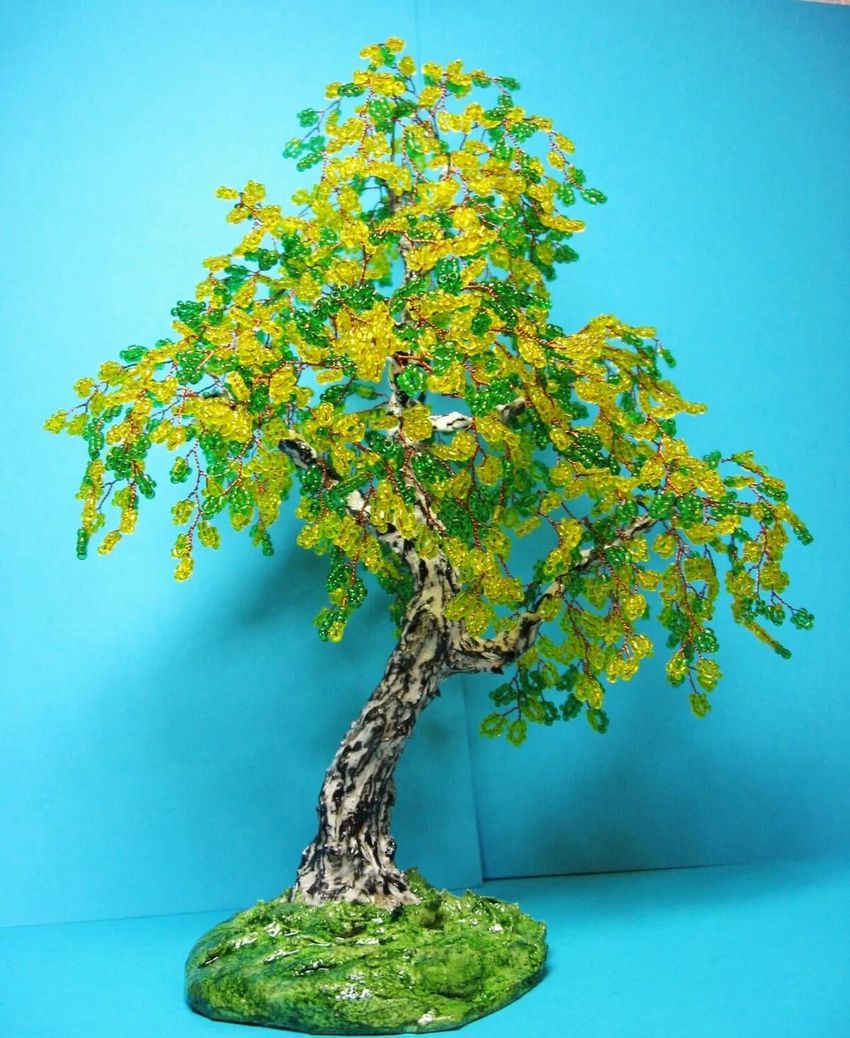
You can try to make an autumn or winter birch, which will differ only in the color of the material. For the summer version you should not take too dark beads, you can only dilute them with transparent or yellow shades. It is important that they are in small quantities.
Necessary preparations for work
To create a birch tree you will need:
- Lots of different green shades of beads.
- Thick wire for the base of the tree.
- Fine wire to make branches.
- Glossy varnish.
- Acrylic paints in black and white.
- Floral ribbon or mouliné thread.
- Alabaster.
- PVA glue.
- The stand.

Weaving sprigs
- To make the twigs, you need to thread on a piece of wire seven beads and twist them into a loop. This will be the central component. Then step back from each side of the central loop one centimeter and thread seven more beads, forming a loop. Make another six loops on each side.
- After that, the ends of the wire twist together. Branch is ready.
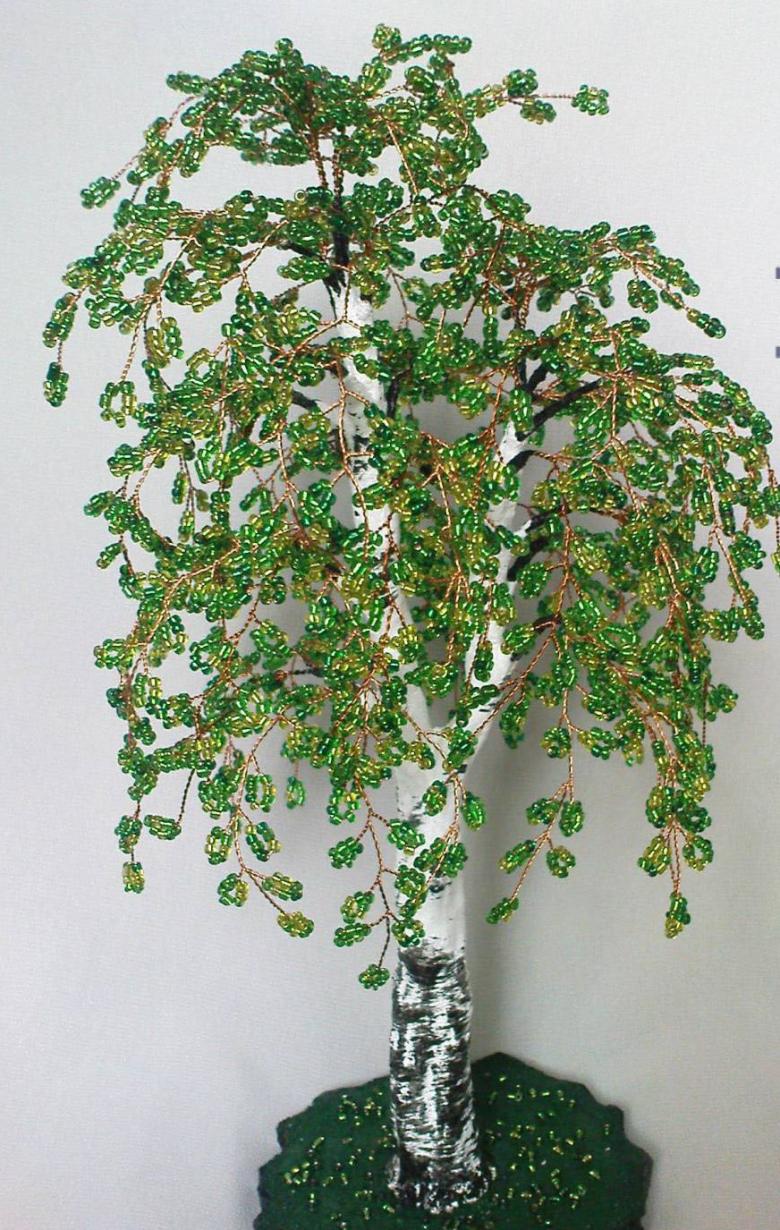
- For the tree top make fifteen branches of the nine loops. For the rest of the tree - at least 55 branches with eleven loops.

Shaping the crown
The next step will be to put the branches together. The branches created beforehand need to be connected to each other. Connect three pieces of twigs with nine loops and exactly the same connect three twigs with eleven loops.

The output should be five pieces for the top of the tree and nineteen - for the rest. Thread a thin wire with a diameter of 1 mm to the branches.
Making the trunk
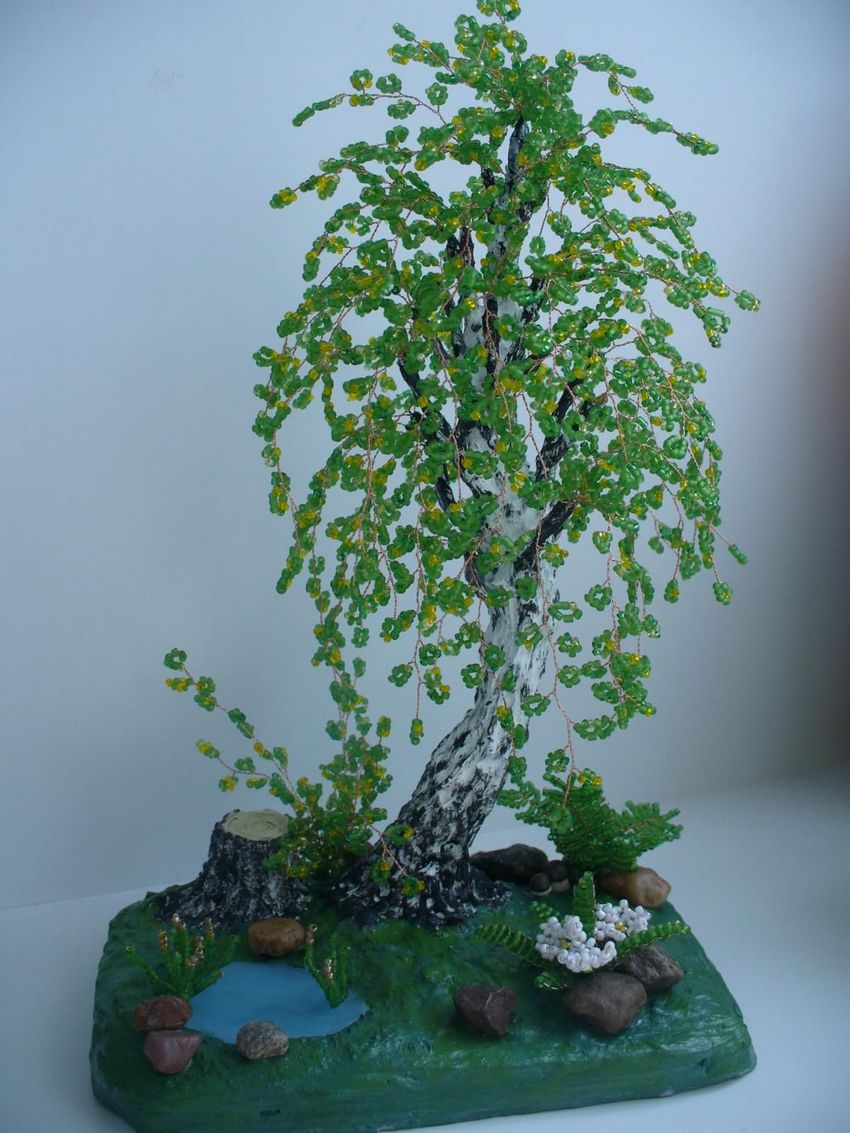
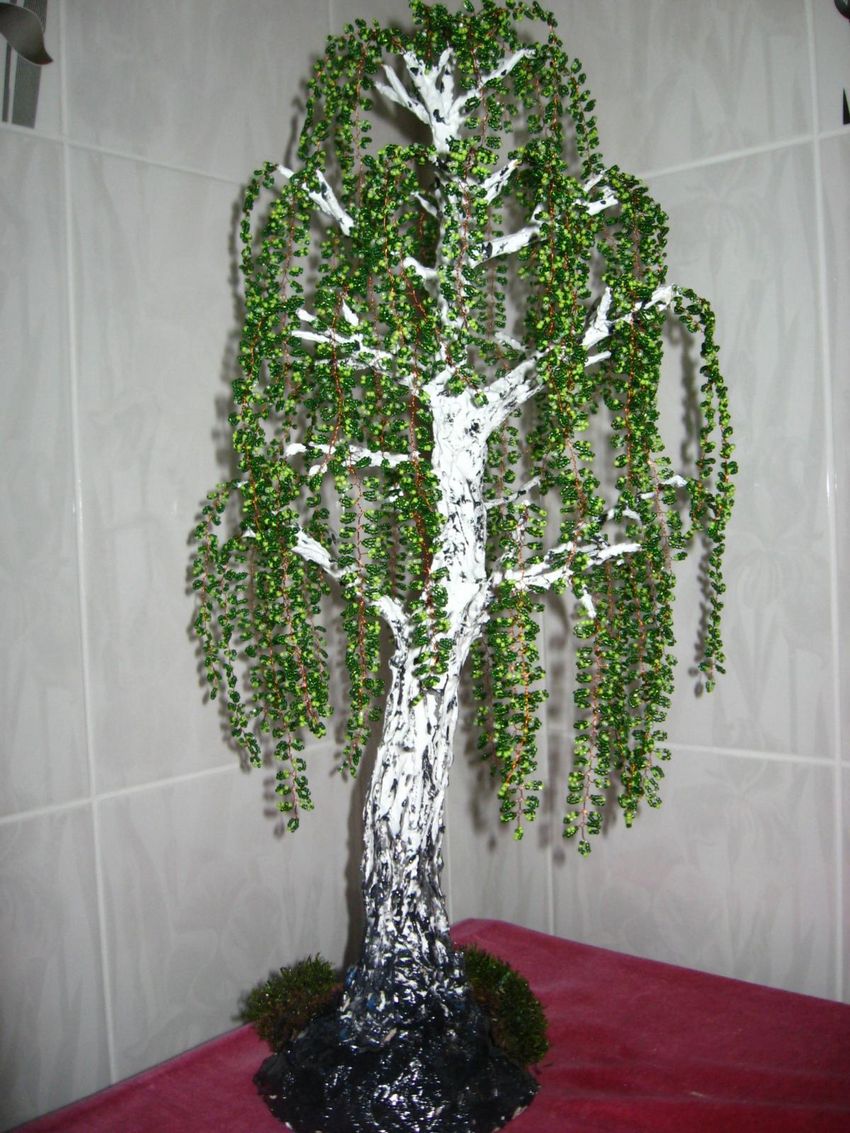
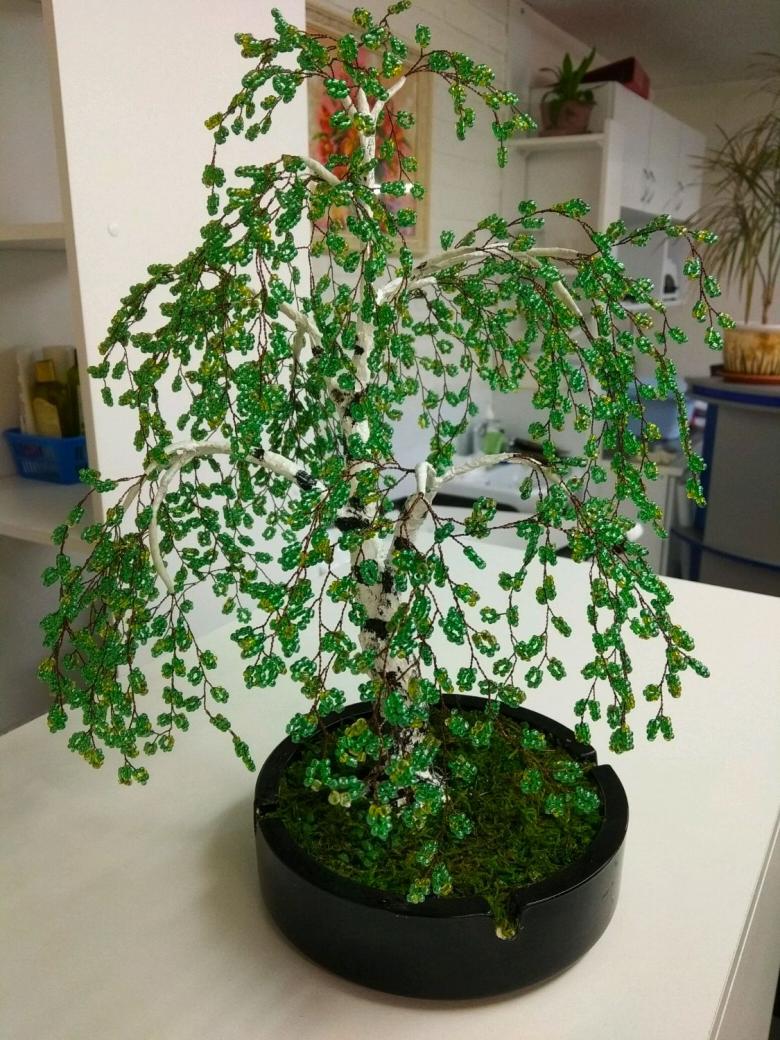
To assemble a double birch from beads, you need to create two trunks. To do this, you need to connect three branches in one part, and in the other part - two branches. These will be the two tops of the tree. Both parts need to be wrapped with a thread, to which a thick wire should be attached.
Then start to attach one branch each to the thick wire. For the main trunk you need to take three branches for the top and twelve - for the rest. For the additional trunk you need two - for the top and seven - for the rest.

Assembling all the parts
- Next, connect the yes trunks together with floral tape. The main trunk should be slightly larger than the second trunk.
- For the base, find a suitable container and cover it with polyethylene.
- Dilute the alabaster with water until a thick mass is obtained. Fix the birch tree in the mold with polymer clay and pour the alabaster. When the alabaster hardens, you need to take the tree out of the container and remove the polyethylene film.
- Then dilute the alabaster with PVA glue in the ratio of 1:1. The resulting mass is applied to the branches in two layers. Allow the first layer to dry before applying the second.
- With a box cutter, create the relief of the tree.
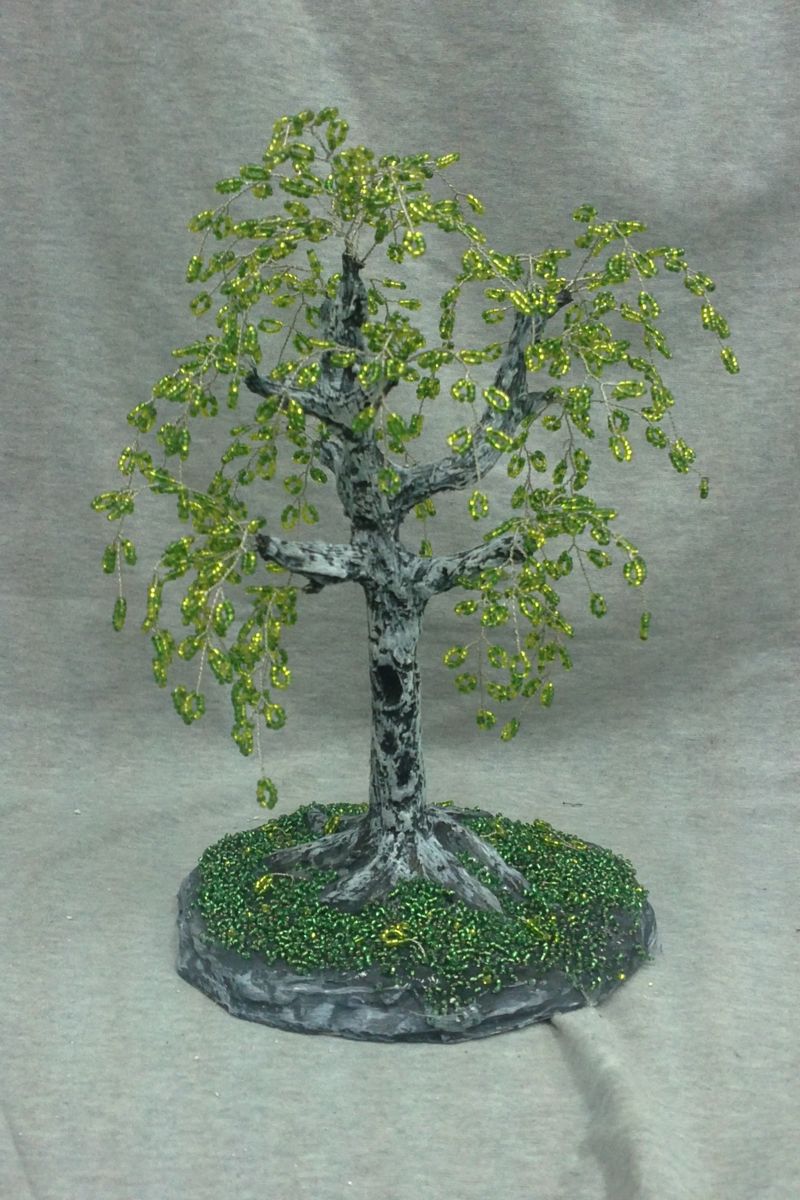
Painting the product
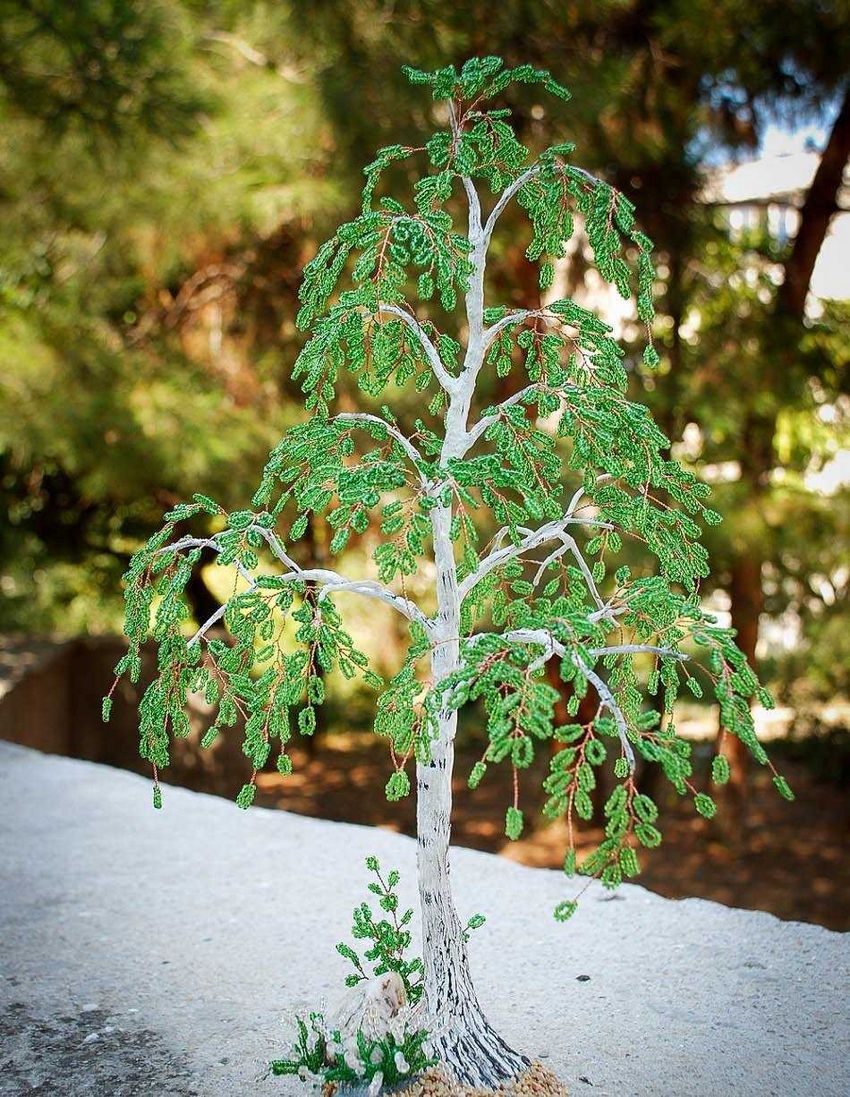
In the final step, the product must be painted. First of all, the branches and the trunk should be covered with white paint. Let it dry for two hours. After that, dot stripes of black paint.

Decorate the stand with beads, you can create a relief with polymer clay. In conclusion, cover the product with glossy varnish.
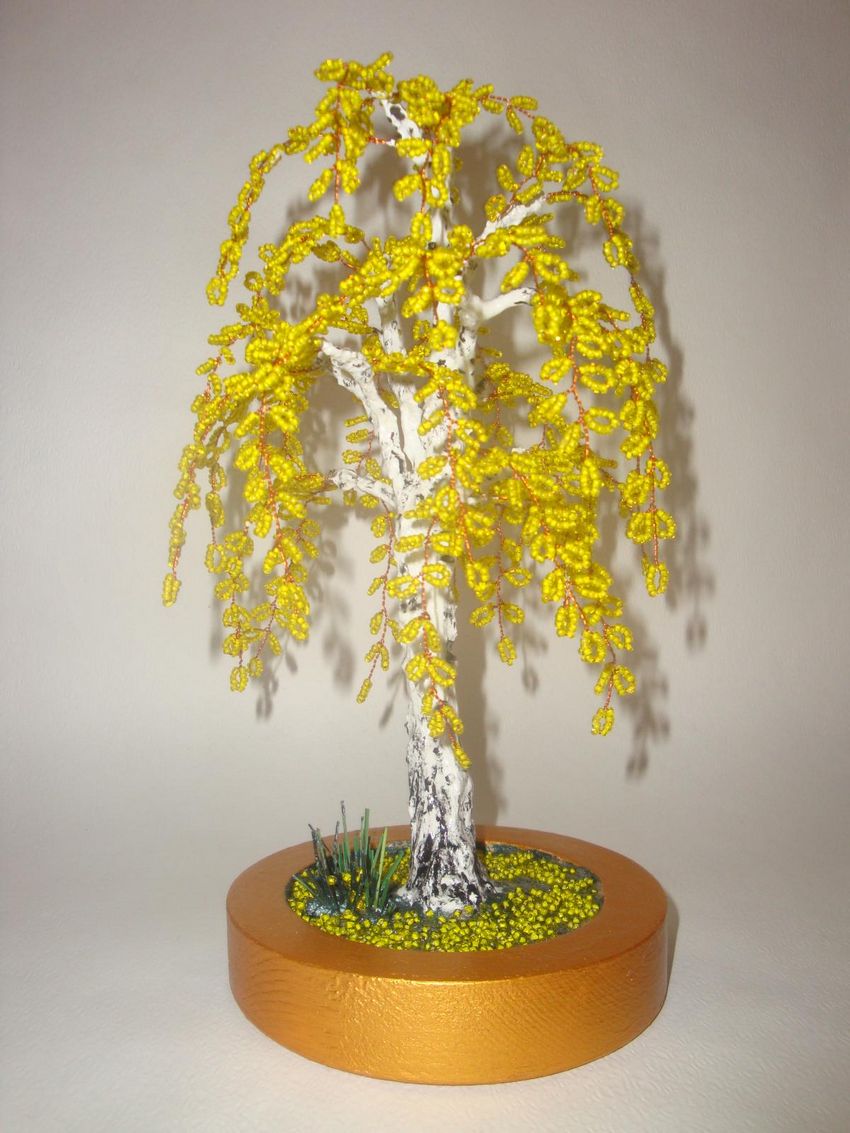
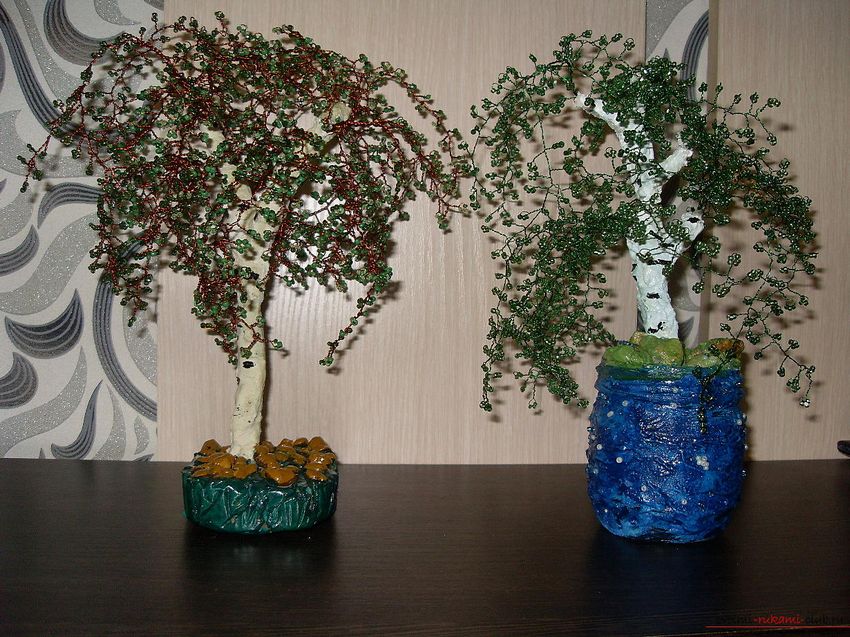
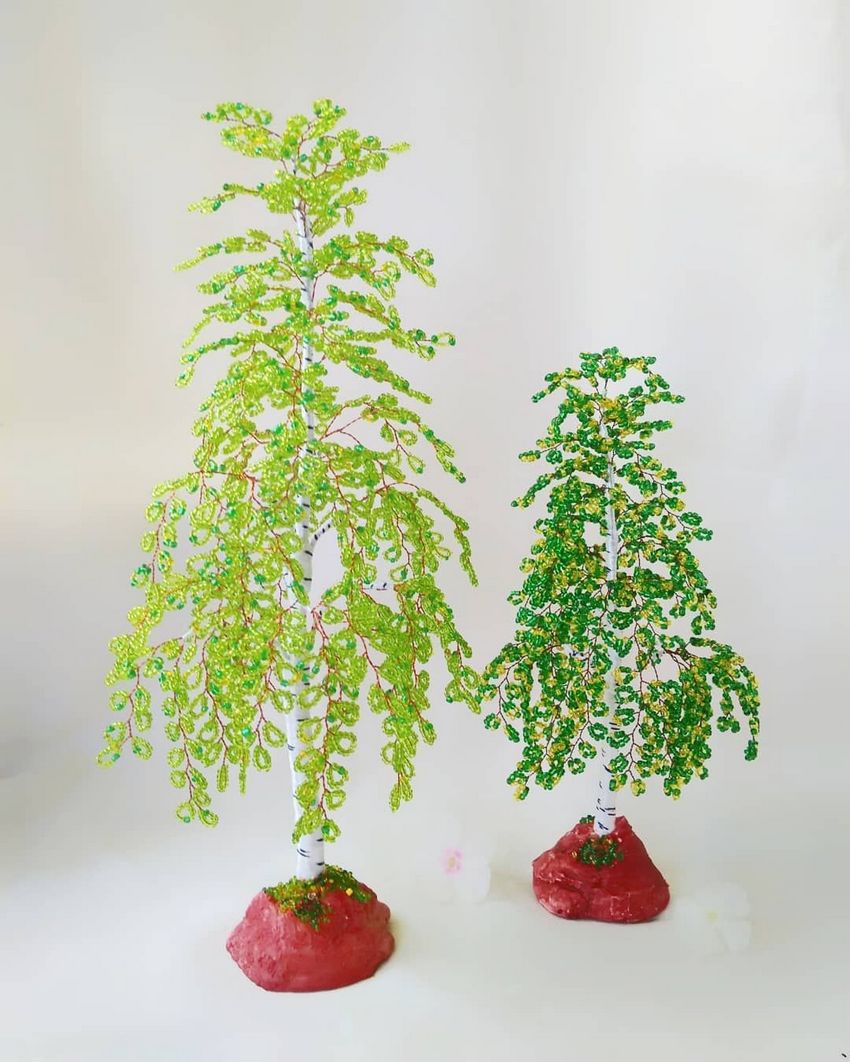
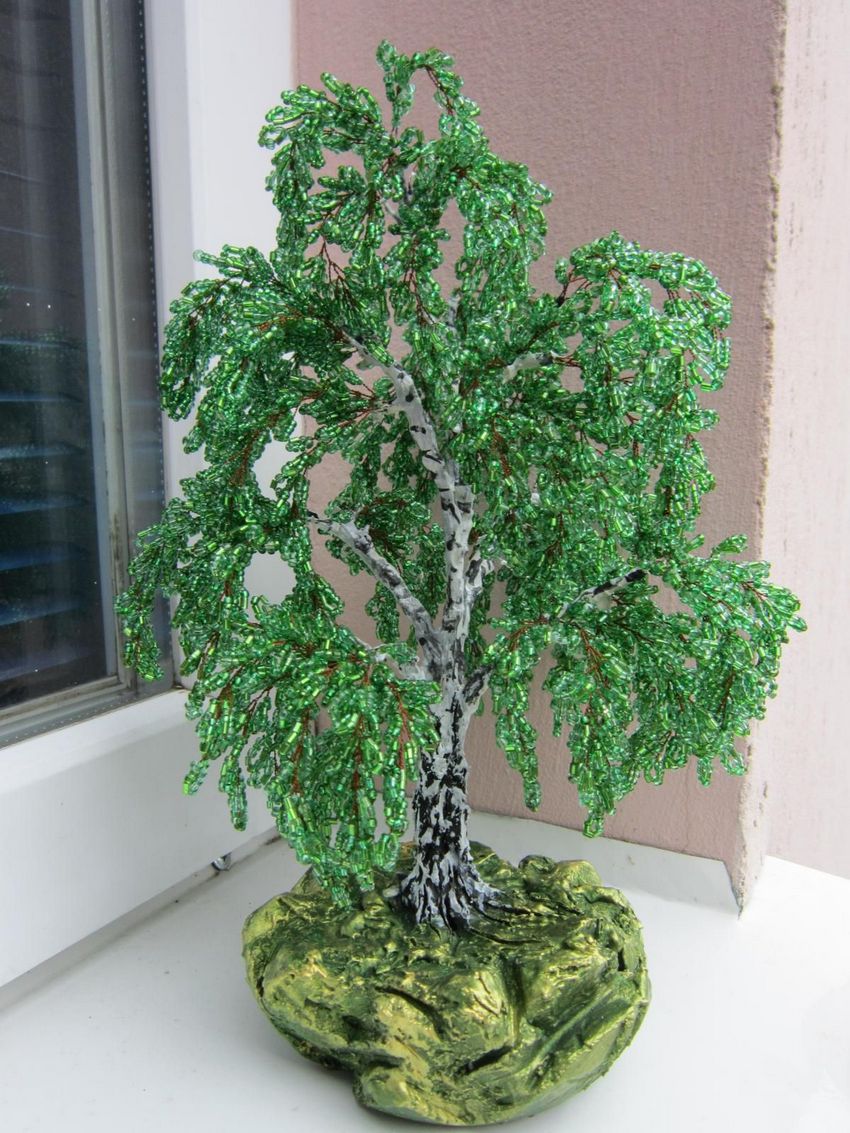
Photo ideas of homemade birch beads