How to make a parallelepiped: schemes, projects, drawings and patterns
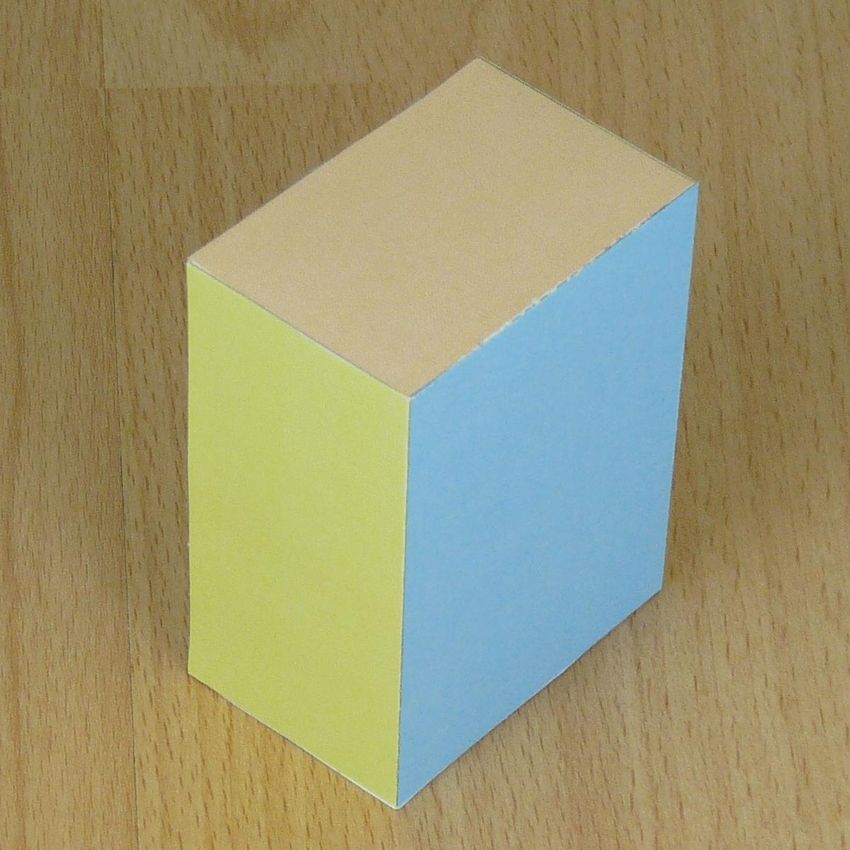
How to create a rectangular parallelepiped with your own handsSurely many of you have done for a variety of projects fakes on the theme of geometric shapes. The simplest of the models can become the most ordinary parallelepiped, which we often see as a simple box.To create geometric shapes you need a little creative imagination, available materials and of course - a template by which the model will be made.
What may be needed in the work?
To begin with it is necessary to decide on a set of materials and for what purposes the model will be made. Further we will consider on a concrete example how to make a parallelepiped from paper.
For work it is necessary to prepare:
- Glue,
- Paper,
- Cardboard,
- Scissors,
- Pen,
- Ruler,
- Pencil.
- Model parallelepiped
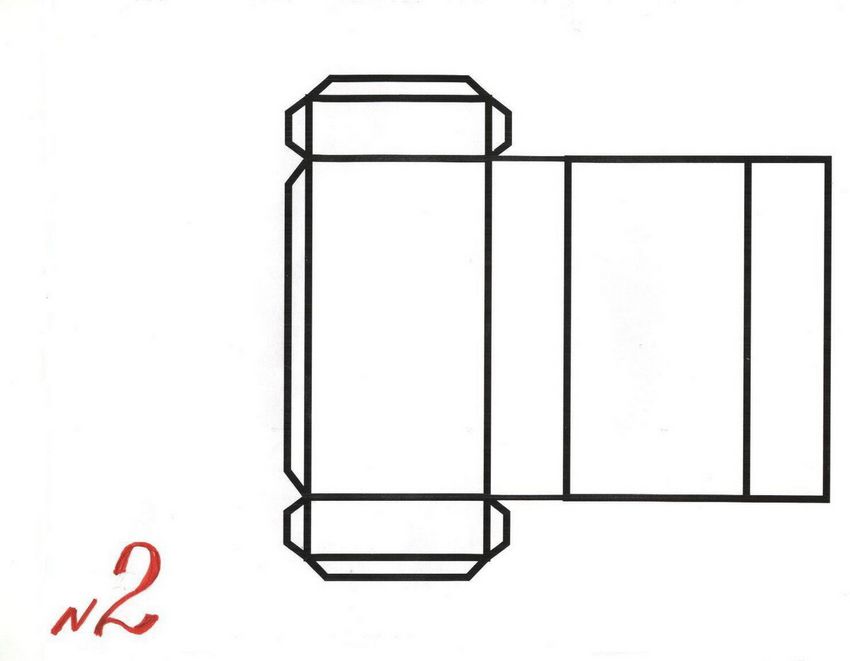
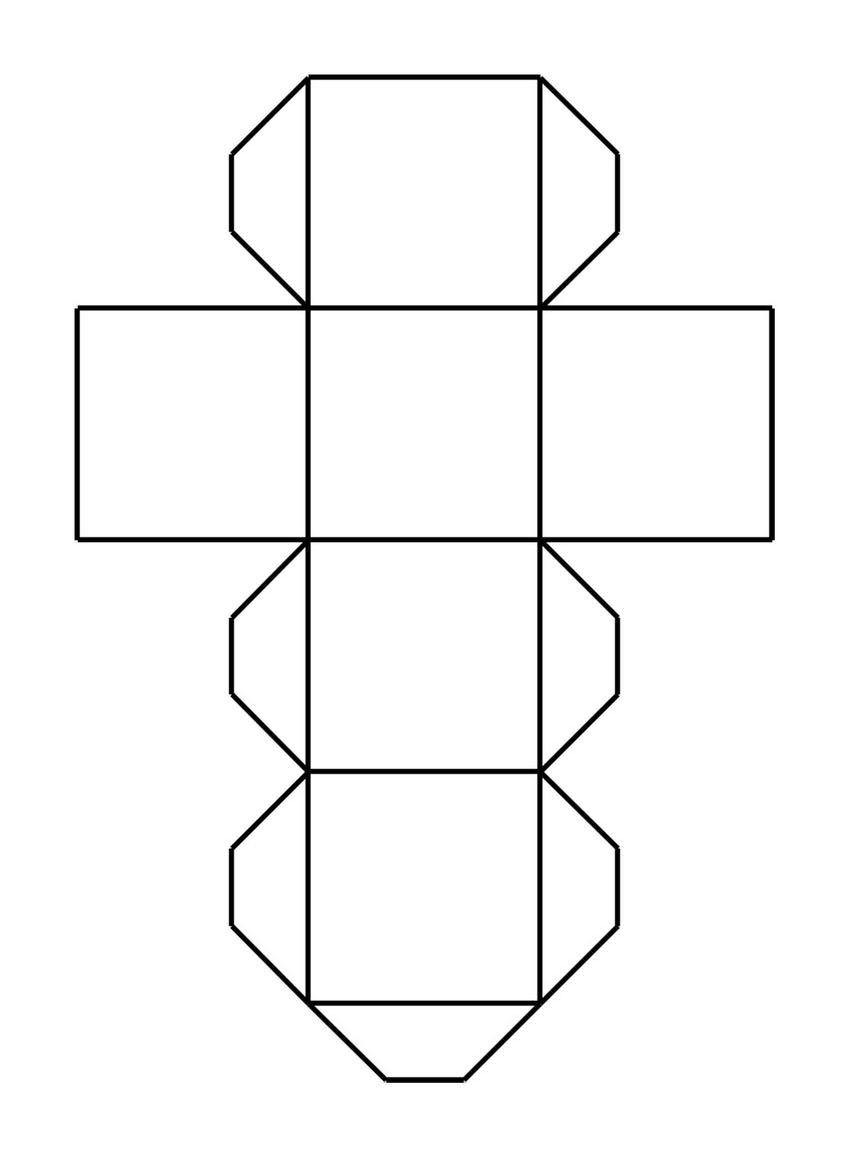
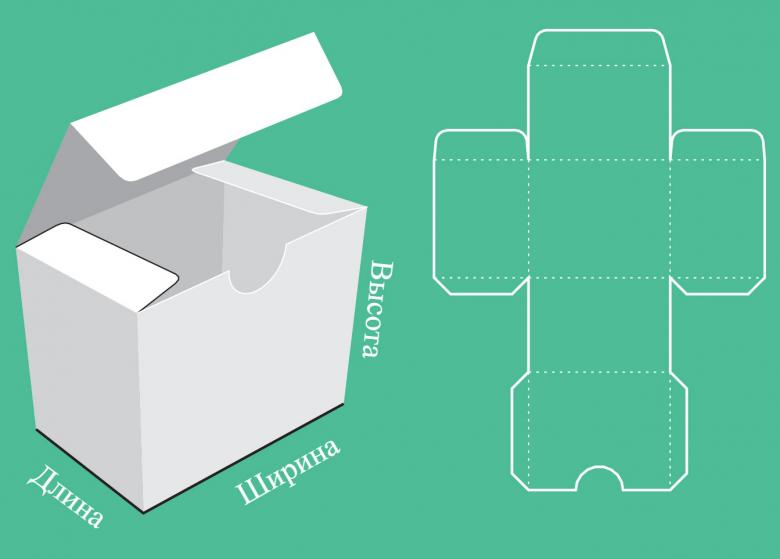
How to make a parallelepiped out of paper scheme
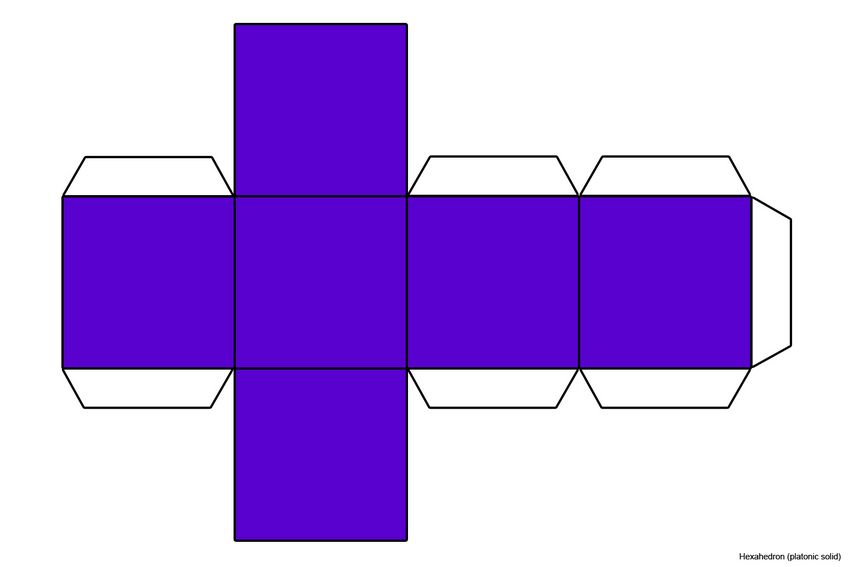
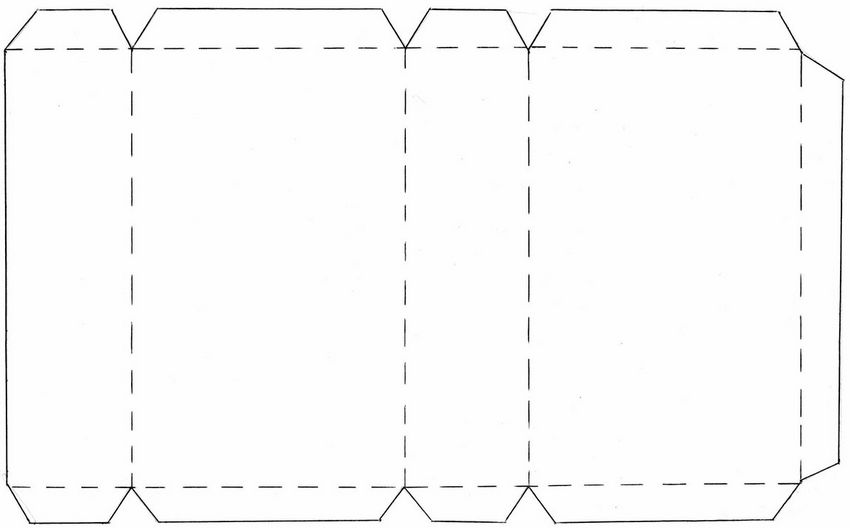
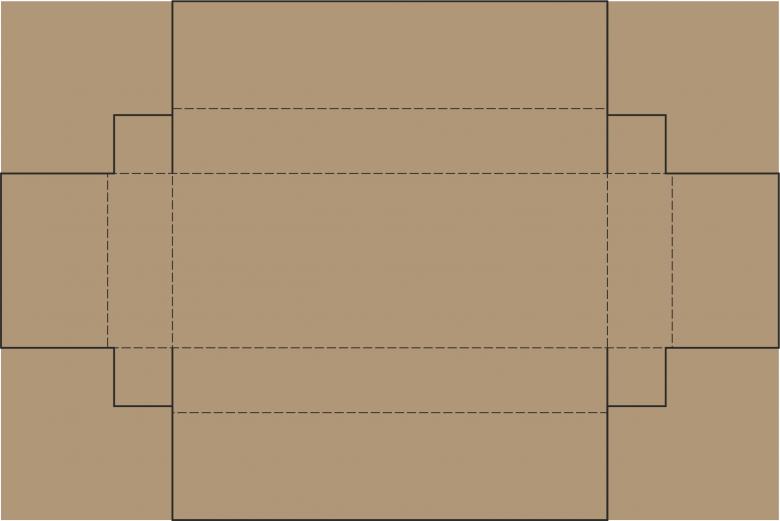
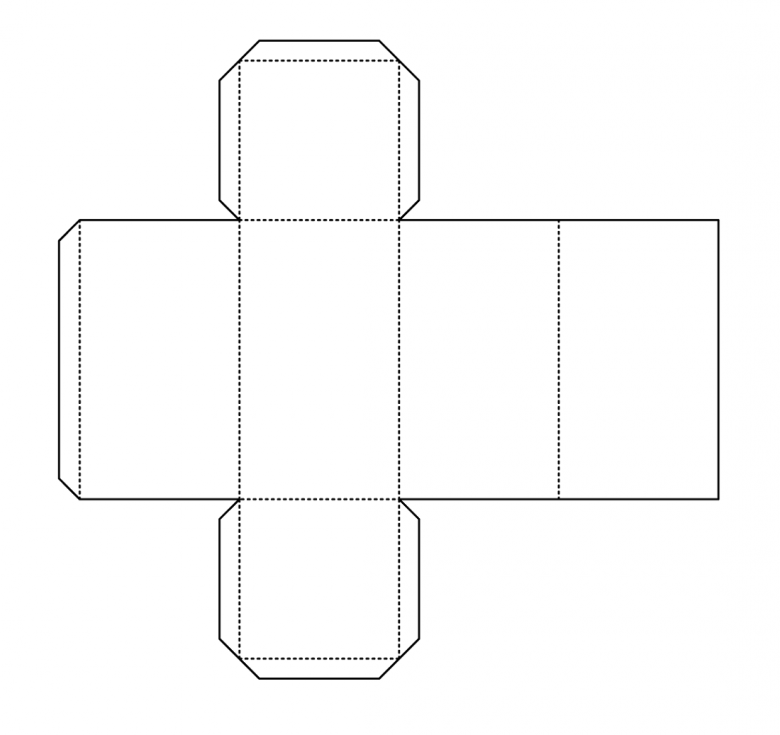
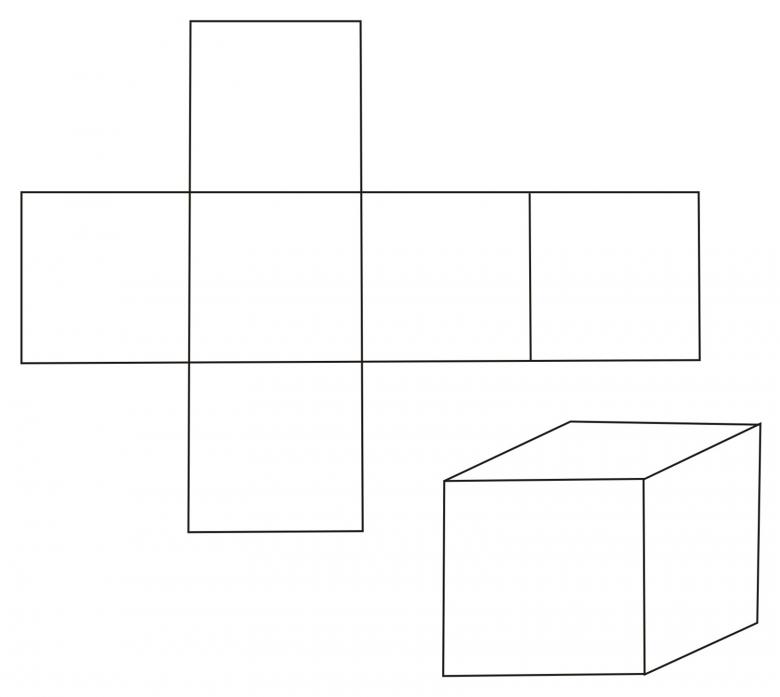
A basic model will be considered for making. As you can see, the template is completely proportional to its sides and has contours for bending and gluing the model at the seams.
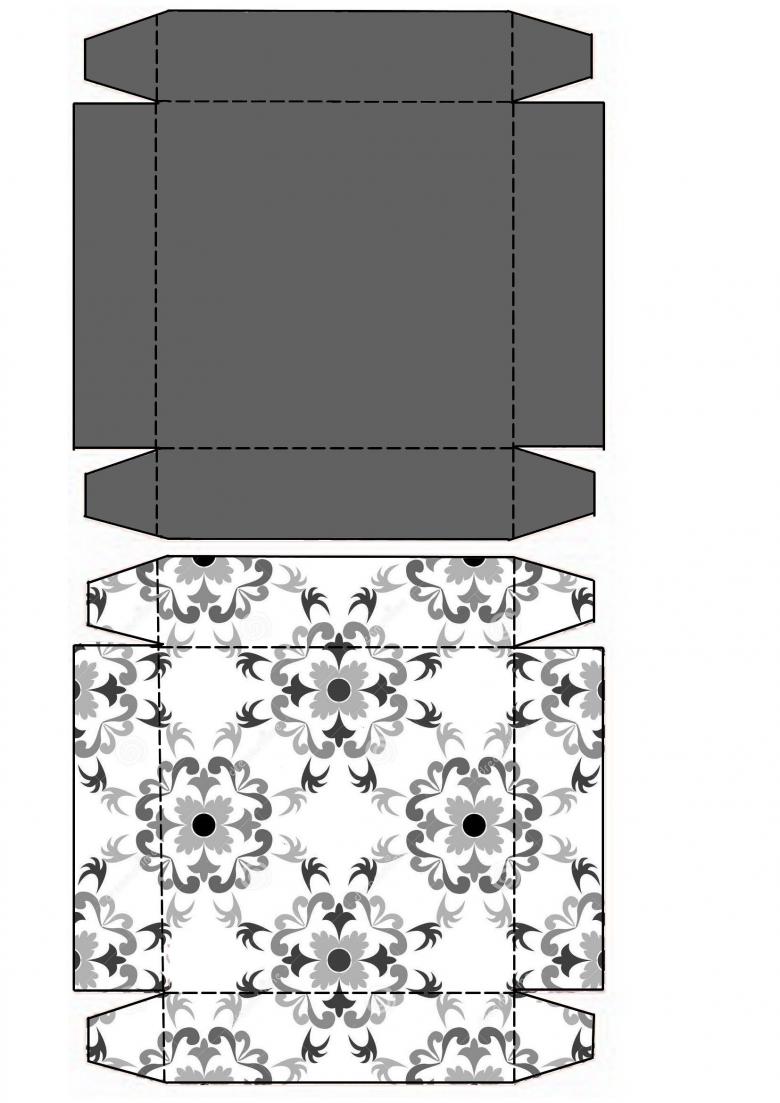
If you need to make a larger parallelepiped, then to begin with you just take as a basis one central side, to which the "ears" of the sides go.

The main side is completely proportional to its side on the parallel, which means that the neighboring faces must also be parallel proportional to each other. In order not to complicate the process, it is sufficient to simply print out a ready-made template and cut it according to the desired lines. Note that for the glue level, the side edges are marked in a different color.
Important points
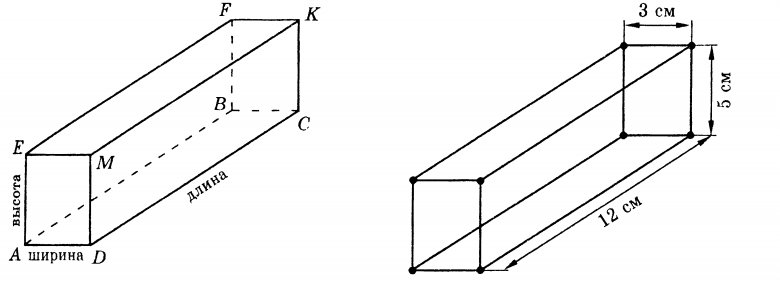
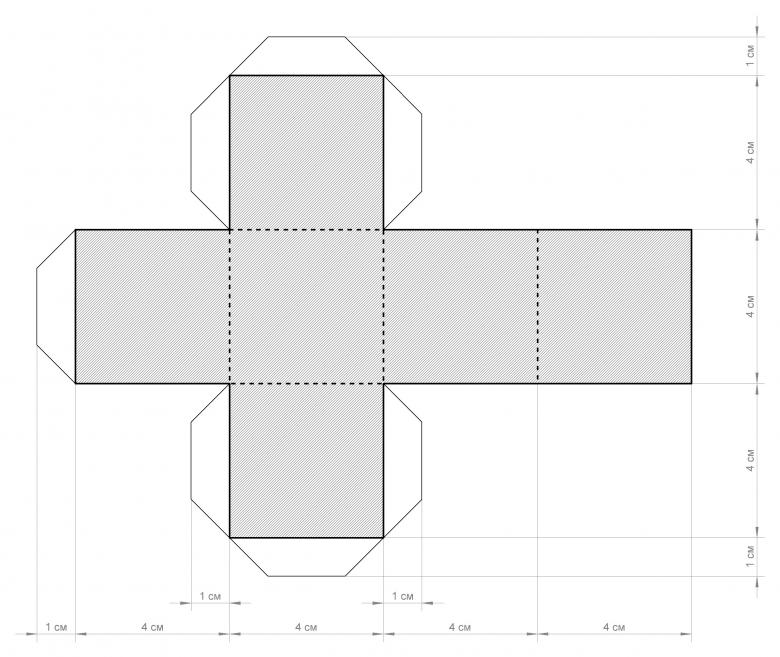
Many people wonder how to make a rectangular parallelepiped even? A pencil and ruler will help well in this question, as the main thing is to observe the proportions of dimensions. If they are not, the model simply will not work, and if you make all sides the same, then we will get not a parallelepiped, but a square.
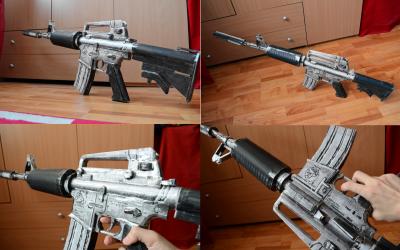
Where else can you apply a rectangular model in everyday life and fakes? On the geometry alone is not the world, because in this case, you can show imagination, after which a simple and boring model turns into a real colorful fake.
Ideas for creativity
Photos on a rectangle
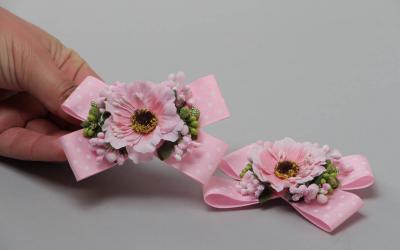
Want to add originality to your own photos? Then, why not frame them from a parallelepiped? Thanks to this uncomplicated model, you can constantly change the photos on your favorite shelf just by flipping your rectangle to a new face.
What do I need to make?
- Step 1 - Take heavy paper or cardboard to make the model.
- Step 2 - Draw a parallelepiped template on the cardboard.
- Step 3 - The finished template should be outlined according to the location of the photos.
- Step 4 - Trim the photos.
- Step 5 - Cut out the finished rectangle template.
- Step 6 - Glue the pattern behind the pattern along the edges.
- Step 7 - Once dry, apply glue to the faces.
- Step 8 - Glue one by one the pictures with the outlined arrangement.
- Step 9 - Allow the construction to dry.
- Step 10 - That's it, the model is ready to use.
If desired, you can cover the rectangle model with tape, which will ensure greater durability and safety.
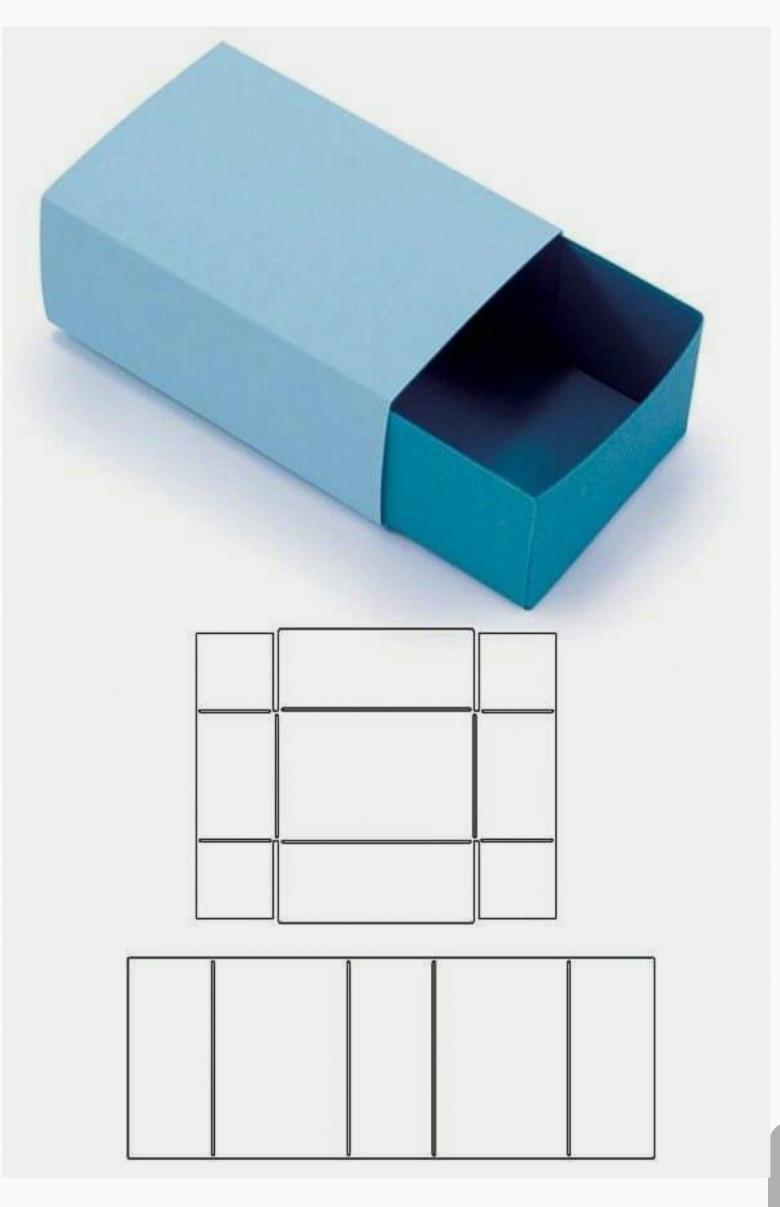
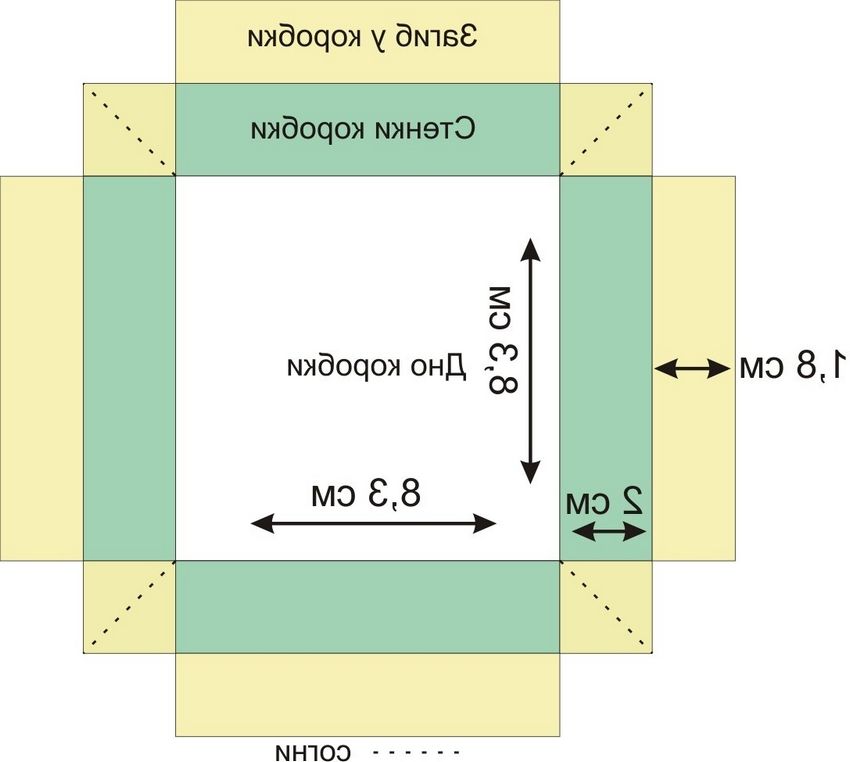
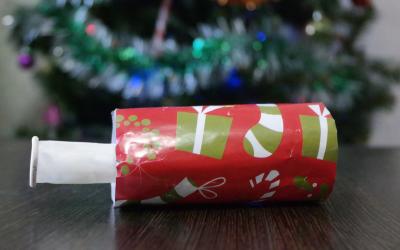
Box for a gift
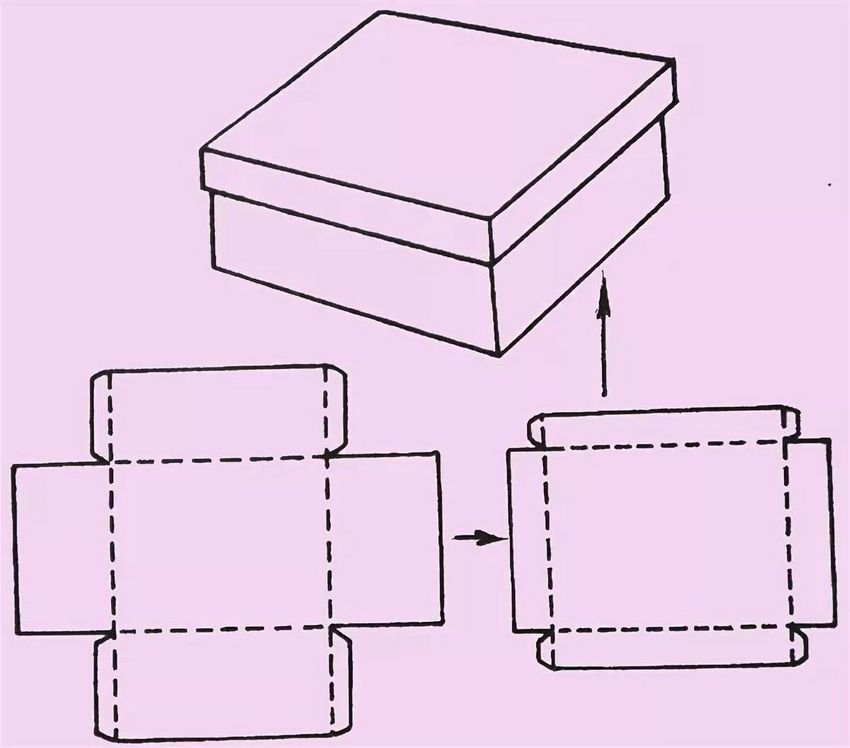
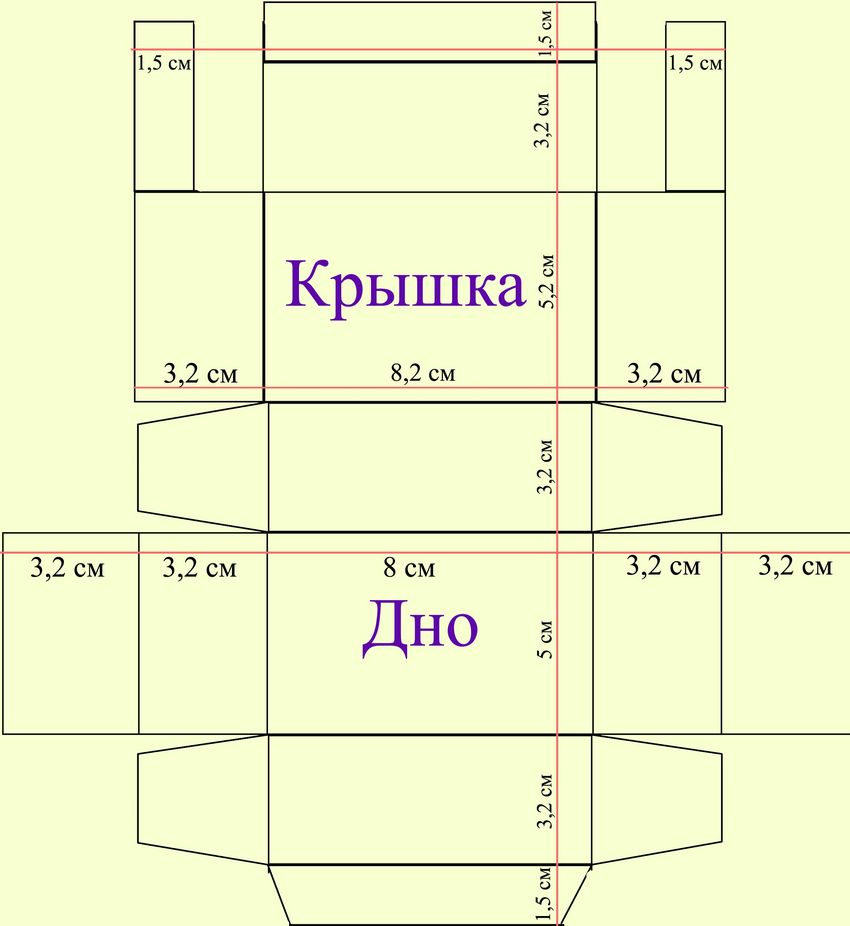
Making a rectangular box with your own hands is not so difficult. All you have to do is stick to the same pattern and proportions. The only difference is that you don't have to glue all sides tightly. This is necessary so that the finished model can be used as a box for a gift.
The manufacturing process is repeated exactly the same way from the template, cutting and bending in the facets that need to be glued. The only thing, choose a side that will play the role of the "lid" opener.After that, the finished box can be decorated in any way and present it with a gift inside, candy or some kind of wishes.
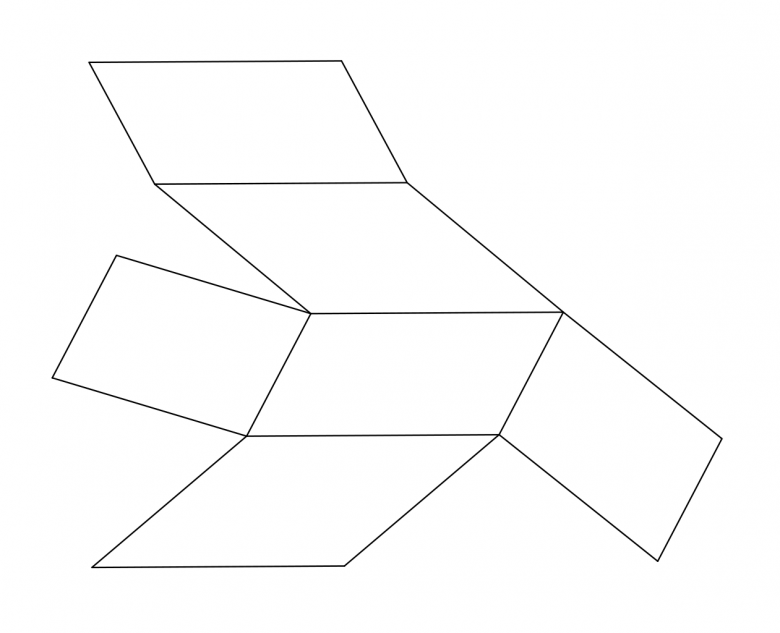
Rhombic parallelepiped
Another original option for creating a rectangle can be the base of a rhombus. In addition to its unusual shape, this option is great for decorating a gift or some kind of fake.The basic scheme has in its basis not rectangles, but rhombuses, which we see on the finished scheme.

To make it, draw the first two central rhombuses with a ruler and a pencil. Then go down proportionally "mirroring" down and up, also applying rhombuses to the paper. Note that all sides must be the same, otherwise the rhombus will turn out wrong.After that it is enough to apply the sides and "ears" for gluing.
By the way about "ears" it is not necessary to make them small. If they are too small it will be hard to glue them together and the model itself will not be as dense.
IMPORTANT: Do not forget about the safety of working with glue, scissors and other materials. If you are preparing a model of a volumetric parallelepiped / rectangle, then we recommend that you advise children on the correct use of materials and tools with which they work. Explain the rules of gluing and on what side you need to bend the edges.

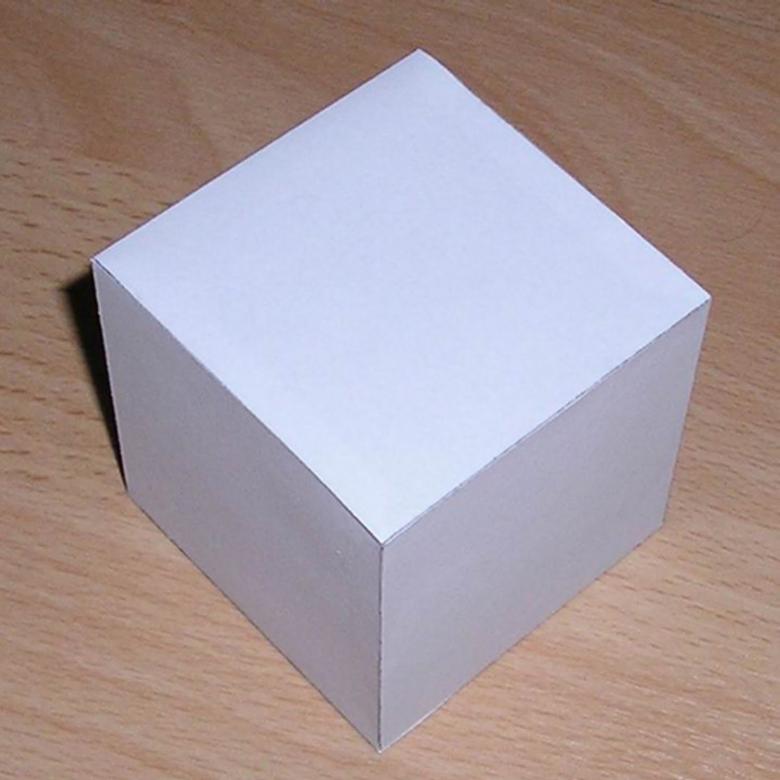
Parallelepiped to schoolchildren
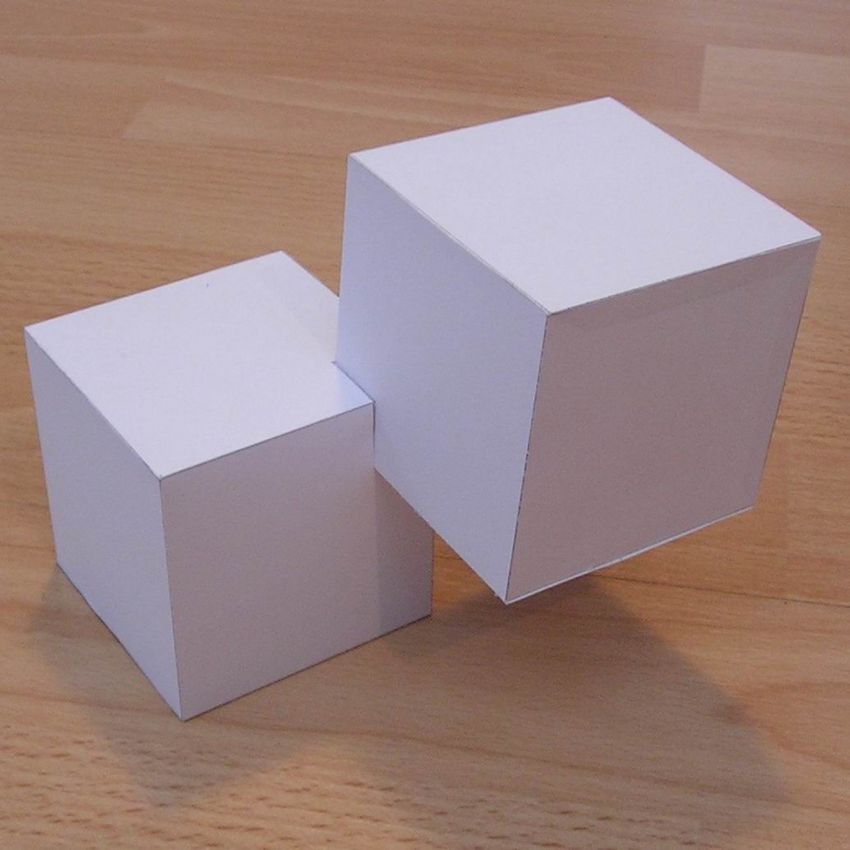
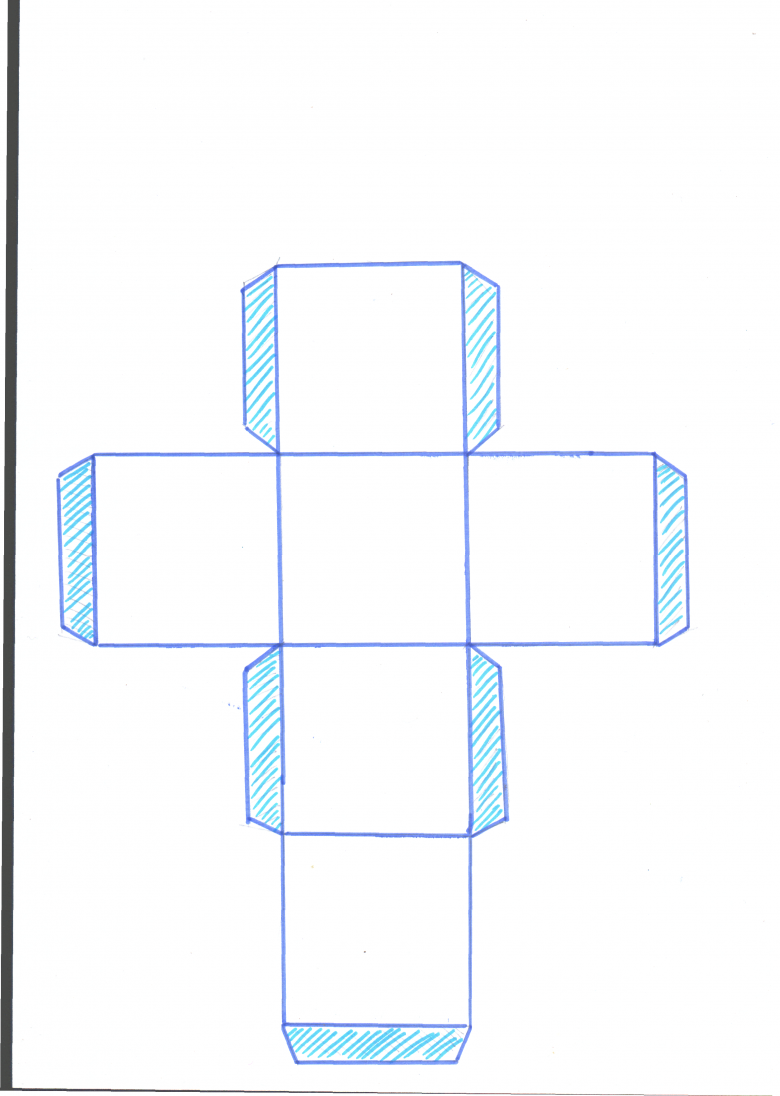
Quite often at school lessons pupils may be asked to create a variety of geometric shapes, and a rectangle is one of them. The figure itself is quite simple, however, many have difficulty at the stage of assembling the model.

To avoid problems, you just need to consider the proportions, and correctly bend the lines. As a result of the work should get a box. If you are having difficulty or the model does not work, take a ready-made box (such as from under the tea) and just cover its sides with white paper. This will give a presentable appearance and allow you to quickly and smoothly create a parallelepiped without much effort.

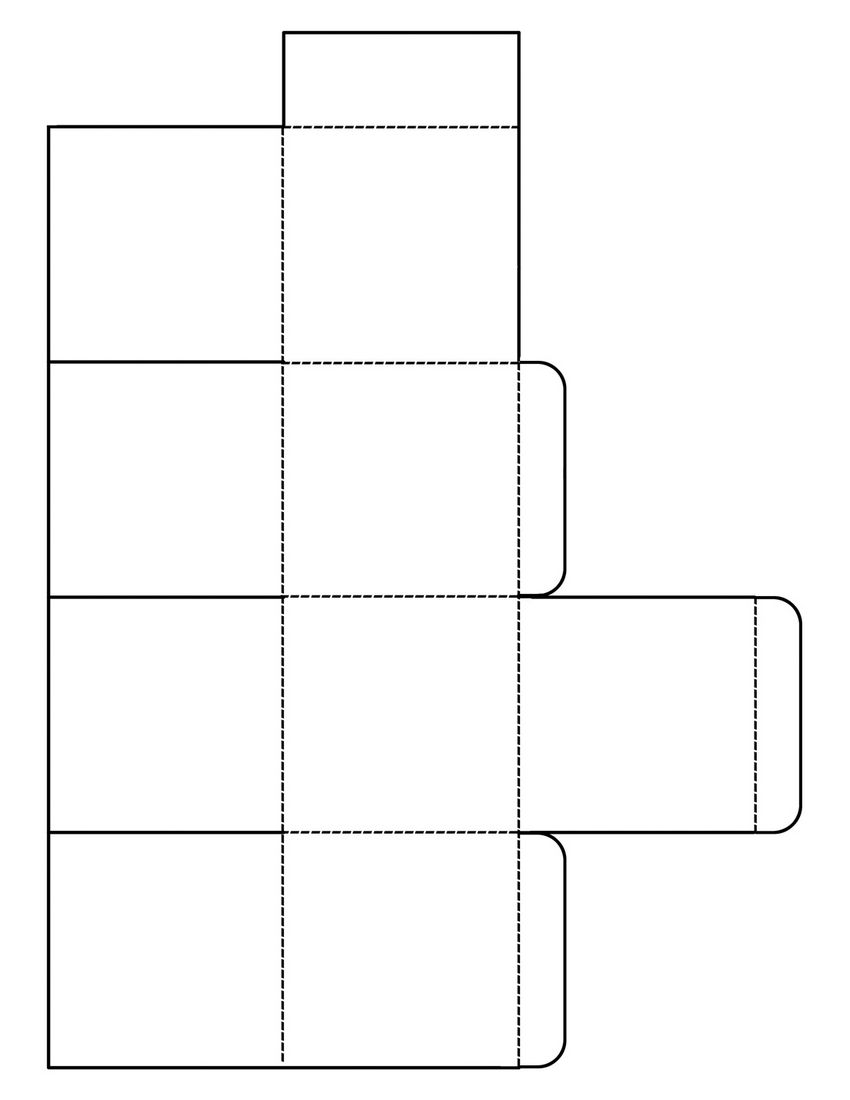
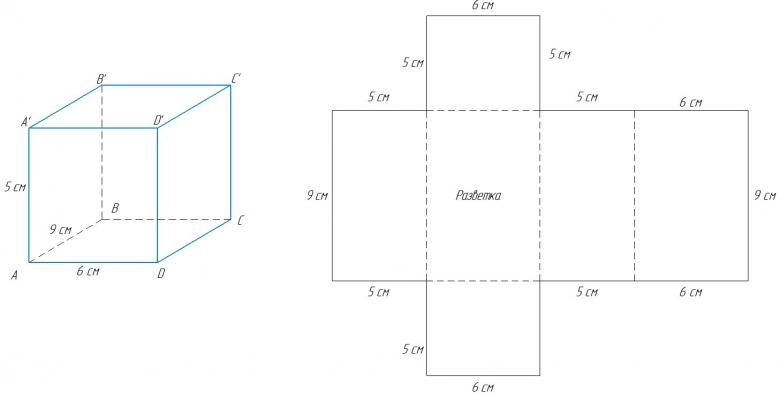
For those who want to purposefully make a parallelepiped of exactly the same shape, it is enough to "disassemble" the ready box and lay it out on a sheet of paper. Draw a template with a pencil, tracing on the contour of the finished model. After that, fold the sheet in the right sides and cut it out. Then it remains just to glue the model in the same sequence in which the box was assembled.

The technique of working with model gluing is quite simple and, with practice, will create a basic perception of spatial thinking in a child. If the model doesn't work the first time, analyze the error and see where the line is bent incorrectly or where something needs to be redone. We are sure the next model will work out for sure.

A few basic templates will allow you to quickly and without unnecessary fuss create a lot of interesting fakes on the theme of the volumetric rectangle, and most importantly, will keep children busy with interesting and educational activities! Especially well the idea will appeal to children of preschool and school age.
Photo examples of creating a parallelepiped