How to make a rose out of paper - easy step-by-step master class with photo ideas
At all times and in all nations, the rose was considered the queen of flowers. This truly beautiful flowers with an extraordinary fragrance to this day are extremely popular with people, as evidenced by the fact that there are more than two hundred subspecies of the beautiful plant.
Interestingly, breeders have bred roses of all colors of the rainbow and a huge number of shades. The possibility of an unlimited choice of colors makes rose crafts one of the most popular activities for both children and skilled craftsmen who make original souvenirs.

Ancient legend
According to the ancient Greeks, such a beautiful flower could not appear without the intervention of the gods. When Aphrodite came out of the sea, she dropped drops of foam on the ground, which immediately turned into white roses. And scarlet flowers appeared from drops of blood of Adonis, the goddess' chosen one.

Fortunately, today, in order to easily and quickly decorate your home with a rose from paper, made your own hands, there is no need to scatter foam on the ground or spill drops of blood.

The queen of flowers can be made with the simplest tools and materials - paper, pencil, scissors and glue.
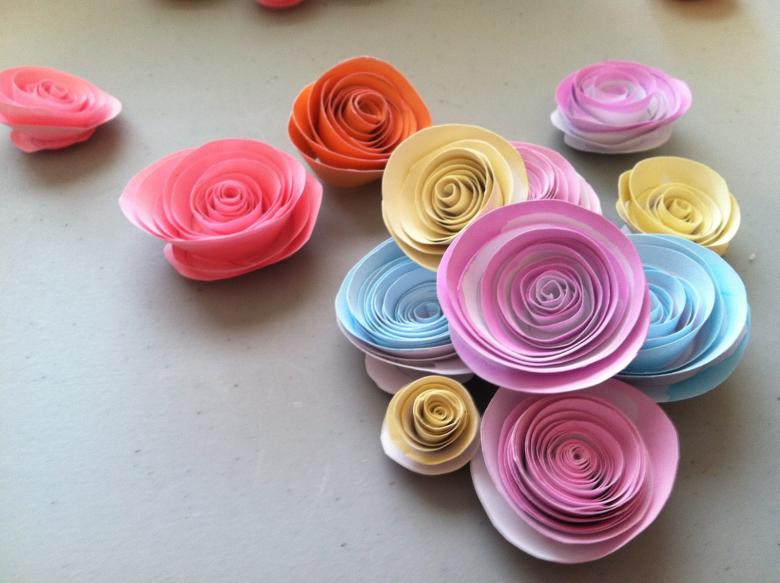
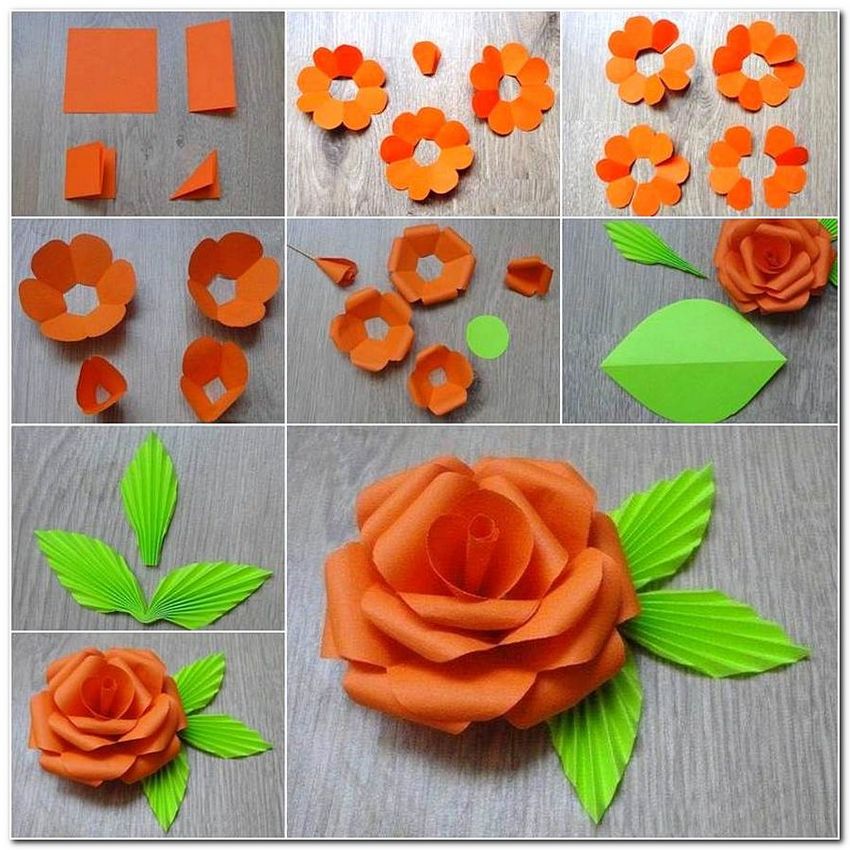
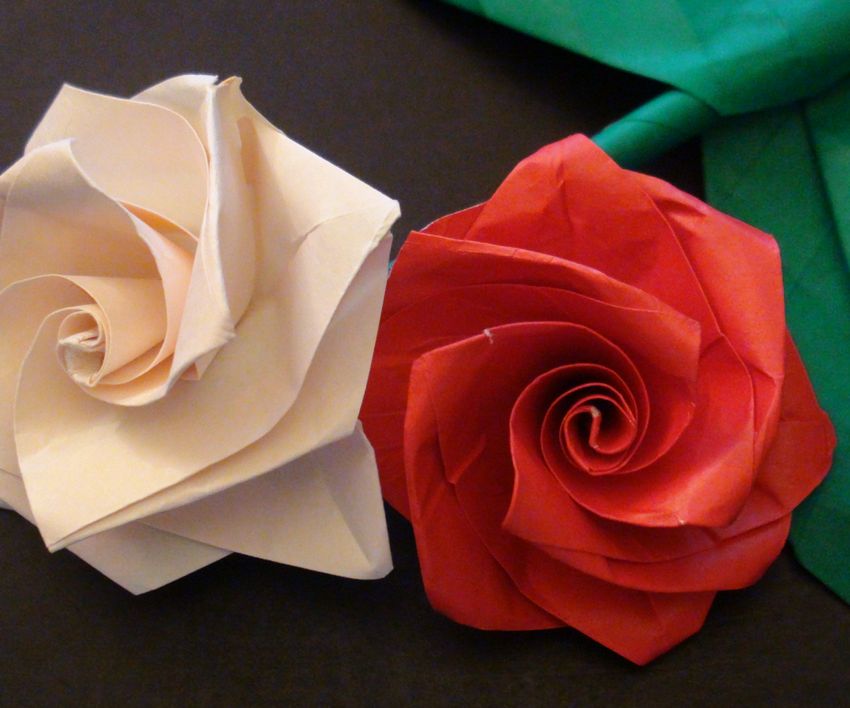
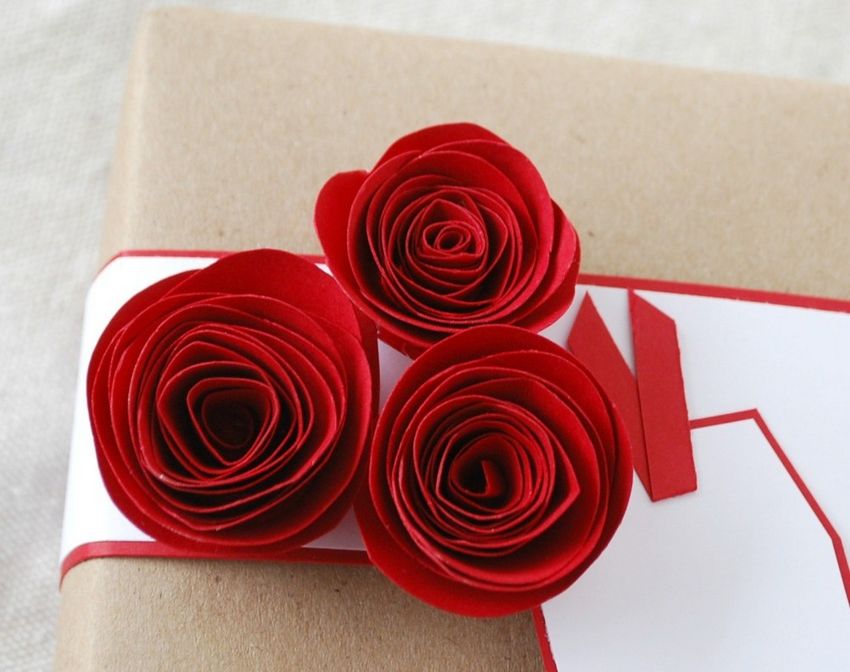
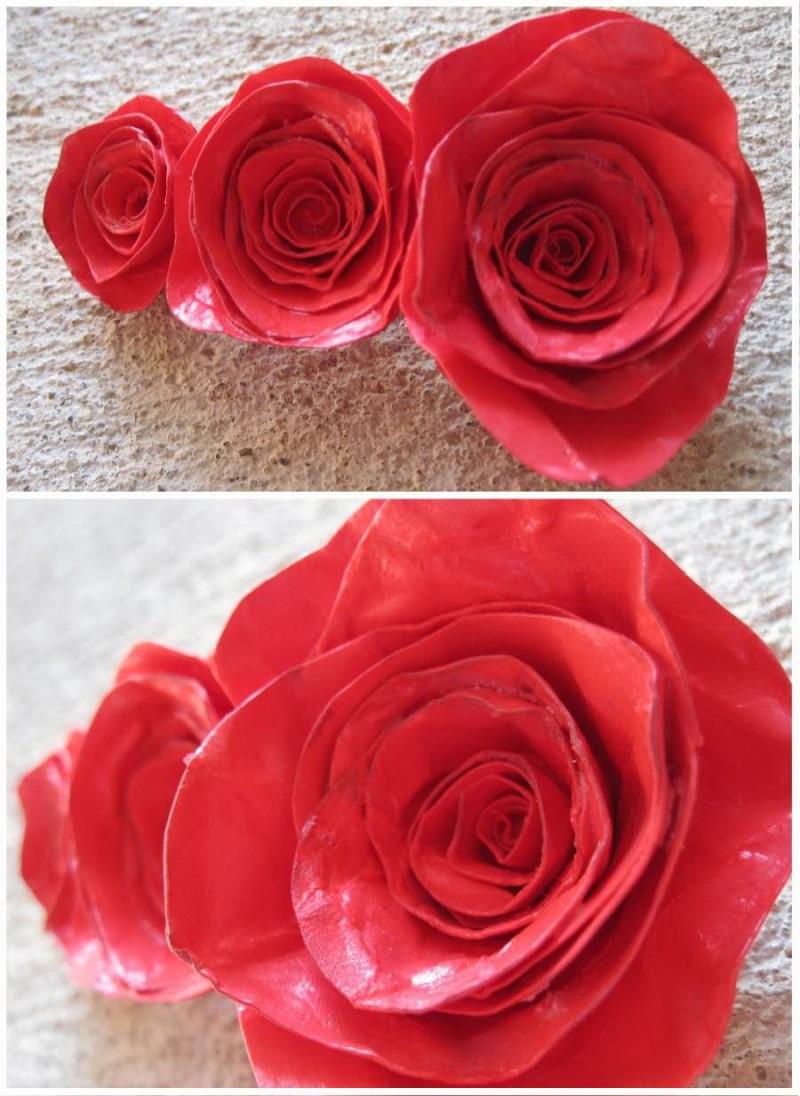
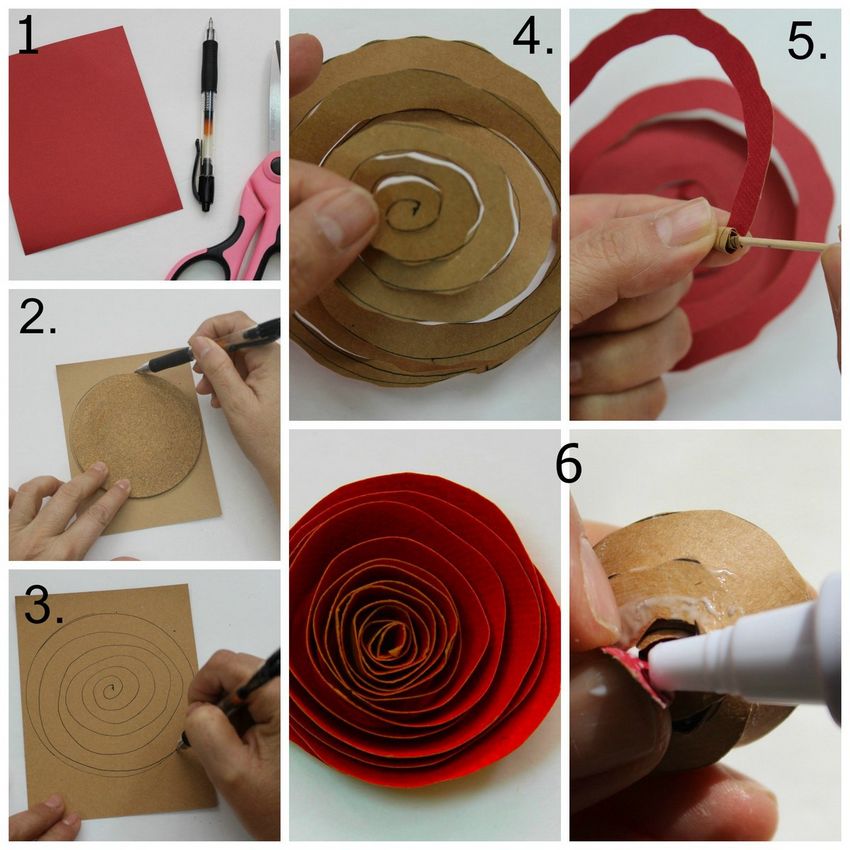
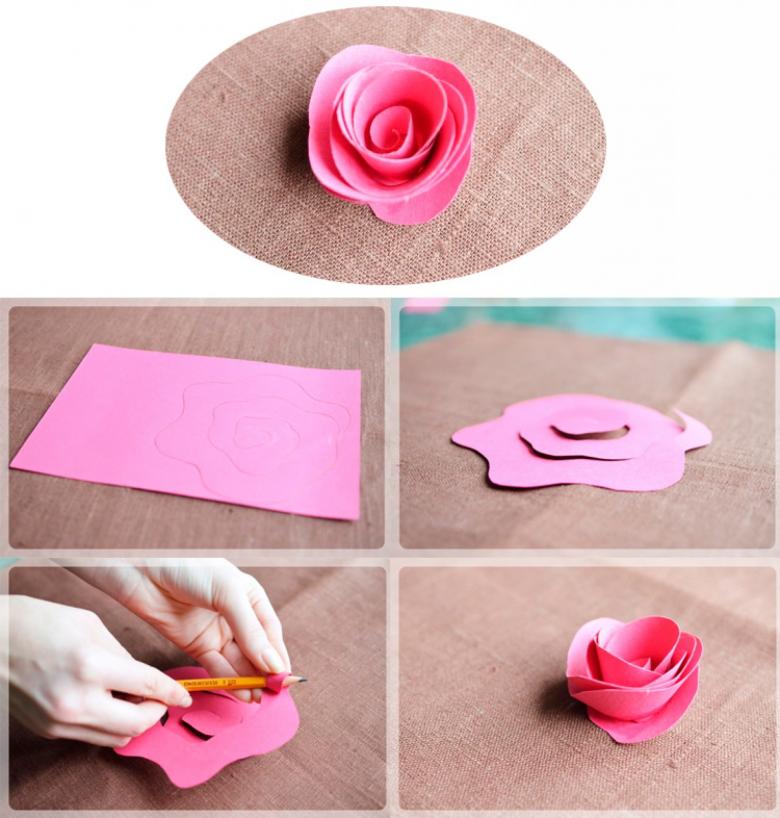
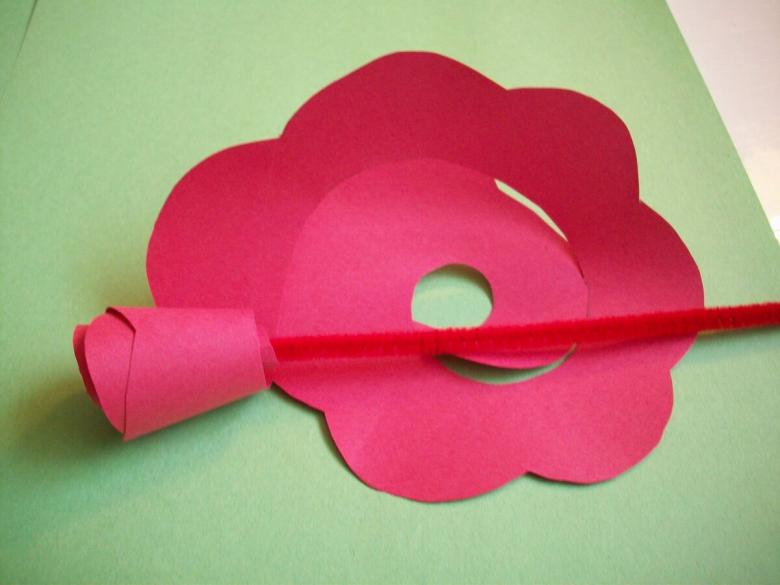
The simplest version
A spiral is drawn on a square sheet of paper, and you should not strive to depict perfect lines - the more diverse they are, the more original the flower will be. Then:
- On the applied contour, a blank is cut out;
- The strip is rolled up, and a little glue is added to make it more dense;
- At the base are added a twig and a few leaves of green paper.
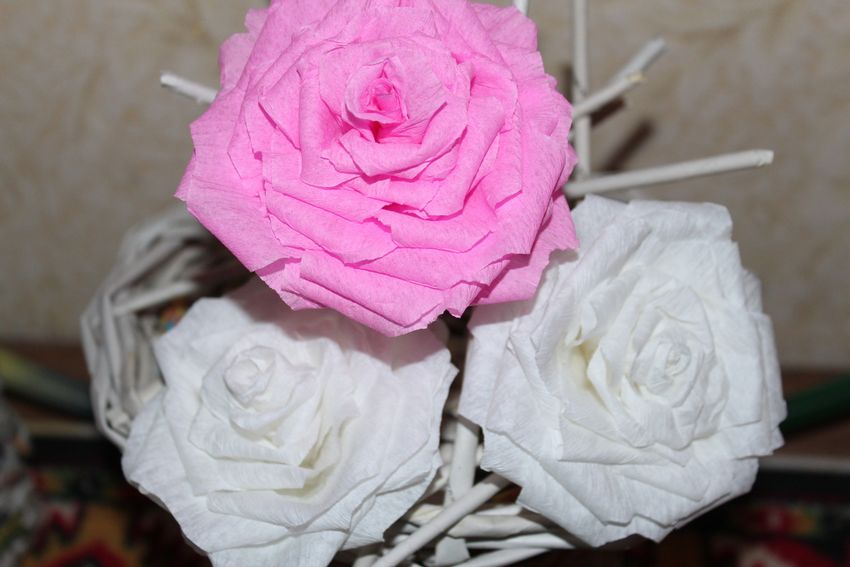
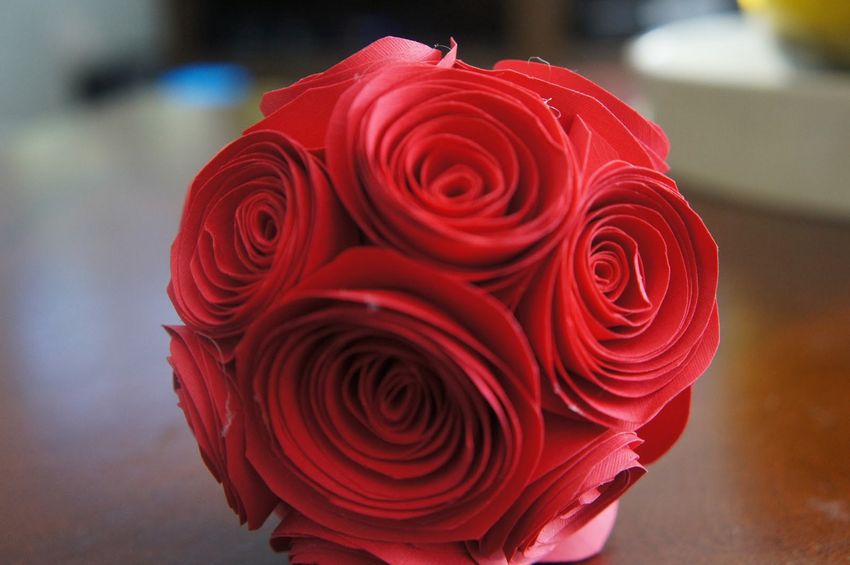
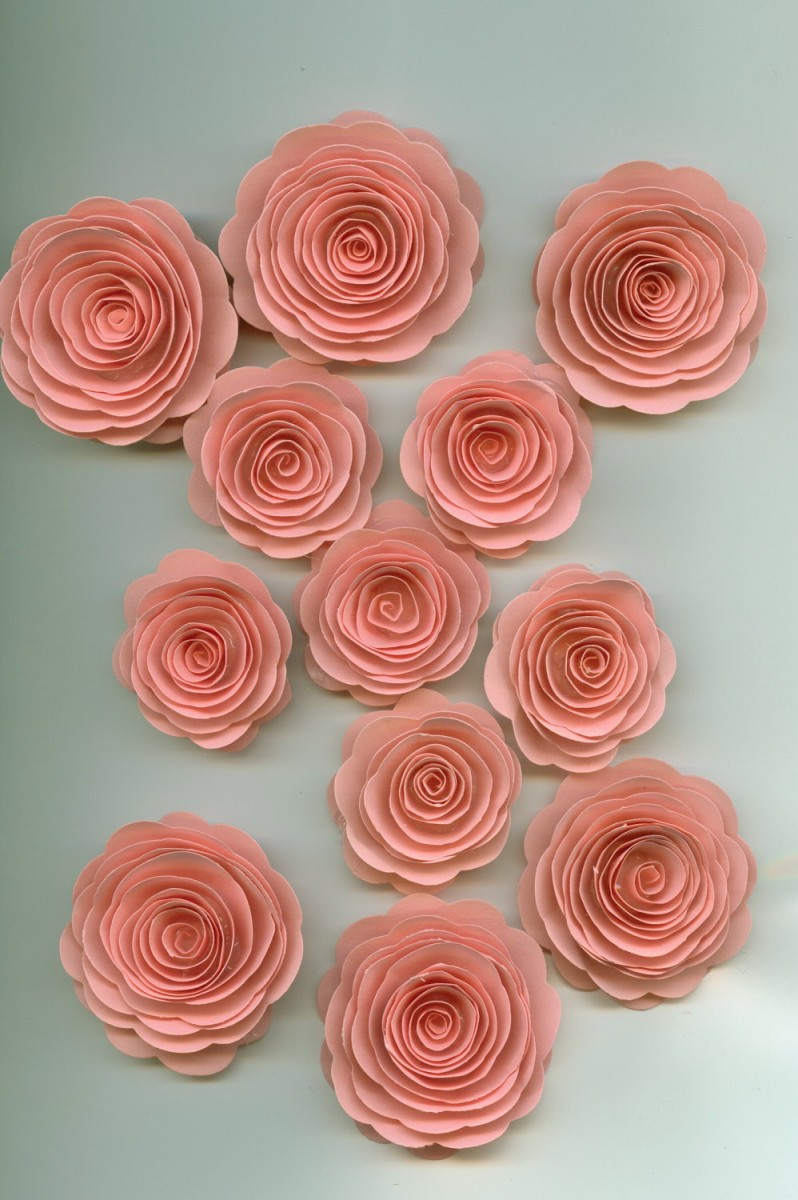
Rose ready. By making in a similar way several flowers of different sizes, you can decorate a luxurious bouquet.
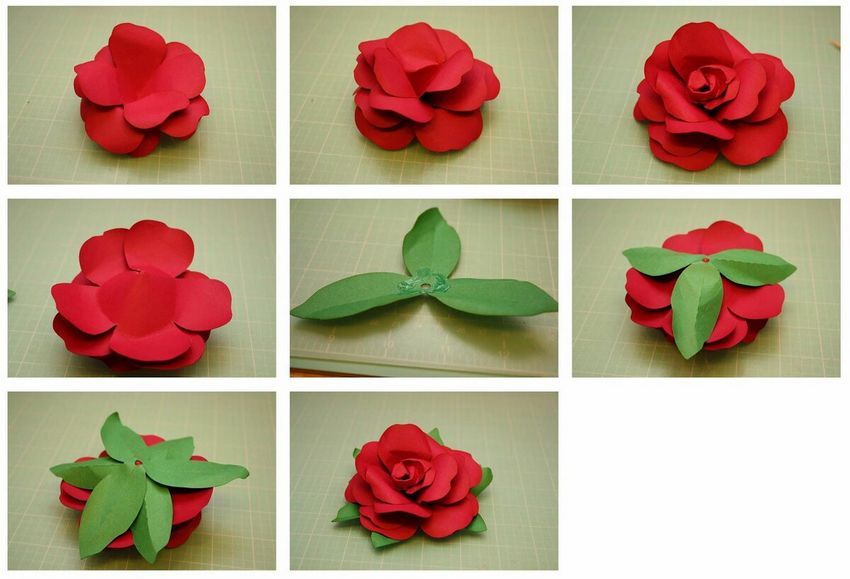
The basis is plain paper
Before starting to work on the handicraft, you will need to prepare the following uncomplicated items:
- a pencil;
- glue;
- wire;
- piece of paper;
- paper painted on both sides in the traditional color of scarlet for the plant.

Making
Consider in detail how to make a rose out of paper with your own hands. The entire manufacturing process will take six steps.
- On a white sheet of paper draw the outline of the plant. Be sure to use wavy lines when drawing the pattern.
- Start cutting out the pattern from the center so that you end up with a kind of spring.
- The resulting blank is transferred to the paper of the desired color.
- Cut out the template from colored paper.
- Take a piece of wire, drop glue and wrap the cut out spiral, thus forming a rosebud.
- Check how firmly the bud is glued to the wire and, if necessary, reinforce it further.
Making a few artificial flowers in a similar way, you get a bouquet of magnificent roses.
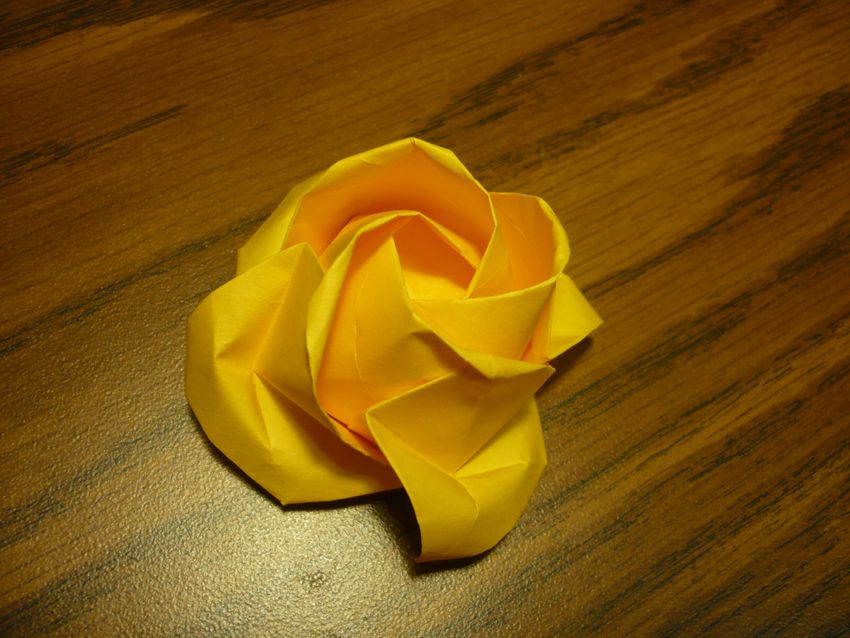
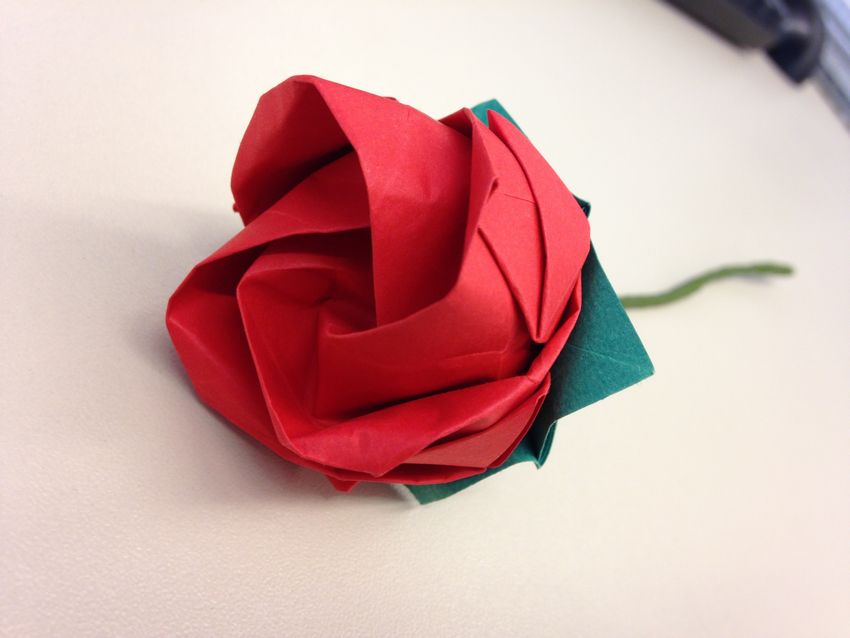
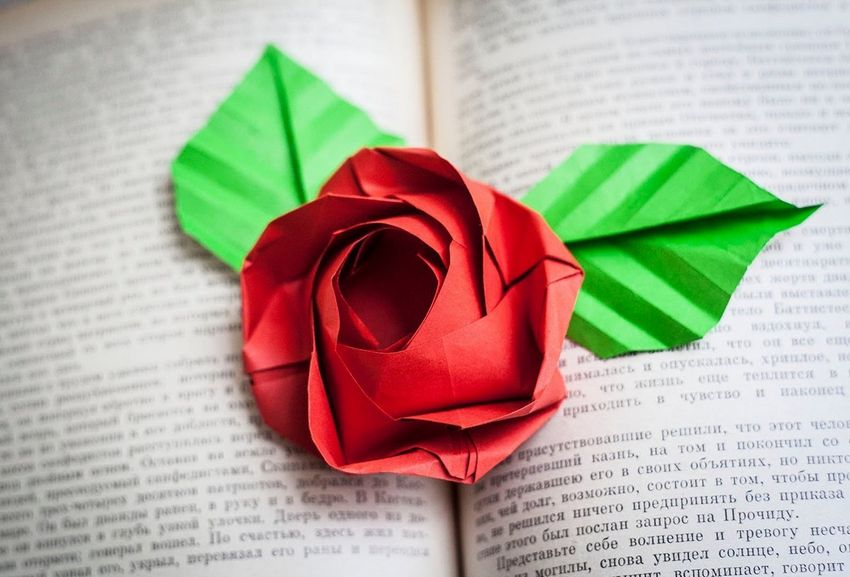
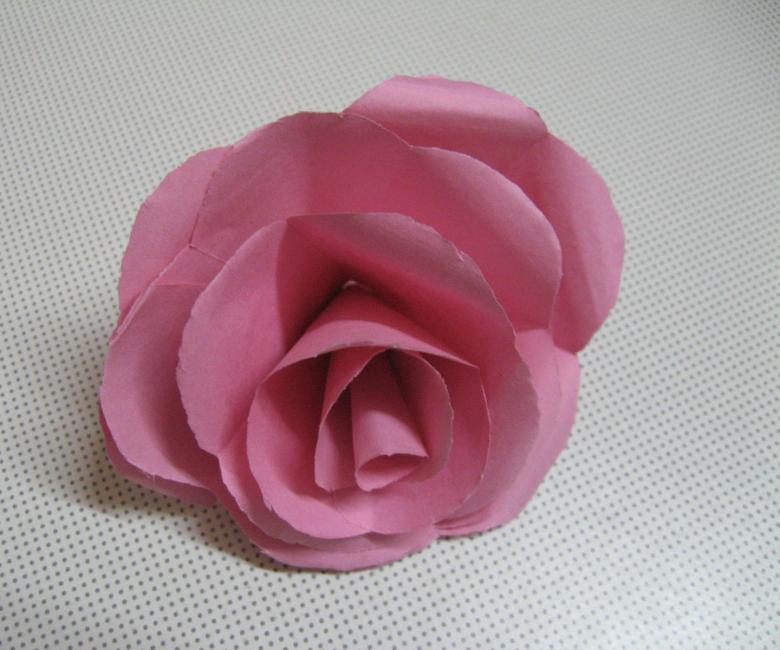
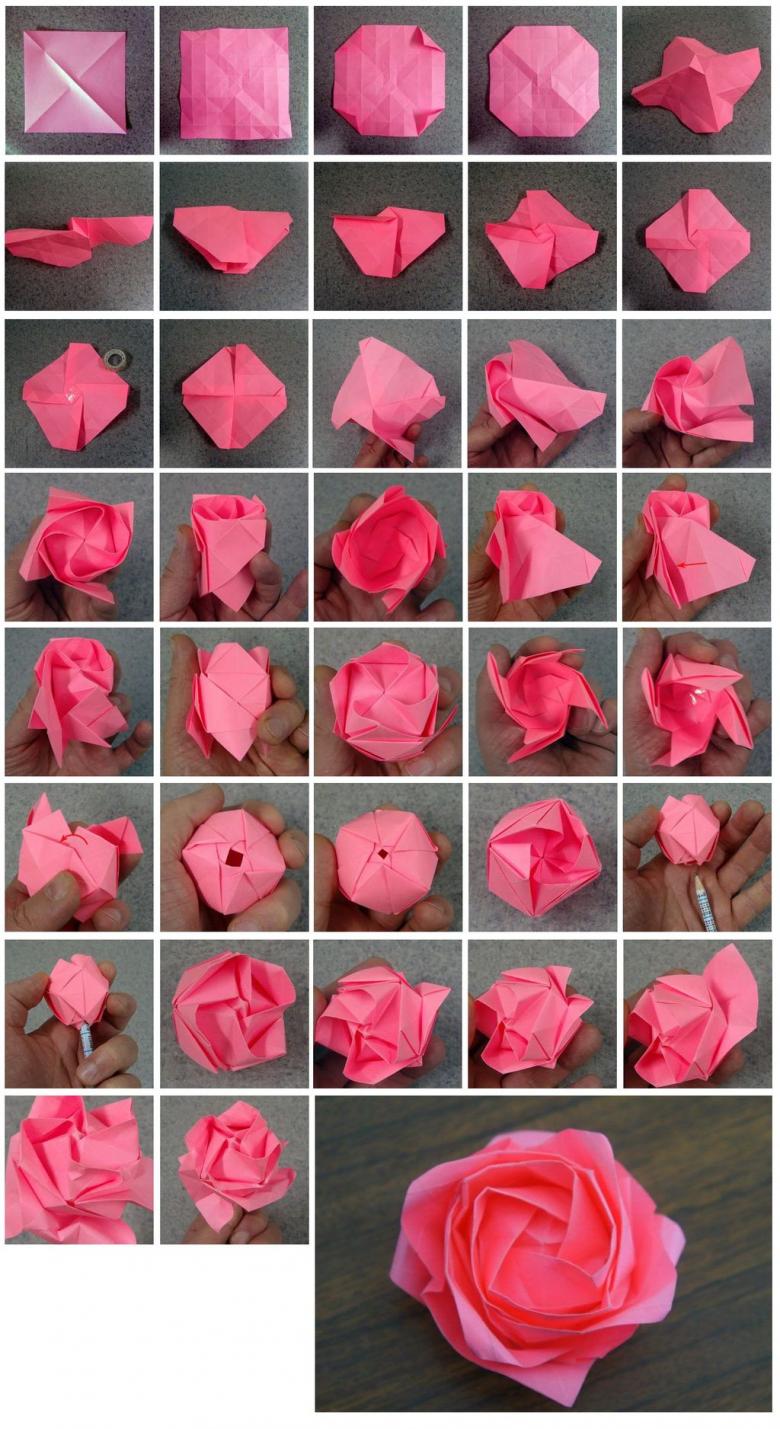
Origami
This is another option for decorating a flower out of a simple material. To make the handicraft you will need traditional for the Japanese technique materials:
- scissors;
- pencil;
- two-color paper.

The work process is as follows:
- The sheet is folded on the diagonal, cut off the extra strip to get a square workpiece.
- The template is folded again, until the second diagonal is shown.
- Bend the square, forming a line similar to the lines of snowflakes.
- The upper right side of the workpiece is shifted to the left, and the opposite bottom - to the right side and get a triangle.
- The tops of the resulting geometric shape is summed in the middle, and the place of folds lead a finger.
- Unfold the workpiece and bend the top corner back.
- Straighten the rosebud and bend the bent corner inward.
- Again "collect" the corner and fix the folds.
- Lift the side corners to the top of the workpiece.
- Turn over, and then bend to the center of all the sides. At the bottom of the workpiece is formed a small hole.
- Need to blow into the hole so that the bud filled with air and straightened.
- Curl the pencil petals of the rose.
- Cut at the beginning of a paper strip is twisted into a stem and inserted into the hole.
Rose made in the Japanese technique is ready!

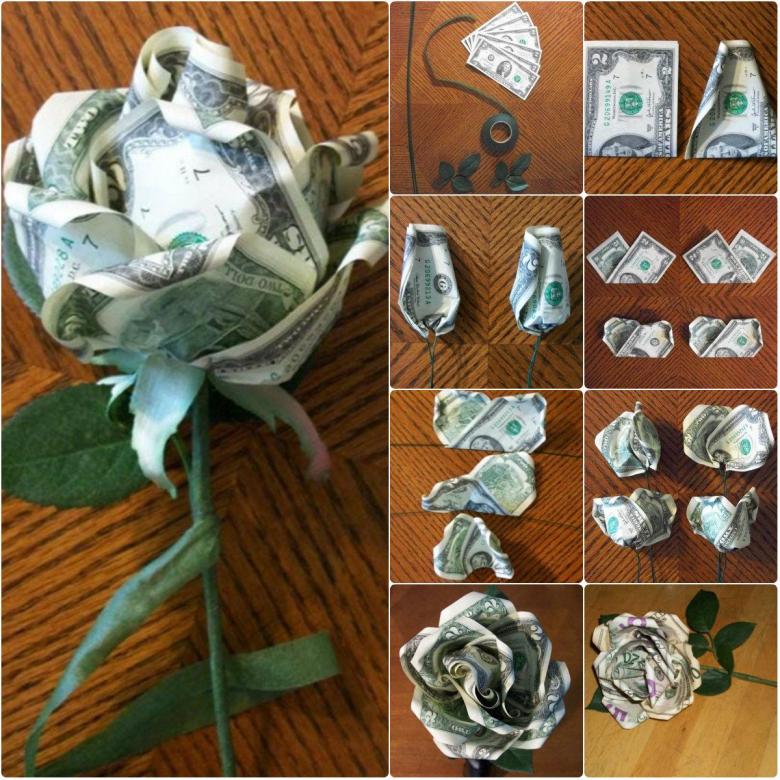
The basis - money
In addition to small denomination bills, you need only wire to decorate the rose. Then:
- The "money" is bent in the center, and then another in two;
- The workpiece in the middle is tightened with a wire;
- Similarly, four blanks are made;
- connect the individual parts to form a flower;
- Connect all the wires of individual buds and make a stalk of the plant.
"Money" rose is ready. Having enough "unnecessary" bills you can decorate a whole bouquet of "valuable" flowers!
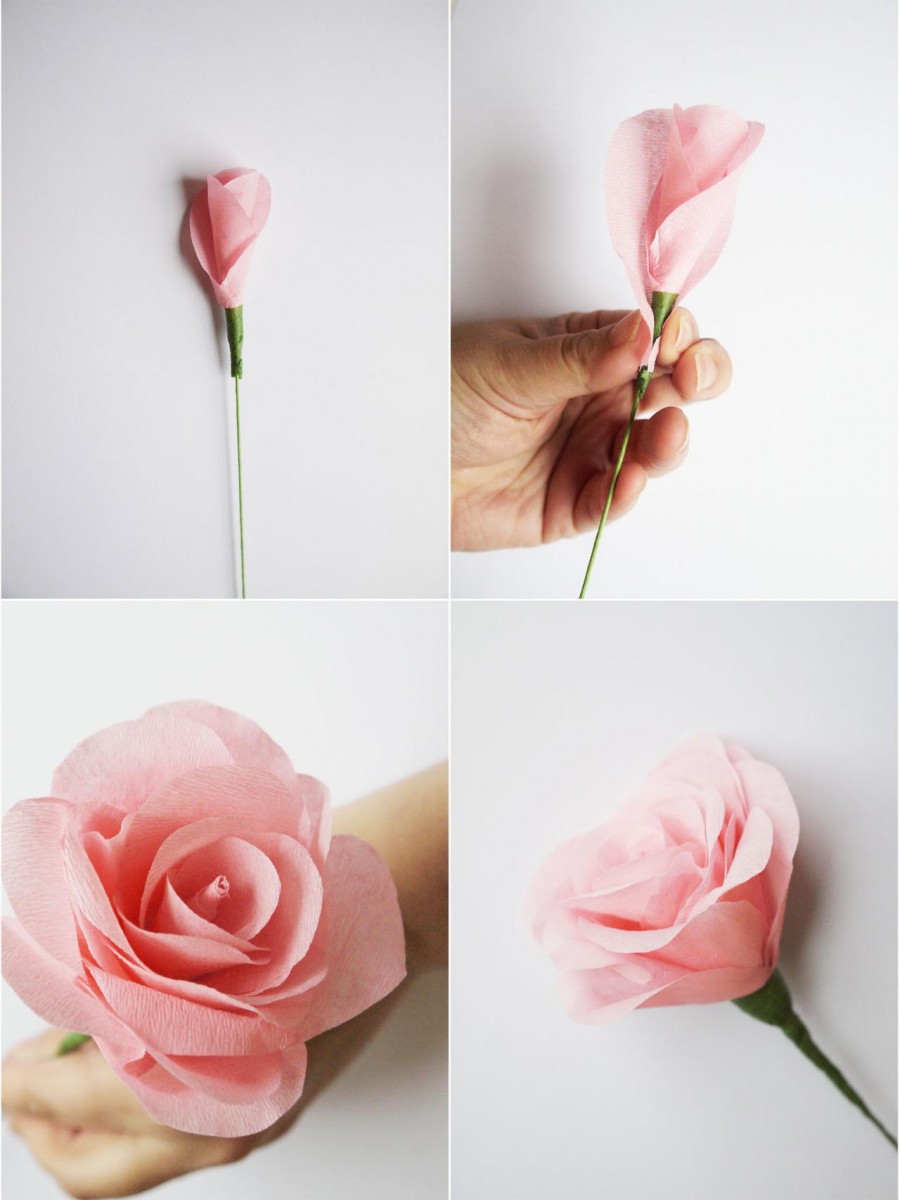
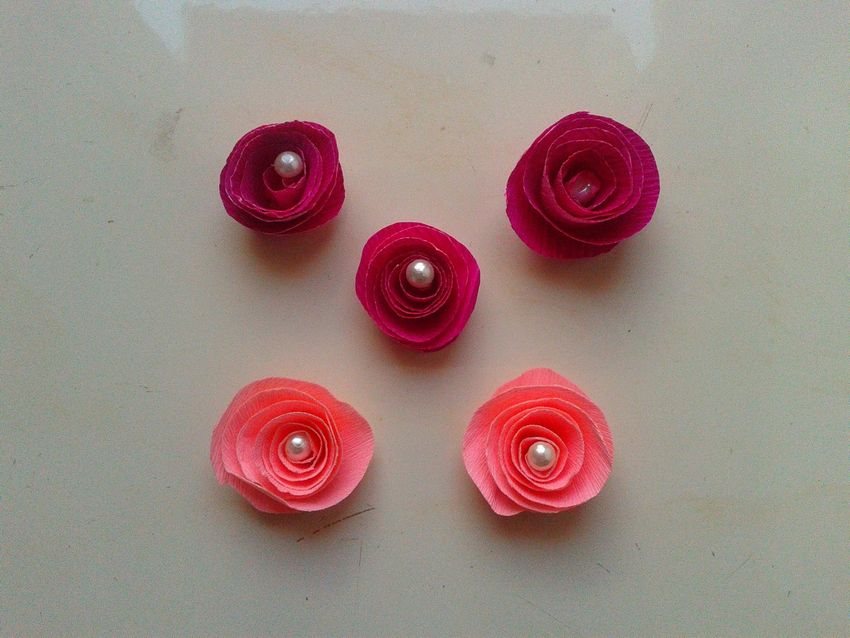
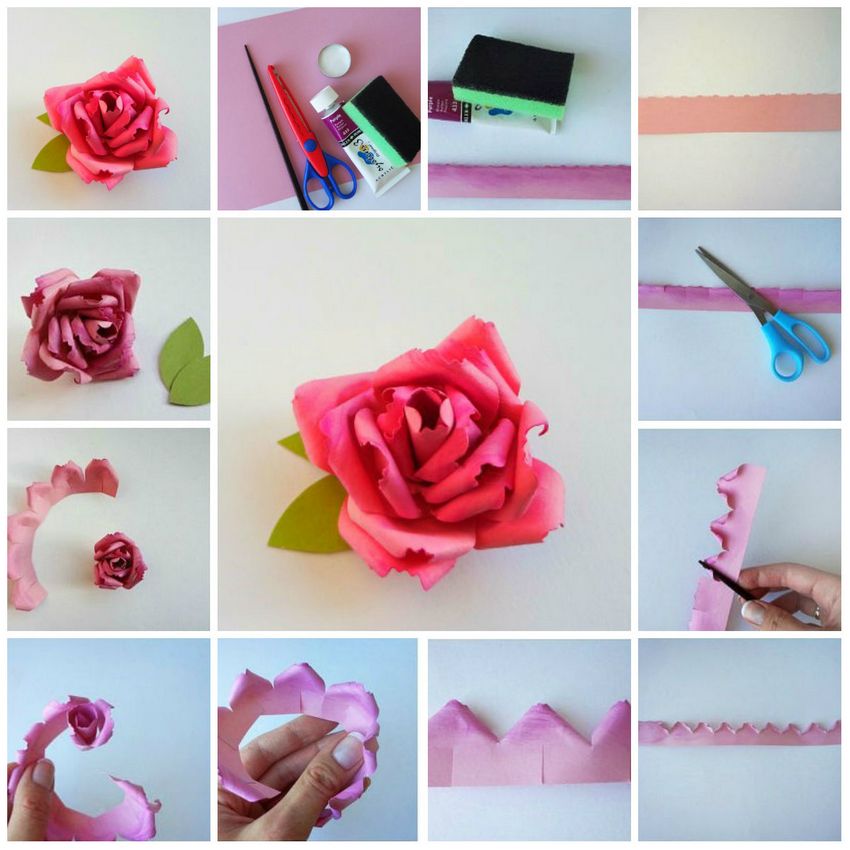
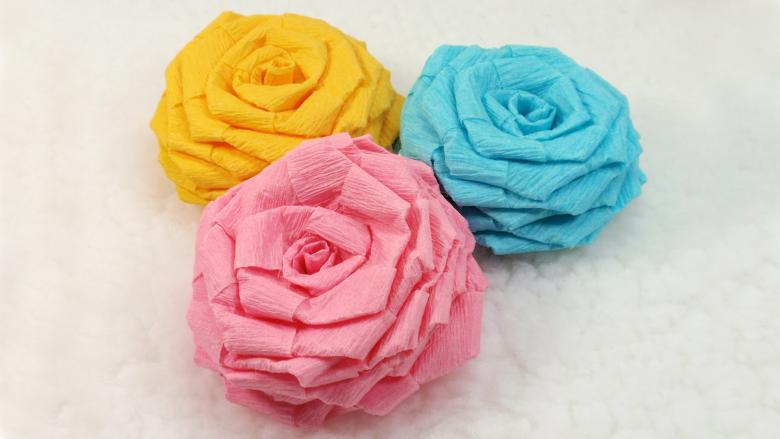
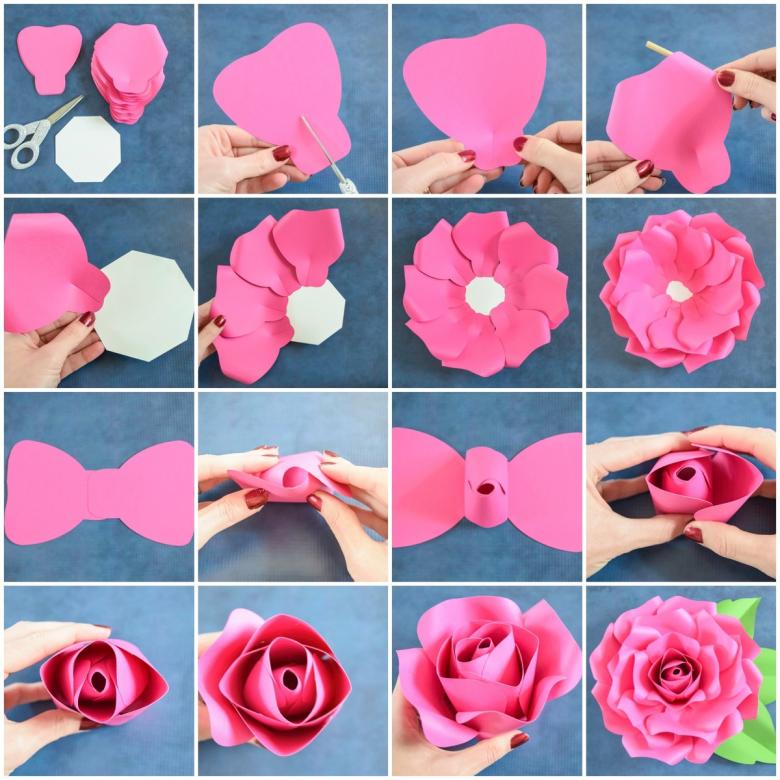
Elegant flower
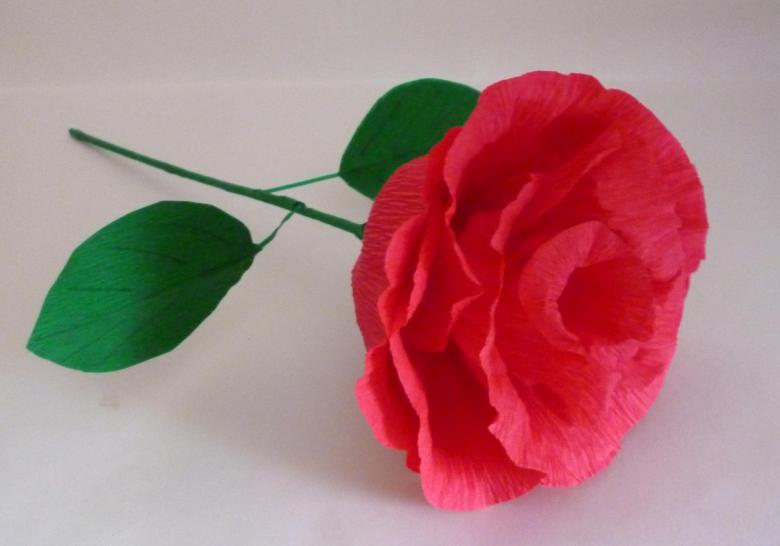
We offer a variant of making a small rose from corrugated paper.
And for this work you need the most minimal set of tools and materials:
- green corrugated color for the stem and leaves, and yellow - for the tea rose;
- scissors and glue;
- pencil.
The process of making will be different from the previous one.
Stages of work
- Step #1. A sheet of yellow paper is folded in quarters and then diagonally, and we get a triangle.
- Stage #2. Blanks are cut and unfolded in such a way as to result in eight petals.
- Step #3. Four templates are made out in the same way.
- Step #4. Begin to change the number of petals in the blank. In the first one we remove one piece, the second - two, the third - three, and finally the fourth - four.
- Step #5. Glue the blanks so that the outer leaves overlap, and we got the buds with three, four, five and six petals.
- Step #6. Leaflets are cut from a green base, arranged in an accordion and attached to the flower.
An elegant, stylish rose plant is ready.

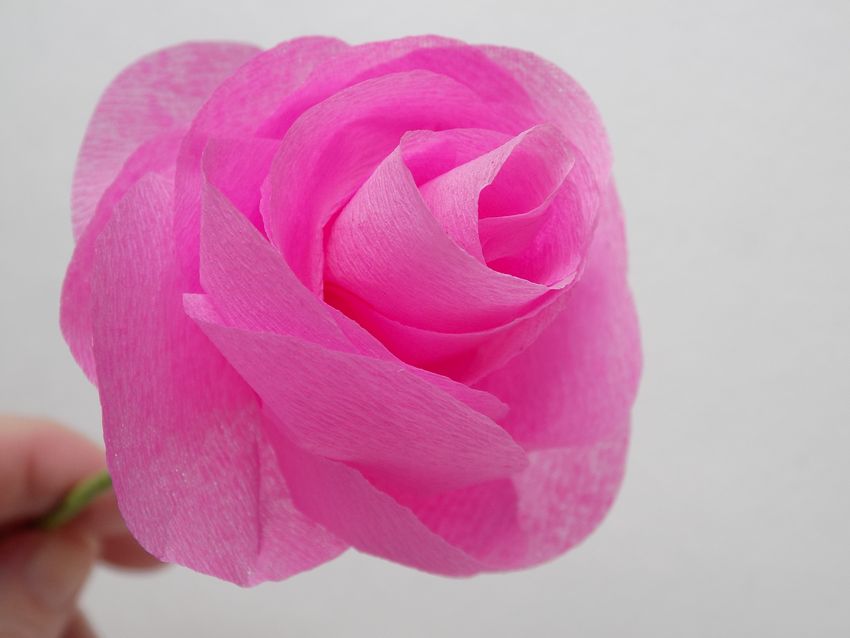
Another option
In addition to green and pink corrugated paper, you need to prepare a ribbon, wire, a thin stick for the stem and a cutting tool.
Making consists of five simple steps.
- Step #1. Five petals in the form of droplets and 15 in the form of hearts are cut from the pink base.
- Step #2. The petals should be stretched.
- Step #3. The base for the stem should be wrapped with duct tape.
- Step #4. The formation of the bud is done as follows - first attach the five droplets, and then all the prepared hearts.
- Step #5. Leaves are cut out of green paper and attached to the stem of the flower.
Another version of the flower, made from a corrugated base is ready.
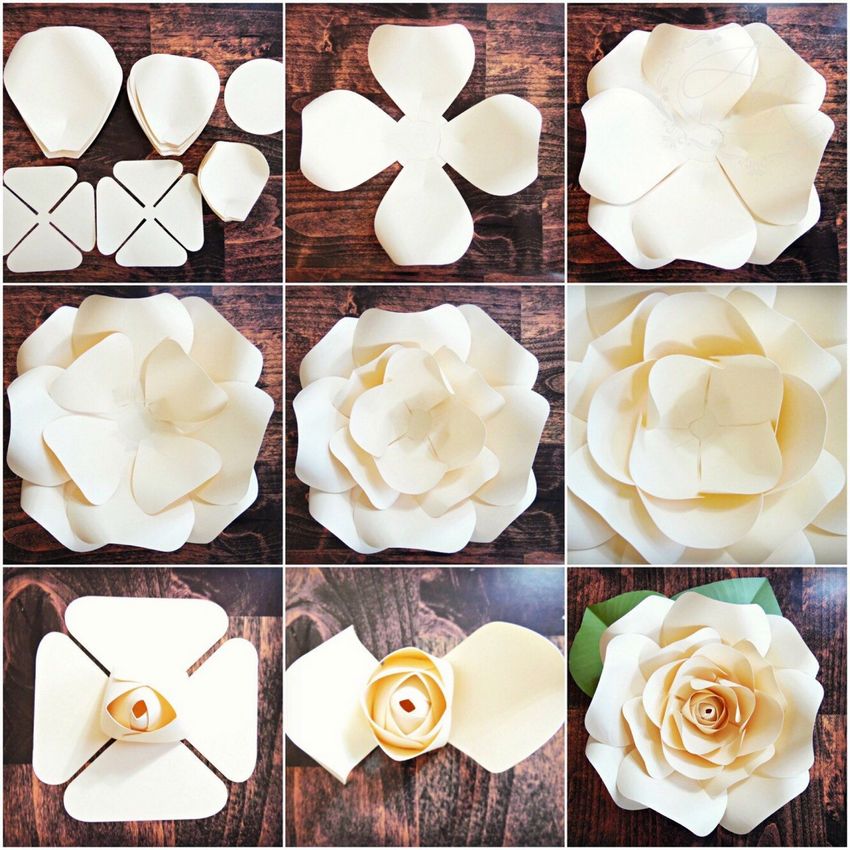
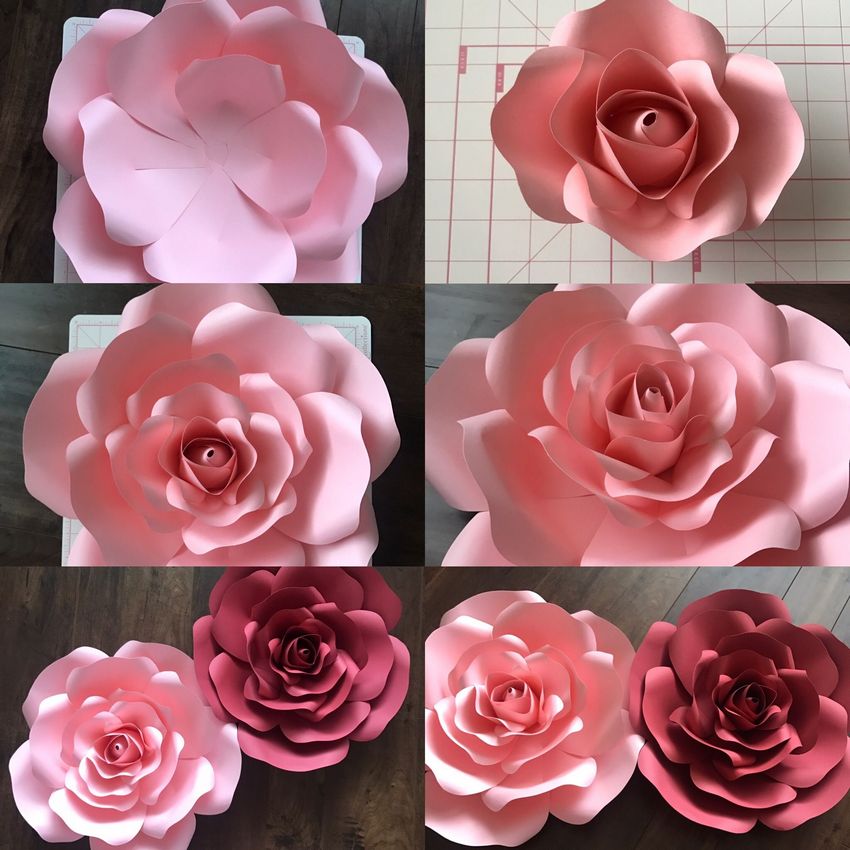
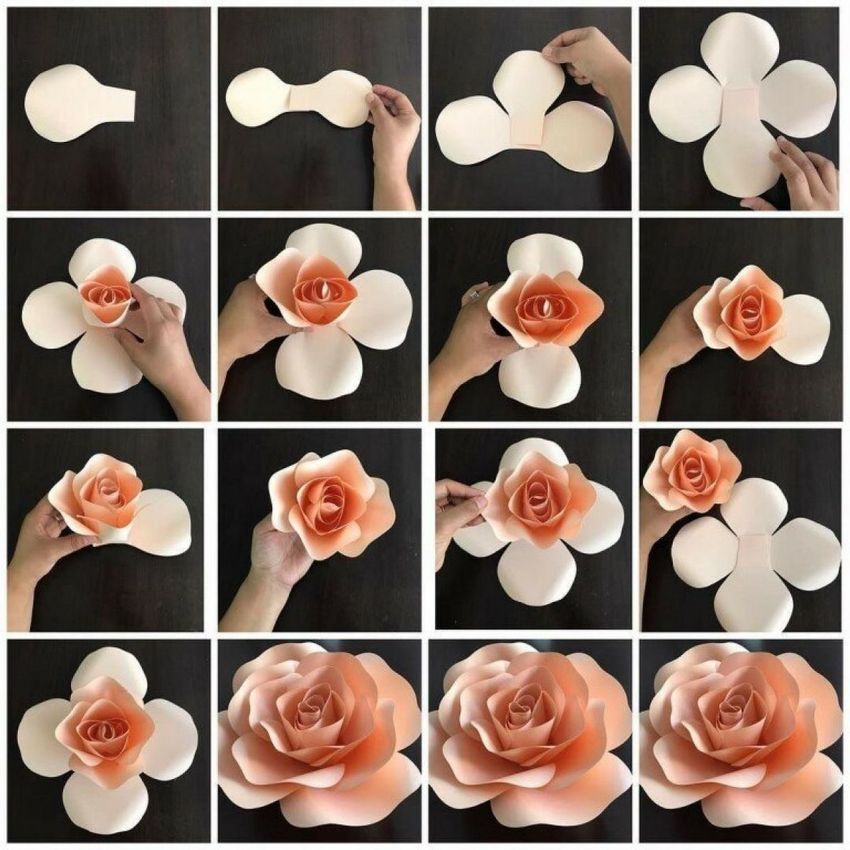
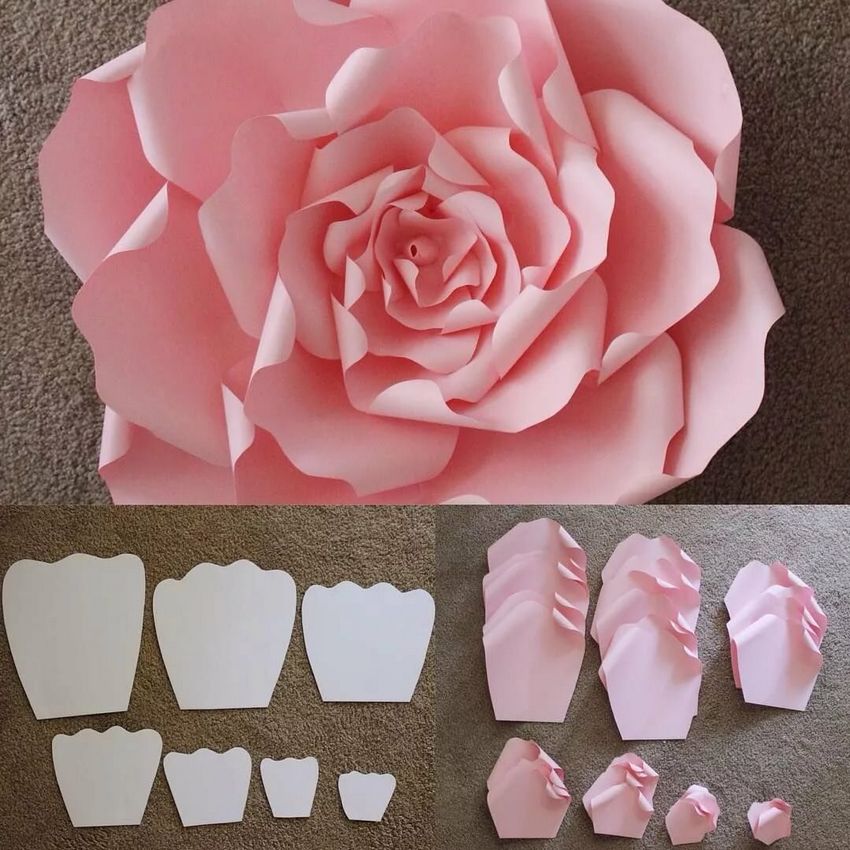
Giant roses
To work on the design of flowers of large size, the same materials and tools are needed as in the manufacture of roses of ordinary size. The choice of base color depends on the preferences of the master engaged in the craft.

What to do
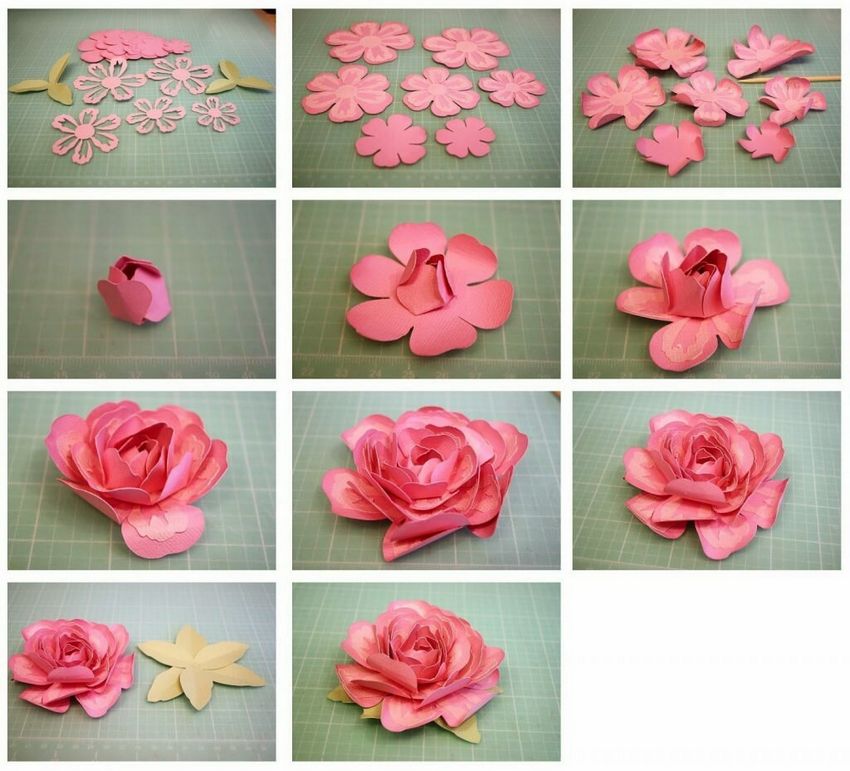
Making a giant rose begins with the creation of 18 blanks - six each of large, medium and small size. The following steps:
- At the base of the cut out blanks it is necessary to make as many incisions as possible.
- The ends of the petals are turned away from the worker.
- Six large blanks are glued together.
- Glued templates of medium and then small size.
- A piece of cardboard is glued to the bottom of the flower.
- Slightly crease the paper, and make cuts on the side of the fold.
- Cut paper is twisted into a ring (such a circle that will fit in the middle of the plant) and unfold in different directions notched parts of the leaf.
- Glue the resulting blank in the center of the bud.
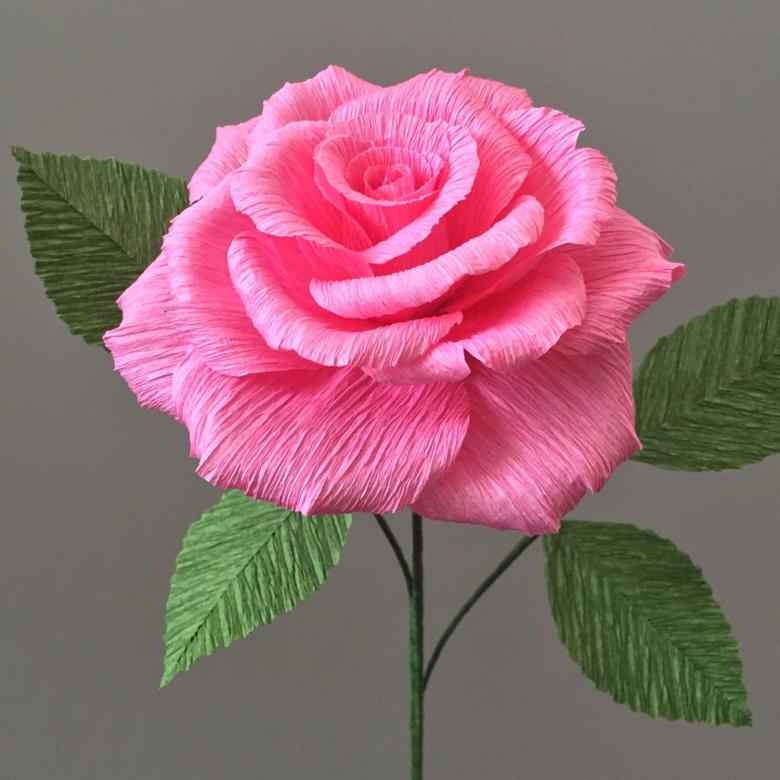
Giant flower ready. It can be placed in a large vase and decorate the composition of a free corner of the room.
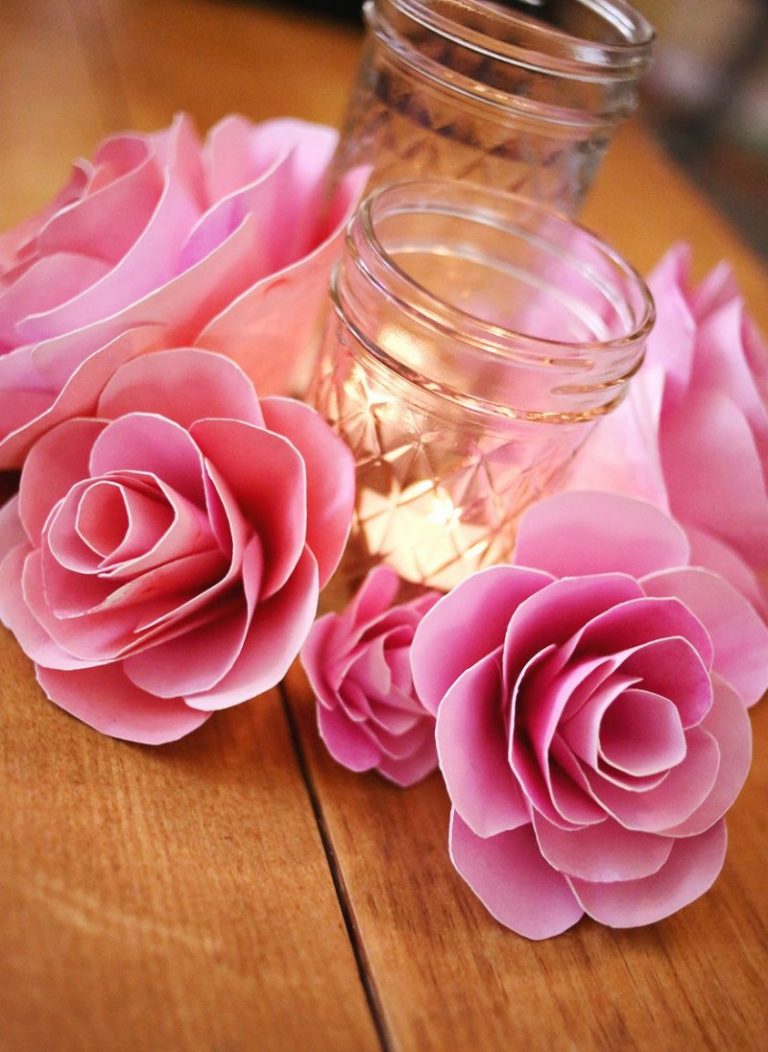
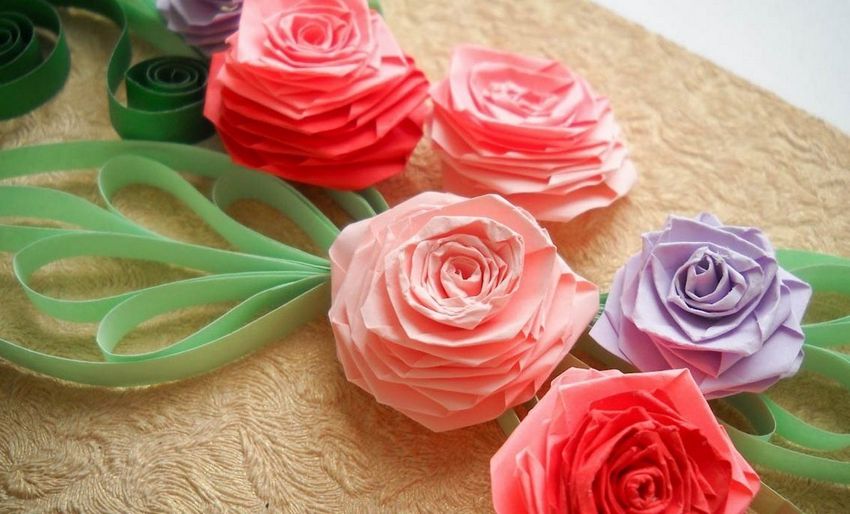
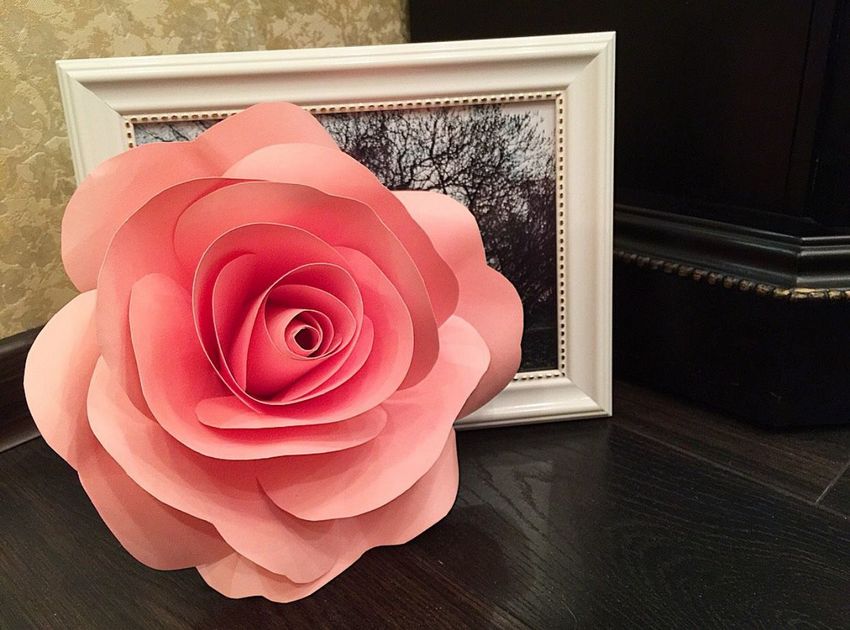
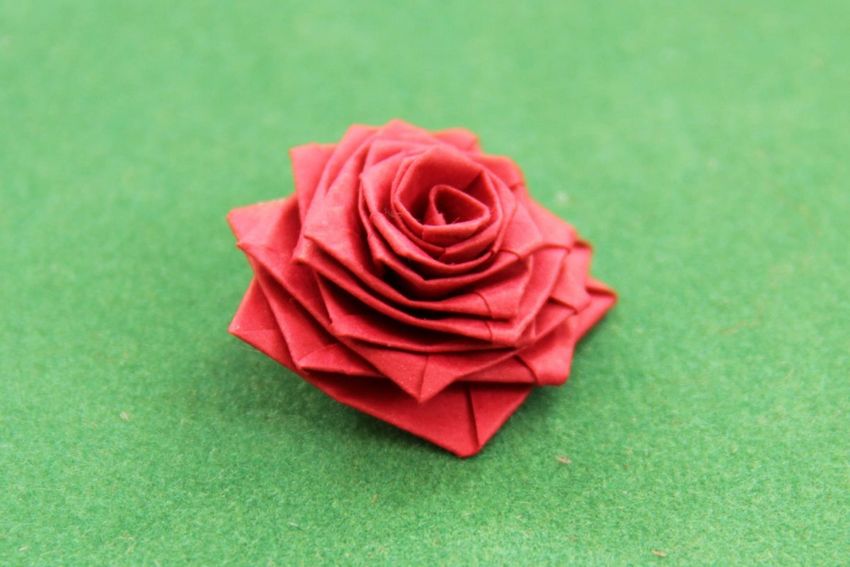
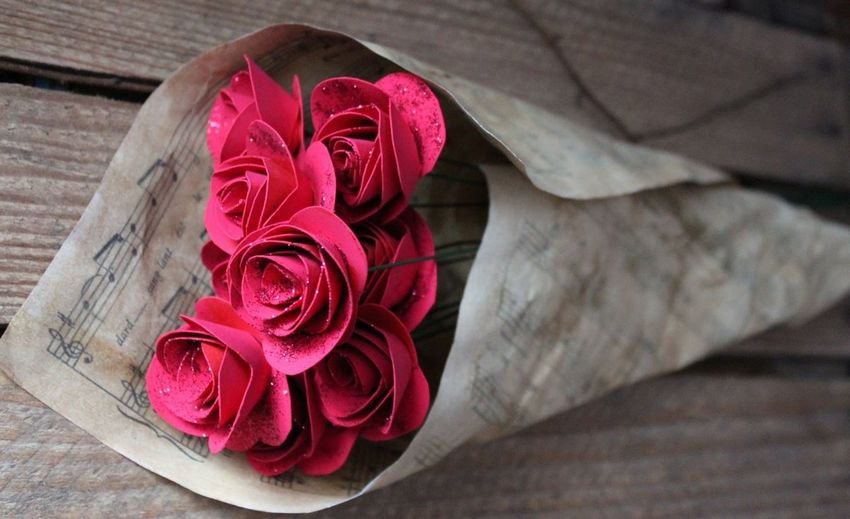
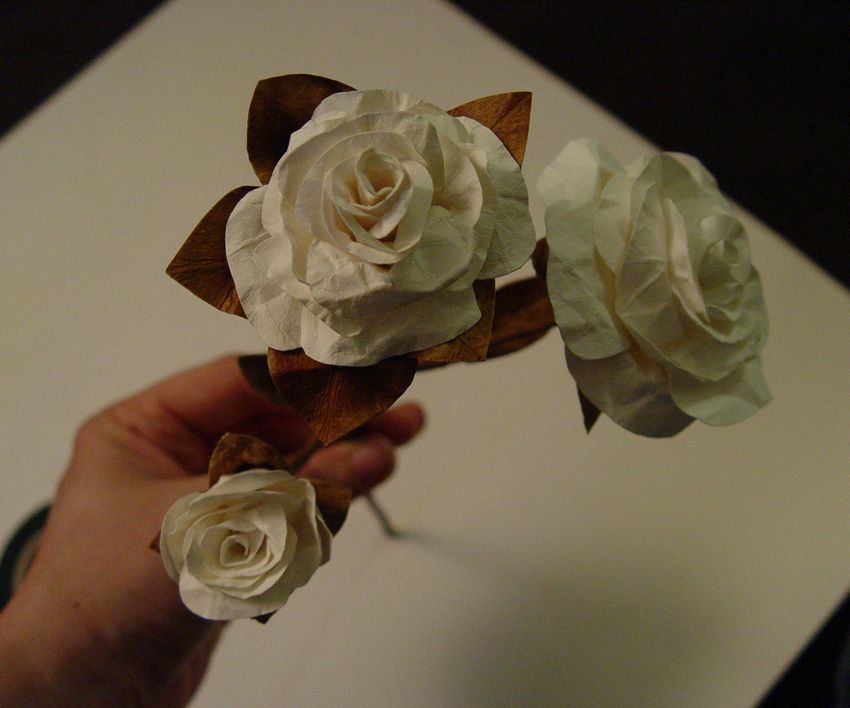
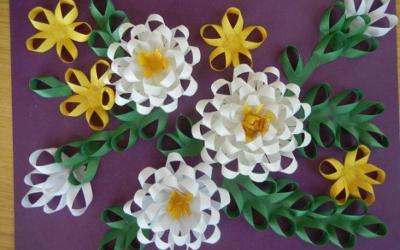
Photo ideas of homemade paper roses