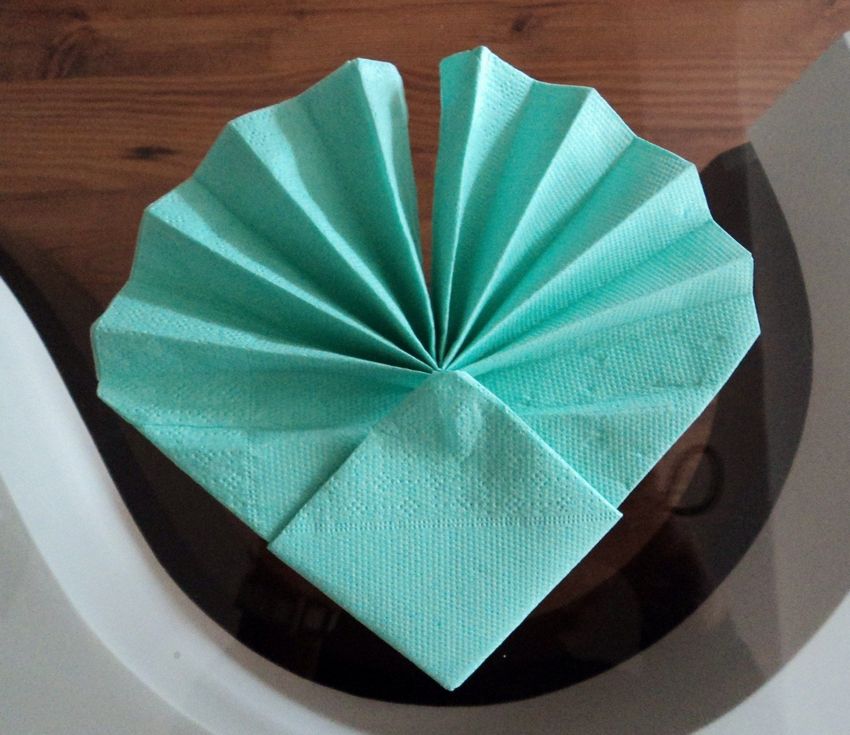
Origami with napkins: how to make napkin decorations for the feast (75 photos)
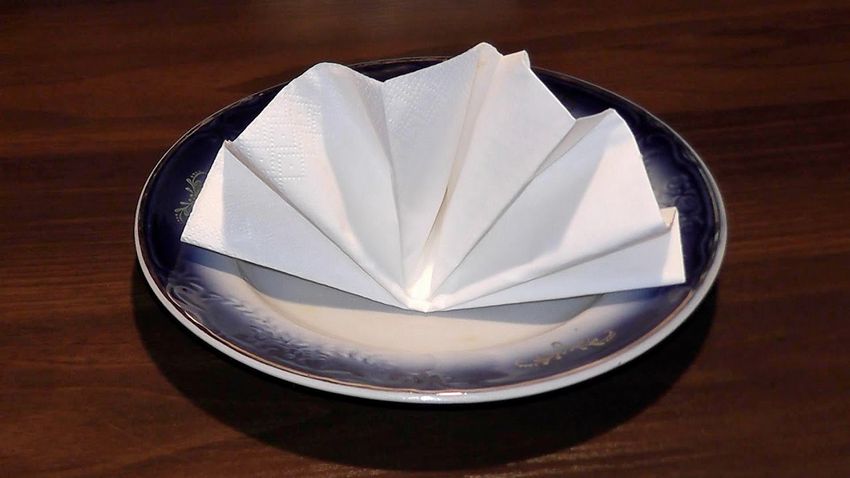
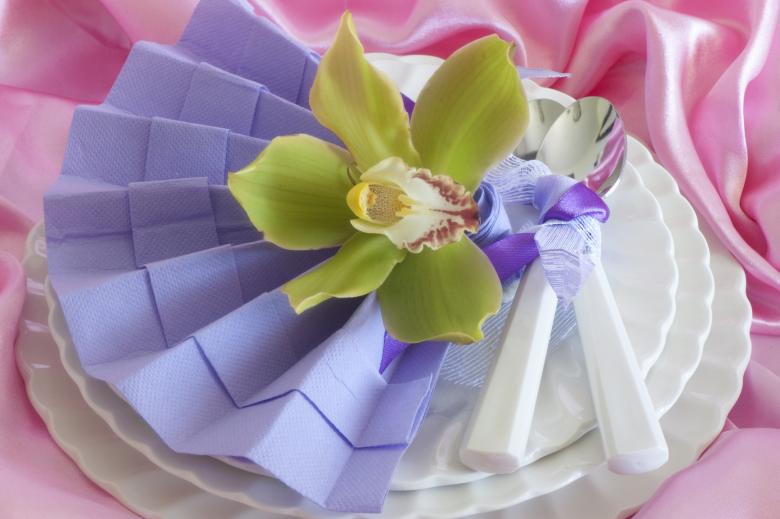
Table service - a whole science. It is important not only to feed the family or guests deliciously, but also to arrange and present all dishes and snacks in the most appetizing way. Such simple, at first sight things as napkins play not the least role in graceful table decoration.
What only original things do not make skilled hostesses from a simple hygiene product. These can be:
- lotuses;
- roses;
- lilies;
- Irises, etc.
Consider in detail how to make an elegant flower in the technique of origami from an ordinary napkin.
Schemes for Beginners
An undoubted advantage of the ancient Japanese art is that in the process of making the original thing you need only a sheet of paper, and the tool are the hands of the master. A beautiful composition of flowers will decorate a family dinner, a romantic dinner, a wedding or any other festive event.
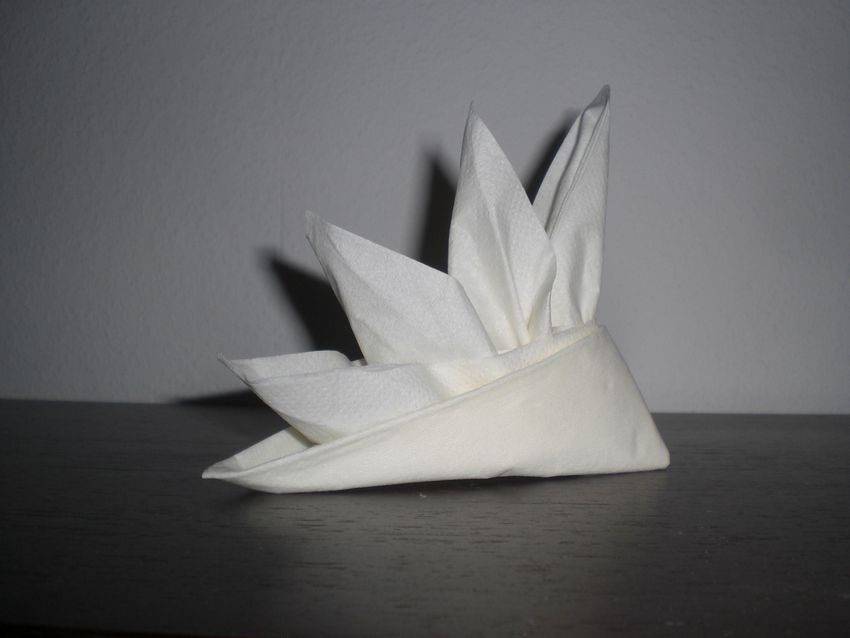
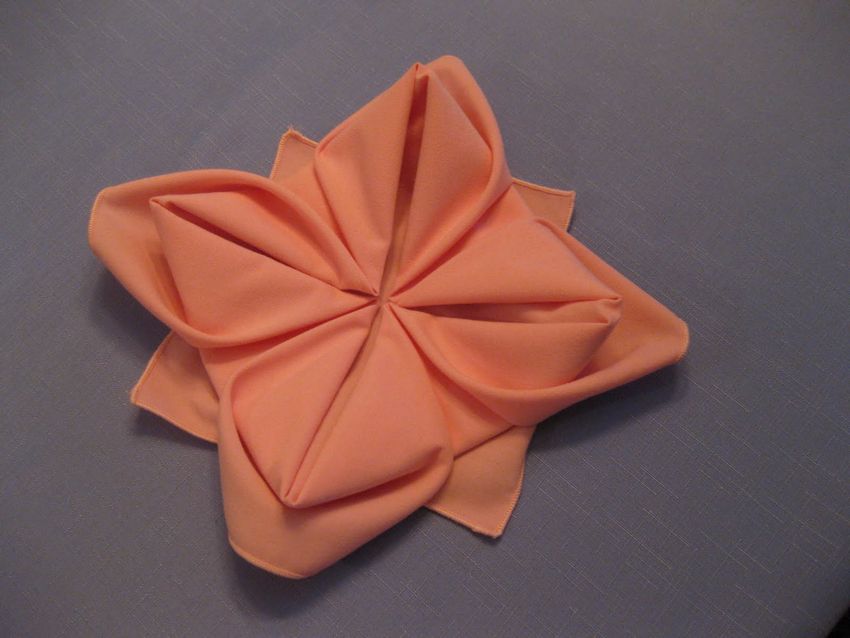
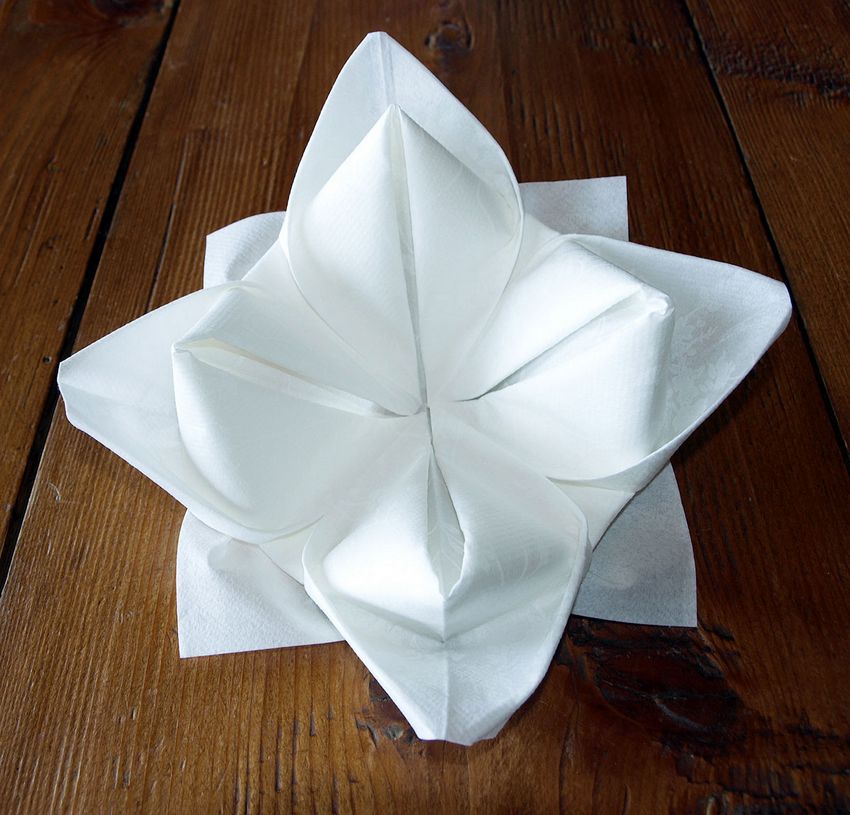
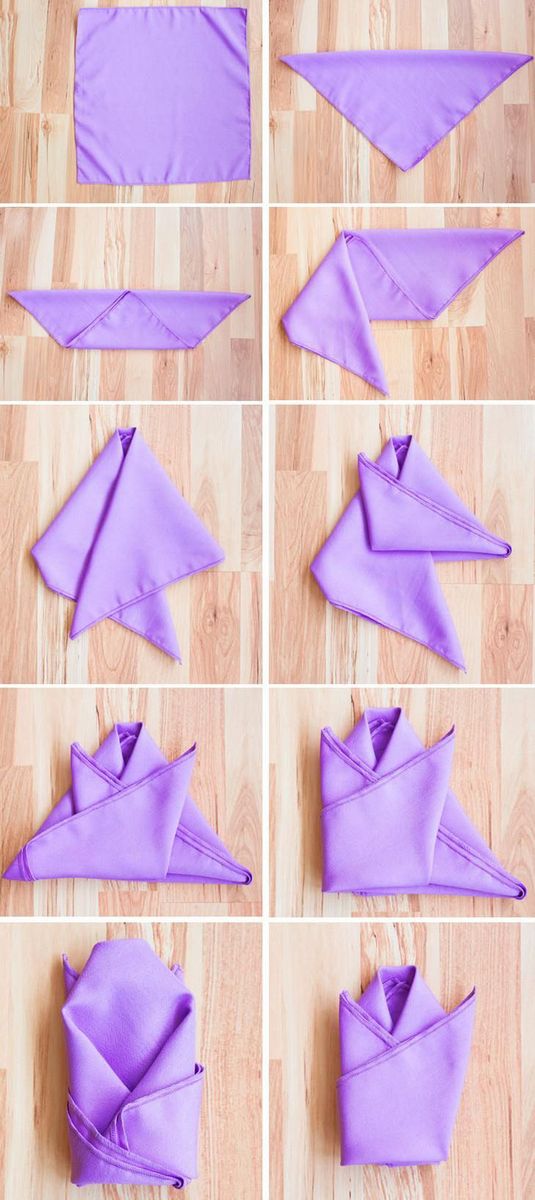
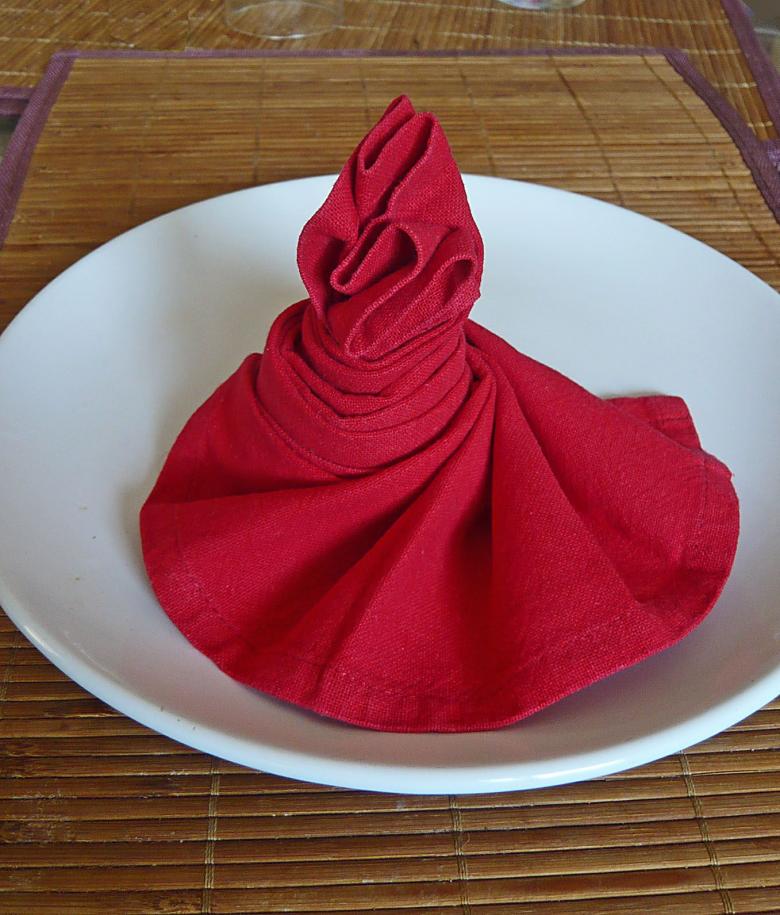
Lily
Making a delicate lily flower is the best way for beginners in origami from a napkin. Carefully acquainted with the scheme of making, you understand that no special difficulties in the work are not expected.
Working steps
To design a flower requires only the simplest of seven steps.
- Spread and smooth out the tissue to make the future product look as neat as possible, and send all the corners to the center.
- Check if any corner is "on top of the neighbor," and once again wrap them to the center, thus forming a square.
- Turn the workpiece, and all the fold lines are on the back side.
- We turn the corners in the center of the product.
- Pull up the bottom corners, doing it carefully so as not to damage the petals.
- Do the same with the remaining corners.
- Bend out the sharp end of the product, on the other side.
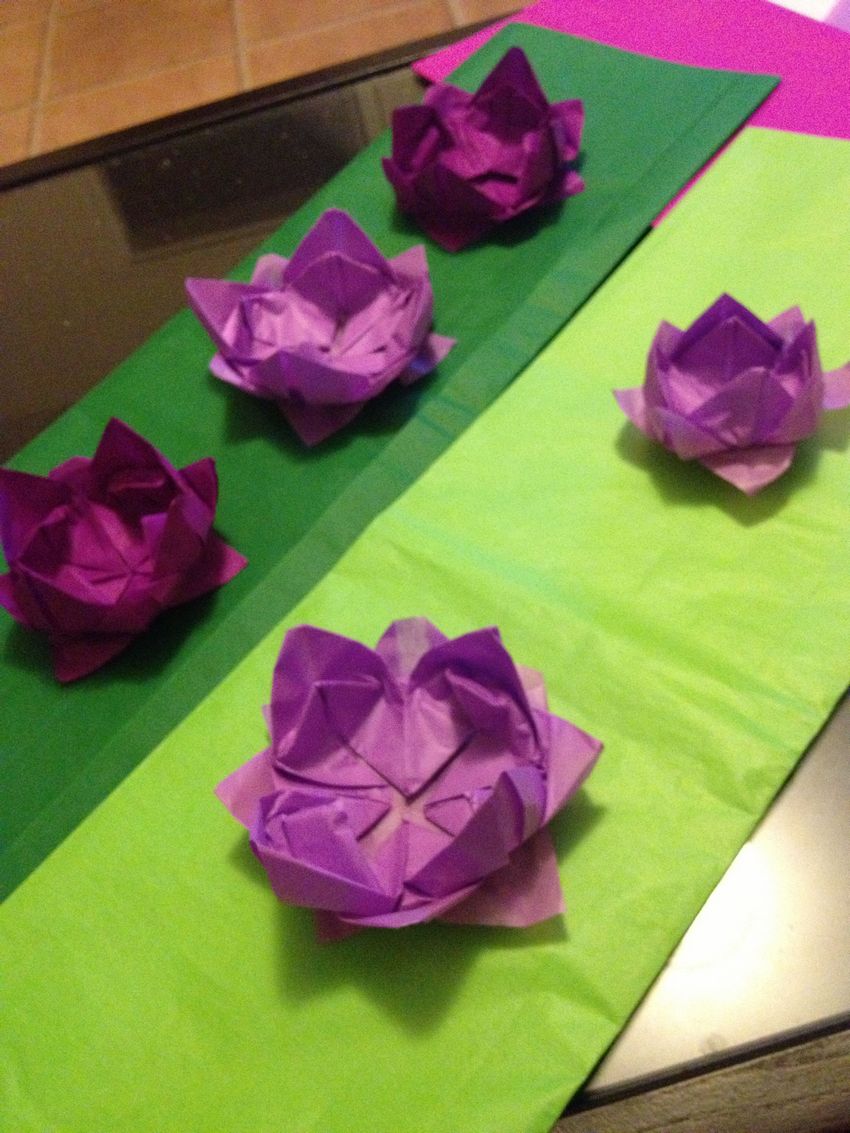
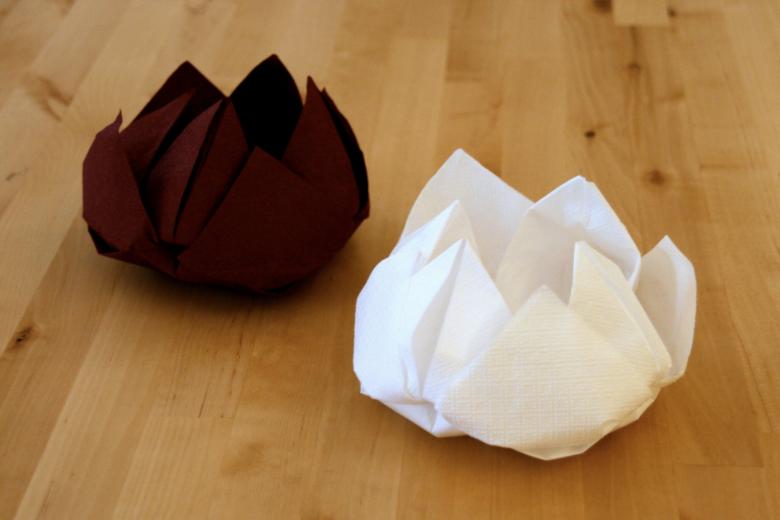
Lotus jug is ready. It can decorate the holiday feast.
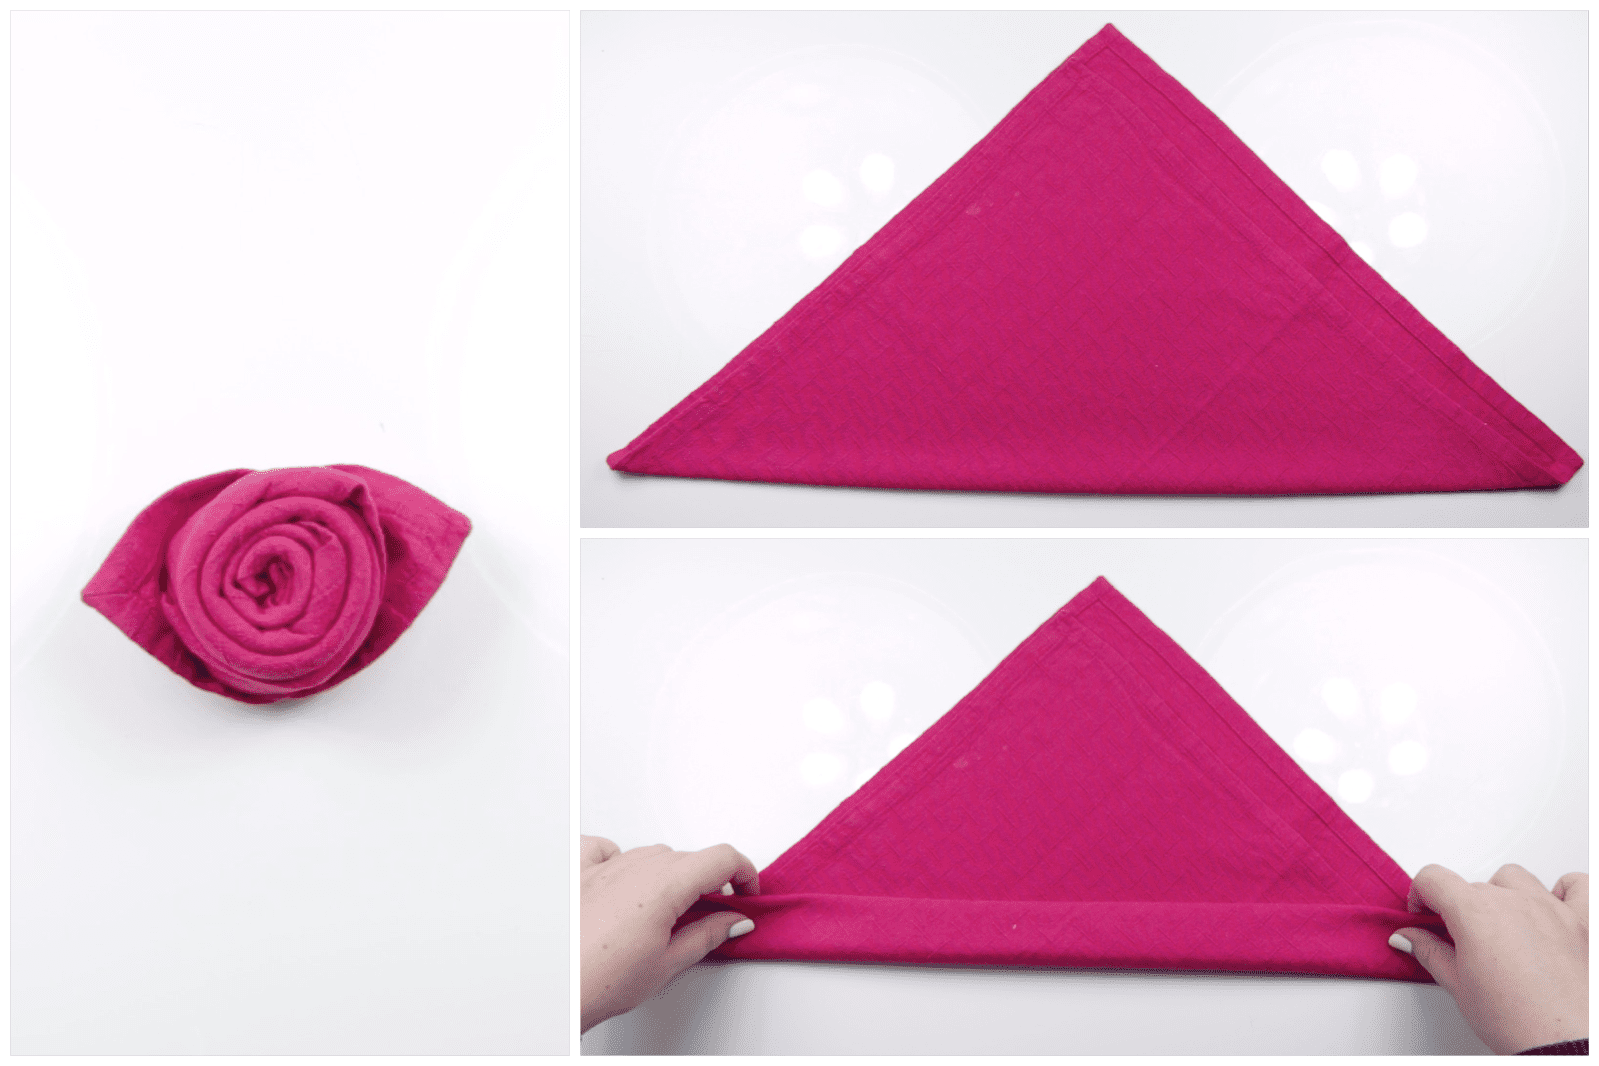
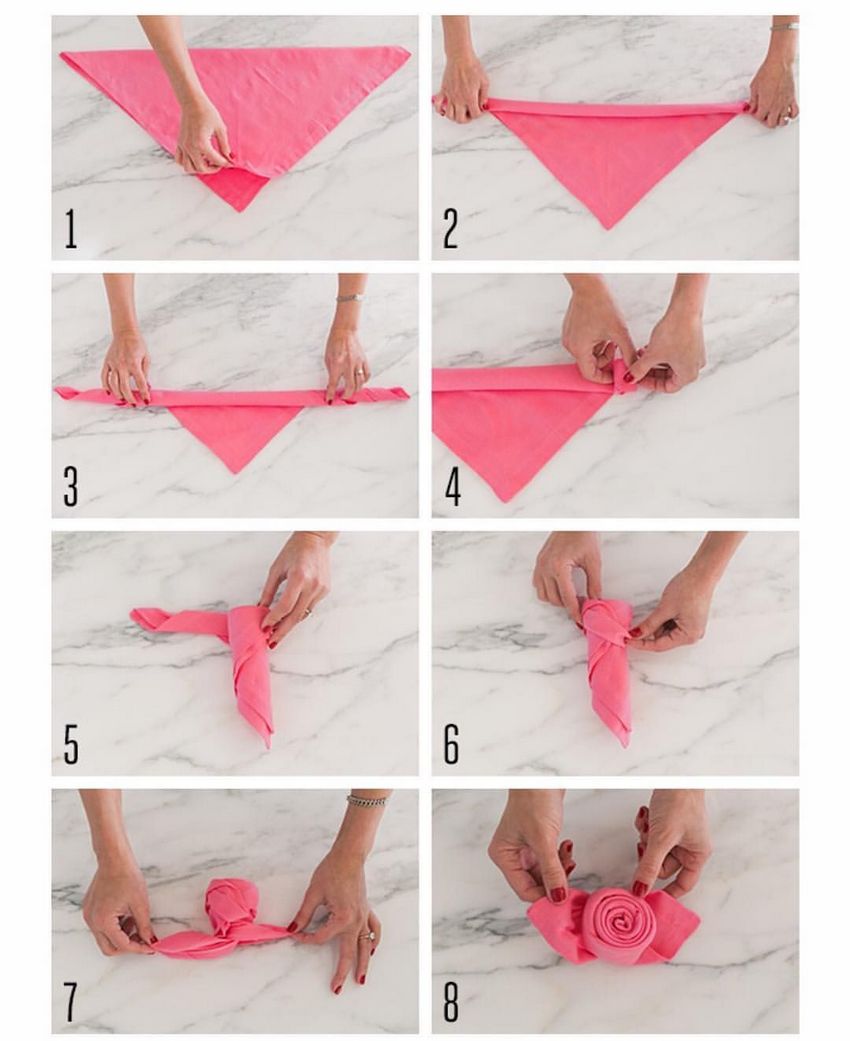
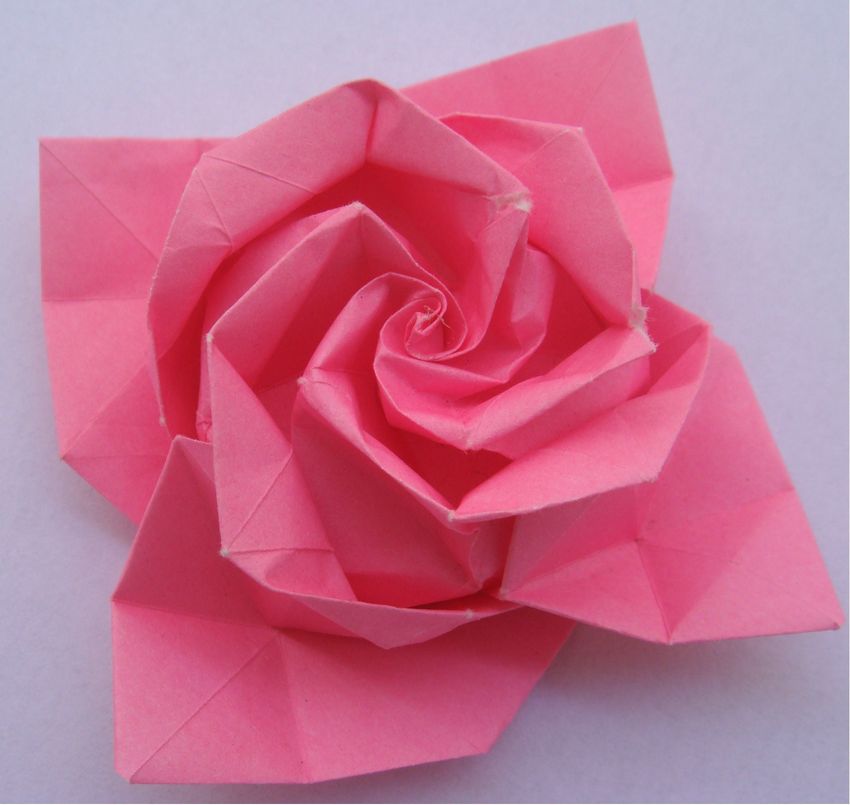
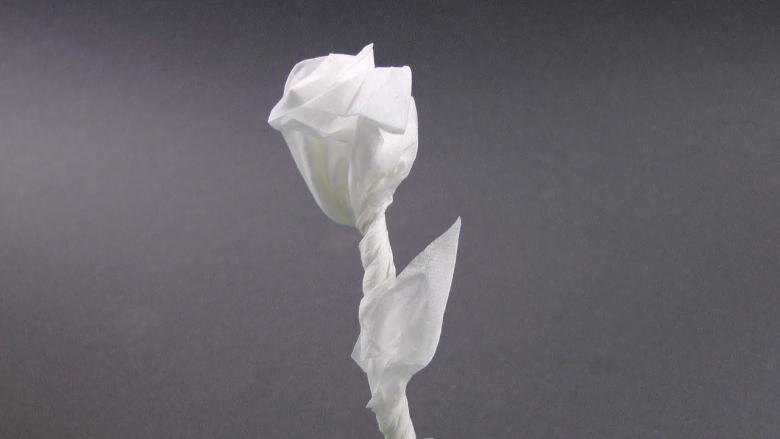
Rose
Making origami queen of flowers so simple task that even a small child can do. The design of a single bud will take a minimum of time:
- napkin fold in half so as to form a triangle;
- The resulting figure is rolled up into a roll;
- Carefully free the petals from the workpiece.
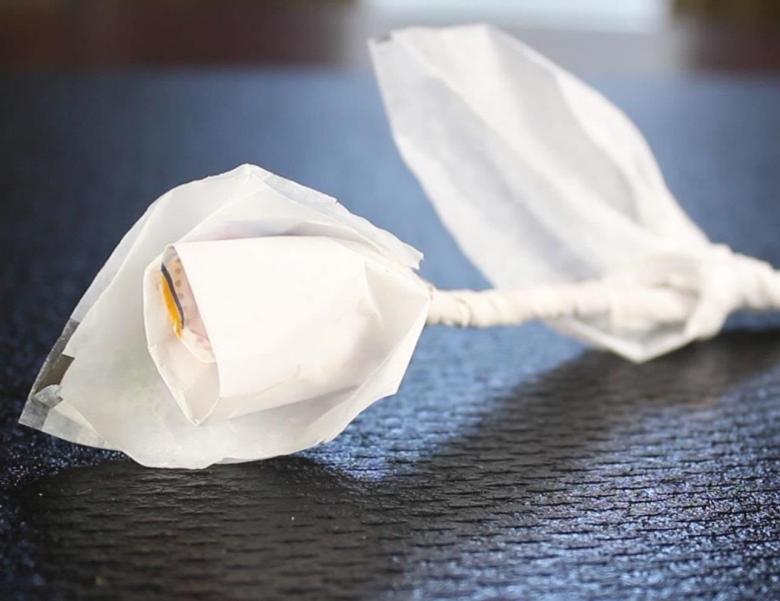
Napkin rose in the art of origami technique is ready. For the basis of the flower, you can take a variety of shades of napkins, because thanks to the efforts of breeders today, the noble plant shimmers with all the colors of the rainbow.
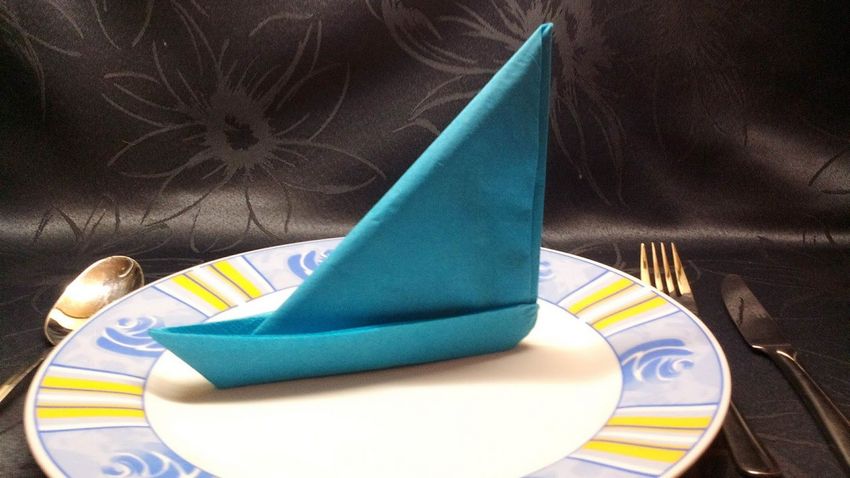
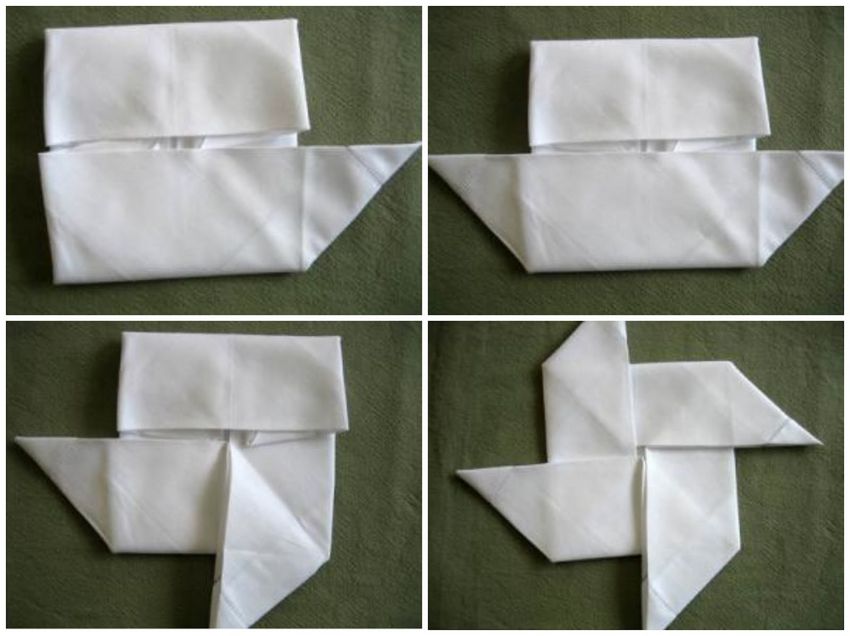
The simplest options
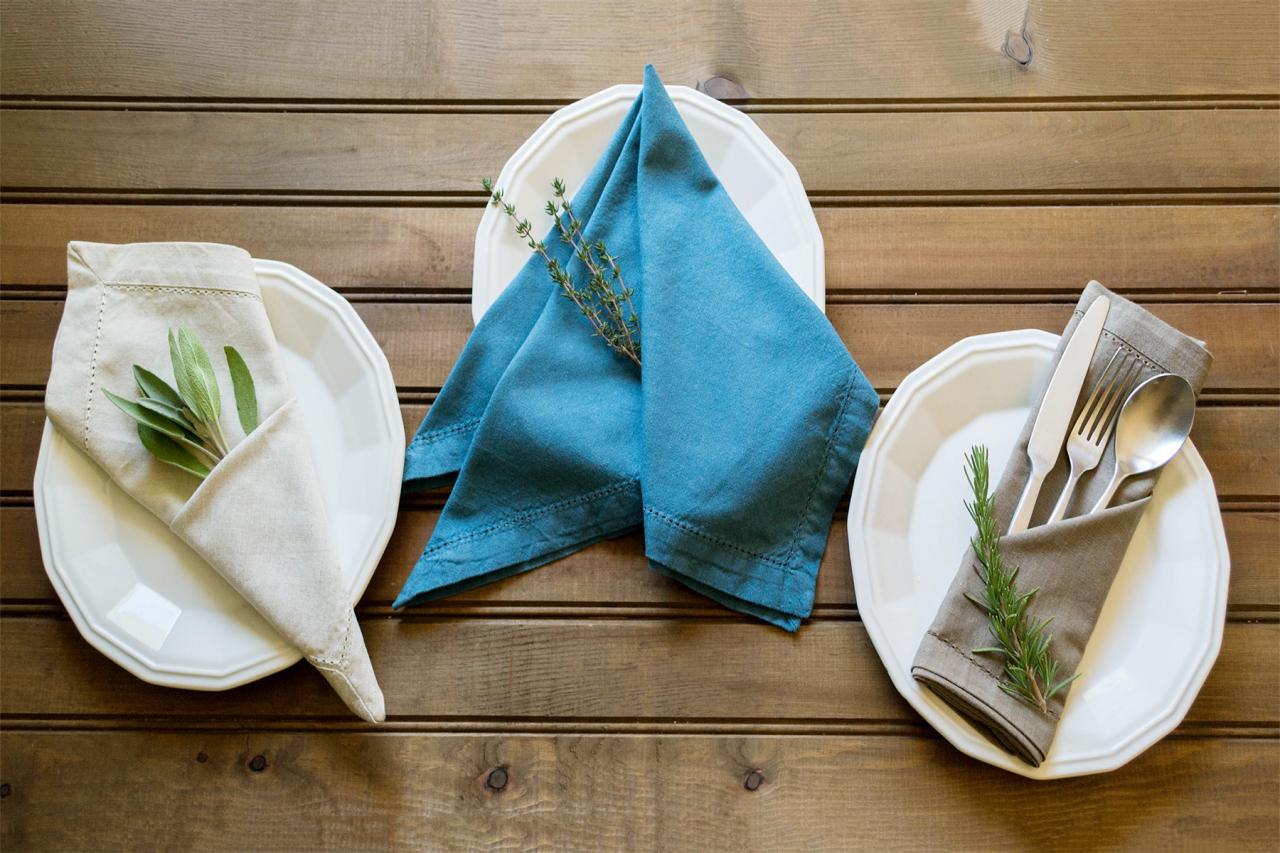
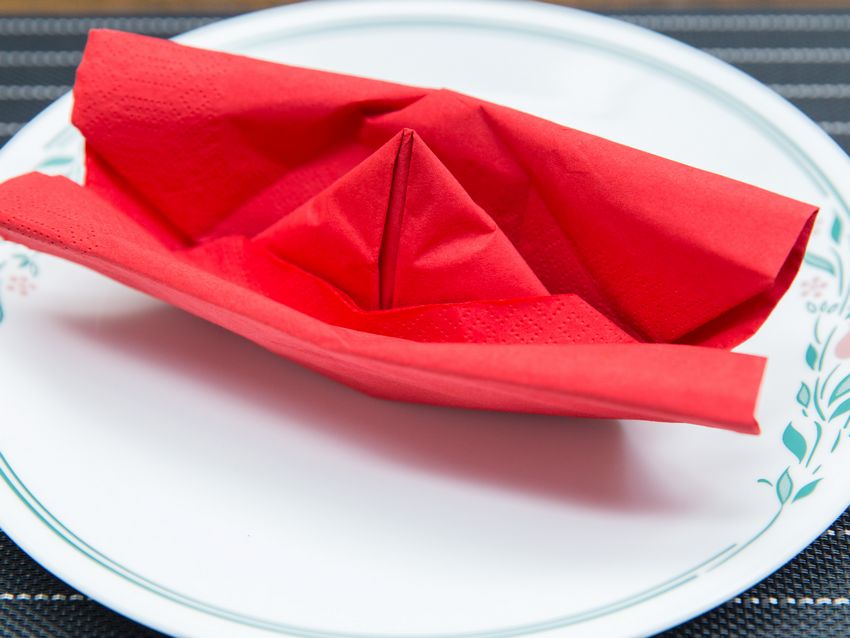
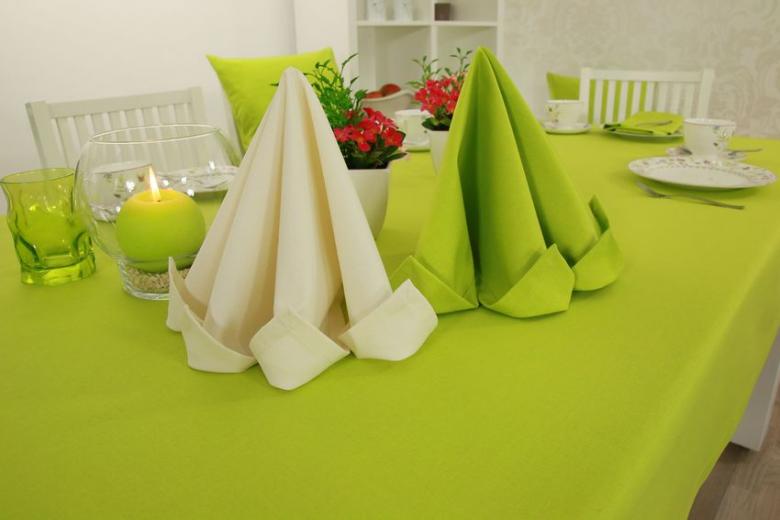
Using a couple of uncomplicated movements, you can create a very original handicraft, which will decorate the festive table, giving it a rich look. Such elegant things include products from napkins called "cone" and "pocket".
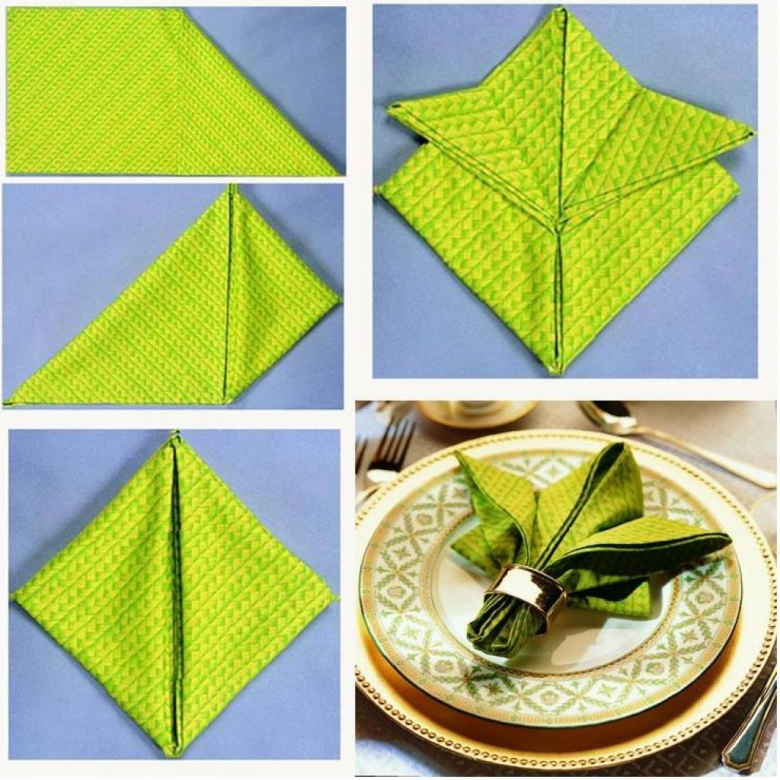
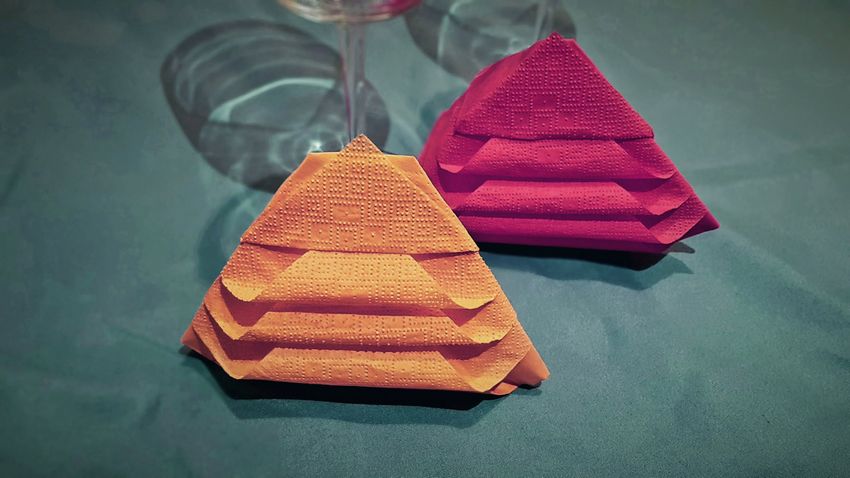
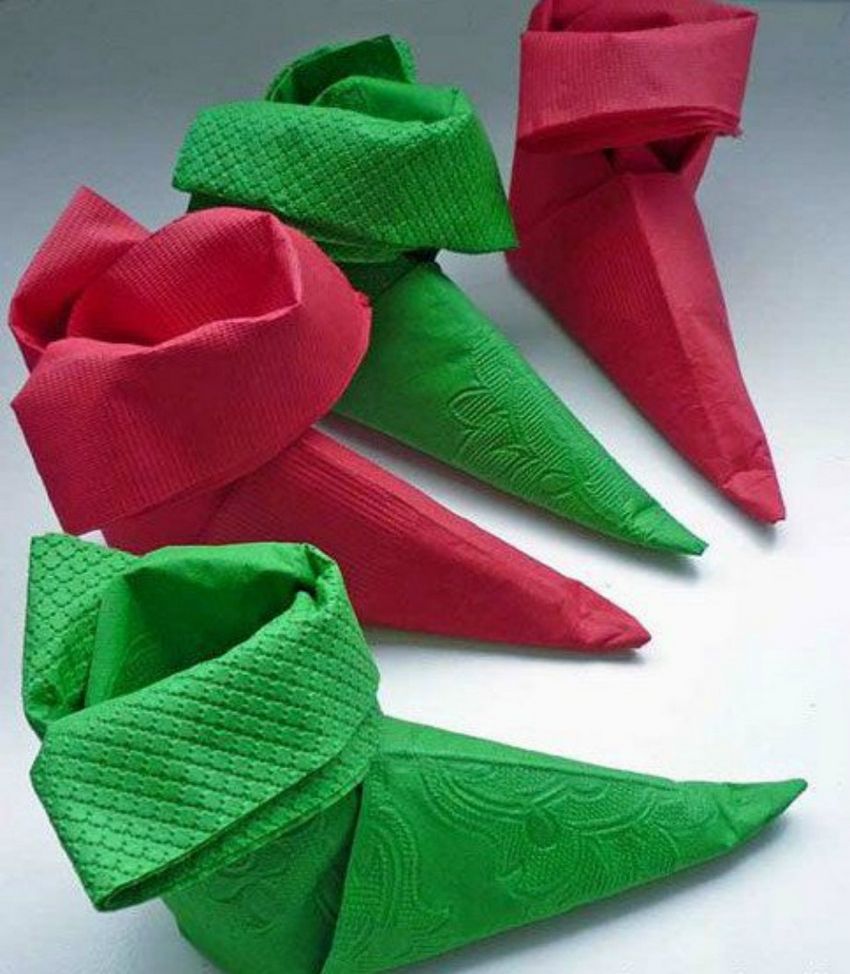
Cone
To create this geometric figure will require a square-shaped napkin made of textile. The following steps will be required:
- From top to bottom, the square base is folded in half.
- Now the napkin is folded in half from left to right.
- The workpiece is rotated, and the top layer is folded in two.
- Turn the product and the left side is about two-thirds of the bend to the center.
- The right side of the blank is aligned at the edge.
- The free corner tucked into the left pocket.
Tissue cone ready. It has a free pocket, where you can put the cutlery.
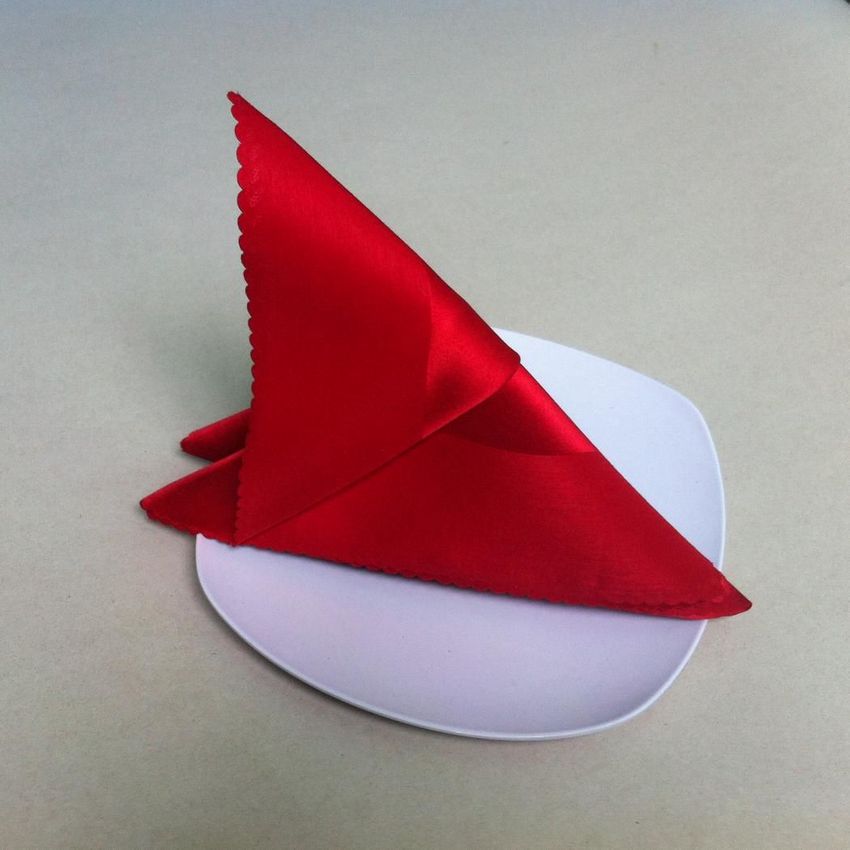
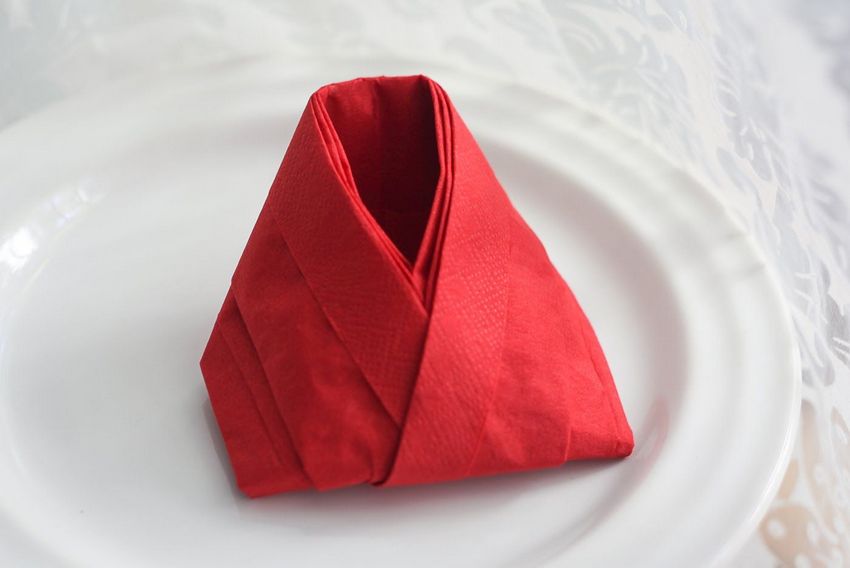
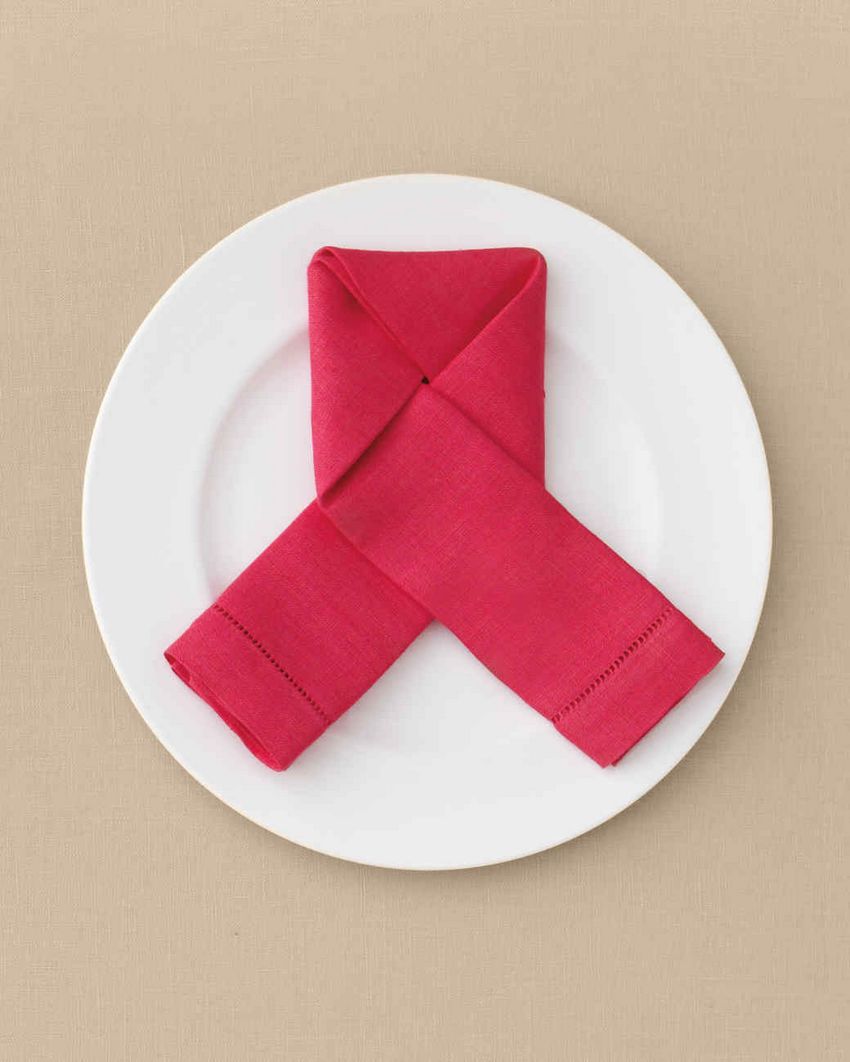
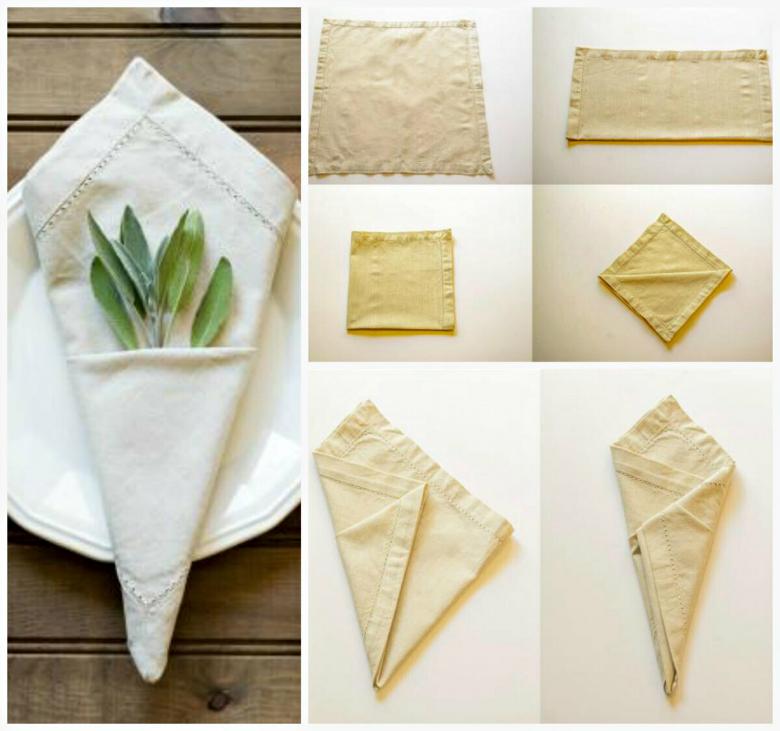
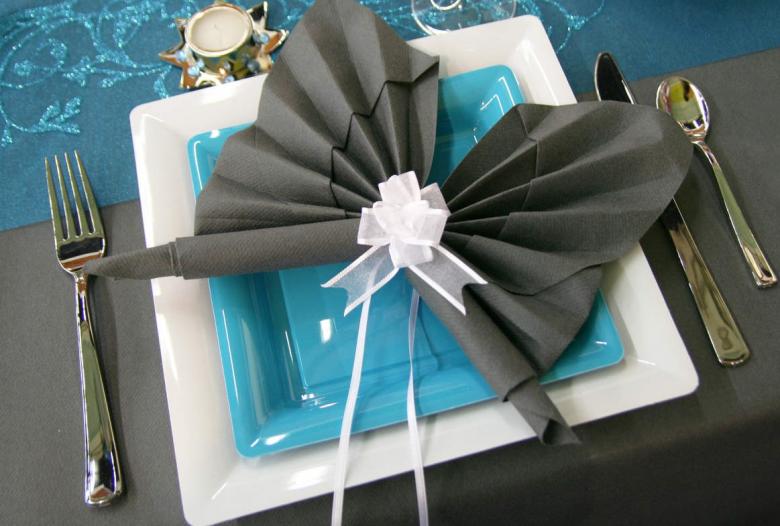
The pocket
The beginning of the work is similar to the stages of making a napkin cone:
- Fold the square napkin in half from top to bottom and then from left to right;
- fold the closest part of the workpiece diagonally;
- turn the napkin over, and fold the right side toward the central part by a third of the width of the square;
- The right side covers the left side, and the bottom corner is tucked into the pocket that is formed.
Convenient place to put the cutlery ready.
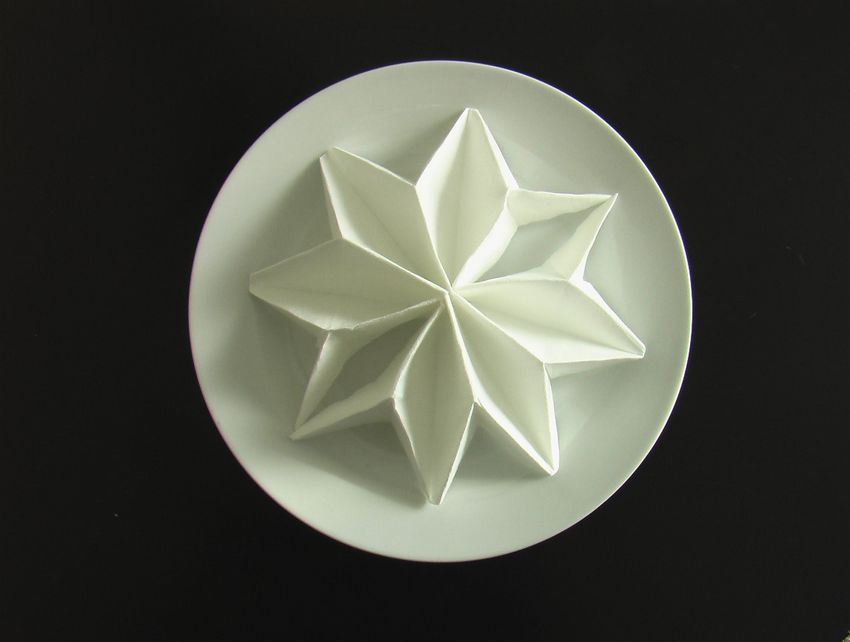
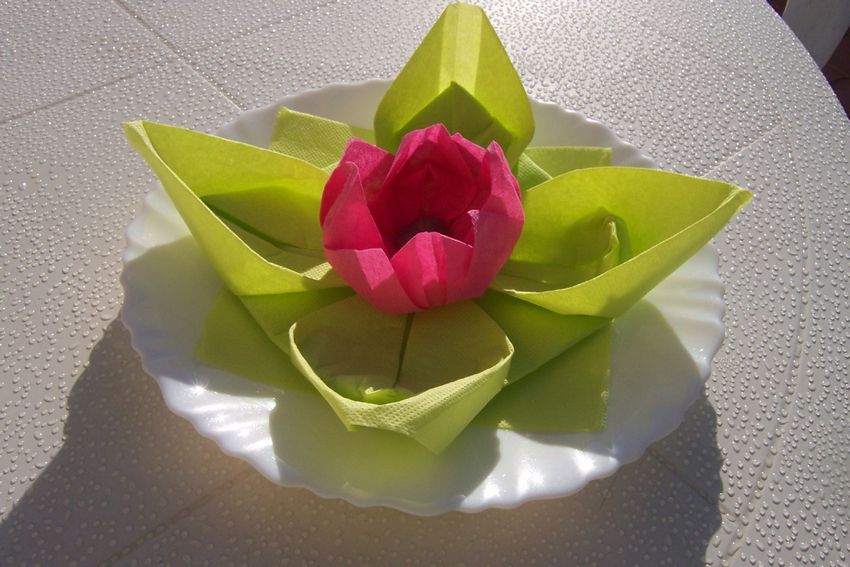
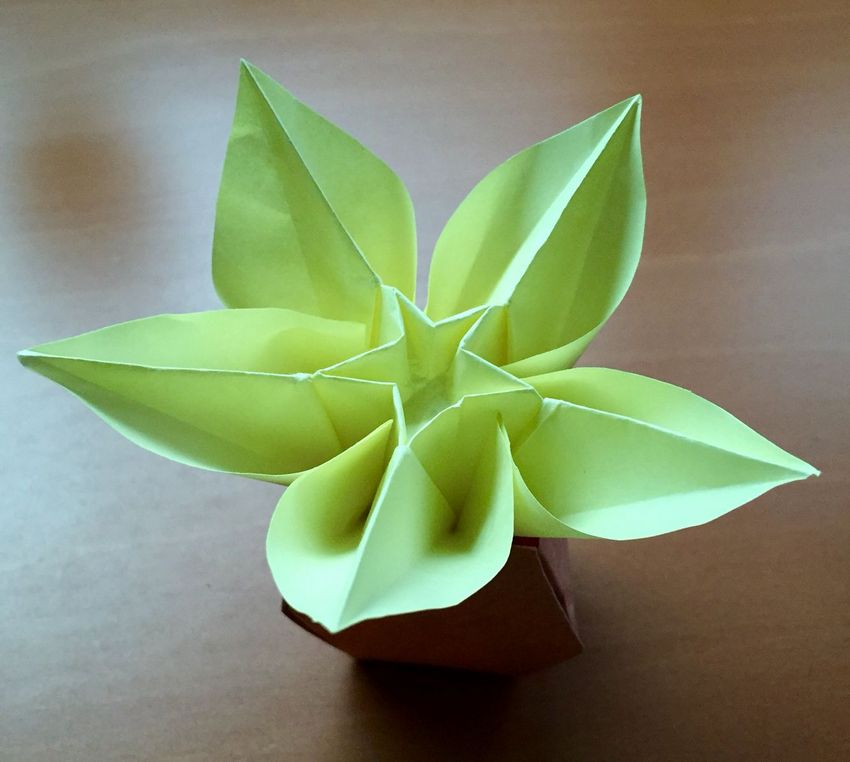
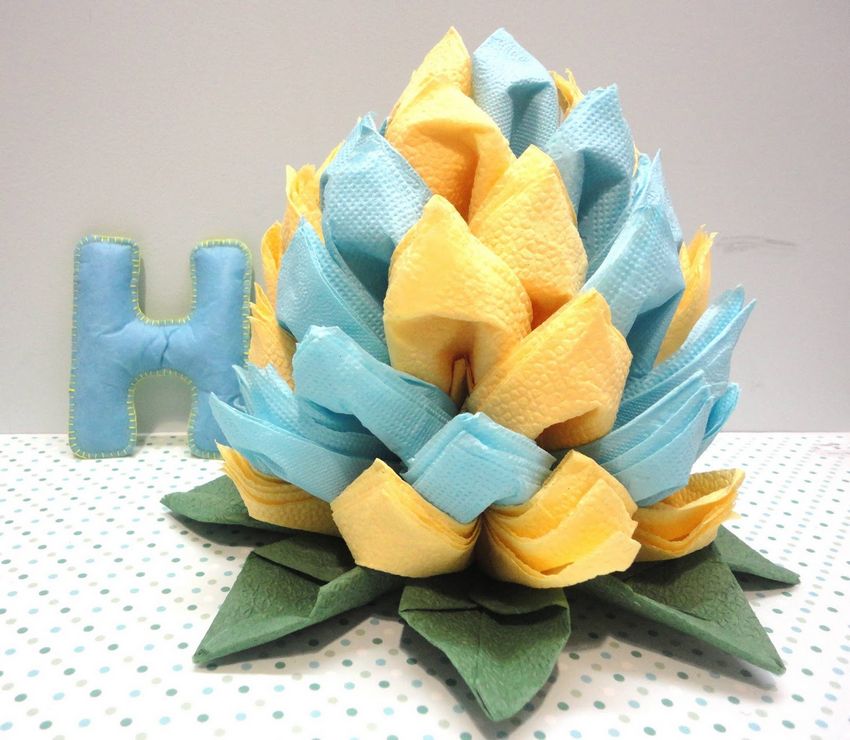
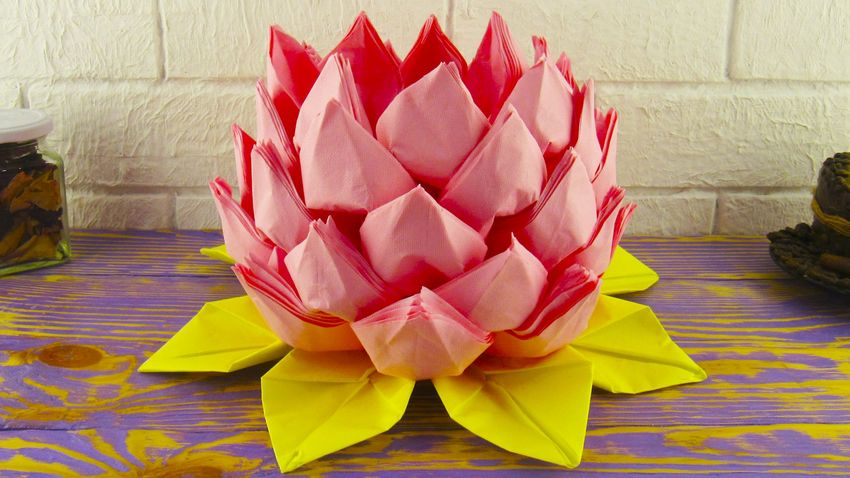
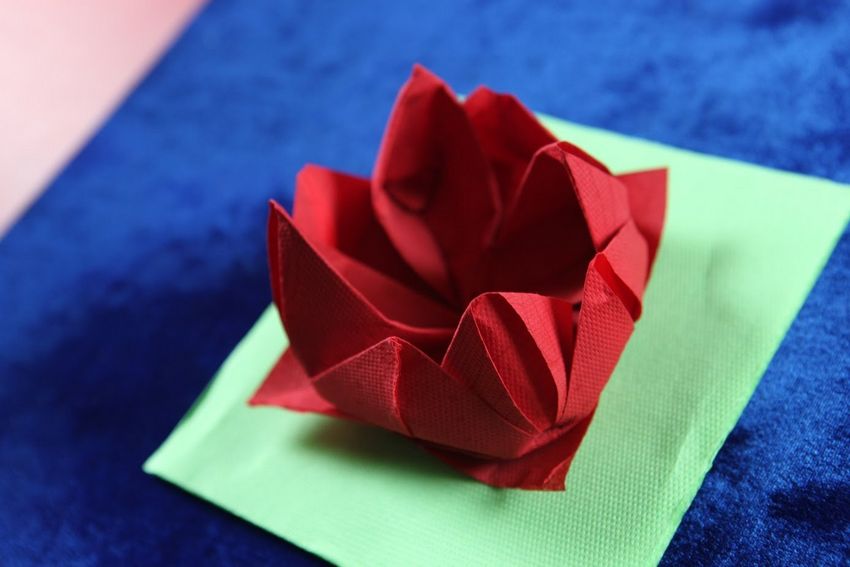
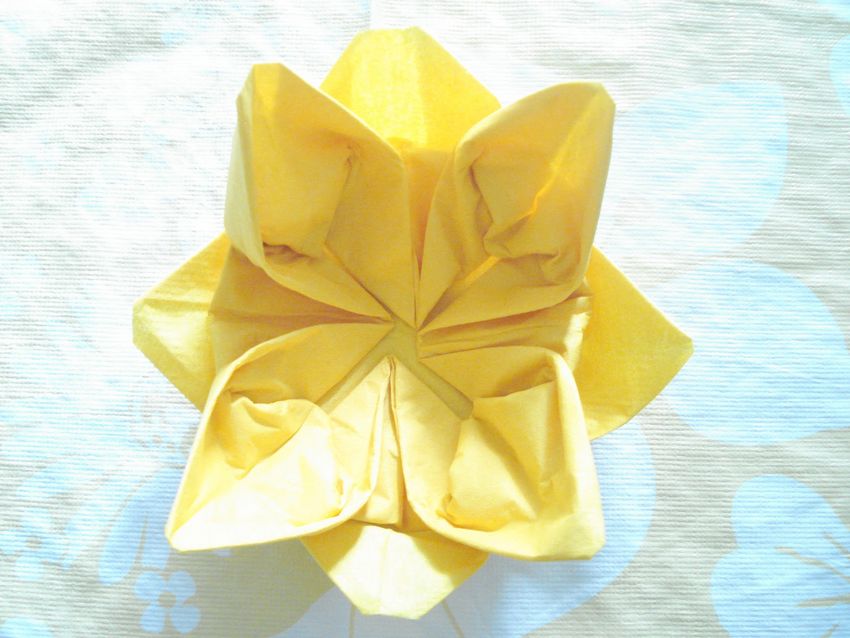
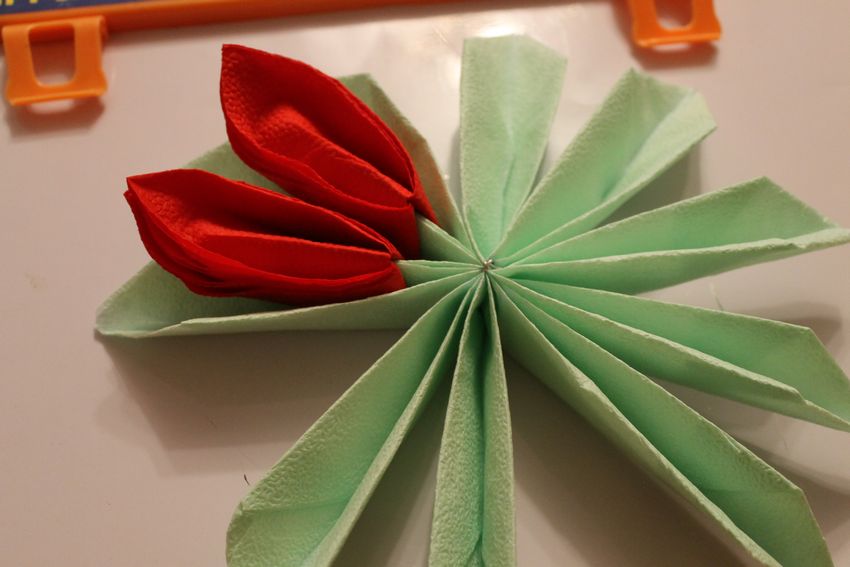
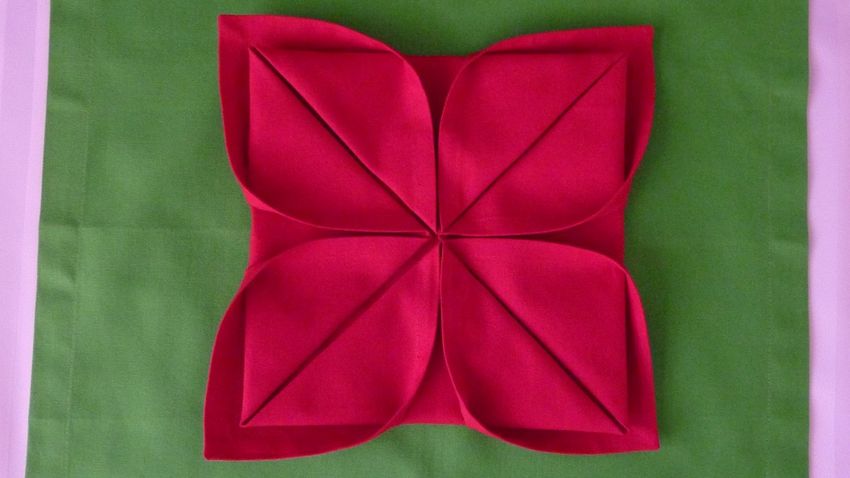
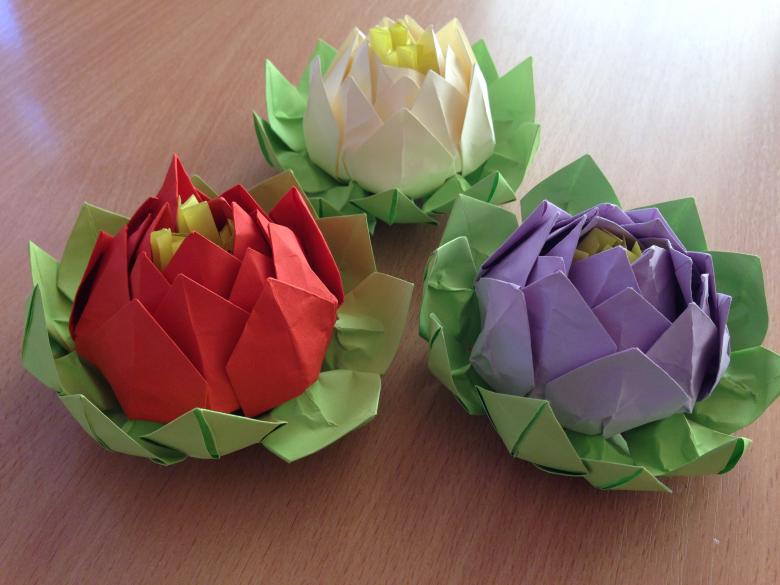
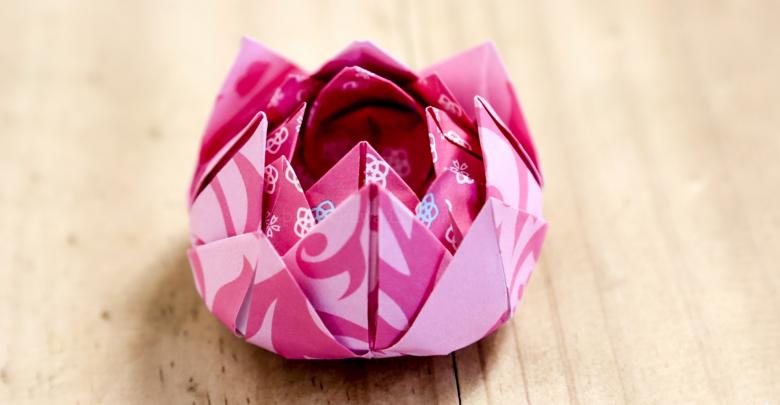
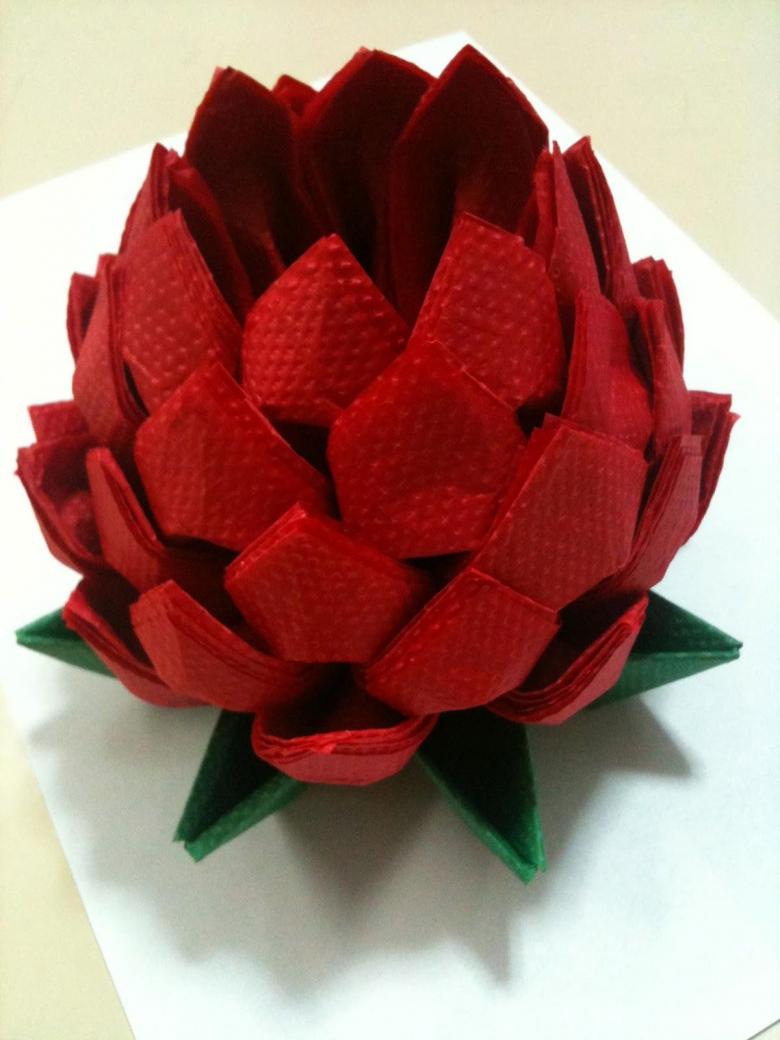
Lotus .
There is a type of origami (it is called a modular), when instead of a single sheet of paper used several. At first glance, this work may seem complicated, but in fact it is not. All the difference lies only in the number of bases used for crafts, and the action itself is almost no different from each other.
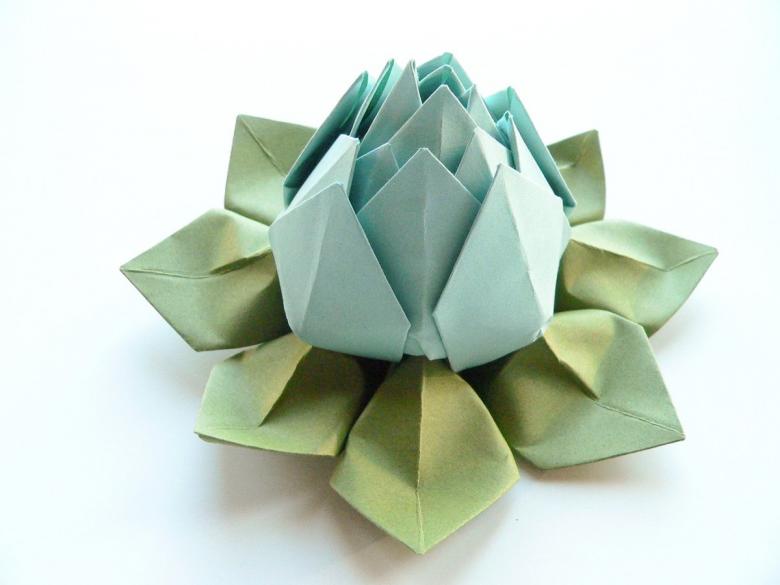
Lets see, for example, sacred to the Hindus and the inhabitants of Ancient Egypt plant, how to make origami out of paper tissues for children.
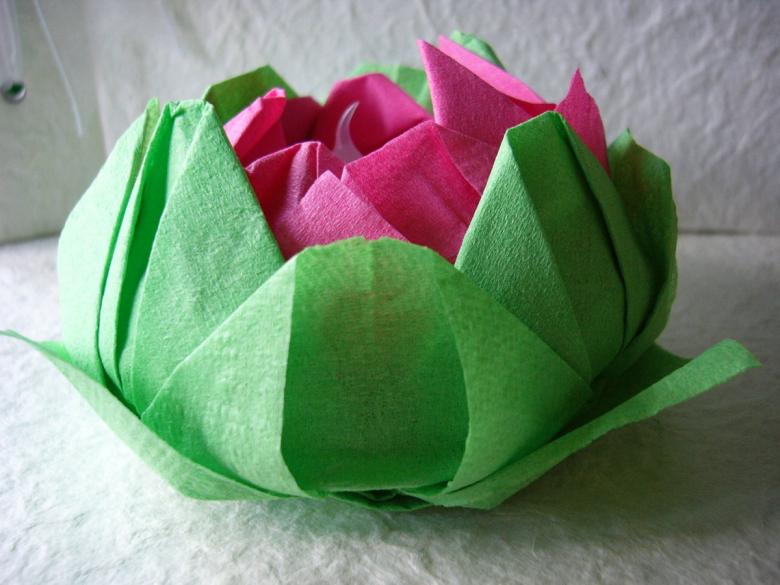
Obligatory actions
In order to make a flower, you will need to prepare green napkins square shape (eight pieces) for the stem of the plant, and white (two dozen) to decorate the plant petal itself. The work includes the following points:
- if the green napkin is folded, as usual, in four, it is simply folded on the diagonal;
- We wrap the side corners as if making a child's paper airplane;
- The ends of the "airliner" are folded again, and the workpiece is folded in the center;
- staple the individual elements of the future flower (it is not recommended to glue the blanks together, because after the glue dries, the delicate basis of the napkin changes its shape);
- the buds are made of white napkins according to the same principle;
- The resulting "petals" of a lotus are inserted into the base of the flower;
- work actions are carried out until all the rows of the flower adjoin to each other;
- The lotus is placed in the center of a piece of yellow napkin, making the plant look more natural and similar.
The composition is placed on the table prepared for the reception.
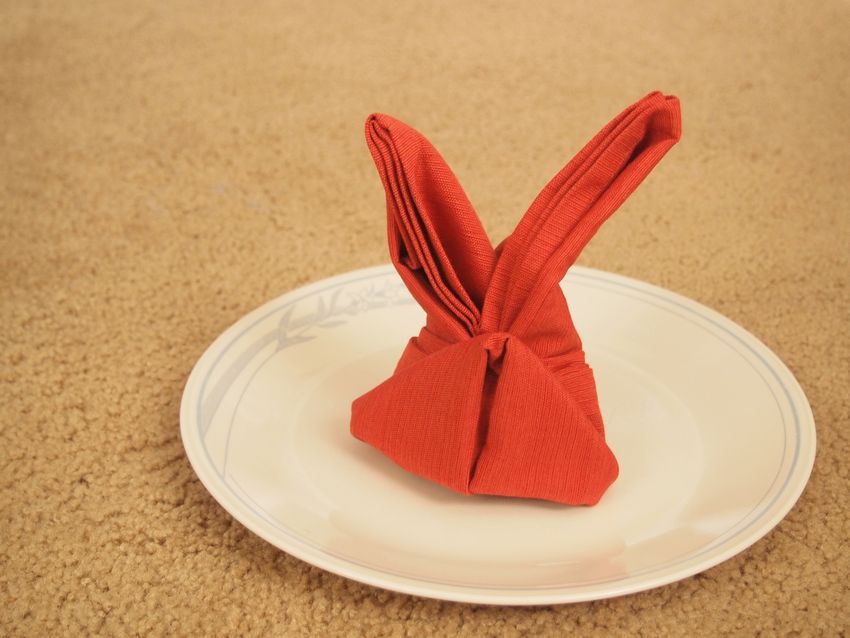
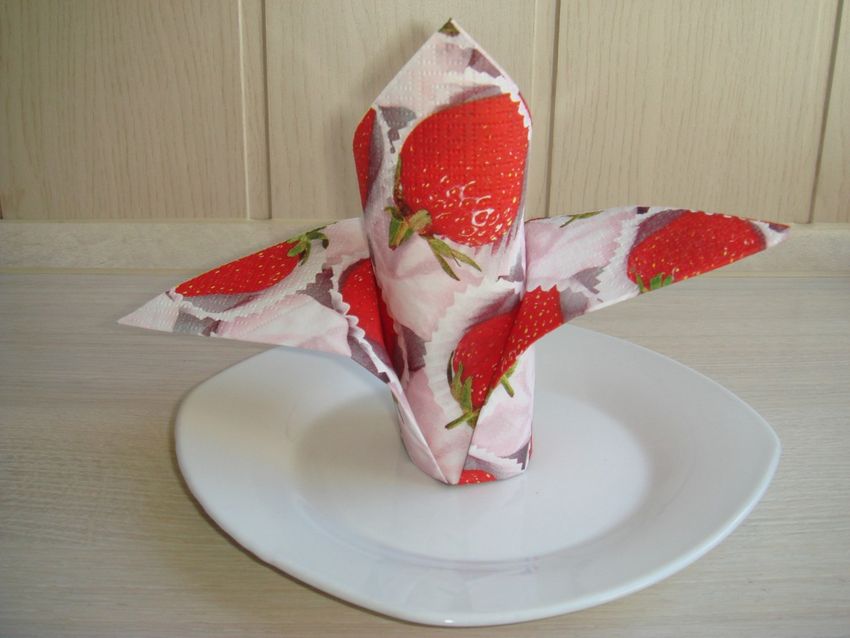
Decorating the wedding table
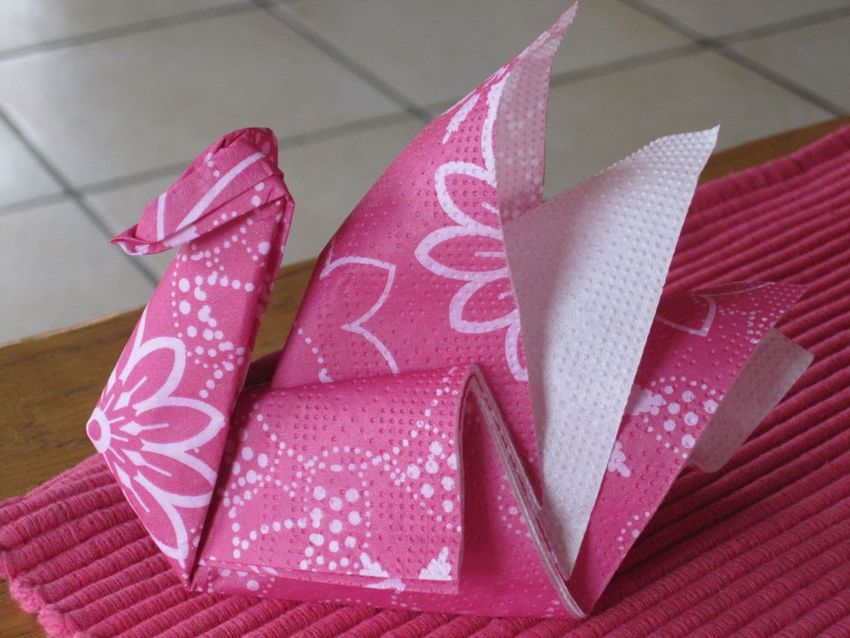
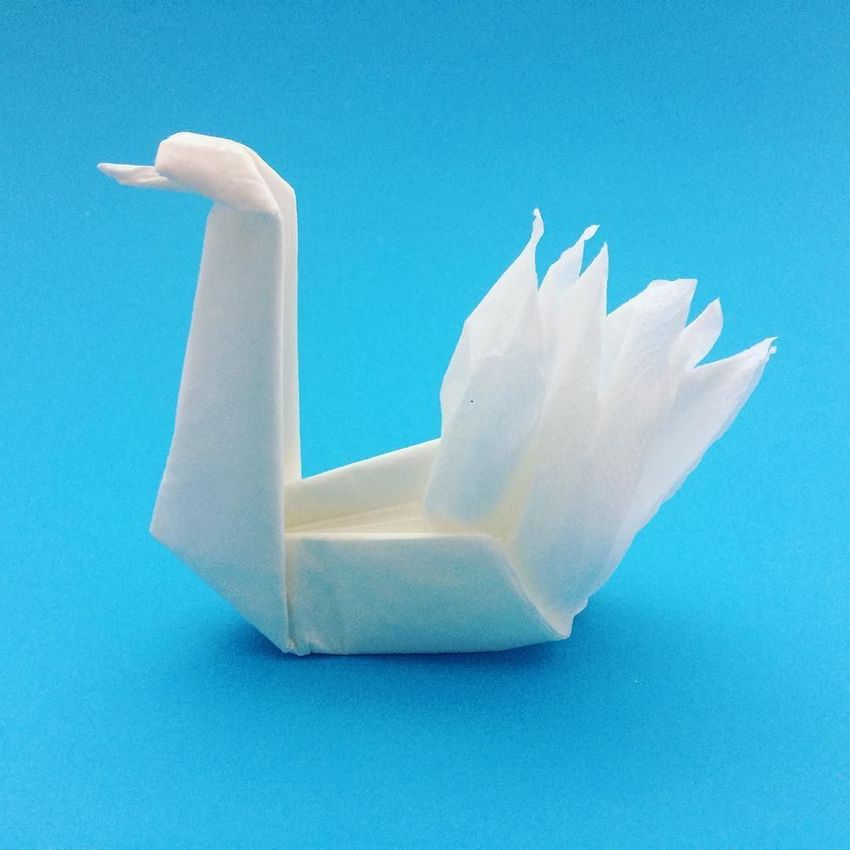
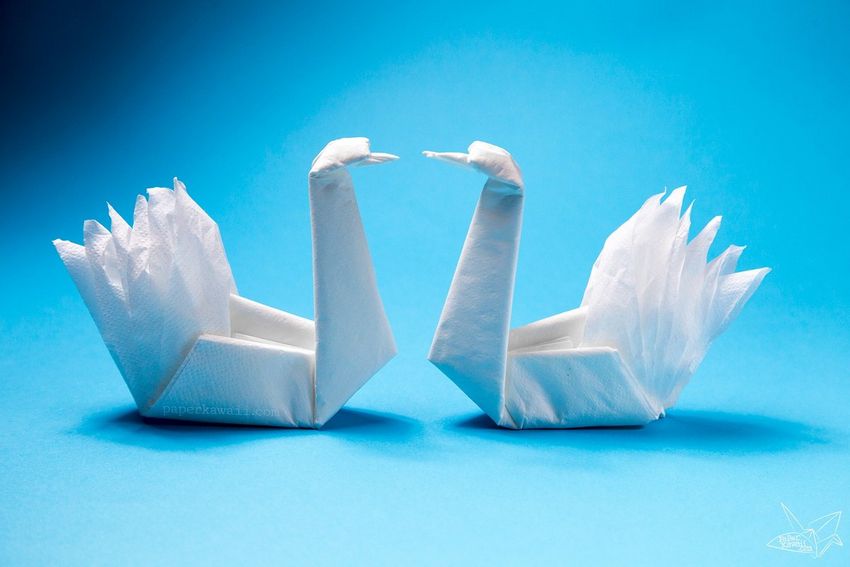
Beautiful snow-white swan birds are the best fit for such an event like a wedding. In laying the table, they are no less in demand than flowers.
For the base of the blanks, it is best to take thin woven or double-ply paper napkins. Specialists in this situation do not recommend working with a three-layer material - it is too dense and it will not be possible to make elegant folds.
Scheme of work
- Place the square napkin so that one end looks at the worker, and then fold it diagonally. Press the folds with your fingers a couple of times so they don't straighten out.
- Open the piece, and fold the top and bottom side (left side) to the line marked in the center. We get a triangle.
- Bend the corners of the workpiece.
- Repeating the first action described in the diagram, turn the workpiece and form the next triangle.
- Upper acute angle bring it to the very end of the workpiece and several times "fix" by passing the fold line with your fingers.
- Otvododim sharp corner of the end of the workpiece and bend.
- Fold the resulting dummy in two.
- Lift the top part - there is a "neck" and "beak" birds.
- On the underside of the blank pull out a piece of tissue, forming the "back" swan.
- Perform a similar operation with another bottom part of the napkin.

Beautiful bird is ready. You can make similar swans from napkins of different colors and put on a plate for each participant of the feast.

As the saying goes, it is better to see once than hear a hundred times. If the above scheme seemed vaguely clear to you, type in a search engine - "origami swan", watch the video, and you will realize that making the bird is very easy.
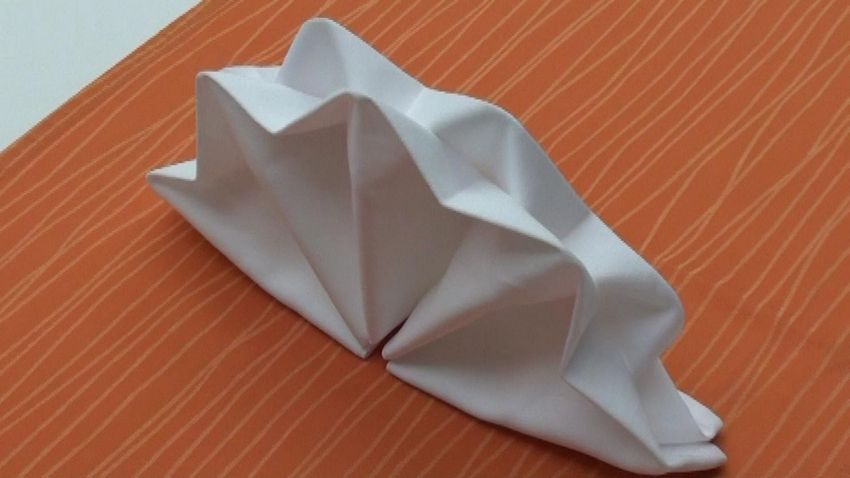
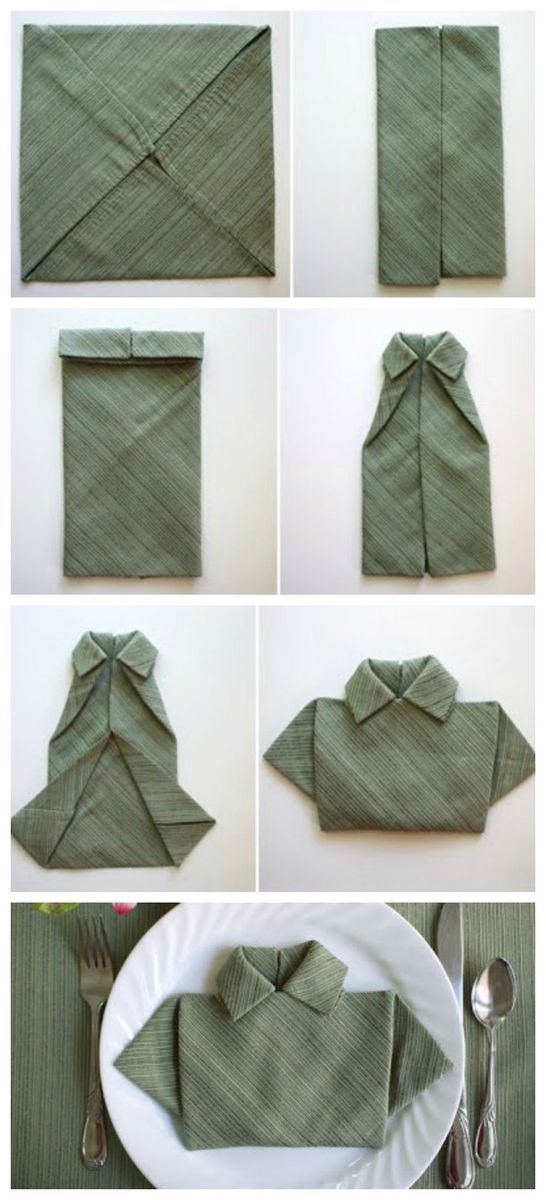
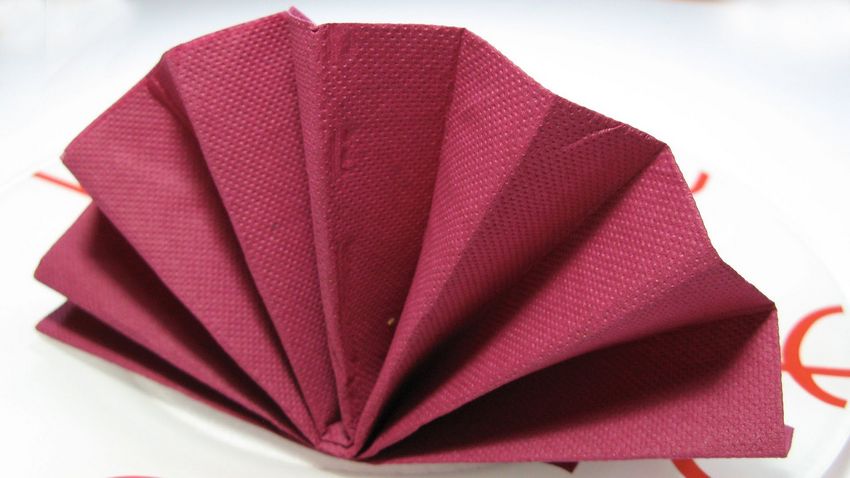
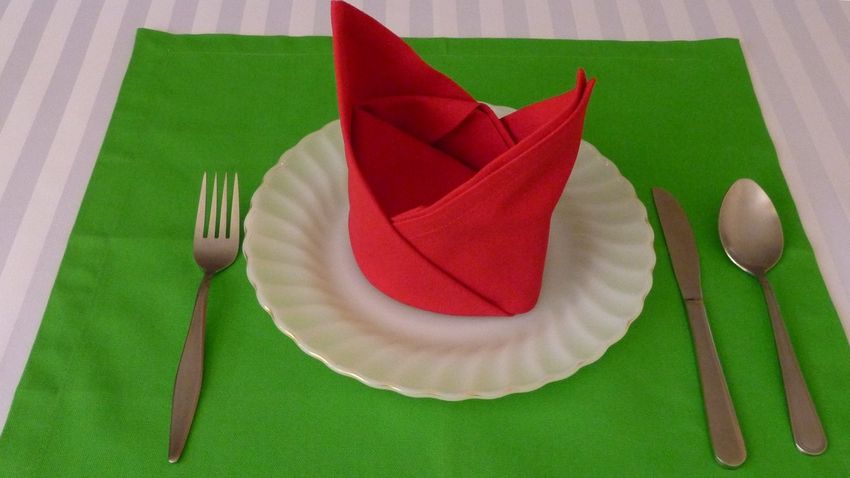
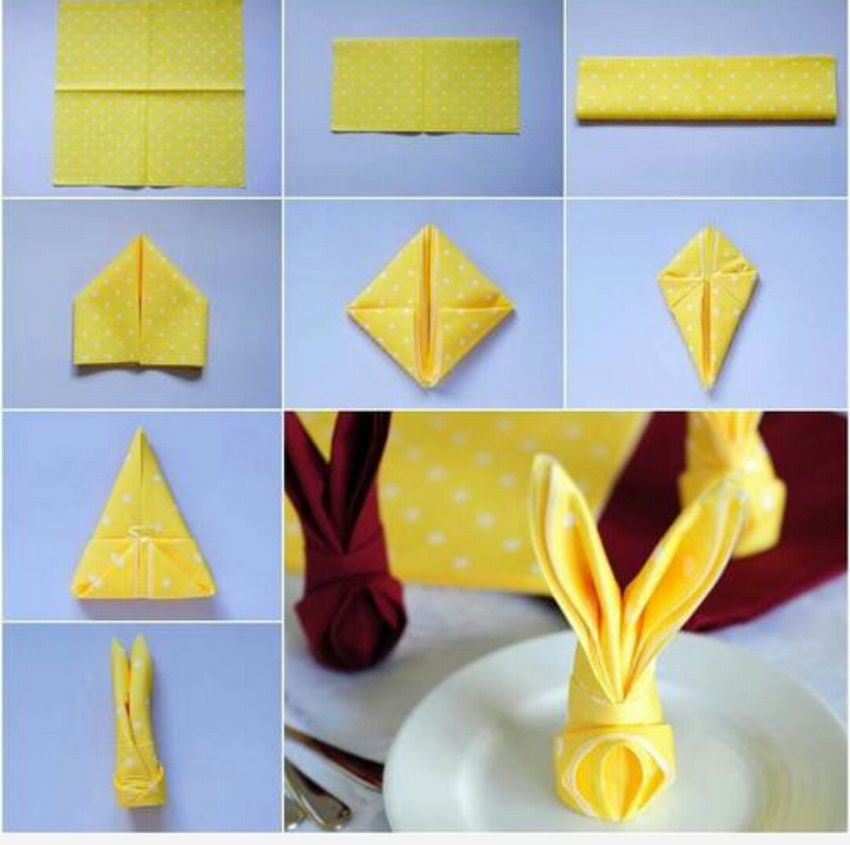
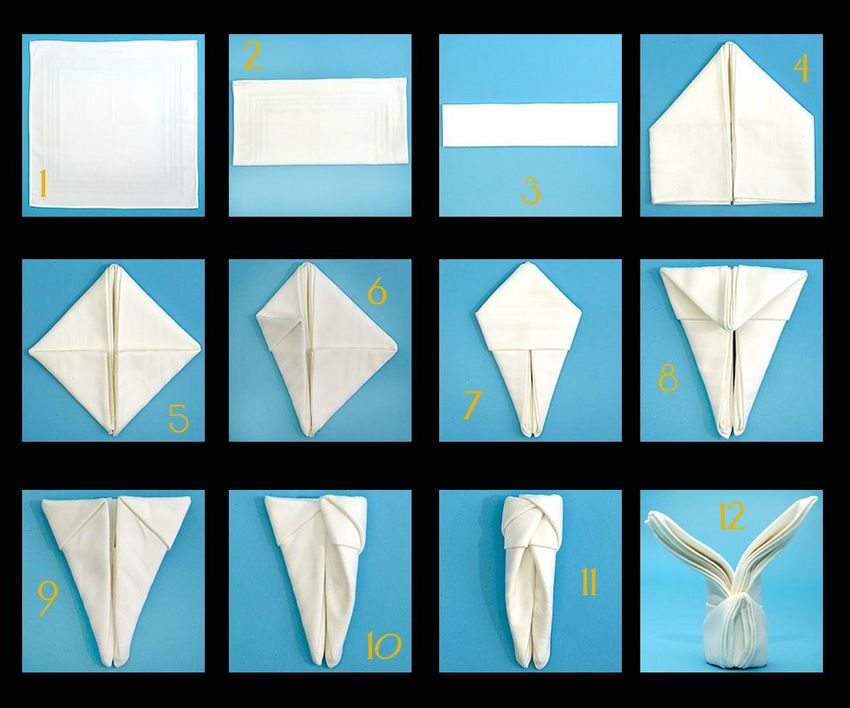
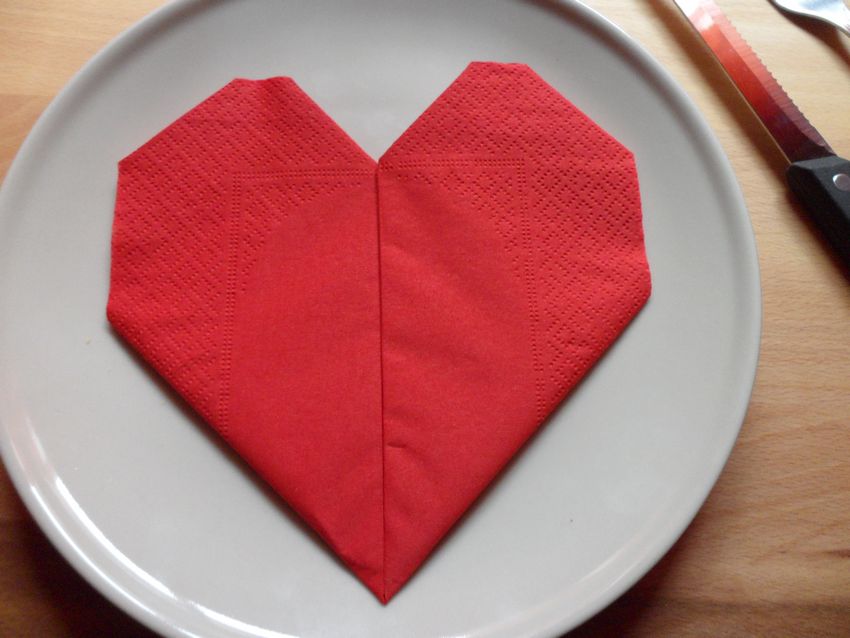
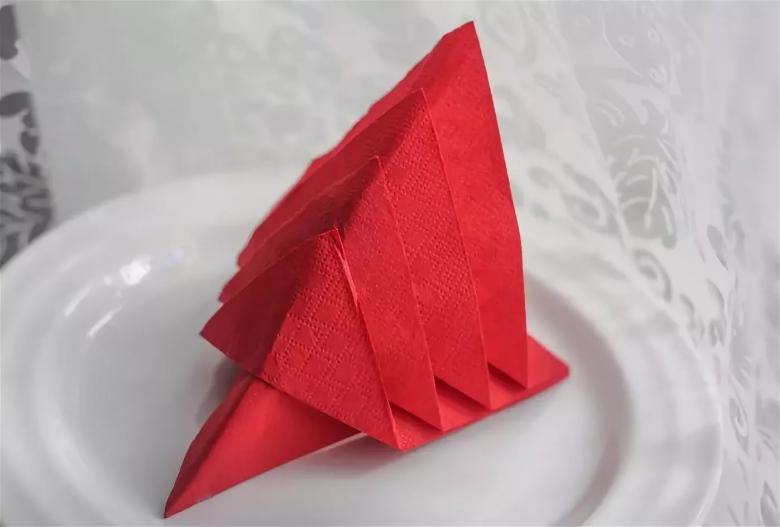
Photo ideas of origami embellishments with napkins