How to draw fruits in a step-by-step pencil - drawing lessons and simple master classes for children and beginners
For the beginning artist, fruits and vegetables remain ideal subjects for drawing. Already from the first steps, the young artist develops skills to work with bright, colored objects of different shapes. There is an opportunity to draw them from life, which helps to better understand how to draw beautiful fruits.
Lessons in drawing fruits and vegetables for beginners
Master class for children how to draw fruits and vegetables, is very useful because on simple objects they learn to analyze their shape. They wonder how to convey it on paper.
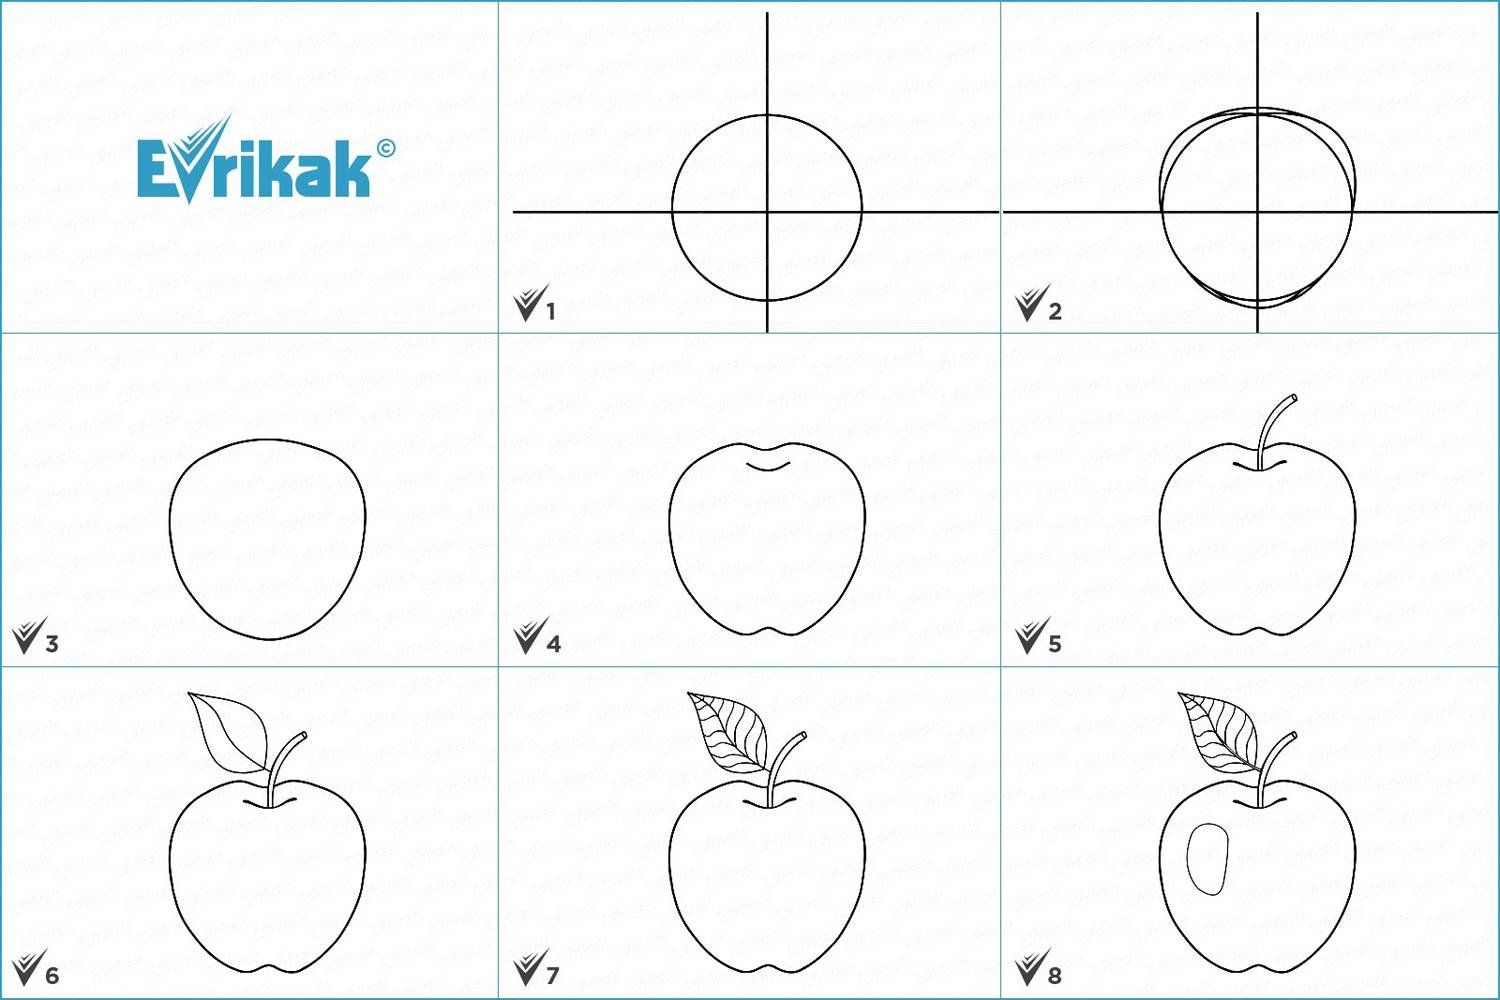
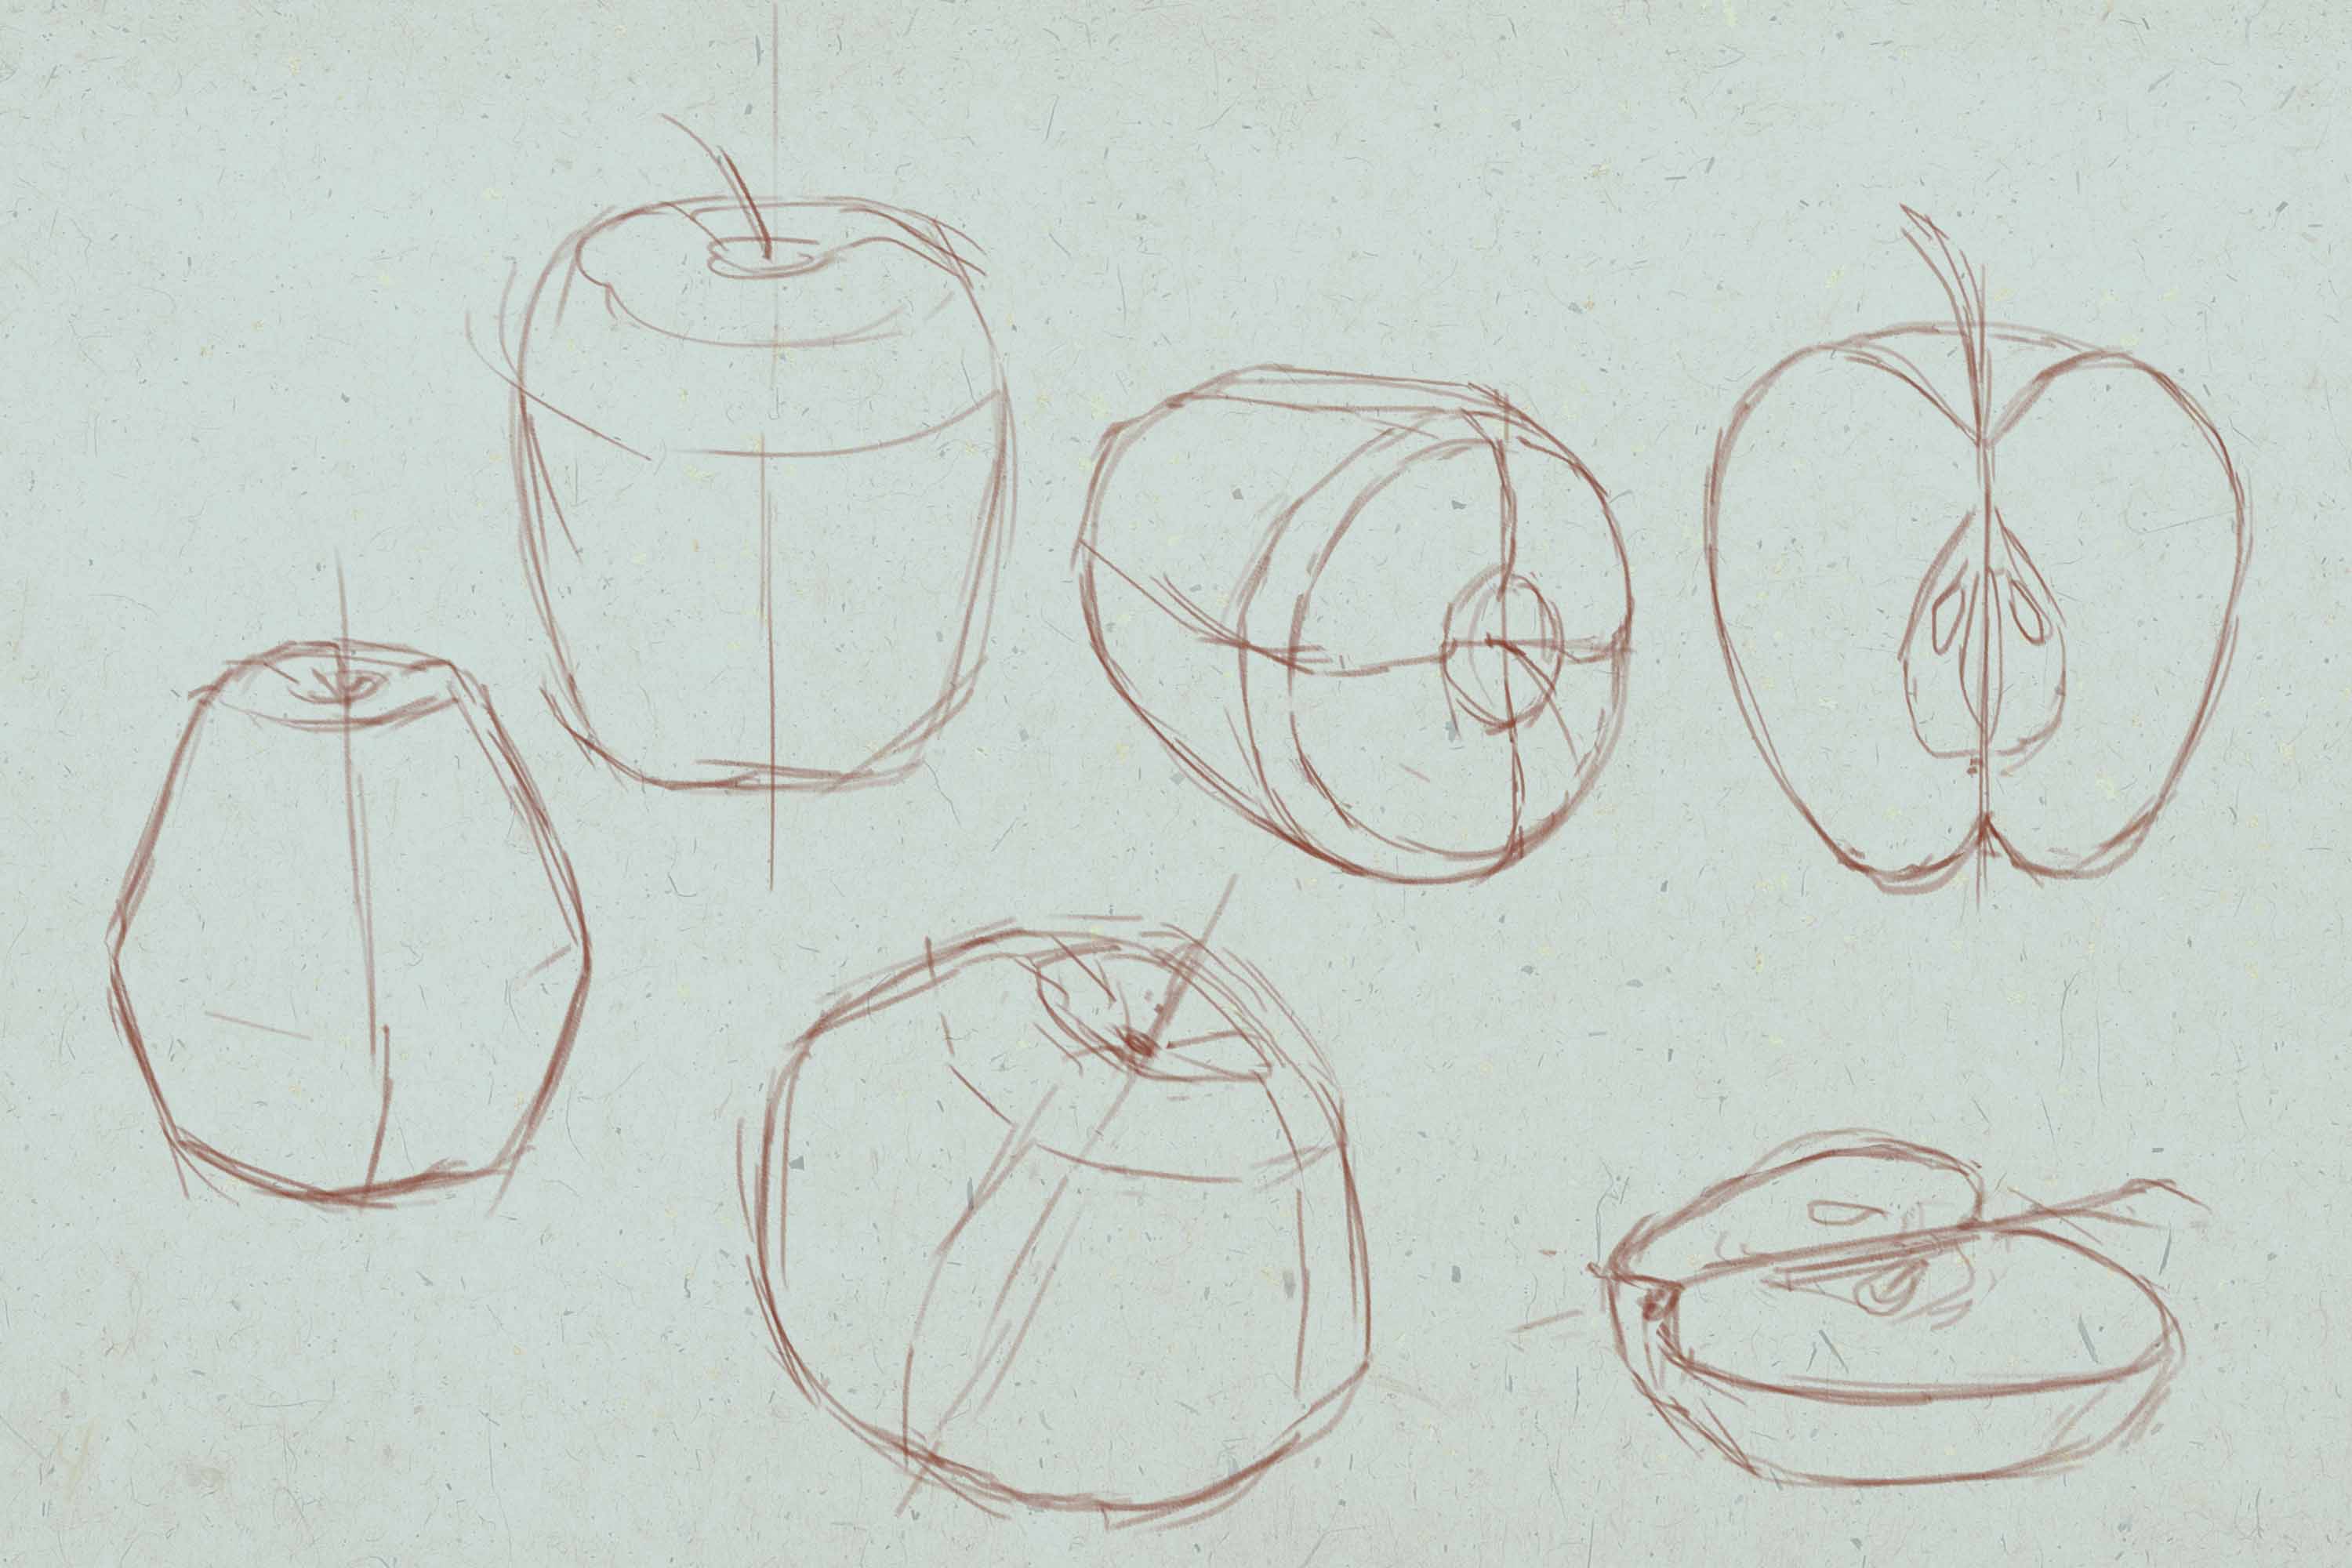
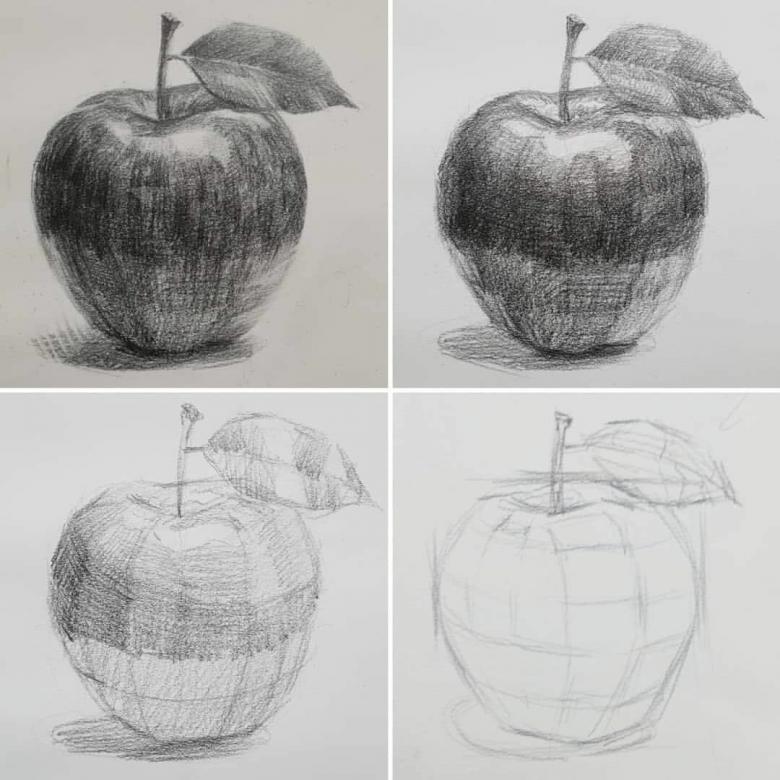
Picturing an apple in steps
Many fruits and vegetables are close to a ball. A circle is drawn on a flat piece of paper. But to get a real apple, the child needs to see exactly what needs to be added. A step-by-step master class will help.
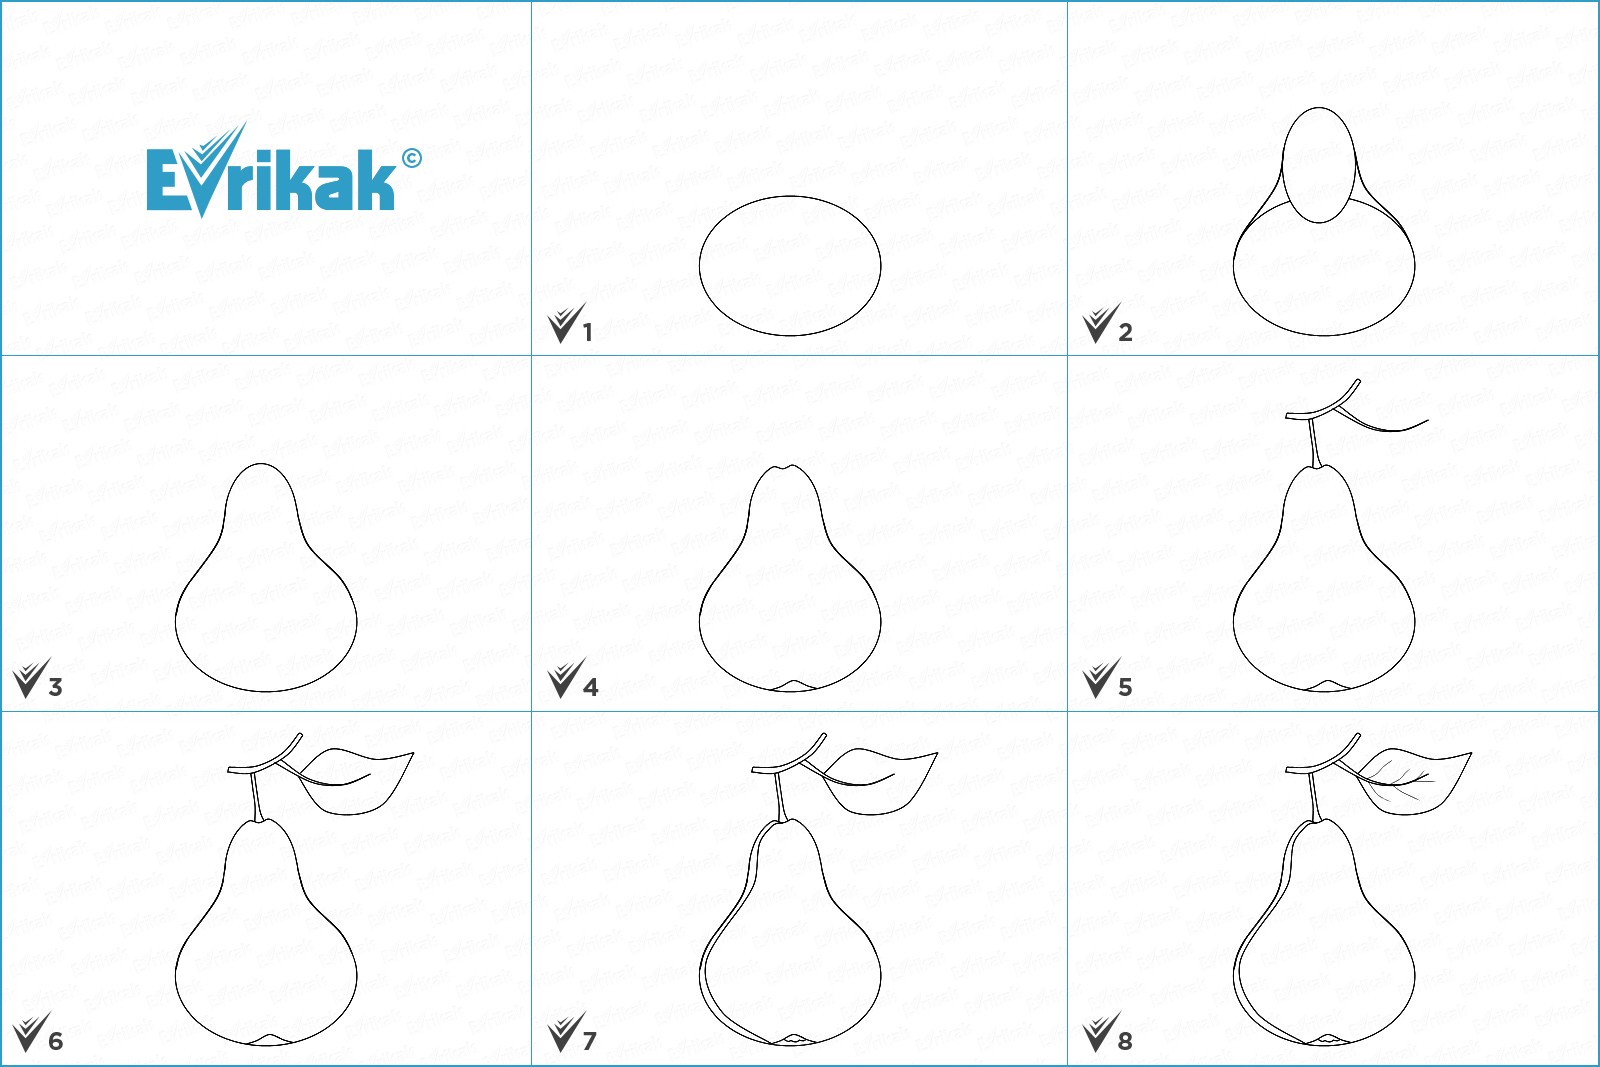
- Light oval is placed in a "glass" so that the figure does not reach the base and leaned on the side walls.
- The lower part of the oval is lowered to the bottom of the "cup" and drawn its contour in the form of the letter "W".
- Closer to the upper contour of the apple is drawn a short curved line. From her upward is raised stem.
- Leaf is attached to the place of growth of the stalk. Its shape can be represented as an oval and a small triangle. It is held on his stalk, which is drawn as a long curved line separating the leaf in half.
- The basic shape of the leaf is drawn, and the auxiliary lines are rubbed out.
- A flare is drawn on the side. Visually, it resembles the letter "D".
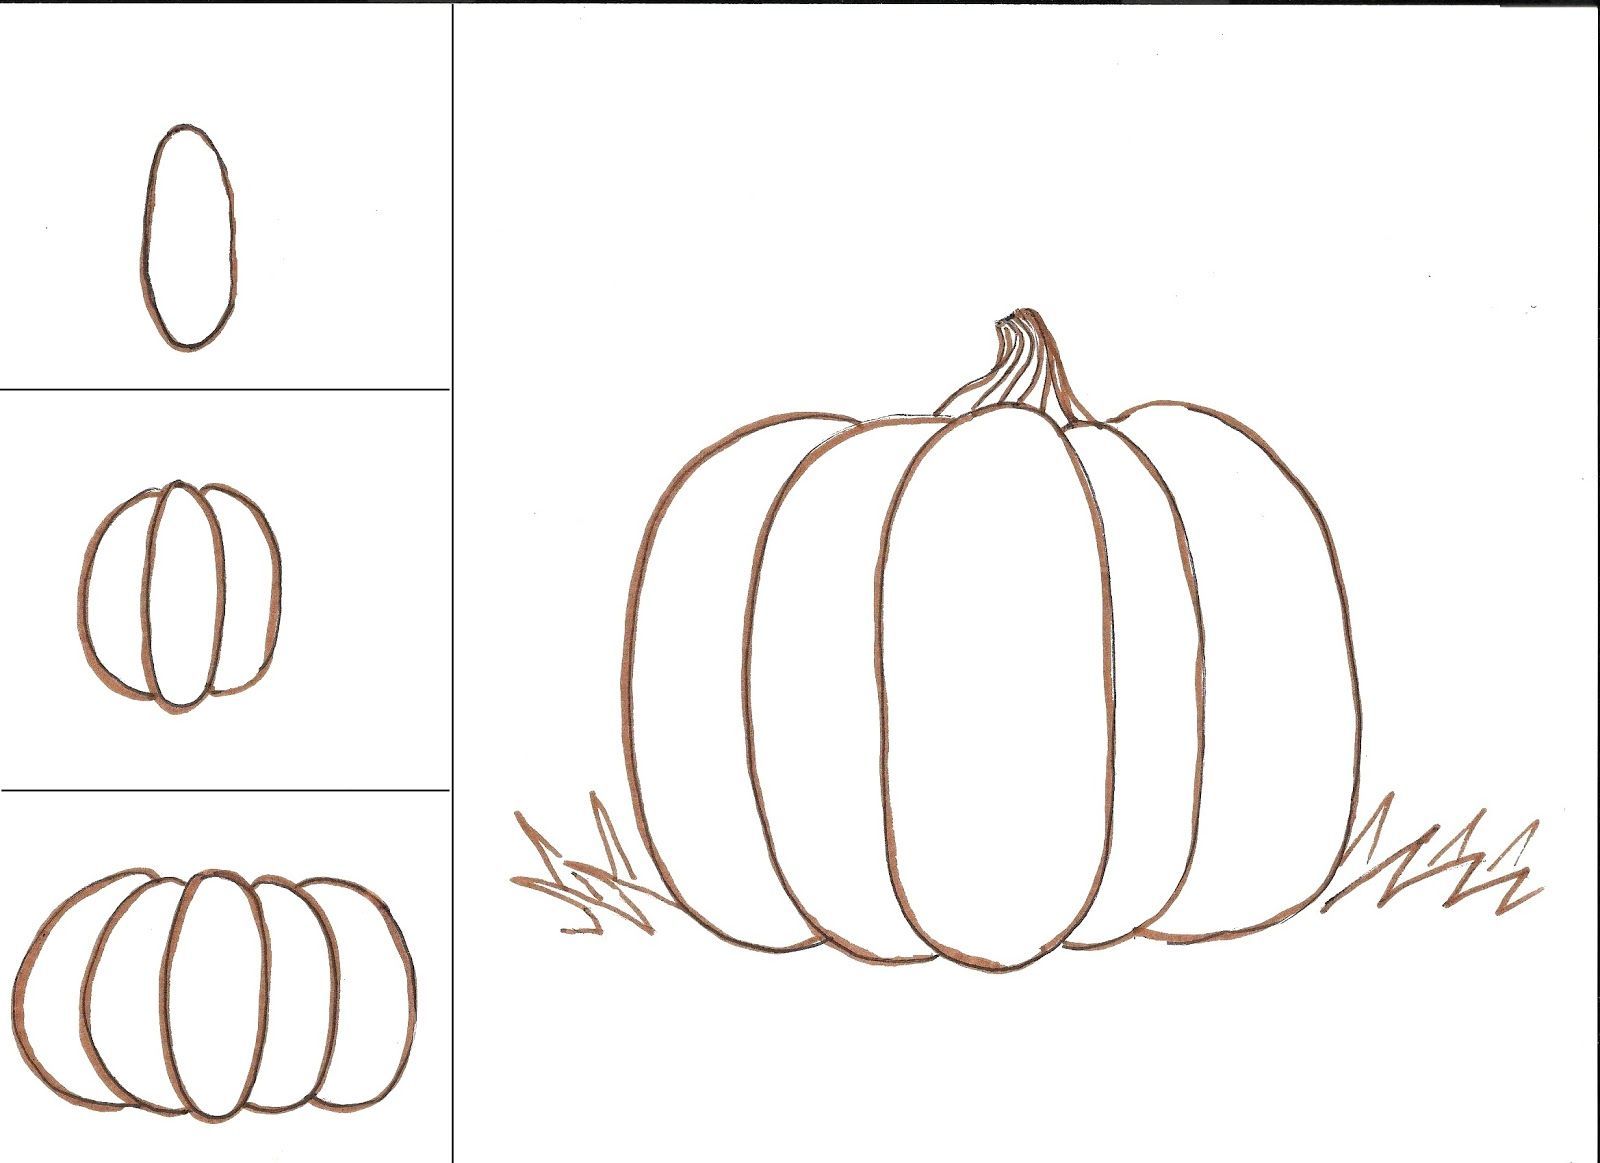
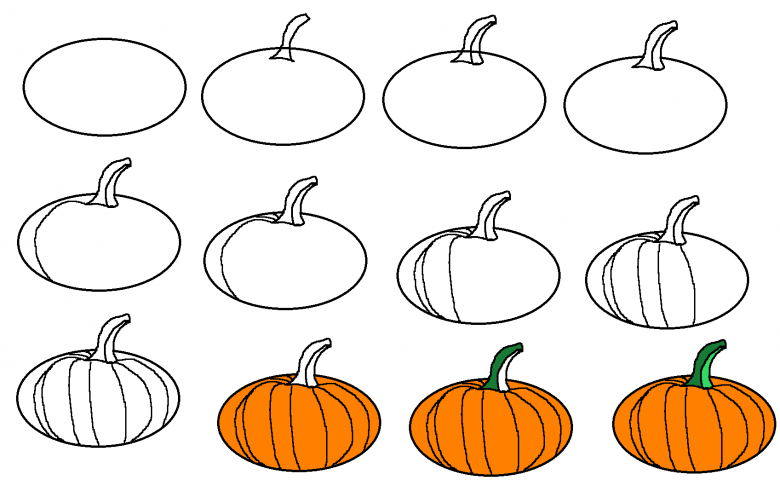
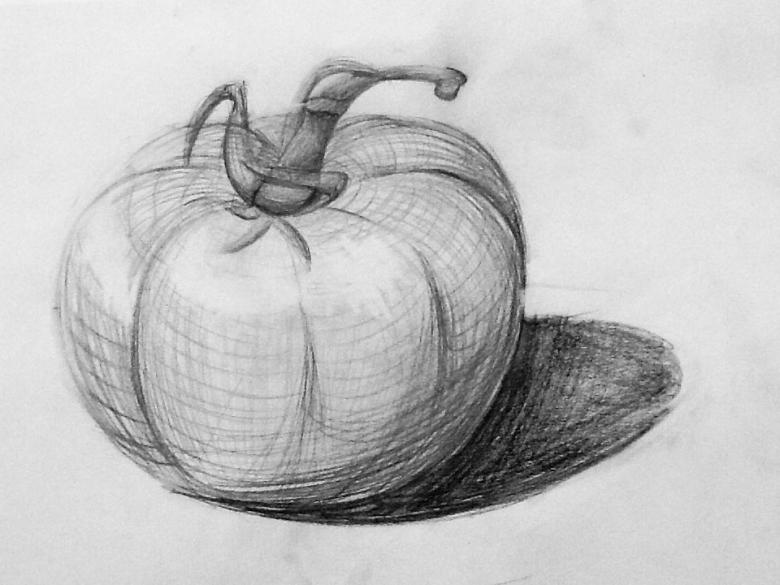
Step-by-step drawing of a tomato
The image of any vegetable or fruit always begins with the selection of the figure used as a template. Further, it is transformed into the already correct shapes of this or that vegetable or fruit.
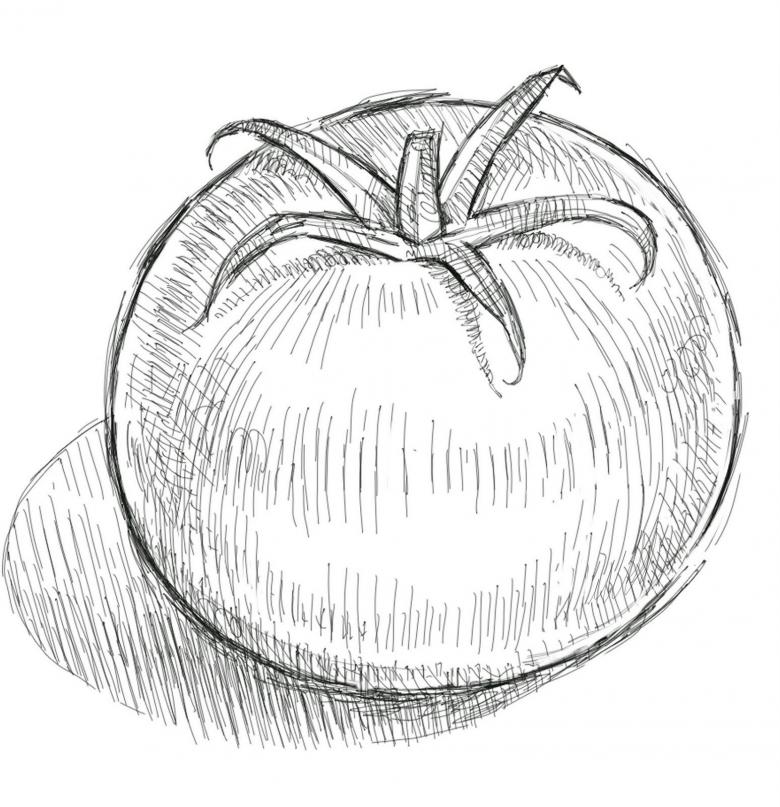
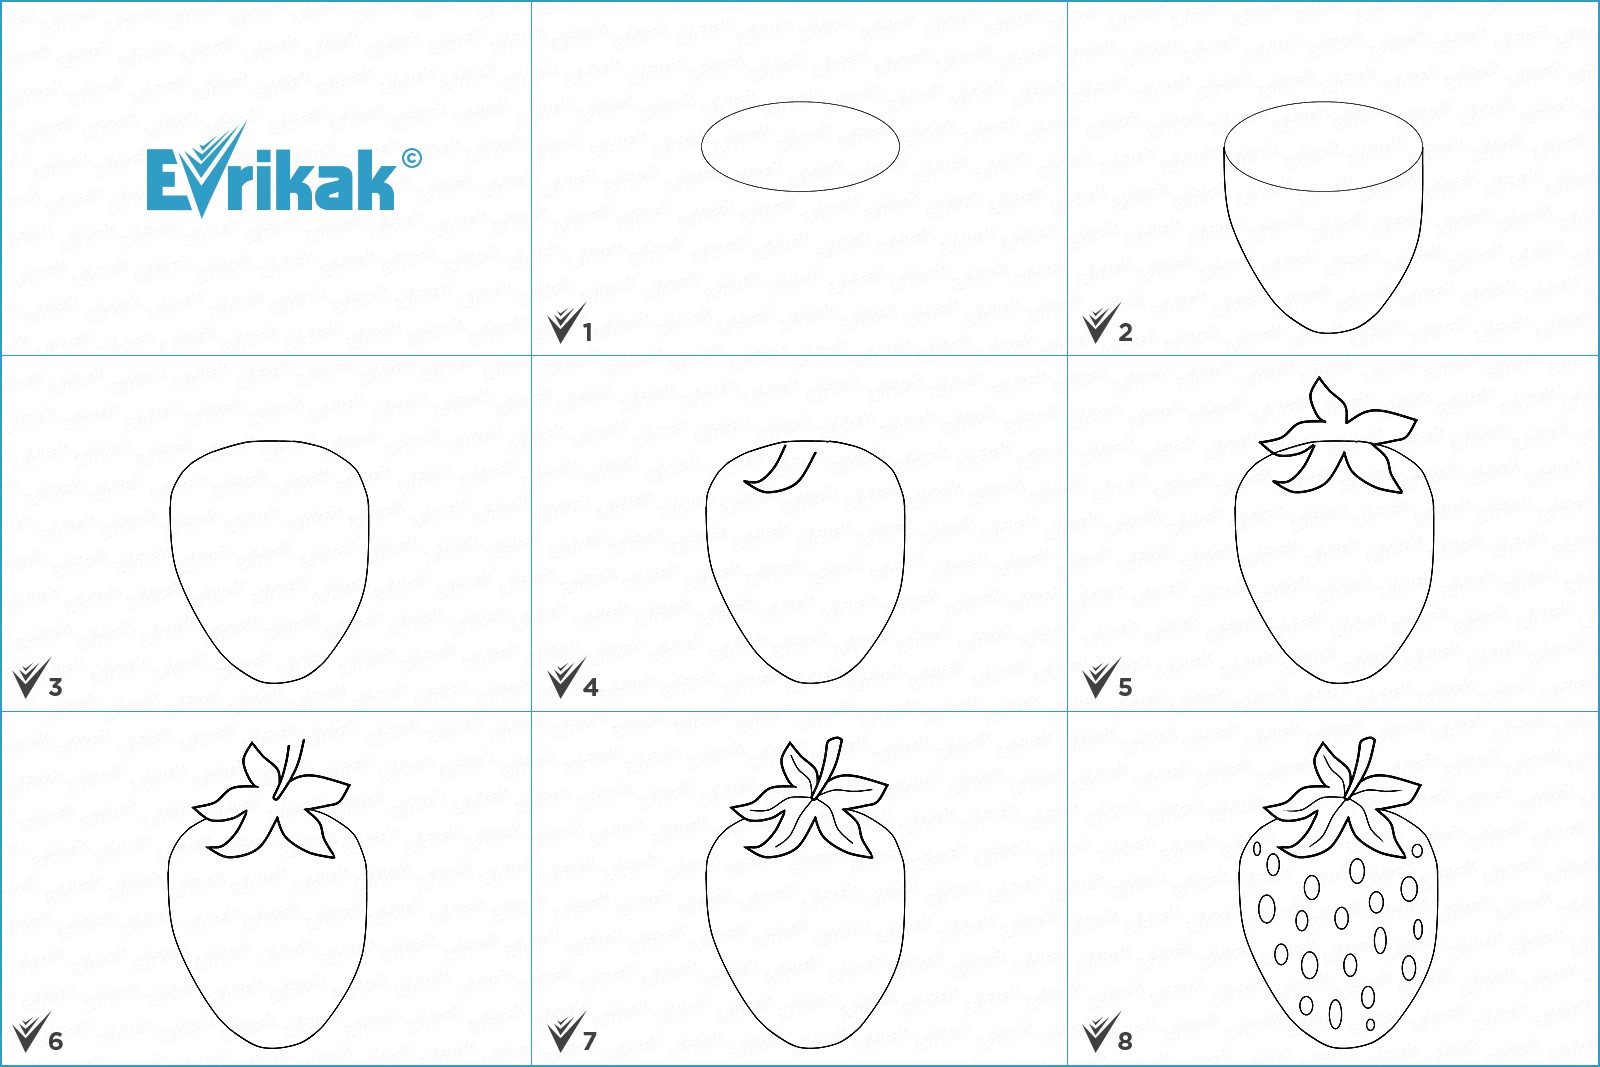
The image of a tomato begins with a template sketch of a ball on a piece of paper. Its contours should not be clear. To make the picture appear not just a red circle, but a tomato, to the ball, the leaves are dorisovyvayutsya like a star, and on its barrel - a trace of glare.
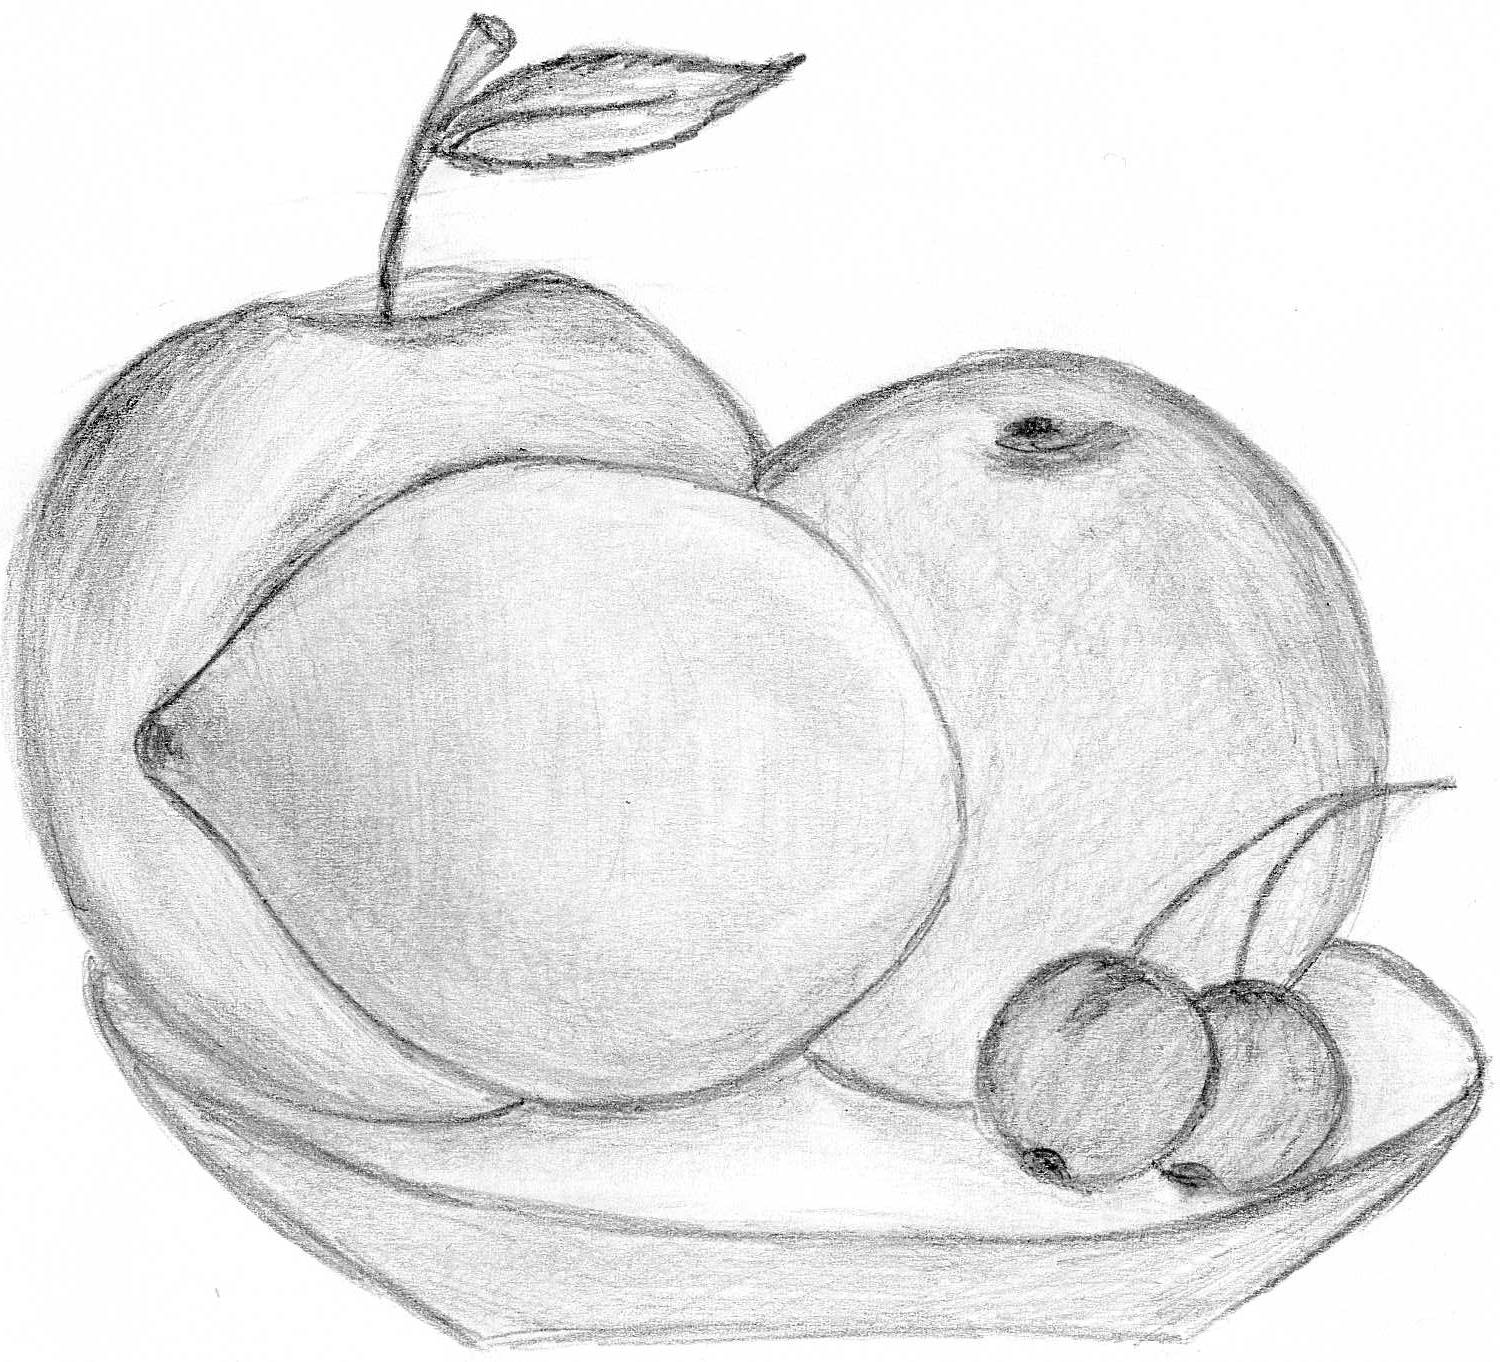
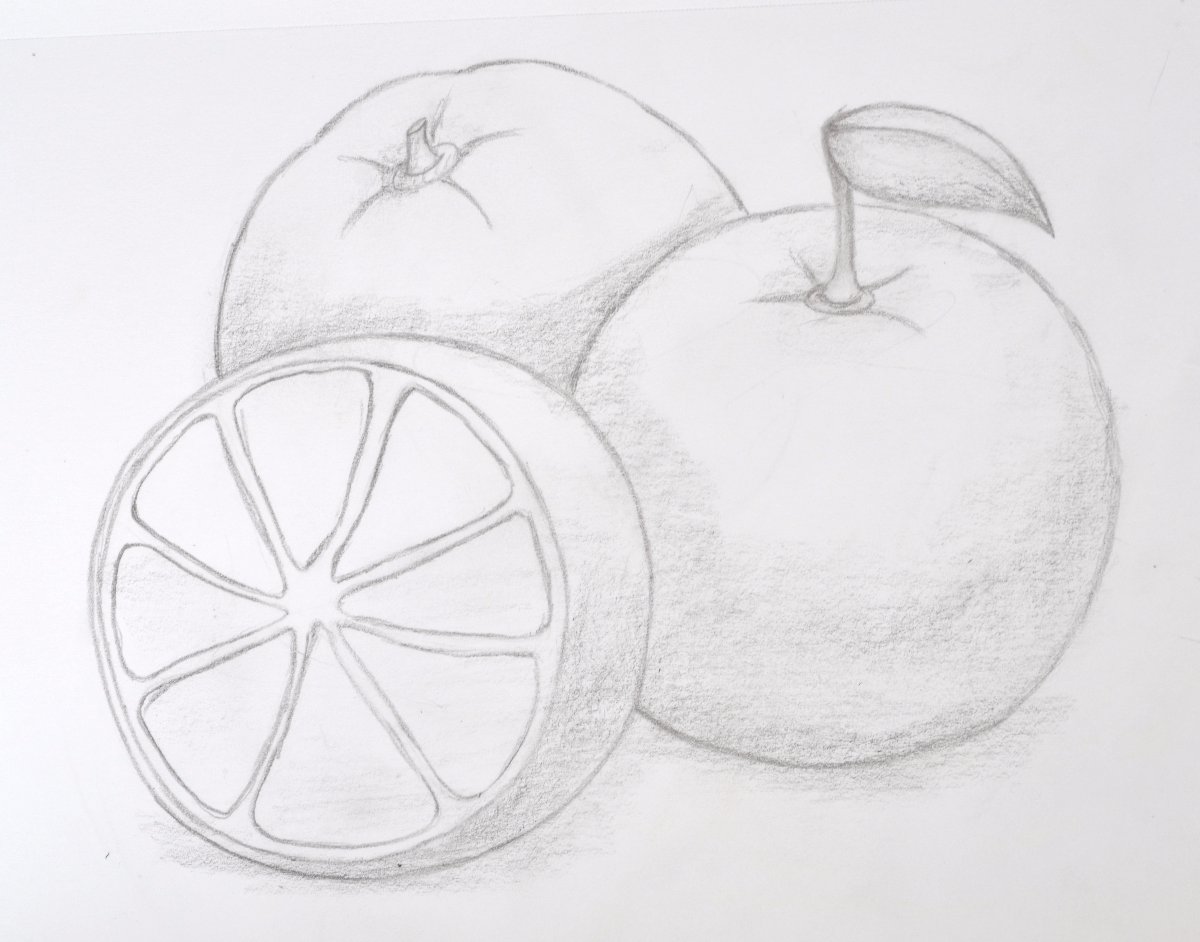
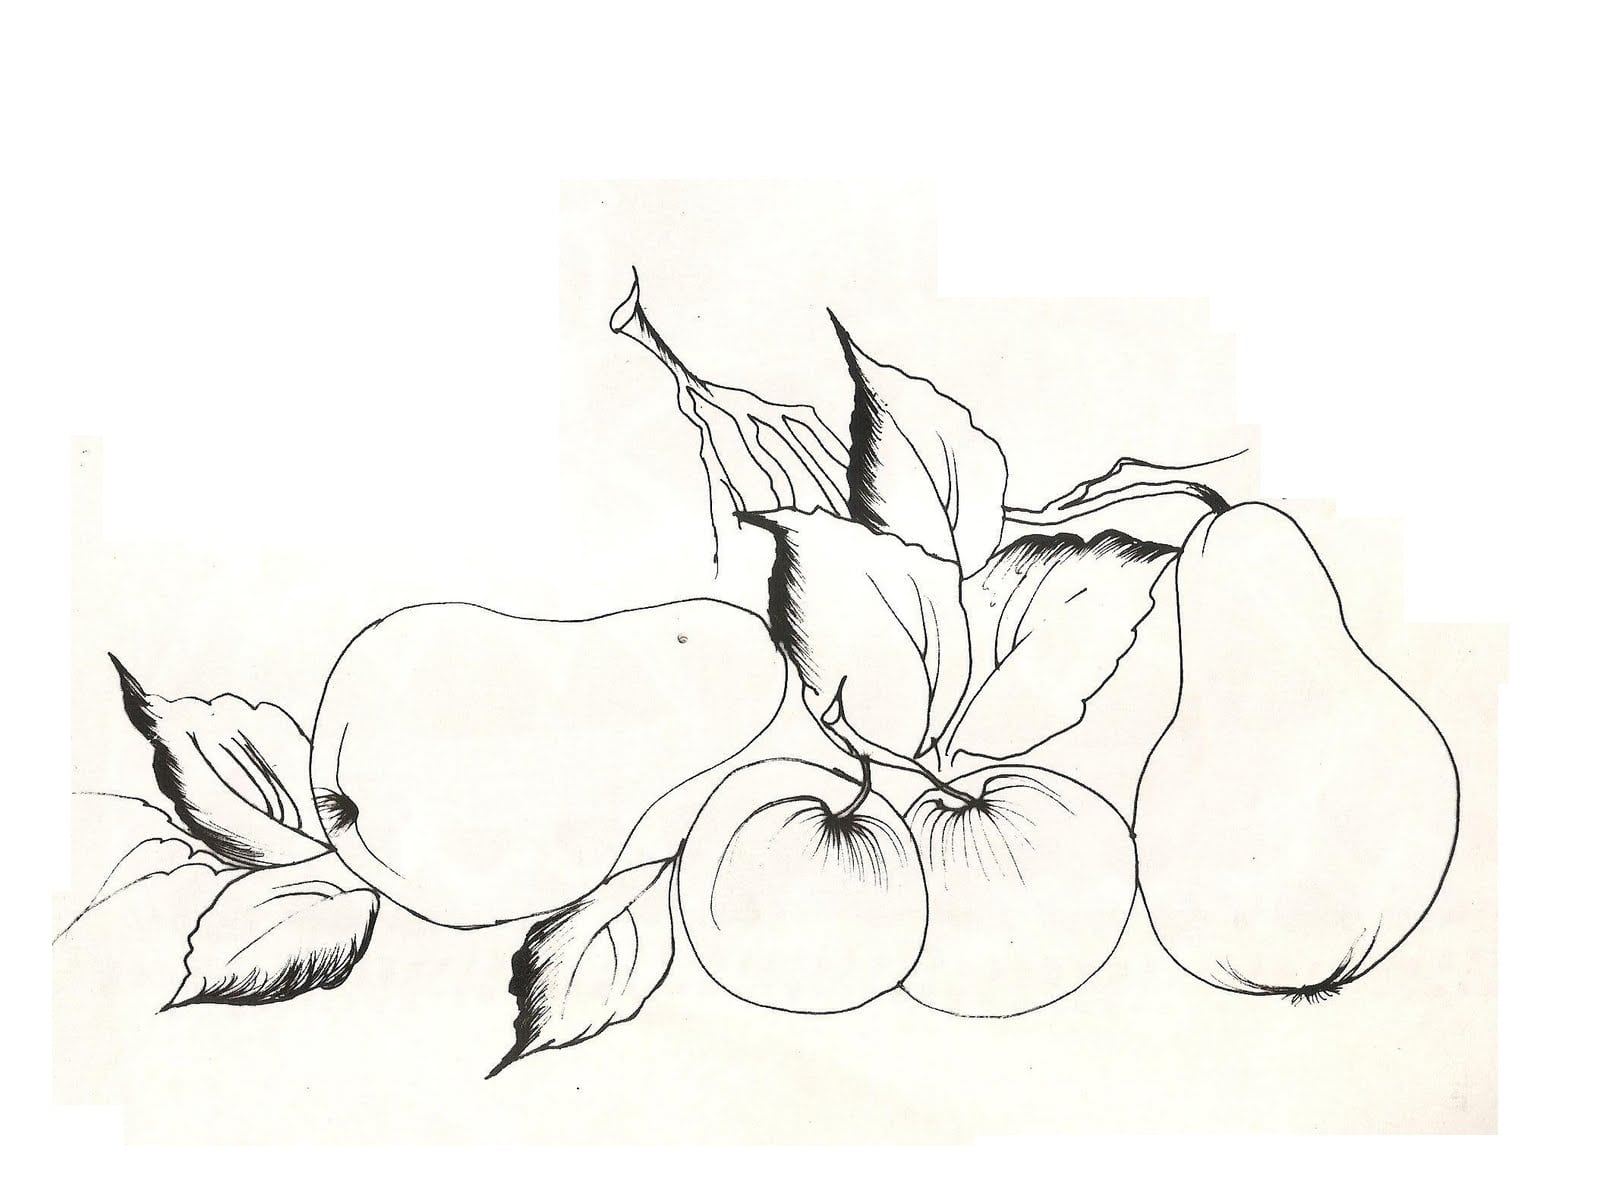
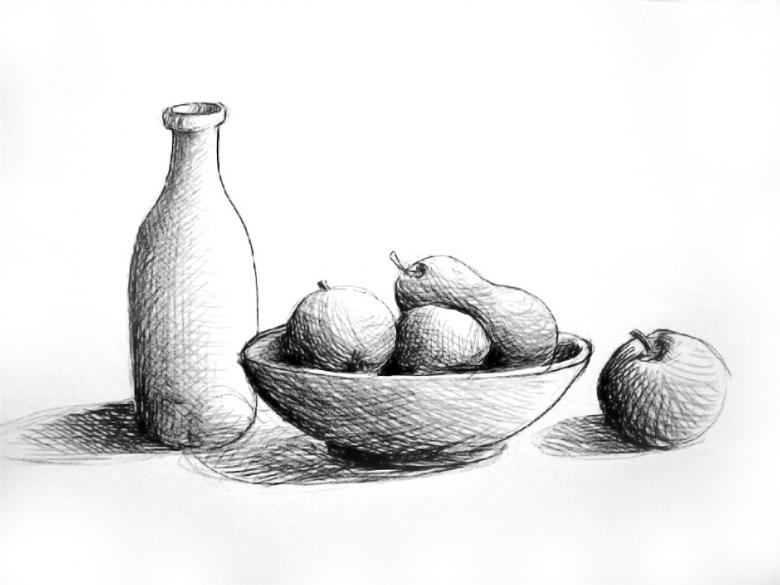
Still Life with Fruit
Still life is any, small size, inanimate objects lying on the surface. At least two objects should be combined into a composition. This is where the master class on how to draw a still life with fruit begins.
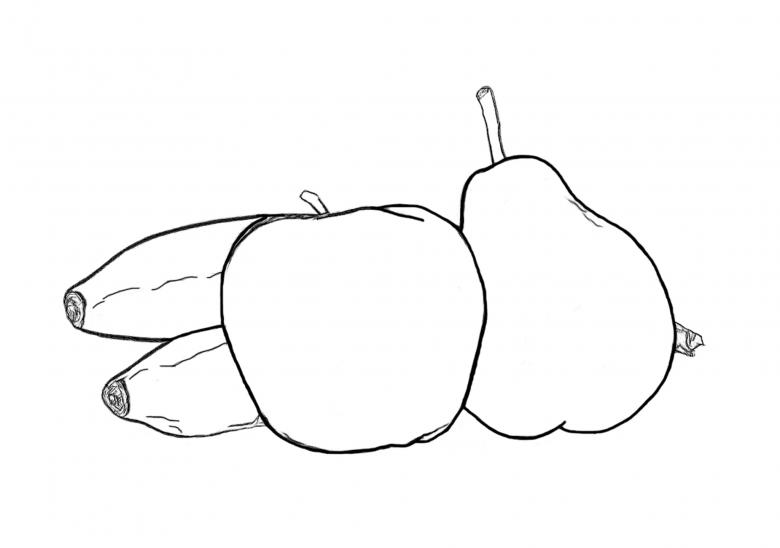
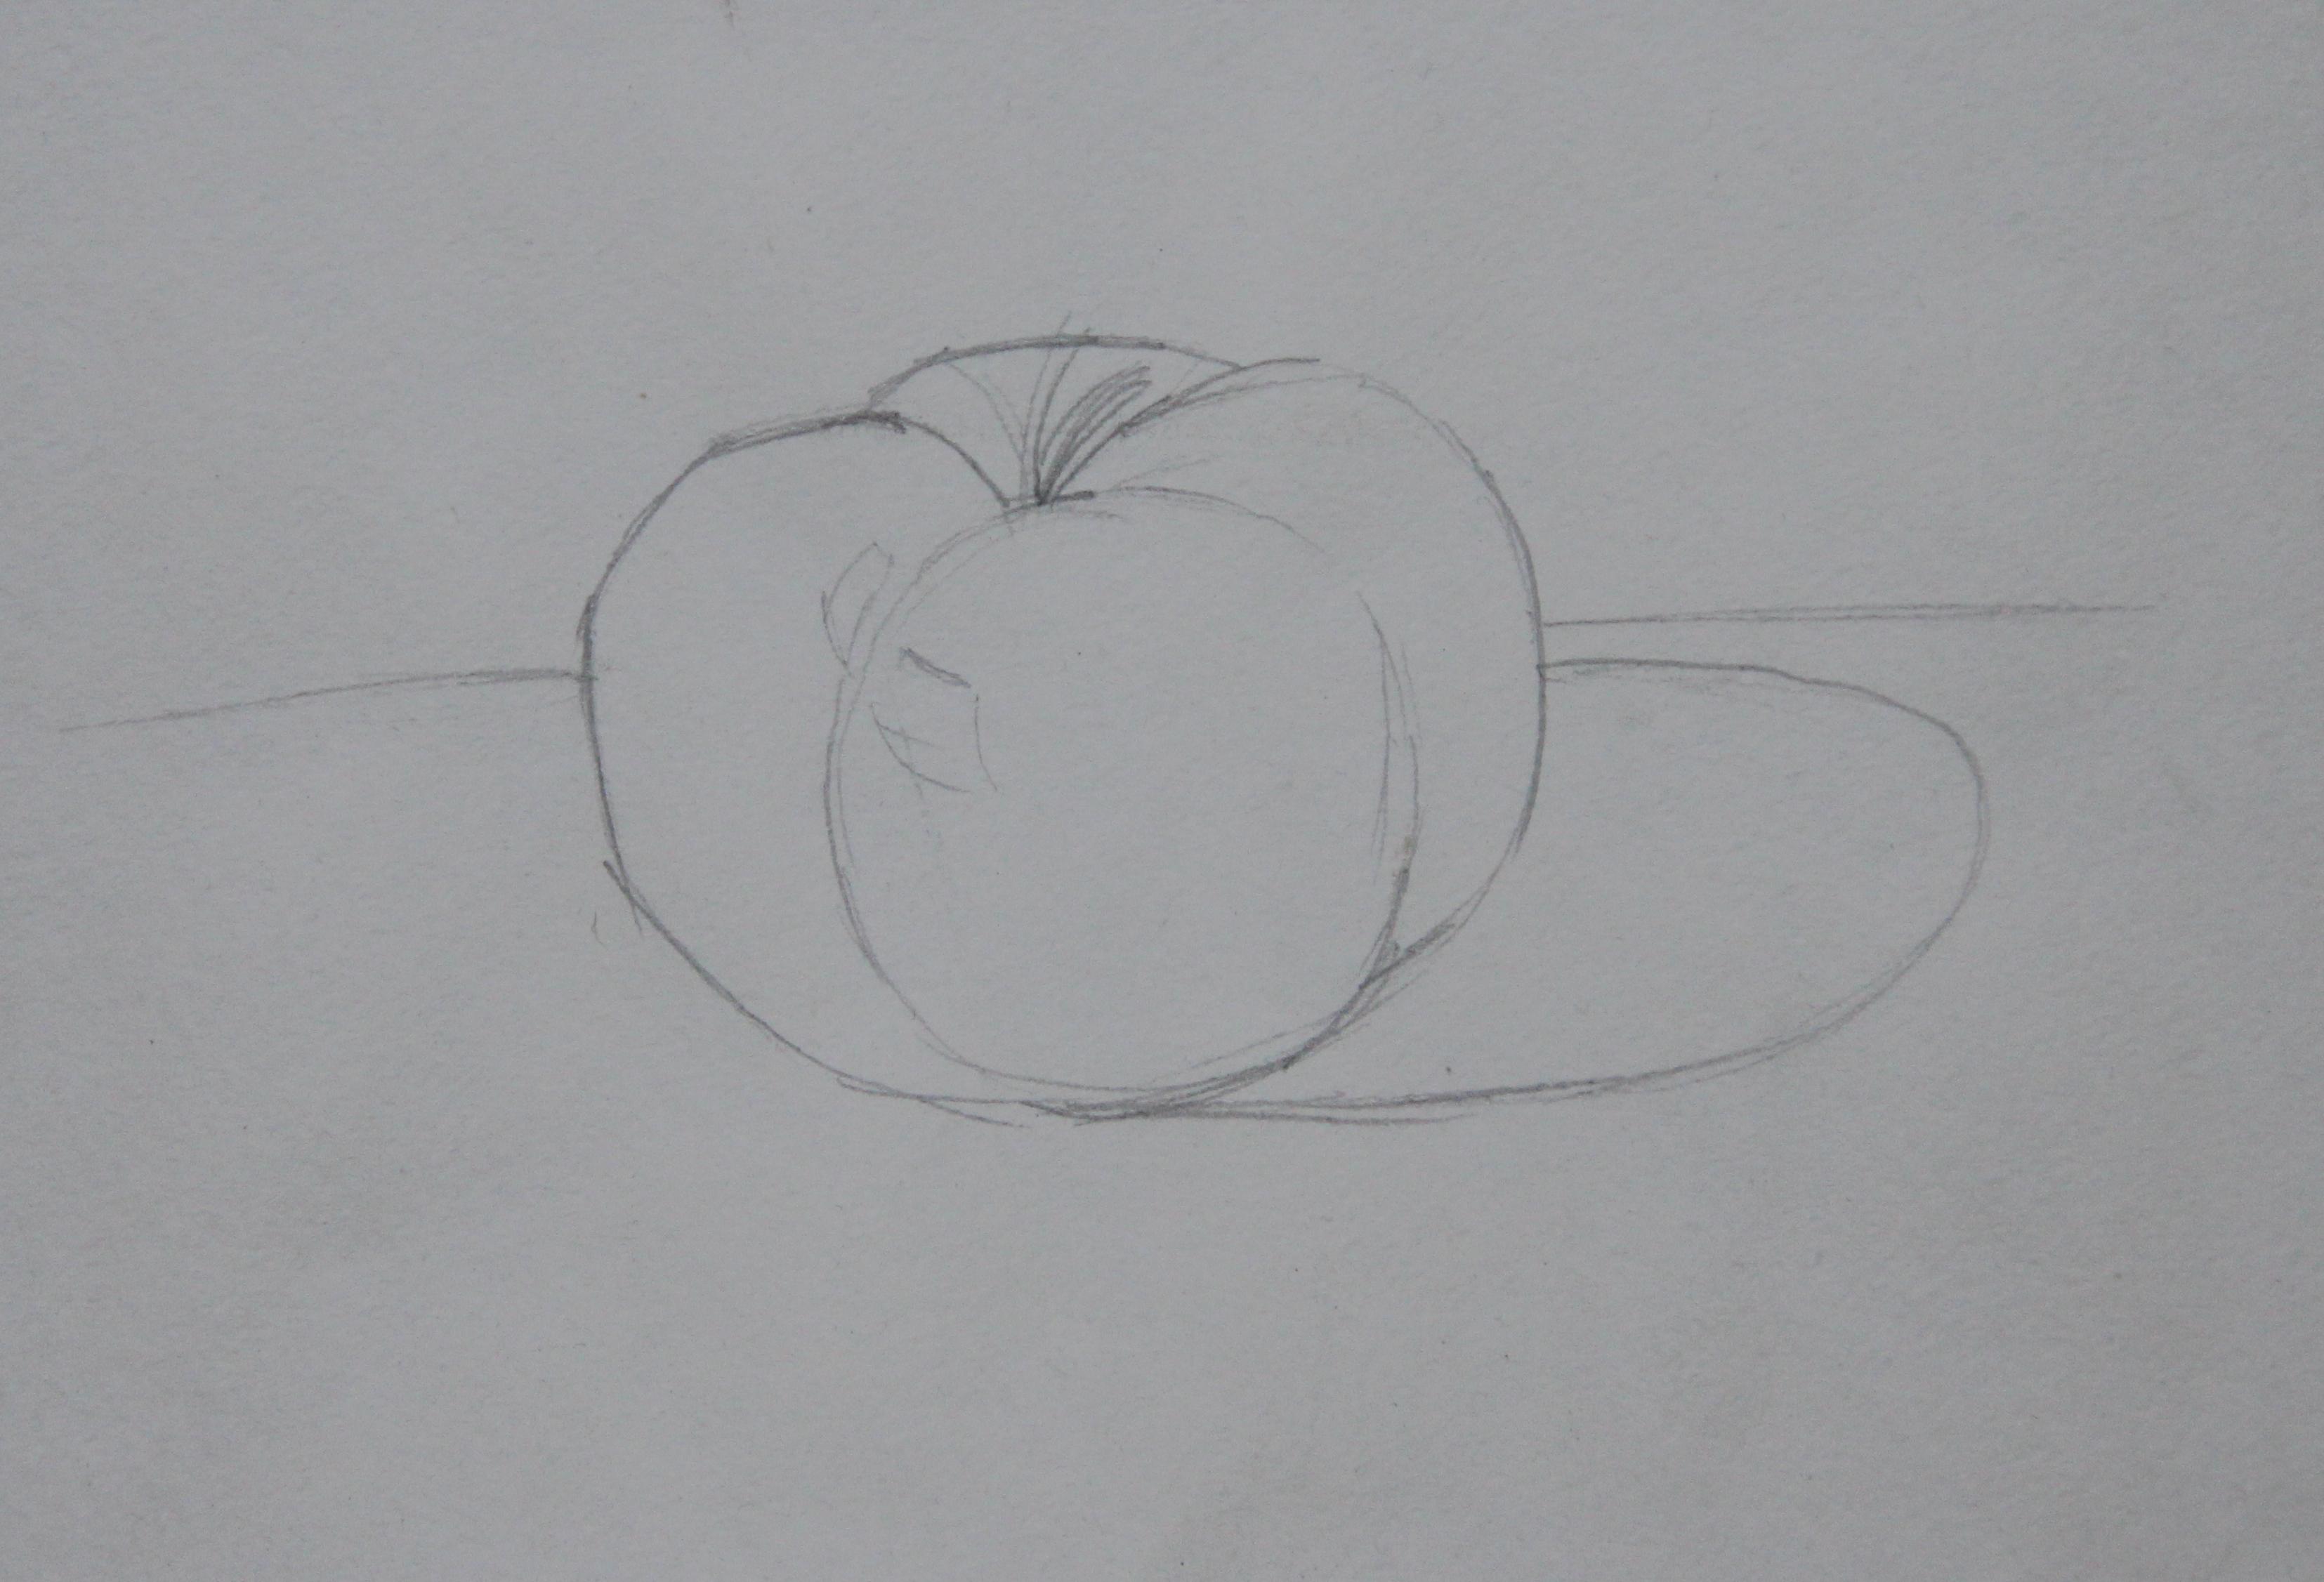
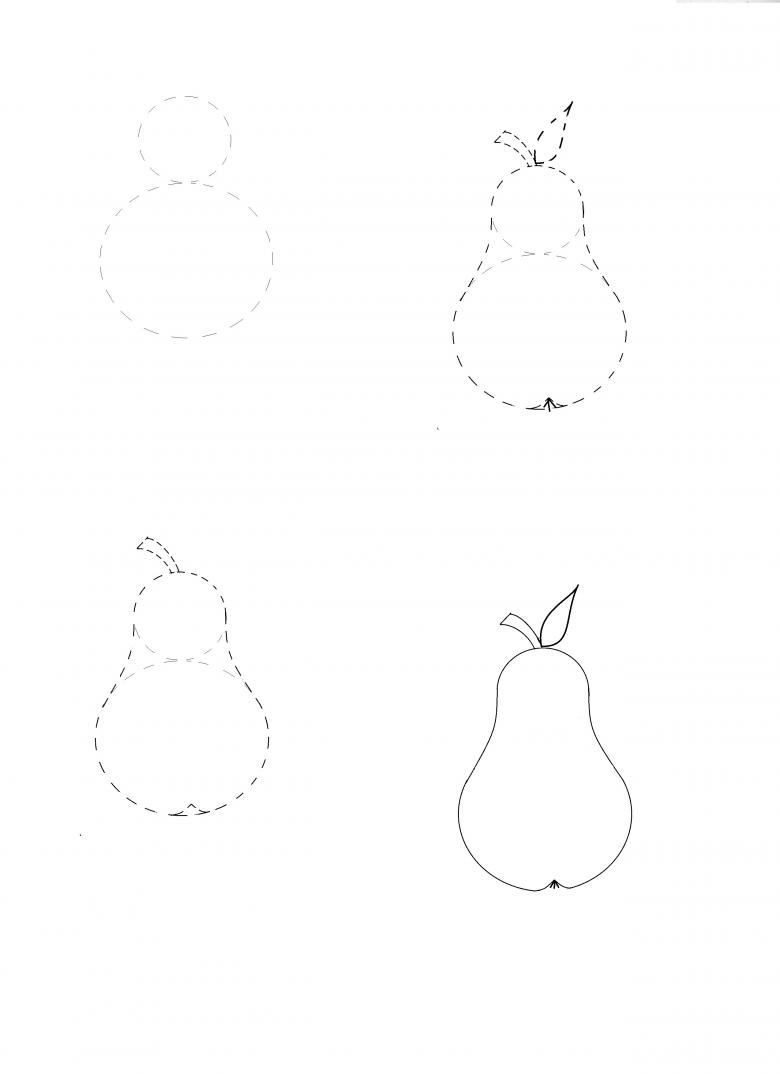
A simple still life of an apple and a pear
- A large circle is drawn on the left for the apple and a large oval with a small circle adjacent to it as a base for the pear on the right side. Lines are outlined their branches.
- On the apple is drawn the top hole. Two pear figures are joined into a single contour.
- The contour of each fruit in the still life is detailed. Conventional lines are wiped out. The cuttings are shaped.
- The exact contours of the drawing are applied.
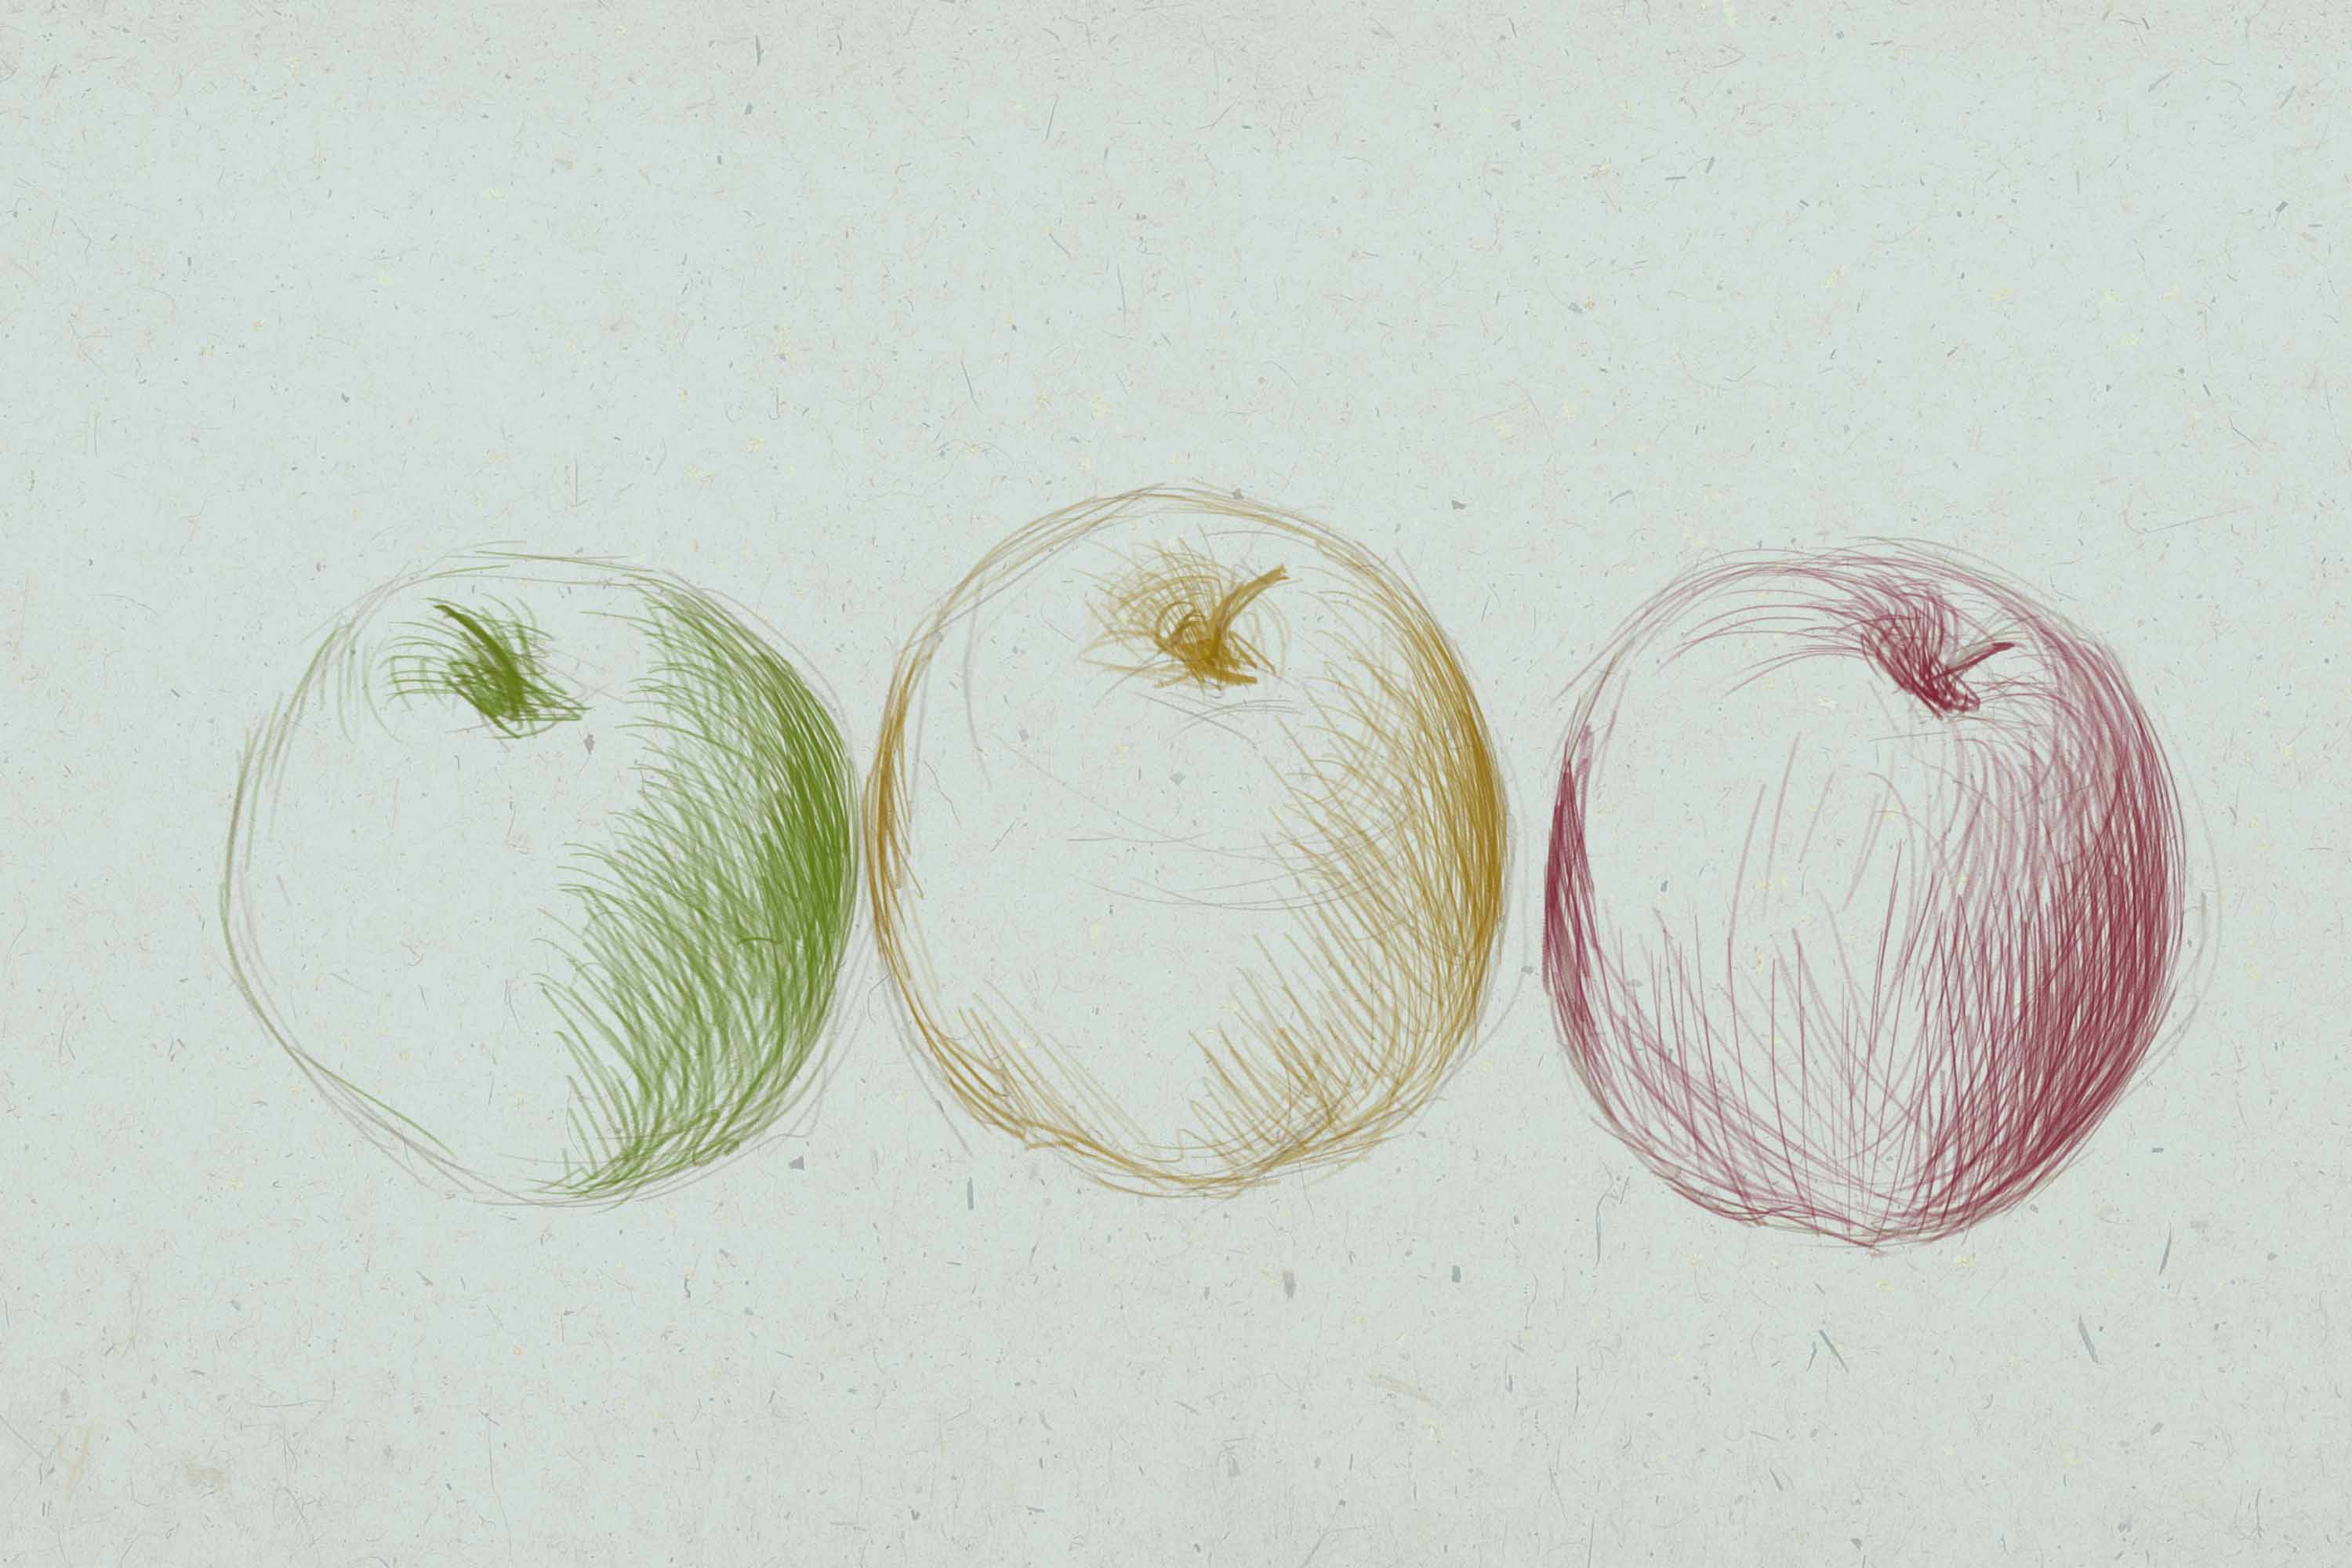
The drawing is ready for coloring. The apple is covered completely with a yellow-green shade, the pear with a red-orange shade.
To give volume, the sides of the apple are lightened with a light green shade. The barrel of the pear is colored in sandy tones. The brown shade is used to intensify the sense of its volume.
The details are finalized: the twigs are painted in brown, white highlights are applied, with the help of beige, terracotta and brown the background and under the fruit the shadow is added.
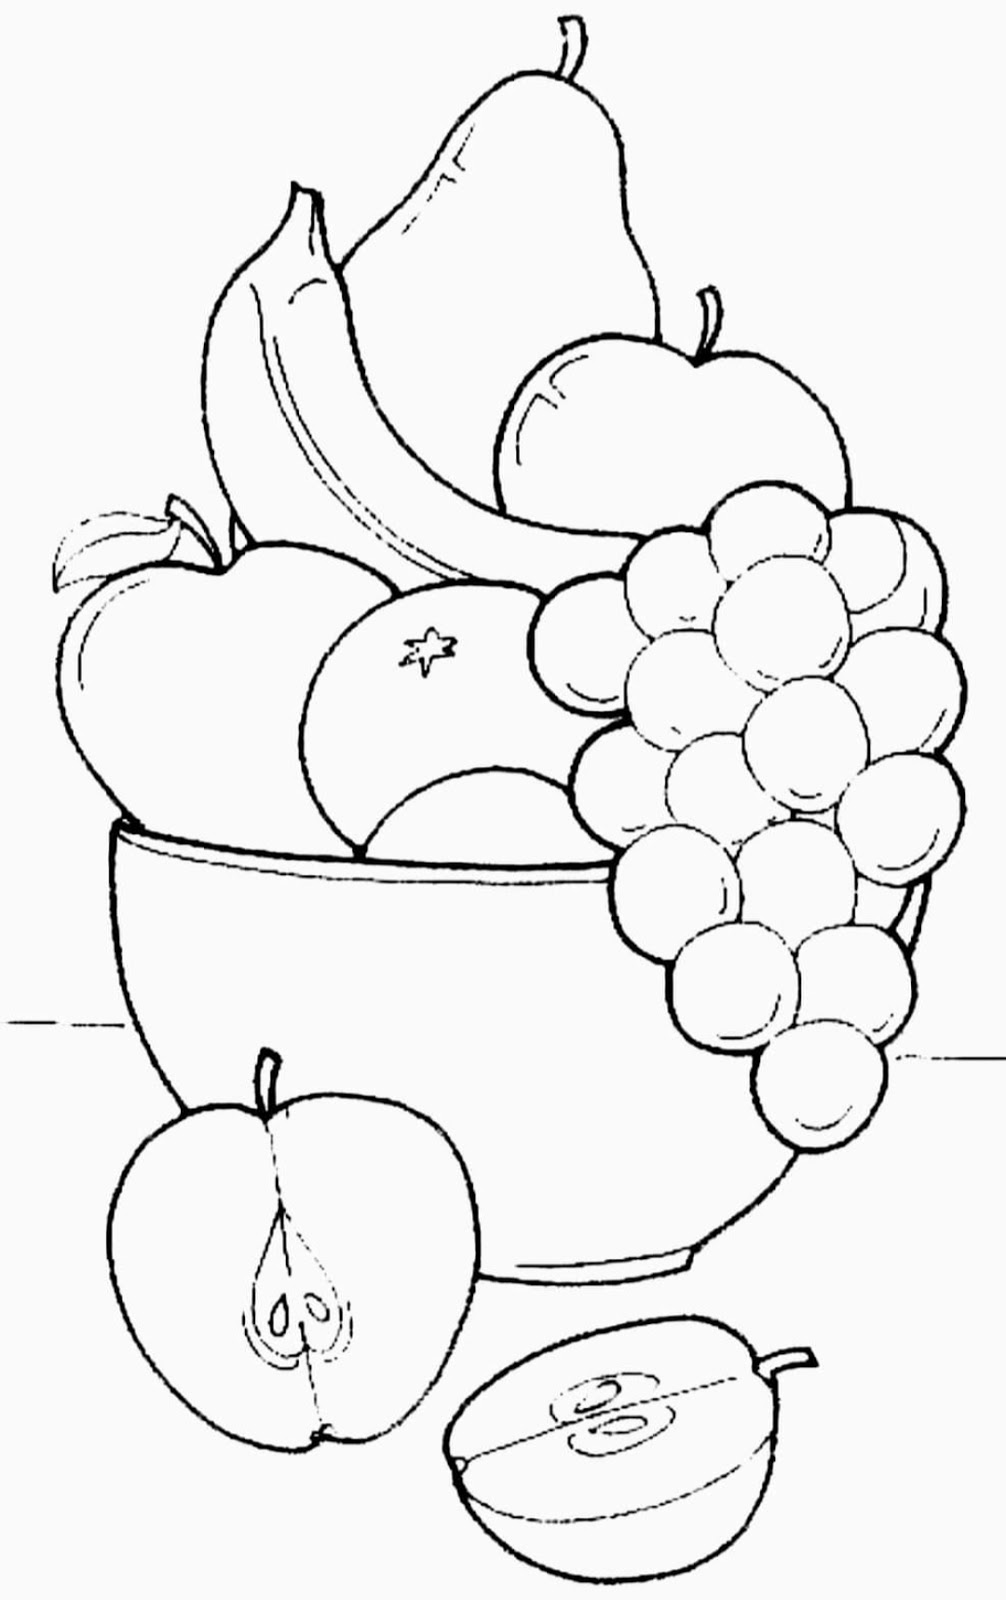
Still Life Basket or Vase of Fruit
For the novice artist, a lesson on how to draw a fruit basket will teach not only how to create still lifes, but also practice in conveying perspective and depth of the subject.

The work begins with the image of the basket.
- A horizontal oval is drawn with light auxiliary lines. Its elongation sets the size of the future basket, and its width should allow you to fit some fruit inside it, as it will be the top edge of the basket.
After the basket will be filled with fruit, will not be visible part of the oval.
- Below the oval draw a line repeating the outline of the crescent.
- Stable base of the basket is depicted as a small ring at the bottom of it.
- To give the object a volume inside an oval, another oval is drawn in parallel. The distance between the ovals is wider in the foreground than in the background.
- The handle of the basket is drawn as two arcs drawn from the middle of the oval on one side to its middle on the opposite side. A small connecting line is drawn at the top of the arcs to make the drawing true.
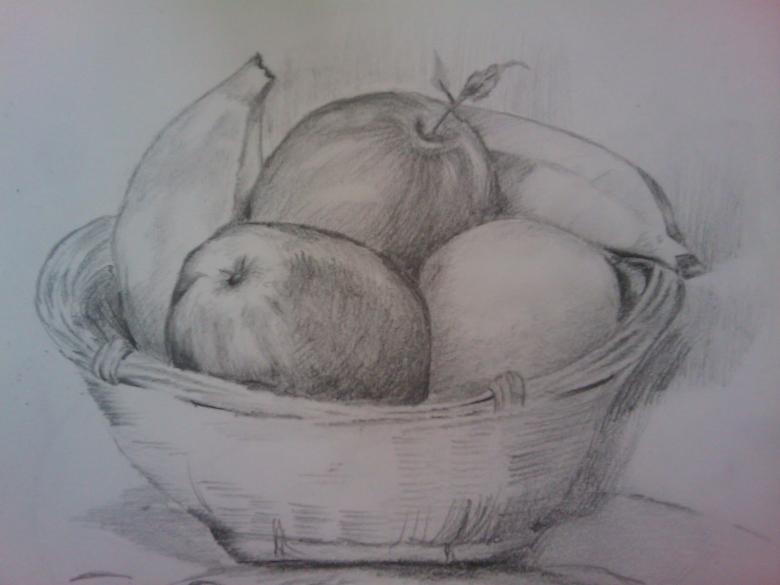
If the step where the handle is drawn is skipped, this instruction also fits the lesson on how to draw a vase with fruit.
The weave is depicted by curved intersecting lines. For example, starting to draw a line from the upper left edge, the arc descends as close as possible to the lower left edge of the basket. The distance to the next arc leaves 1.5 cm. Further arcs are drawn asymmetrically on the other side of the basket: from the upper right edge down to the left.
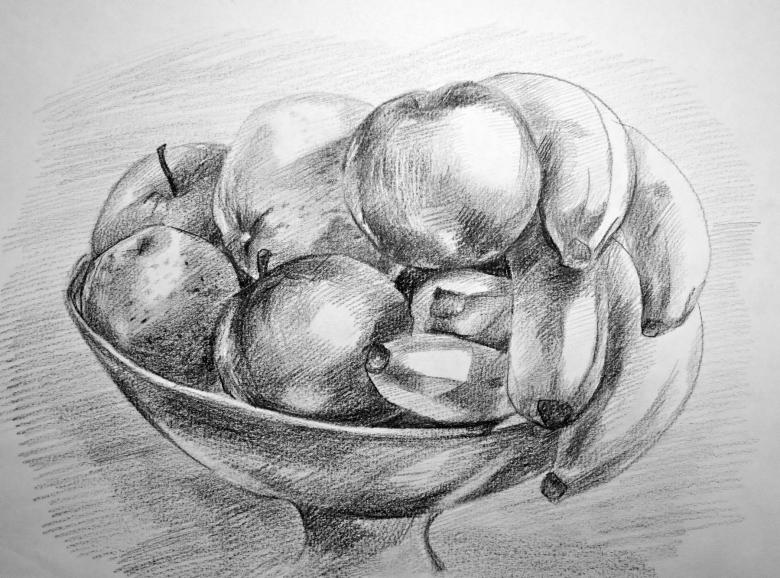
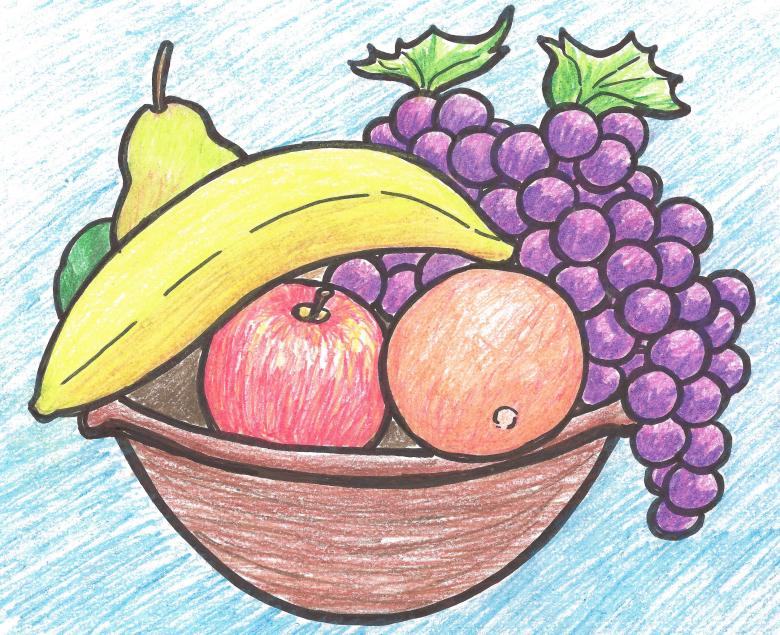
The second part of the lesson is filling the basket with fruit. The fruit in the foreground appears larger than in the background. In the picture, they overlap each other and can look in different directions. This means that one apple may have a stalk and another may have its lower part visible.
- Draw as many semicircles as you want to draw apples in the basket. From them the contours of the fruit are already drawn. Near the stem, sticking upwards, the semi-circle becomes already flattened.
- Nearby two semicircles are drawn as the base for the oranges. The flower stalk on each of them comes out with a small dark circle.
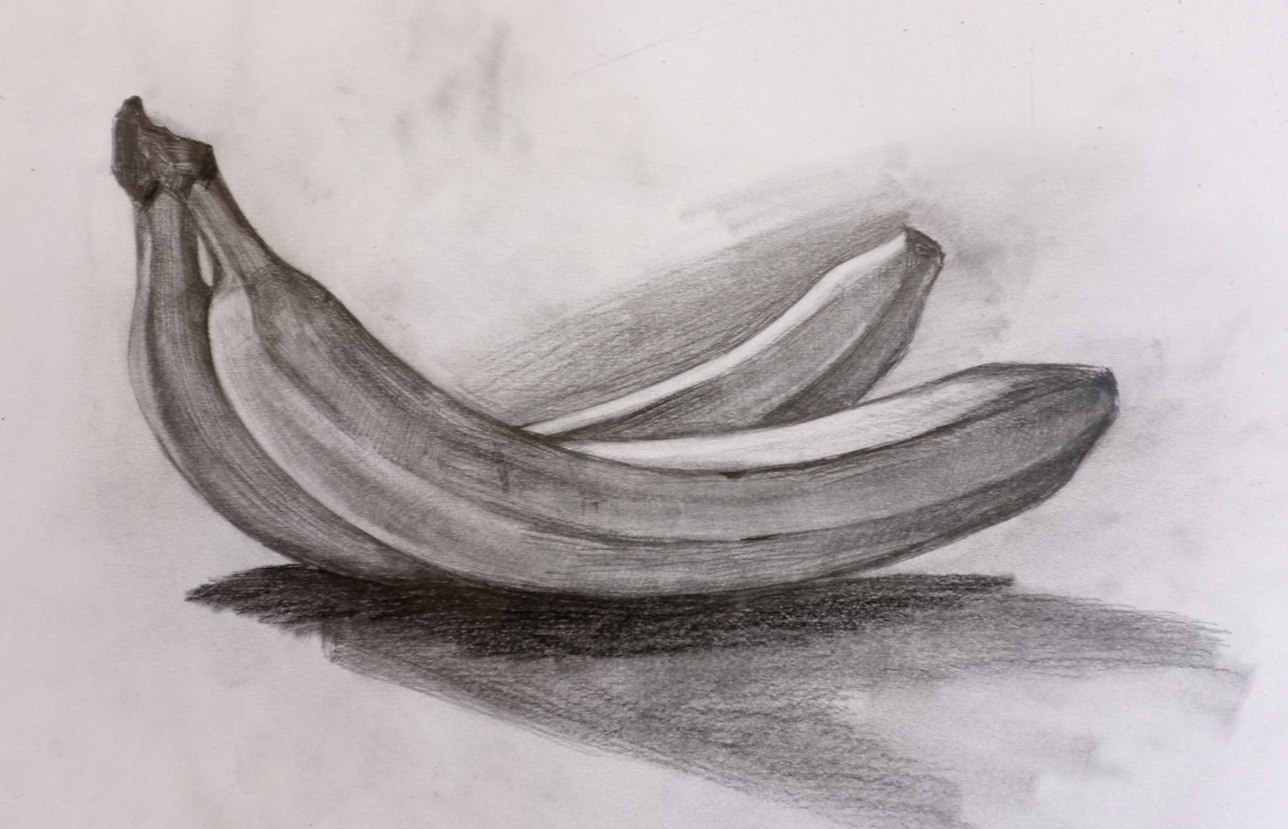
- A line similar to a crooked smile begins to form the shape of a banana. Parallel to her another line is drawn at a distance of 2-3 cm. The stem and the top of the fruit appear after these two lines are connected.
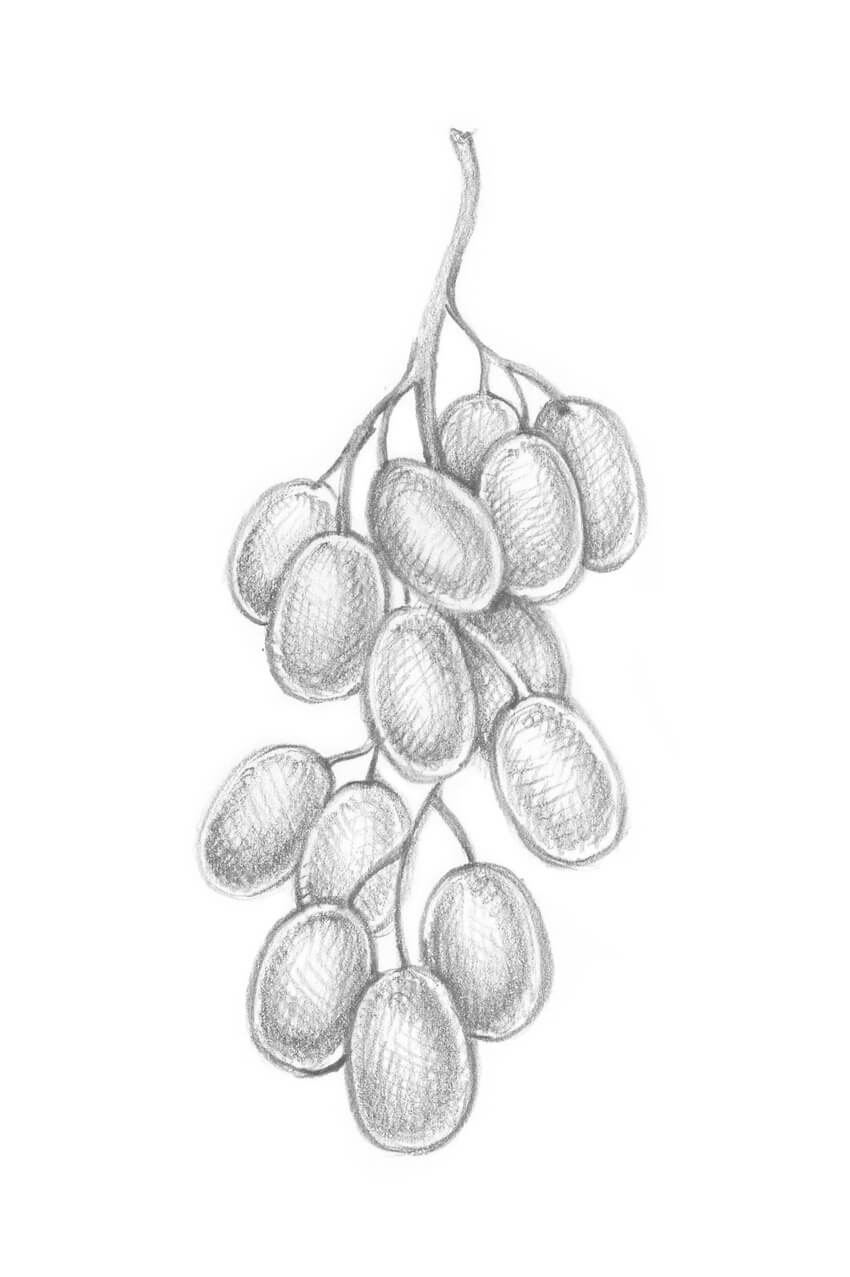
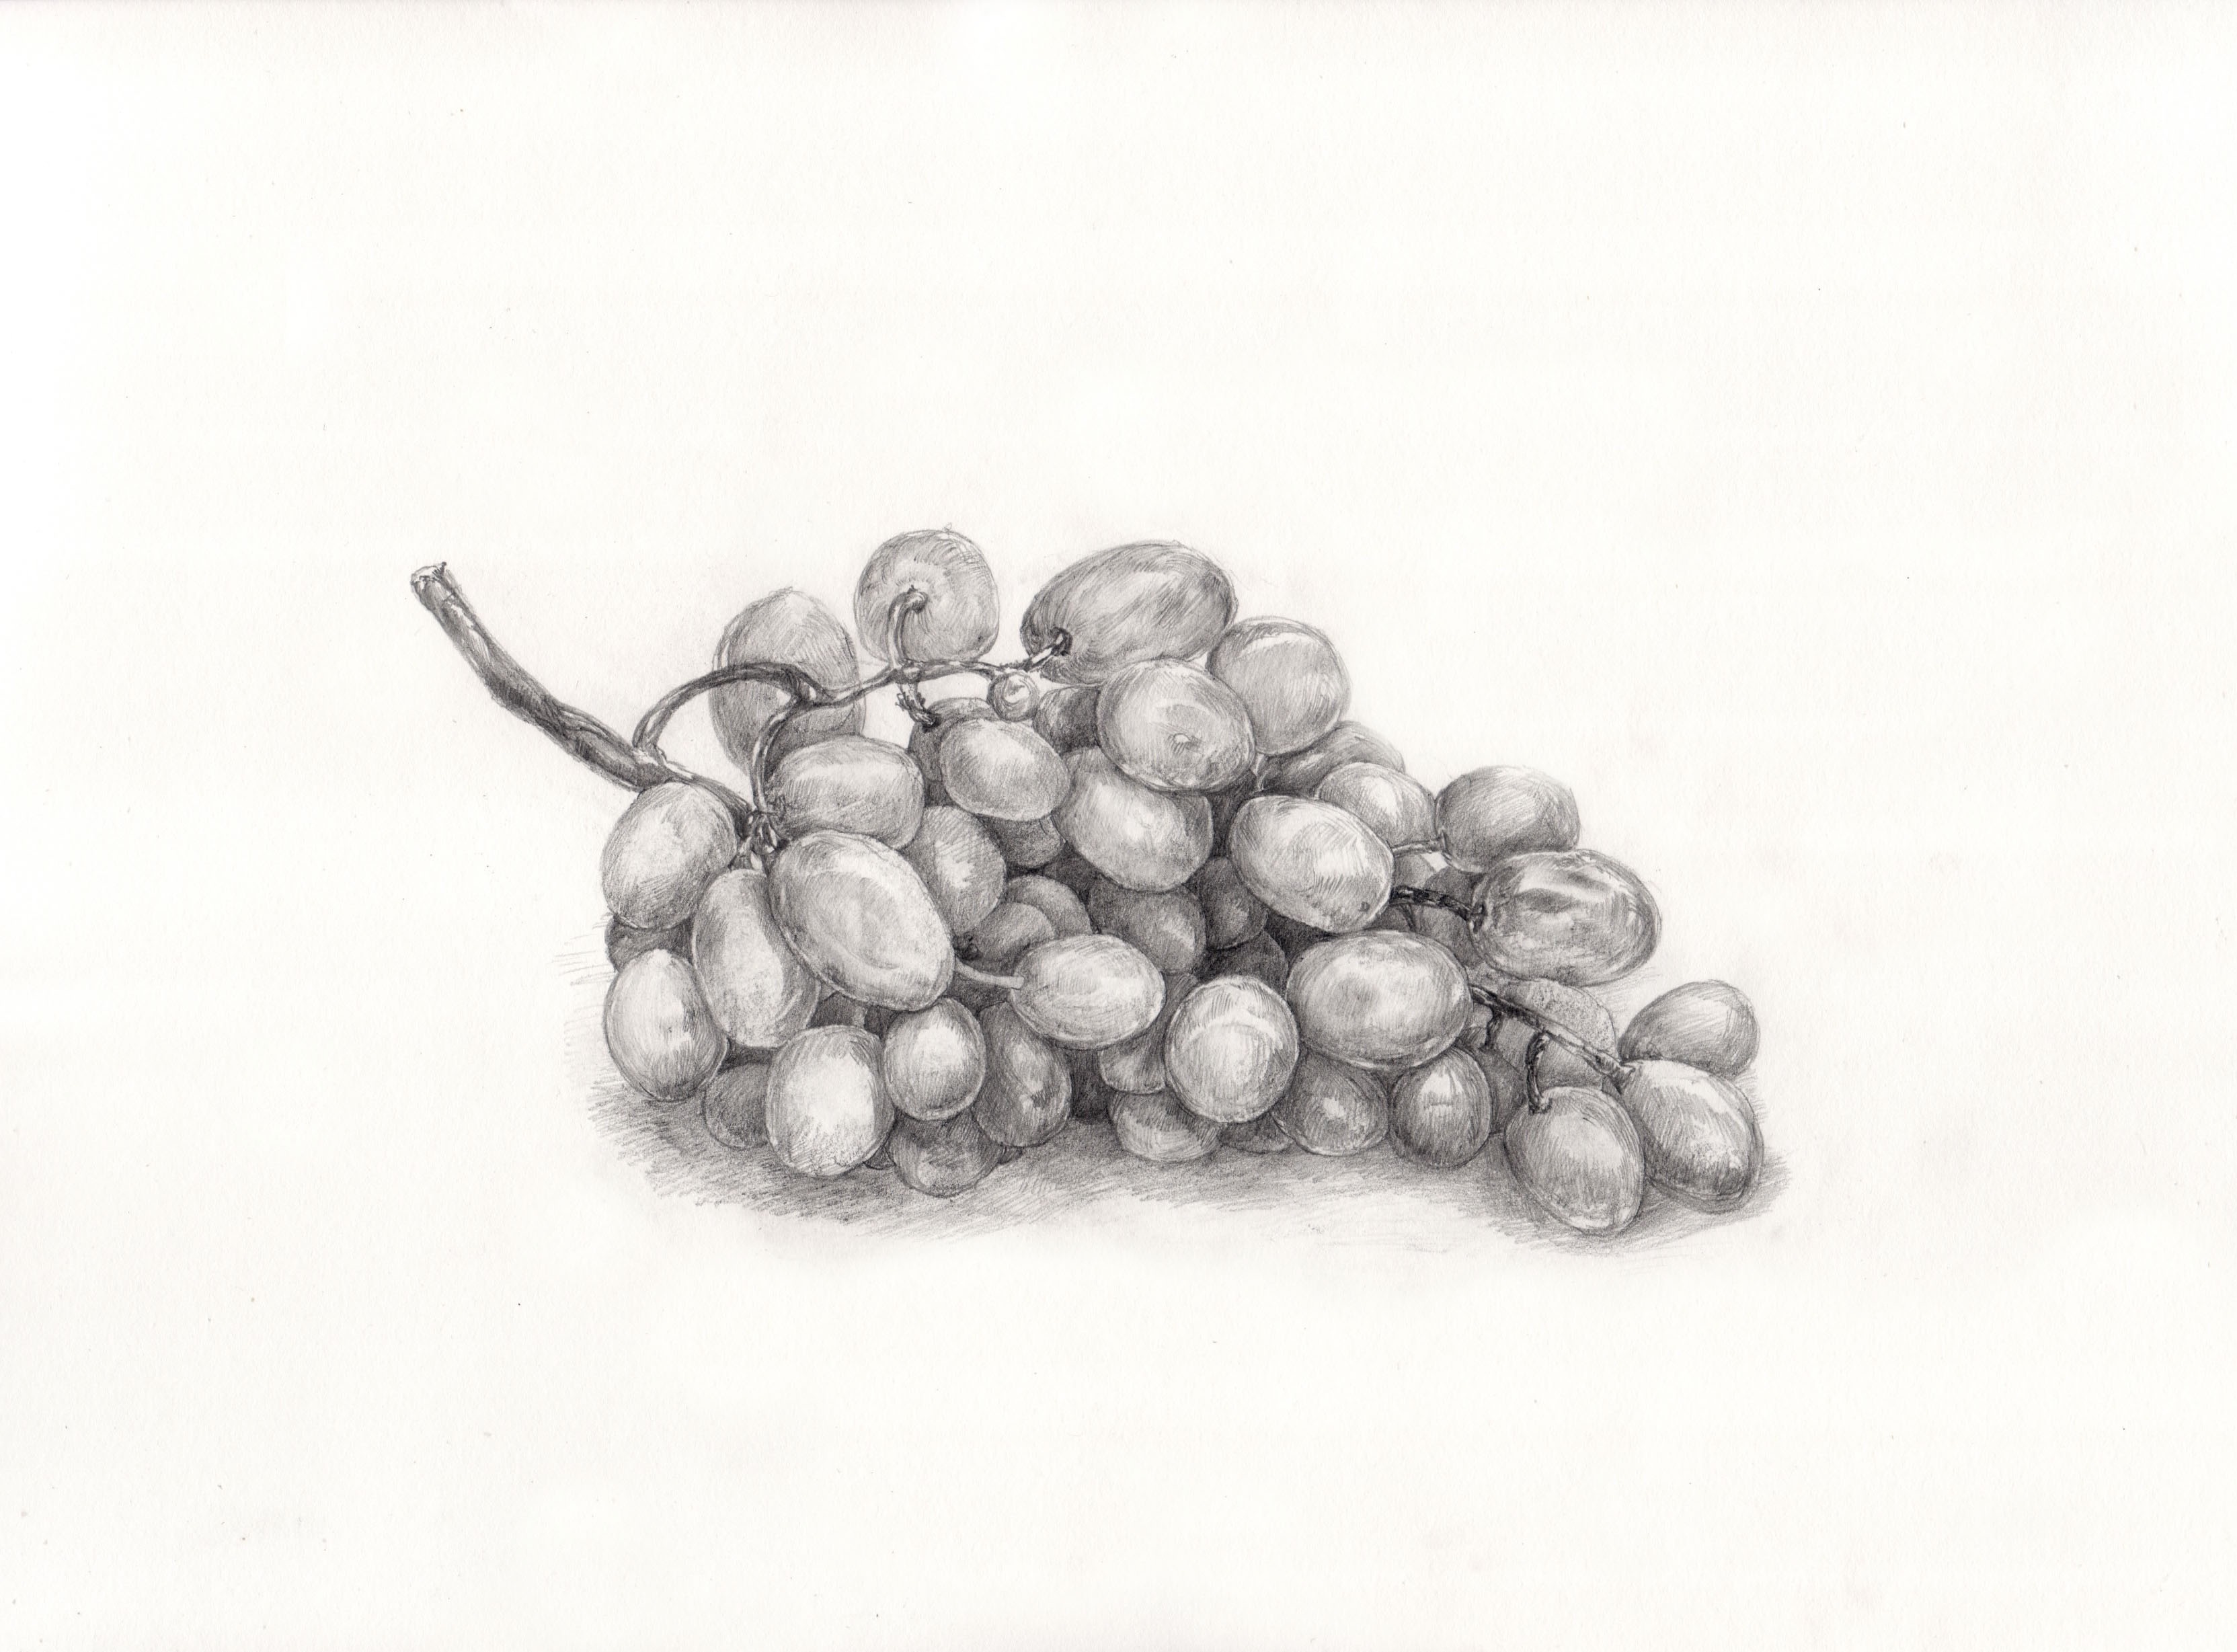
- Small circles grouped in one place are the bunch of grapes. Between some berries thin lines are drawn, imitating the stems connecting them.
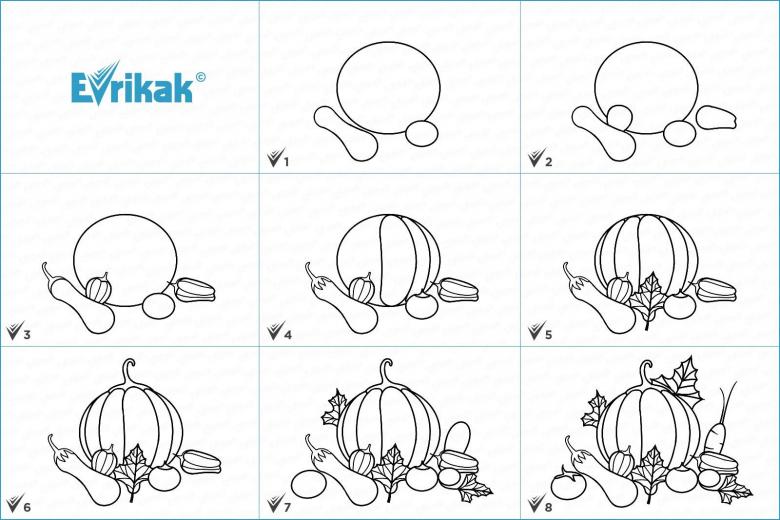
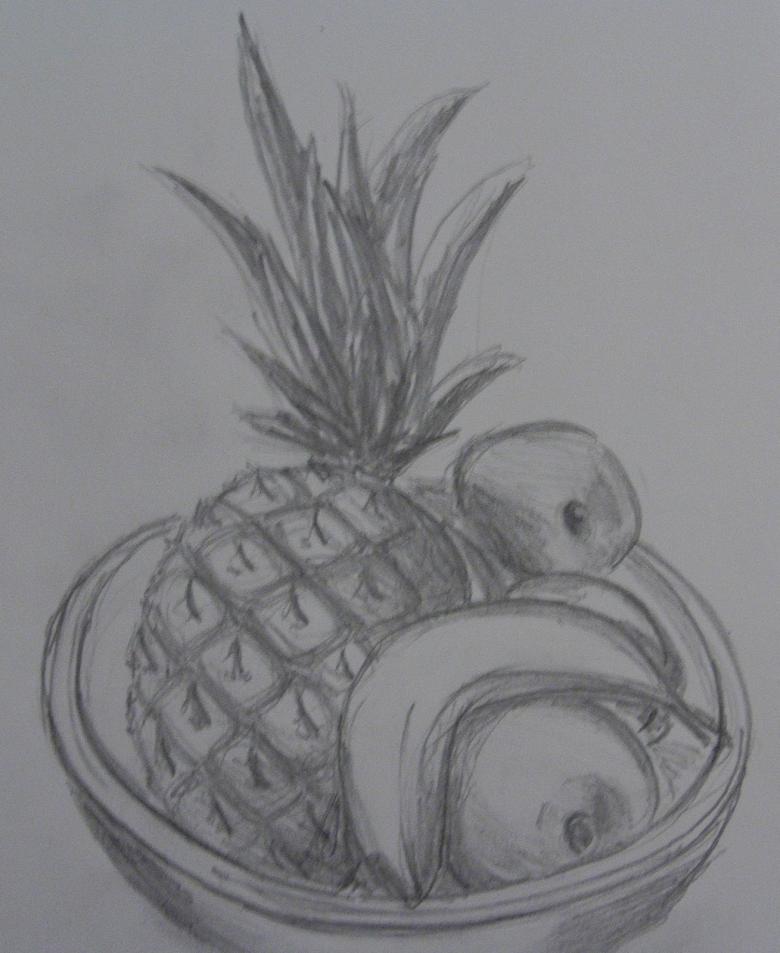
- Still life can be completed with a pineapple. A large oval is drawn. It is hatched crosswise, so that it was completely covered by sections. In the center of each of the bottoms there is a dot. From the main part of the pineapple leaves stick out of the basket.
- Rastushevku on the fruit depicts the shadows. This will make them three-dimensional.
- Wipe out all the conditional lines and the picture is ready for coloring.
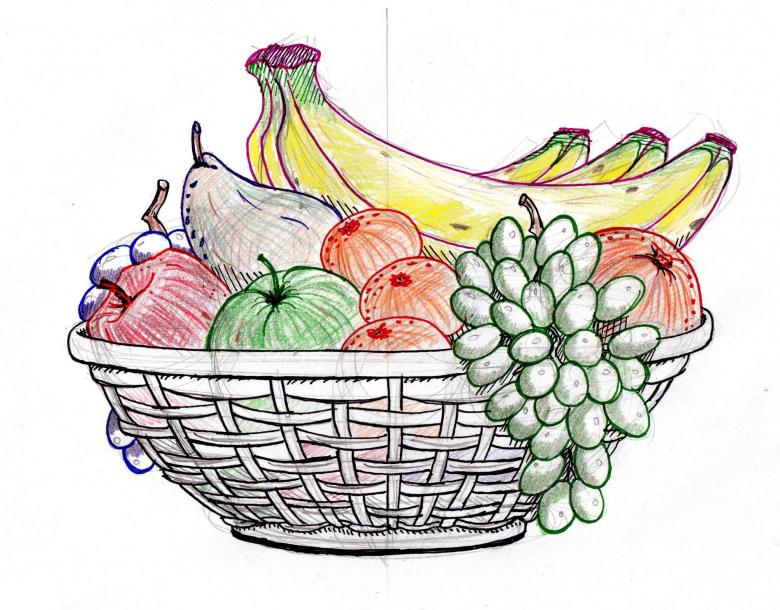
Still life in cartoon style is depicted without shadows and highlights. Just the contours of the basket and fruit are clearly drawn.
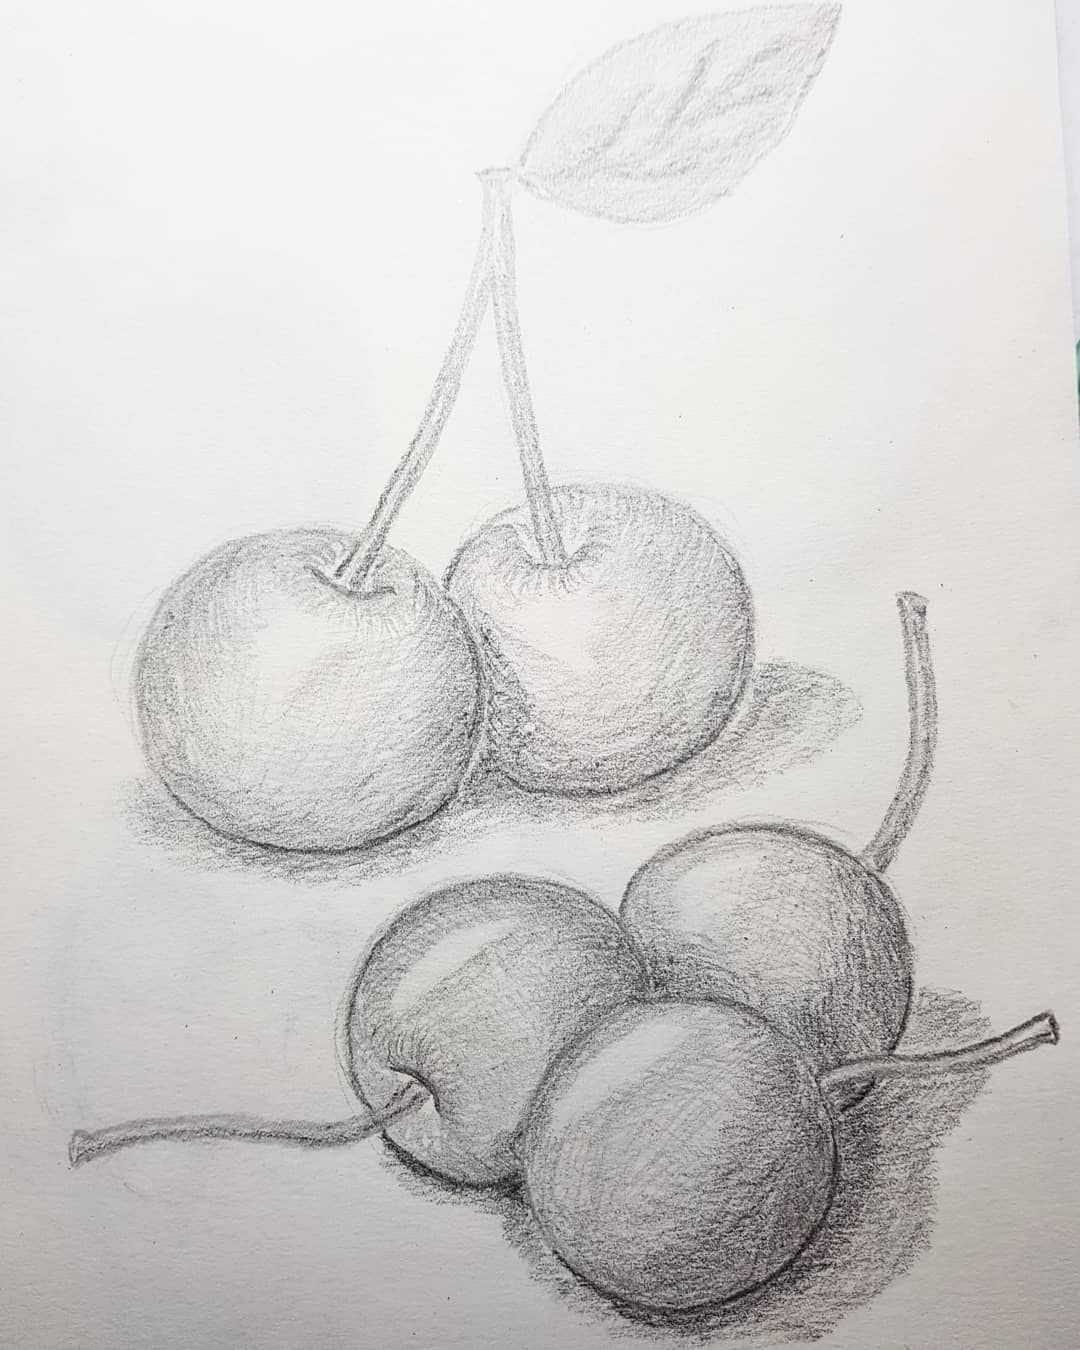
Pictures for drawing fruit in pencil