How to Draw a Face in Pencil Step by Step: General Rules of Portrait Drawing and Detailed Instructions for Beginners
The ability to draw is not always a talent, it is enough to have the desire and to be patient. To create a drawing of a man you need to know his anatomical structure and basic proportions. It is difficult without the ability to convey the image of a face on paper, but everyone can learn.
The basic principles of creating a face on paper
Before working, you should prepare sheets of paper, an eraser, a simple pencil and a ruler. It is worth thinking about where to start with the image. At first, it is necessary to remember some nuances of the basic rules for creating a drawing:
- On a blank sheet of paper, it is necessary to visually determine where the elements of the drawing will be located.
- A pencil of medium softness should be chosen so that the lines are finely laid and can be easily erased, if necessary.
- The outline is kept until the result of the work is outlined.
- The shape of any face is done as follows: the top is rounded and the bottom a little pointed.
- A beginner artist should practice regularly, bringing the execution of the strokes to automatism.
Each part of the face is first taught to draw separately, and then the entire face is created.
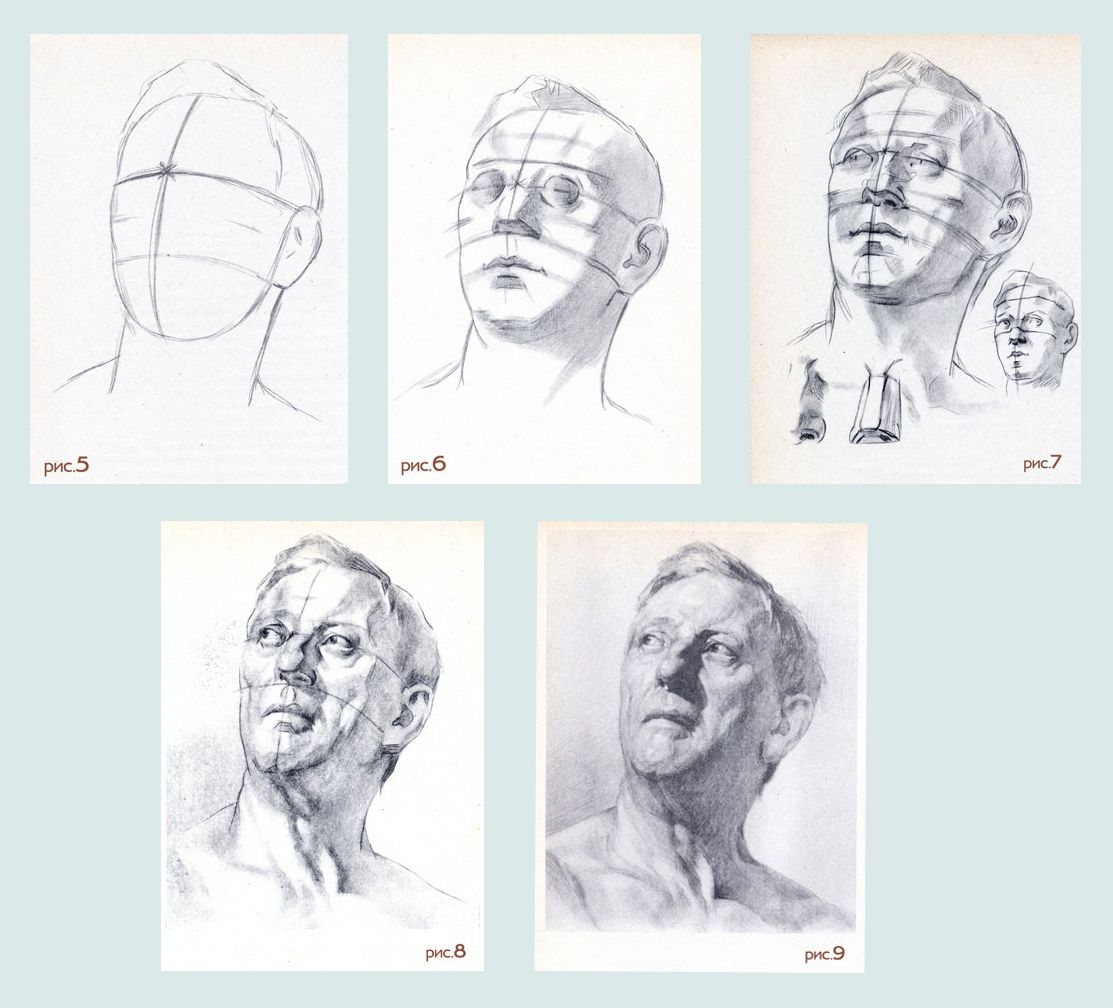
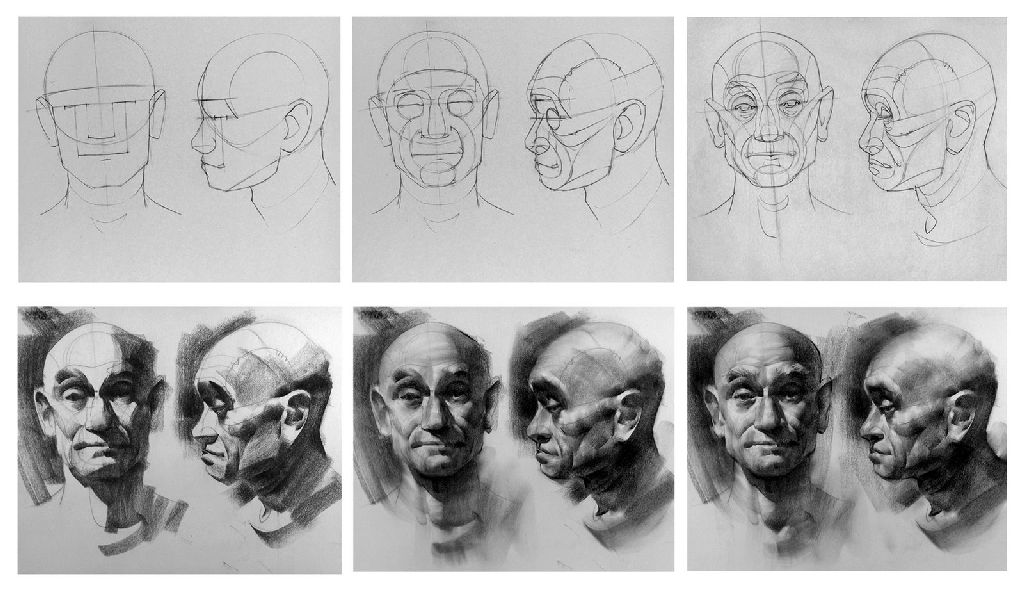
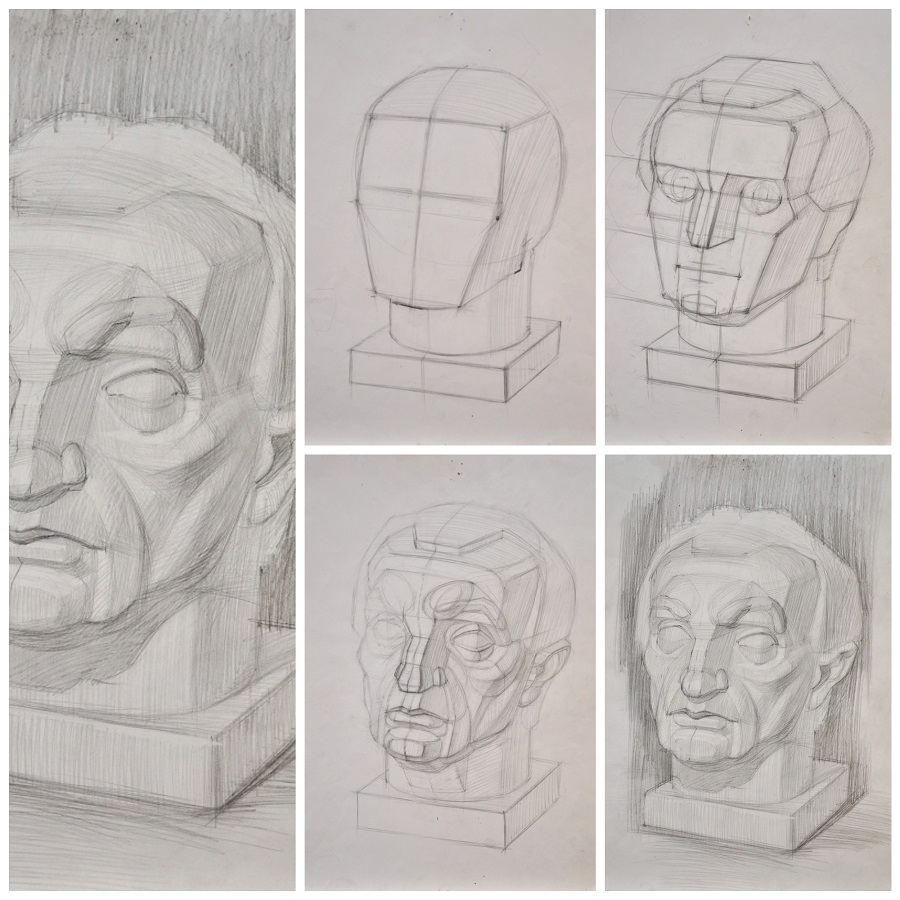
Rules for constructing a portrait
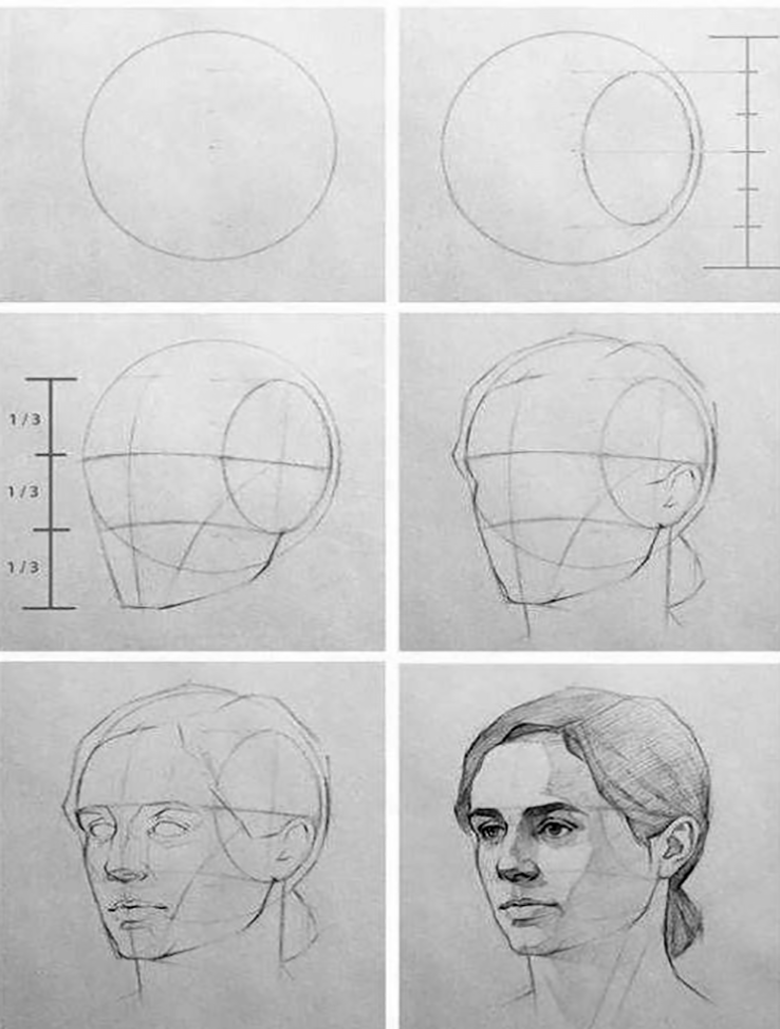
Before how to draw a person's face with a pencil step by step, the task for beginners is to learn and practice drawing centerlines. With their help, the face is created more easily and all proportions are respected. Later, when there is experience, it will be enough to represent them visually to draw facial expressions and moods.
Drawing the eyes
How to position the centerlines correctly should be well remembered:
- The eyes are placed in the middle of the drawn oval;
- The axes are drawn horizontally and vertically, dividing the sketch of the head in half.
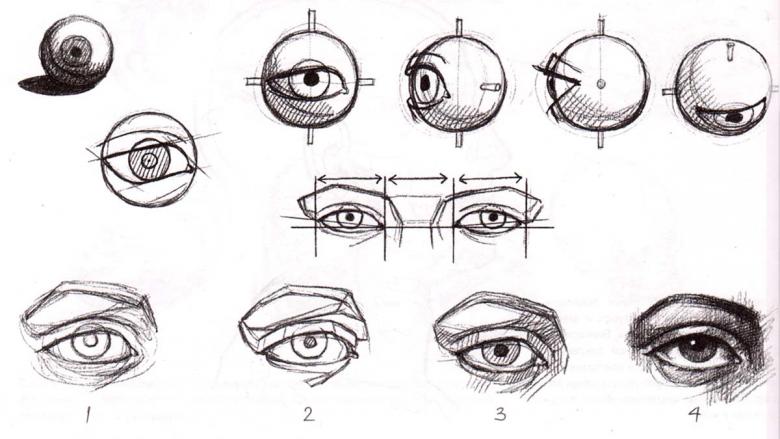
Even parts will be obtained with the use of a ruler, as it is difficult for beginners to determine the size of proportions by eye.
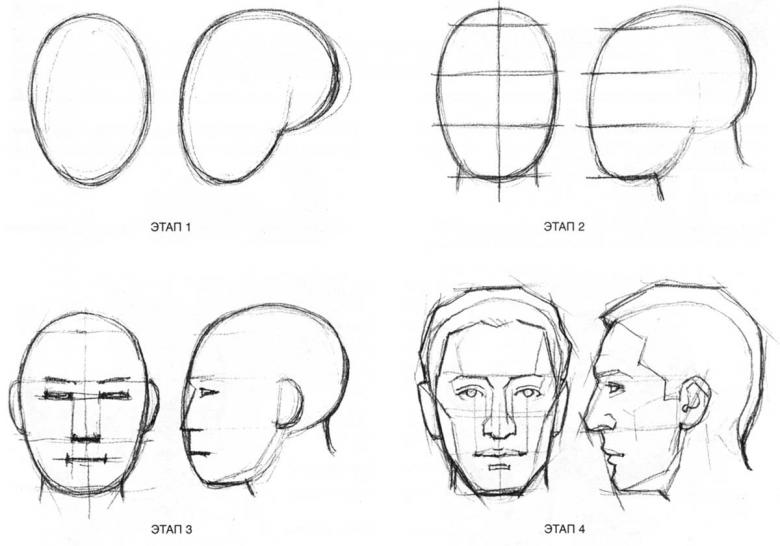
Hair, nose, eyebrows.
The entire oval is again divided by horizontal lines, but already into three equal parts and one half. The top straight line is the length of the hair, the middle one is the eyebrows, followed by the base of the nose. The space from the eyebrows to the hair is the same size as the forehead. If you ignore the hair, the face has three equal parts the same size as the height of the forehead.

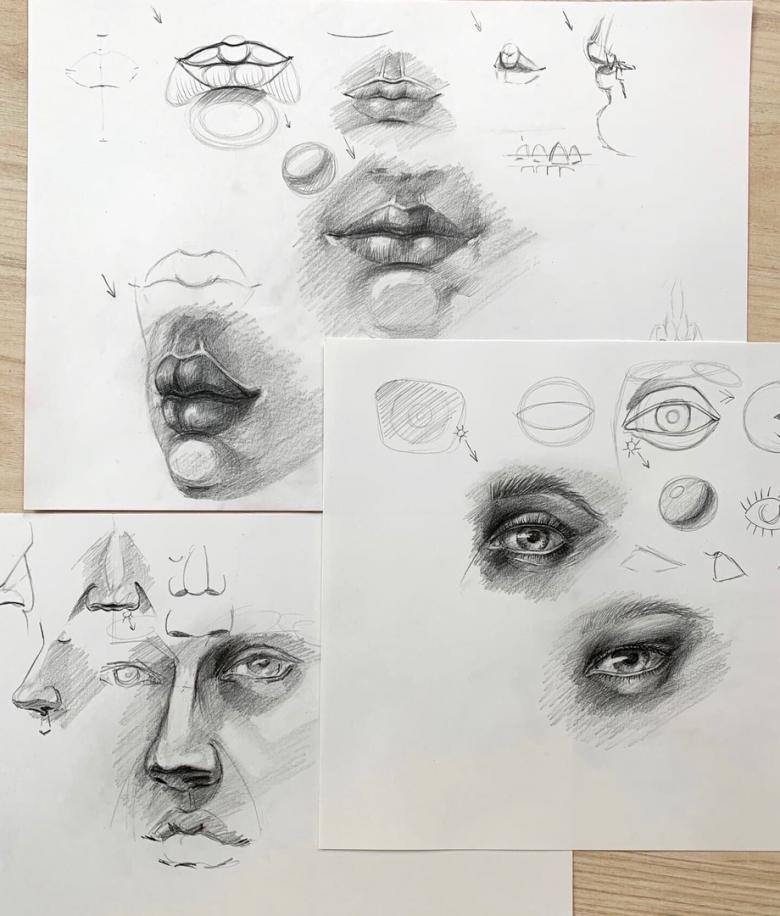
Marking the lips and mouth
The distance from the tip of the chin to the nose is divided into two equal parts. The resulting line will be the edge of the lower lip. The vertical segment from the nose to the bottom of the lip is divided into four equal parts. The first quarter will show the incision of the mouth. The lips are not the same size from person to person, unlike the incision.
Location of the ears
There is one nuance in drawing the ears - they are attached in a slightly different place. The upper limit is determined at the level of the axis of the eyes, and the lower at the line of the base of the nose. Ears can be small, large, protruding and adjacent to the head, but they all have the same attachment.
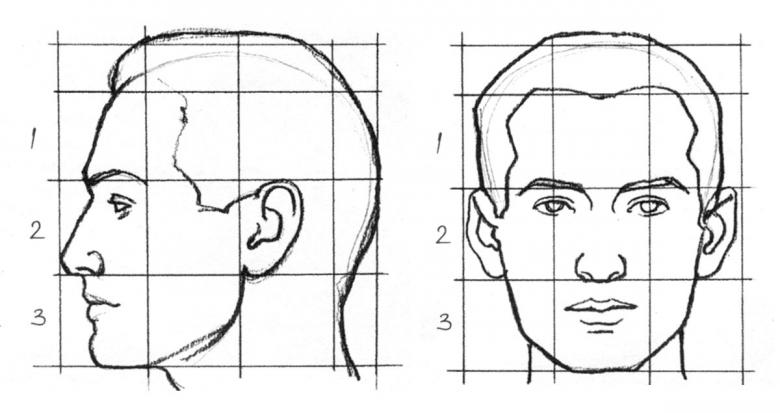
Placement of eyes, mouth and wings of the nose
The eye line is divided into eight equal parts. The distance between them should be two-eighths. Each eye has the same size. From the edge of the eye to the head line distance will be 1/8. All measurements are taken approximate, as each person has anatomical differences.

Important: The corners of the inside of the eyes are always on the straight eye. All the outlined points will help in drawing. The eyes are not placed close together or far apart.
The wings of the nose and the corners of the eyes are drawn at the same level. If you draw a vertical line from the center of the eye, it goes down to the corner of the mouth. This is the correctly created proportion of the facial features.
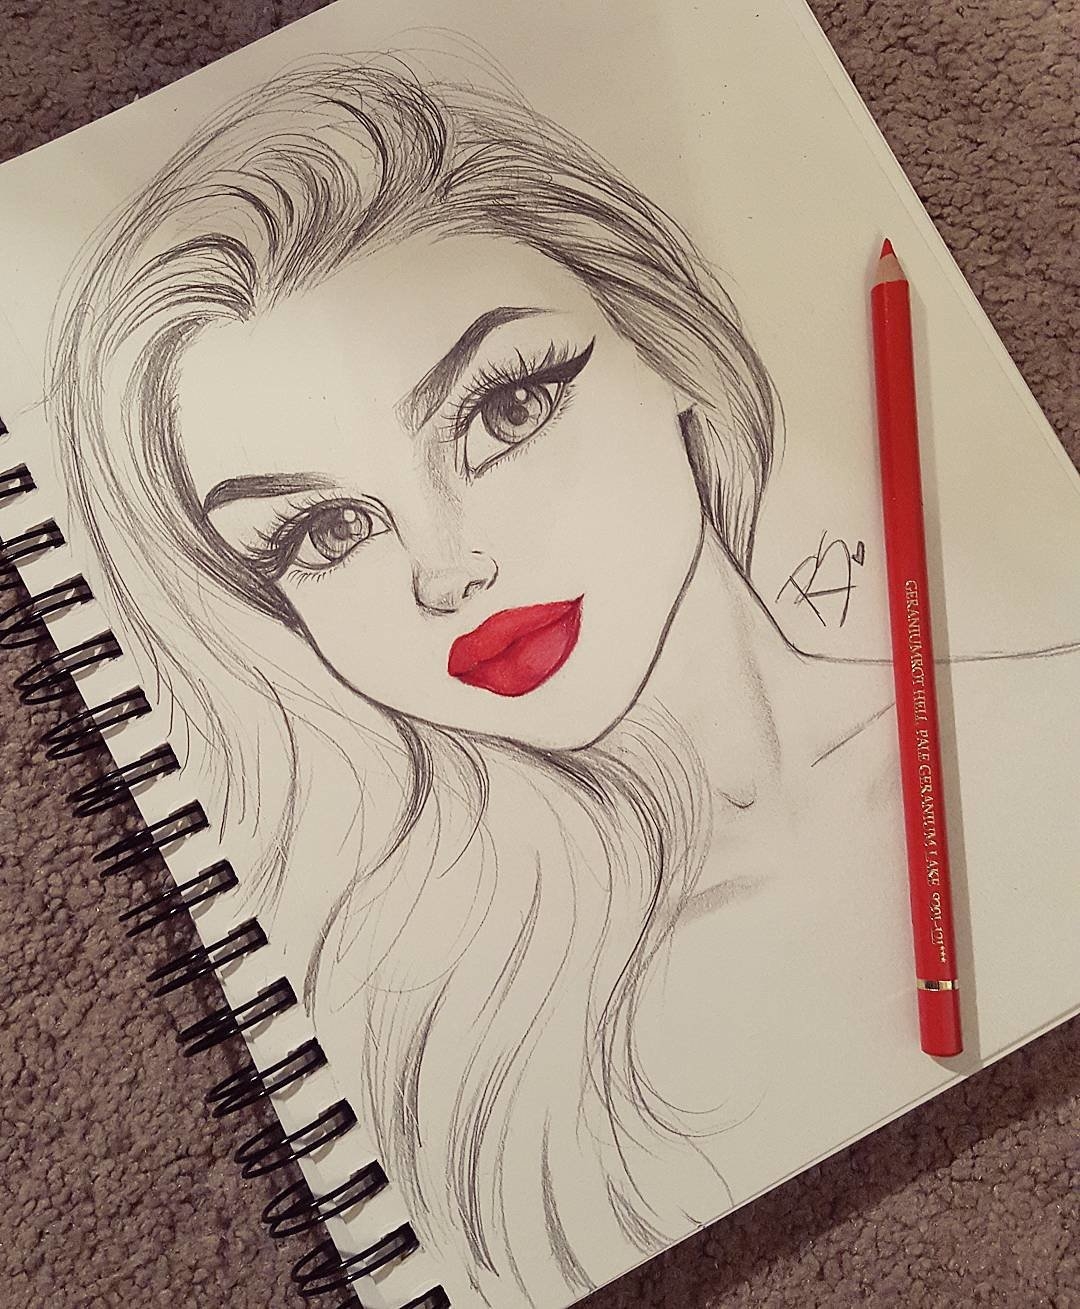
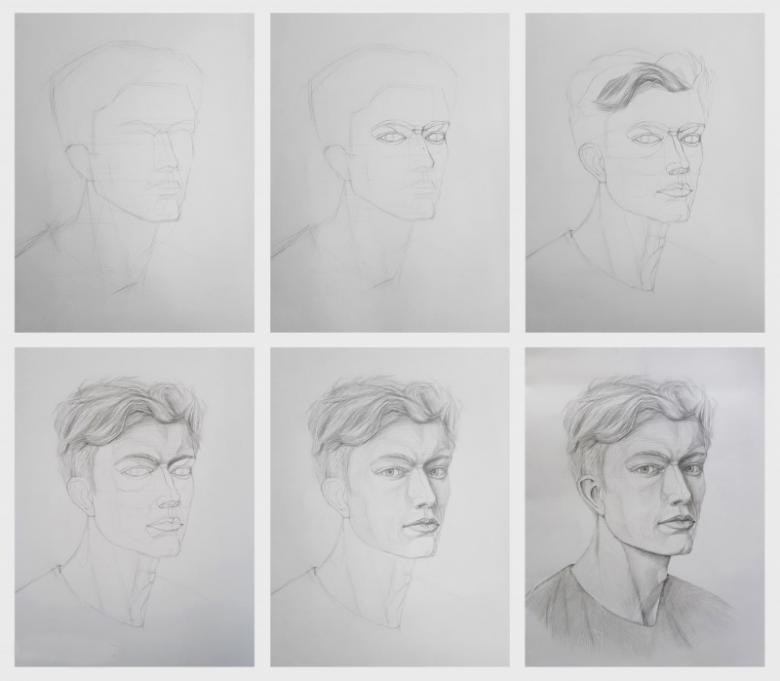
Simple drawing method
After the acquired skills and tips on drawing, you can get to work. The easy method will answer the question of how to draw a girl's face with a pencil, and help to cope with the creation of a drawing step by step:
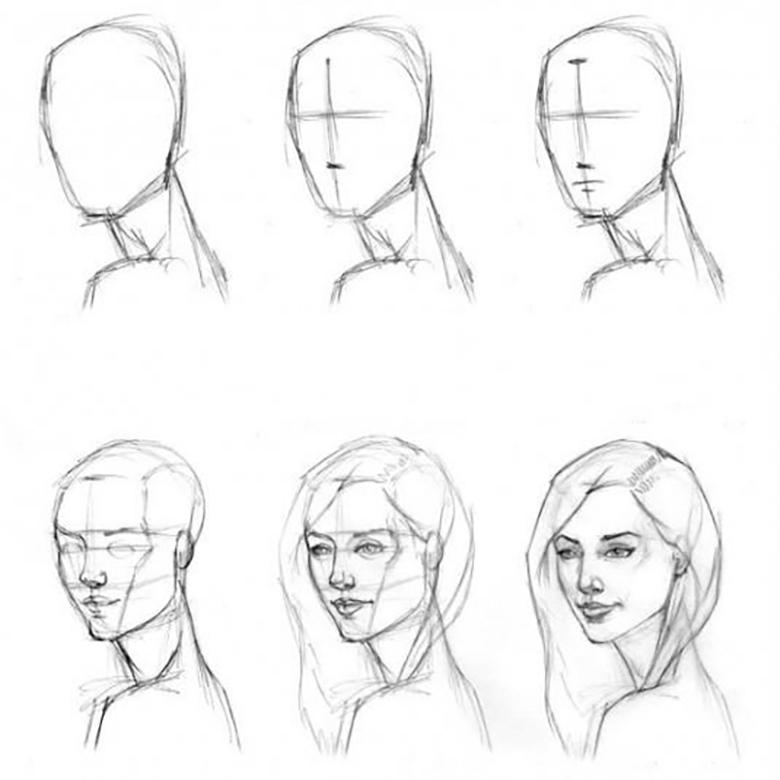
- First a sketch is made of an oval shape, slightly pointed at the bottom. Using a ruler, divide it into two equal halves horizontally and vertically.
- Next, in the lower half, draw another horizontal line. On it marked the place where the lips, mouth and nose will be located.
- A sketch of the nose is carried out in the first place. Then moving upwards, tracing the eyes. The corners must touch the line of the nose. They start with a cut of the eyes, followed by lashes. It is better to draw both eyes at the same time.
- The next step on how to draw eyebrows with a pencil step by step on the face. The border of the eyebrows over the bridge of the nose is marked wider. Draw the contours with different shapes. Small strokes draw hairs.
- A lip contour is created in the lower part of the oval. Its edges are on the line of the pupils. The upper lip has a curved look, the lower lip is larger in size.
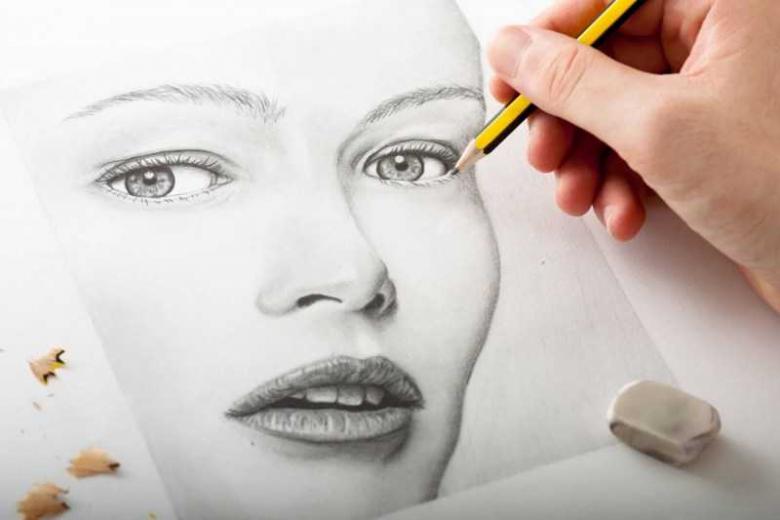
- After tracing the outline, all the auxiliary strokes are removed with an eraser. The parts of the face are highlighted more strongly with pencil.
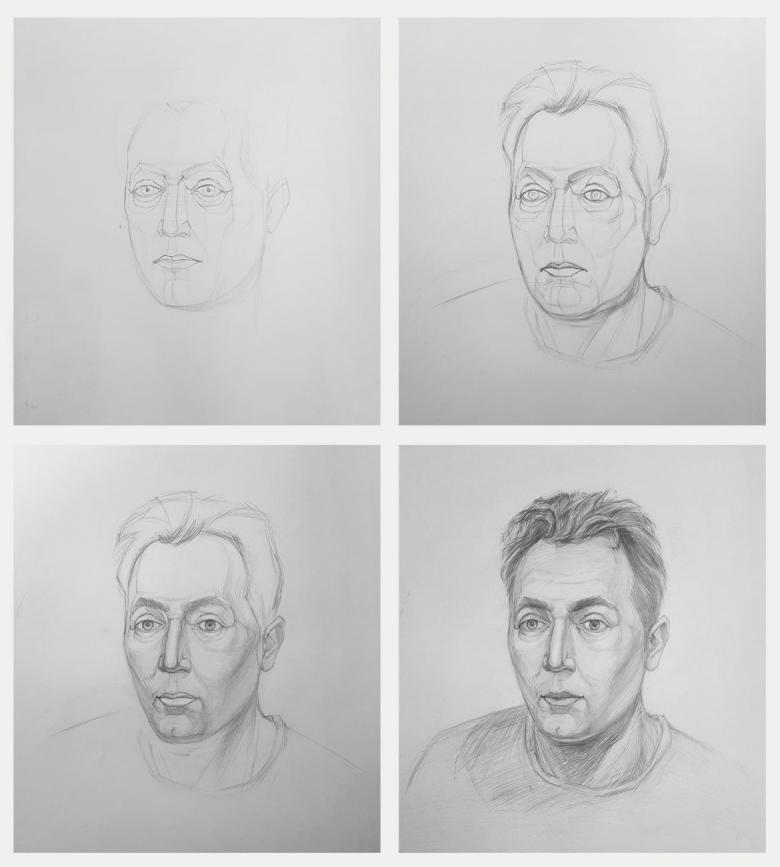
To give volume to the face, it is shaded. Darker areas under the nose, the lower lip, under the eyebrows. The final step is drawing the ears and hair.
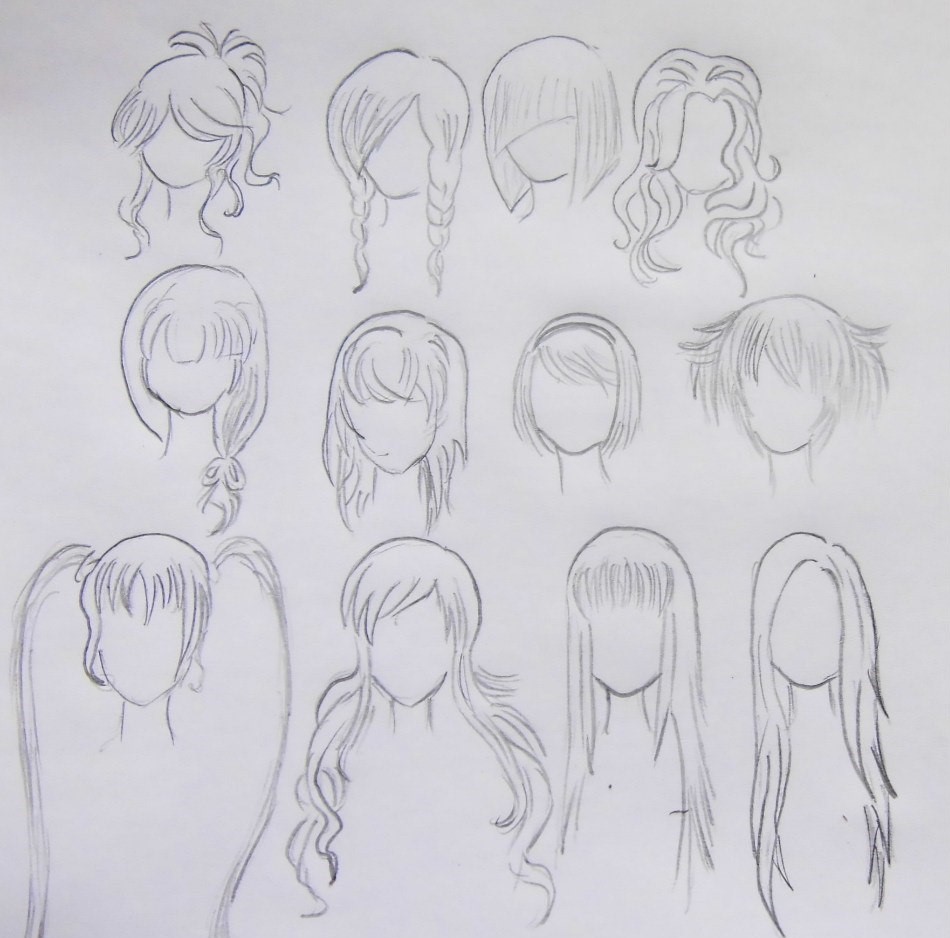
Methods of drawing anime
Fans of animation characters can learn to draw them on paper. Draw the characters with a pen, but first it is necessary to try with a pencil. Experienced draughtsmen offer a variant of how to draw an anime face of a girl in pencil step by step for beginners:
- On the sheet, mark the top and bottom points, which are then connected to each other. On the segment make a mark indicating the middle and two more marks at equal distances. The middle mark is the line to draw the eyes. Connecting the points at the edges, a face shape is obtained. Eye sketch is carried out on the horizontal midline.
- Now in the contours of the eyes perform a sketch of equal circles (pupils). Above strokes are sketched eyebrows. At the lower mark draw a nose. Above the chin traced lips, and then the chin itself.
- Ears are drawn at the side at eye level, and then hair with bangs. The silhouette of the hair is drawn from the center downwards.
- Pupils are dark, all around the eyes are shading. The eyelids are deduced from above. Brighter highlight the shape of lips.

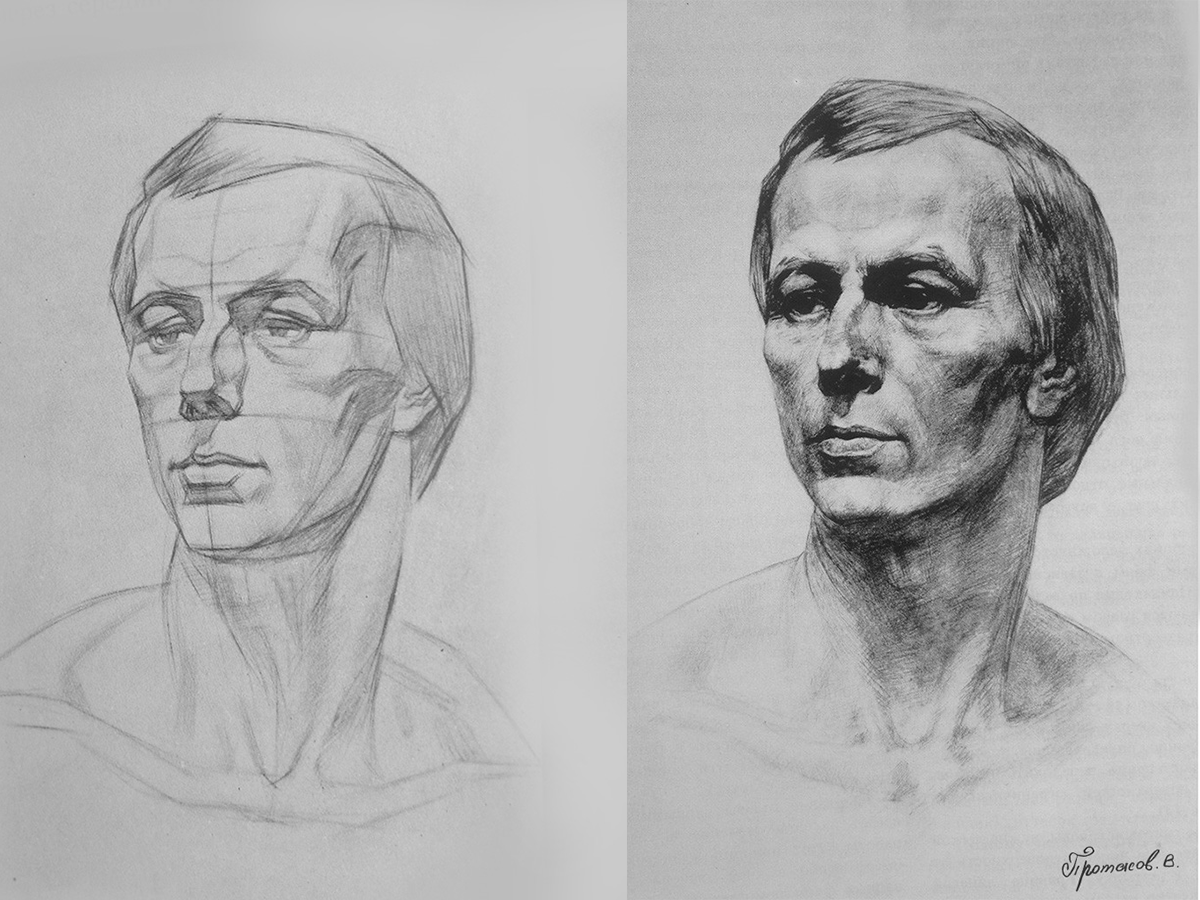
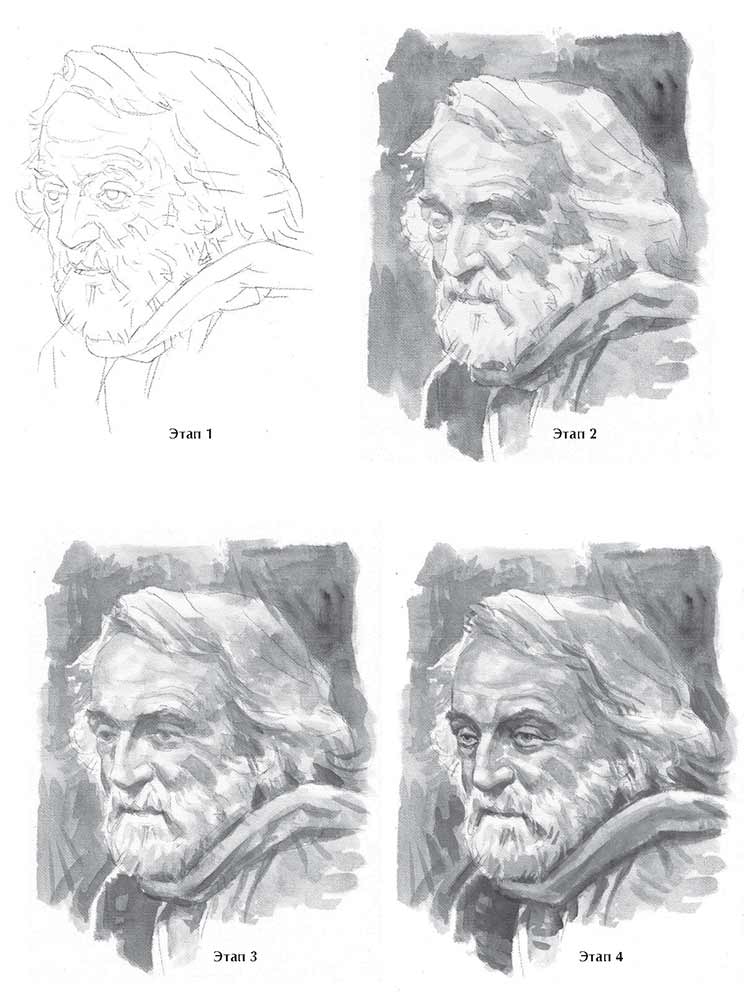
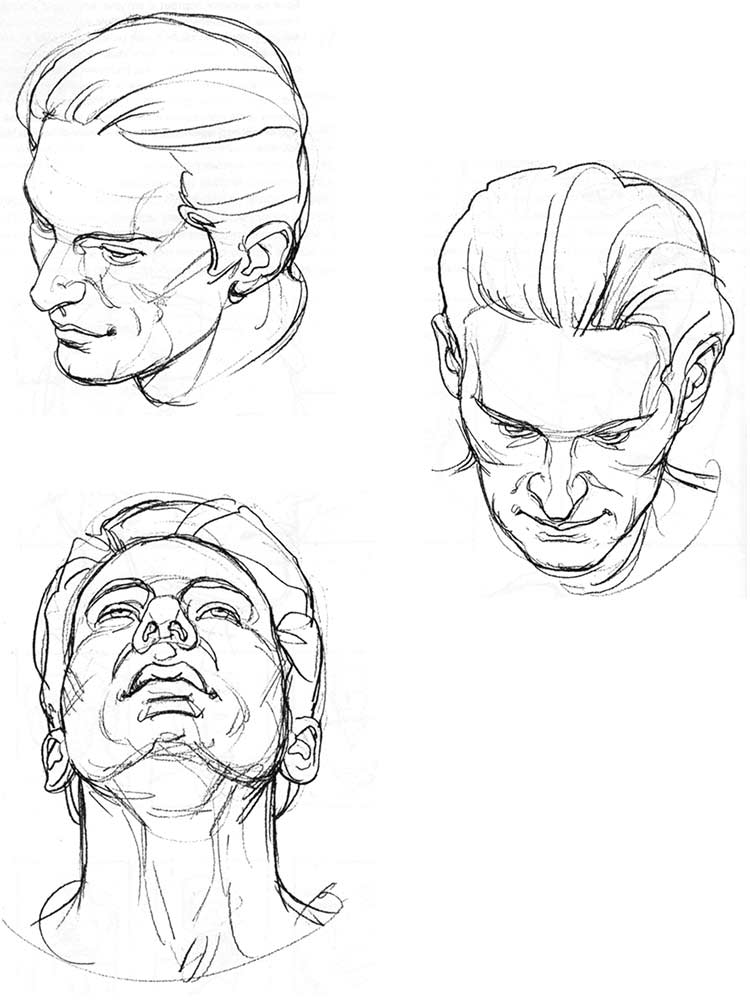
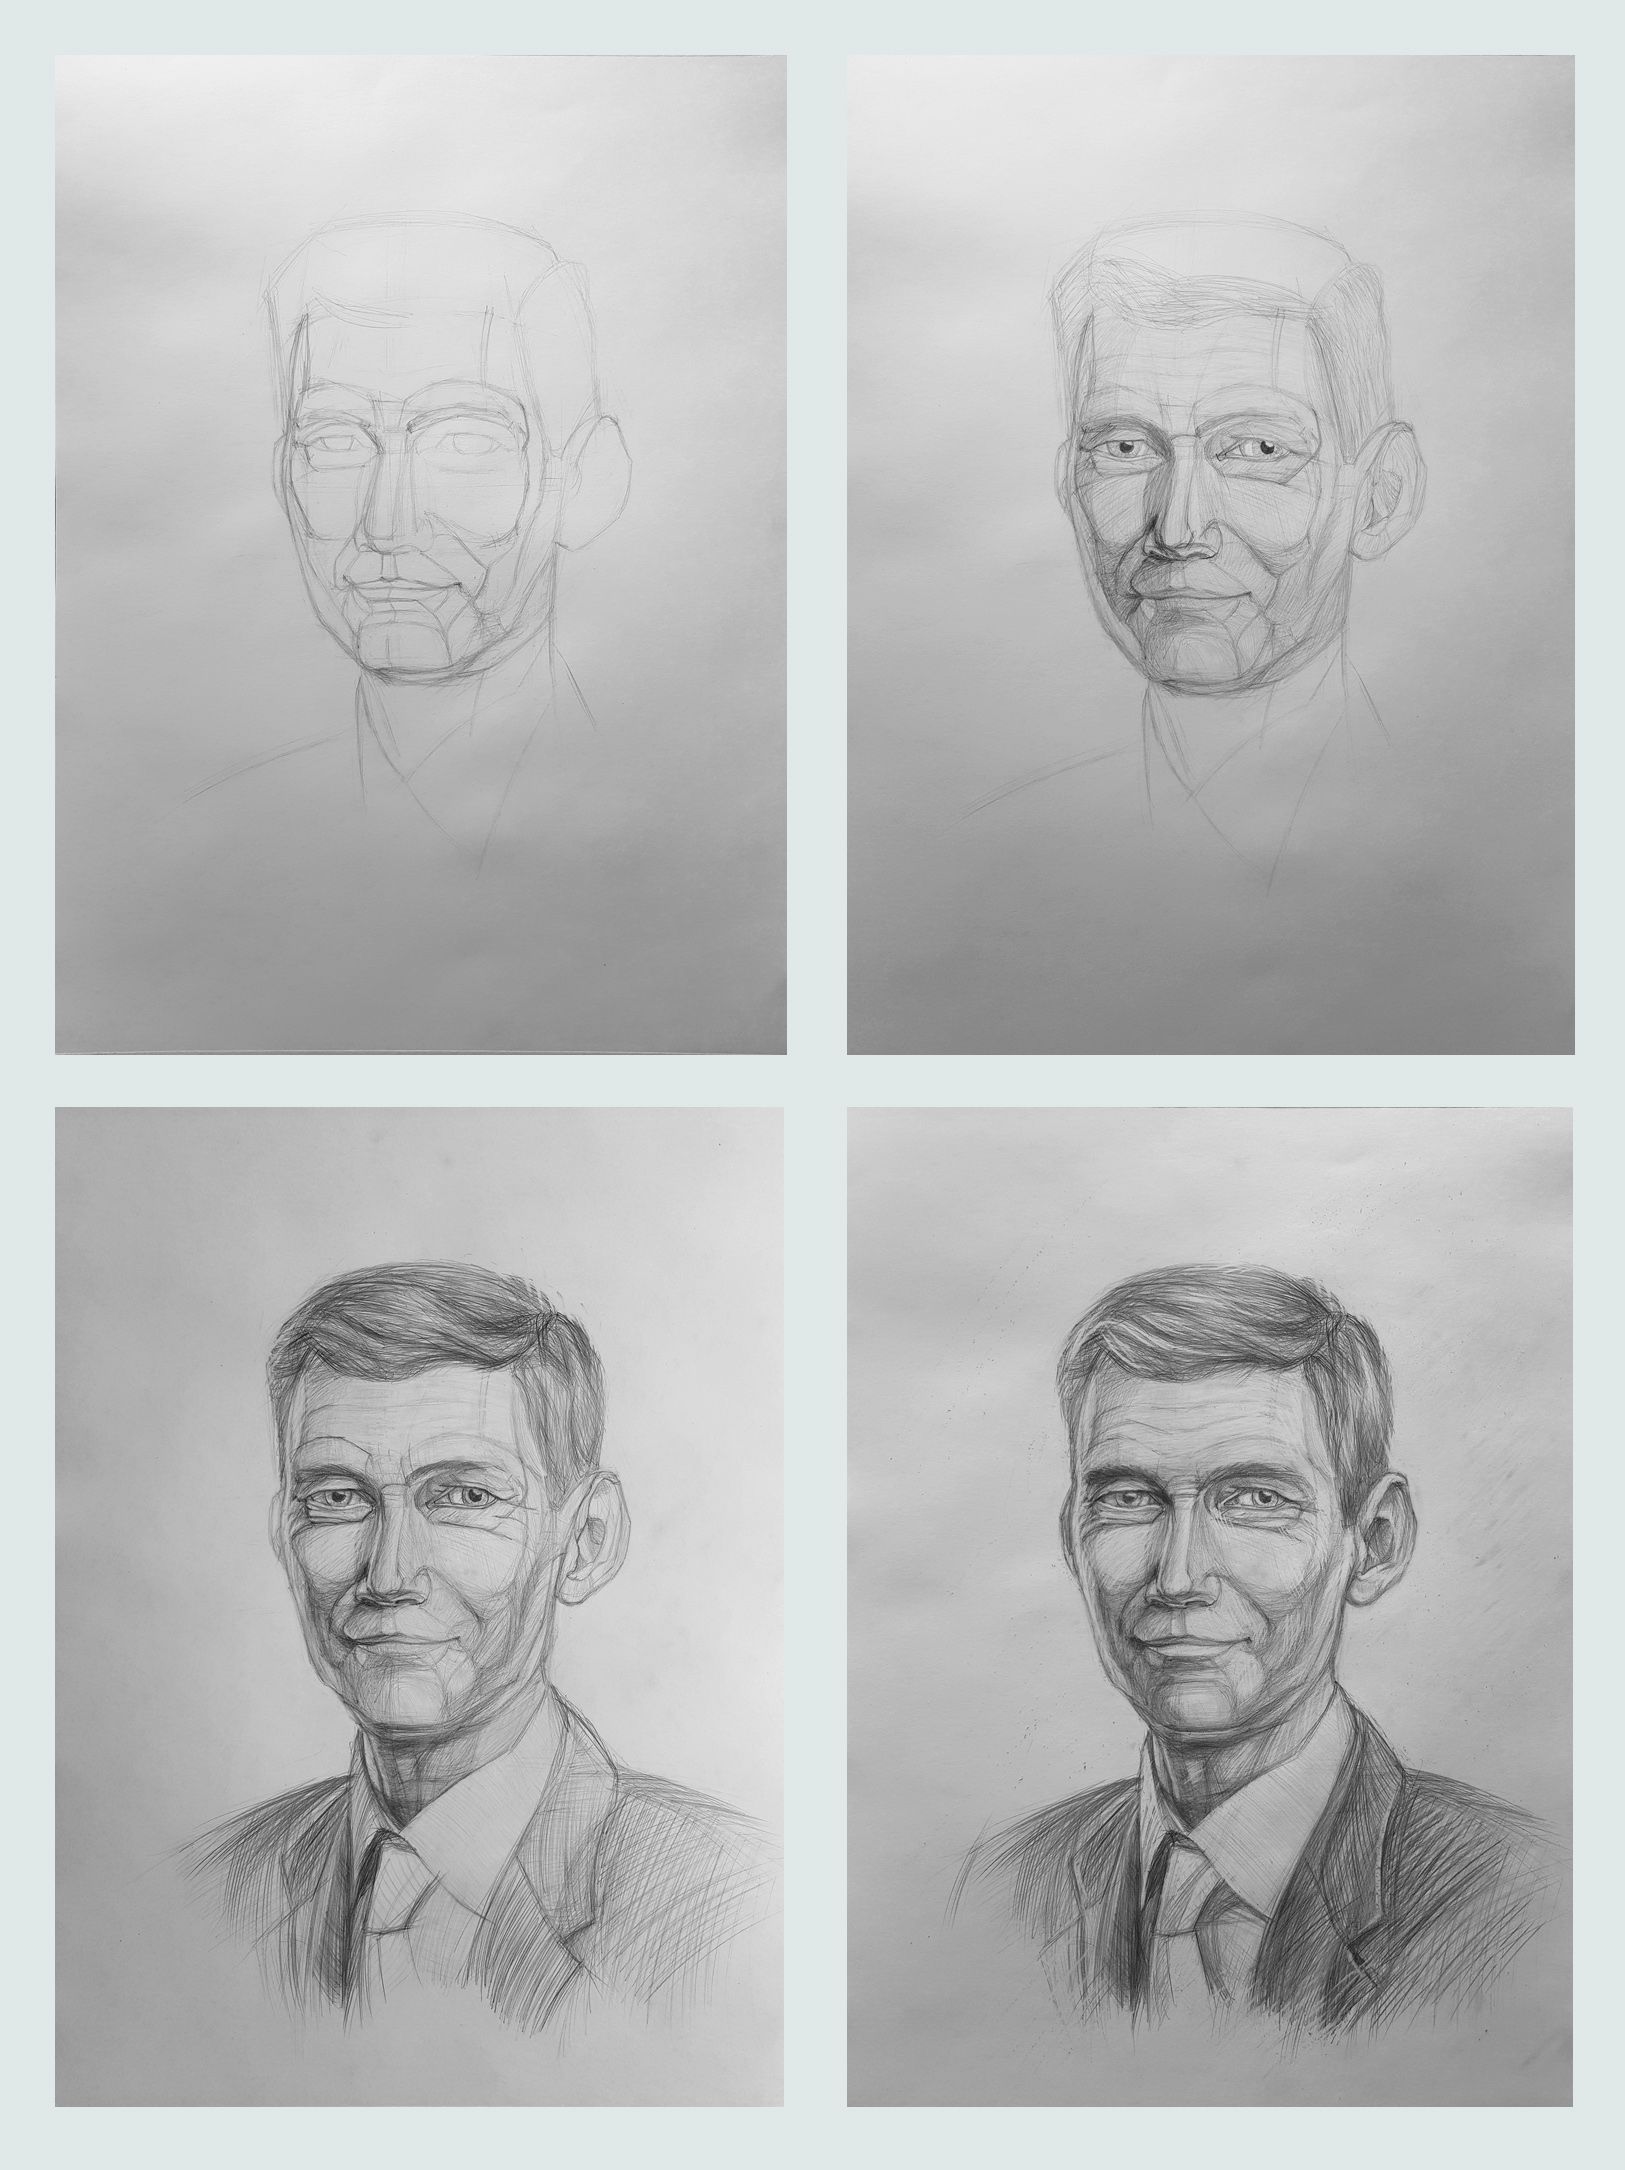
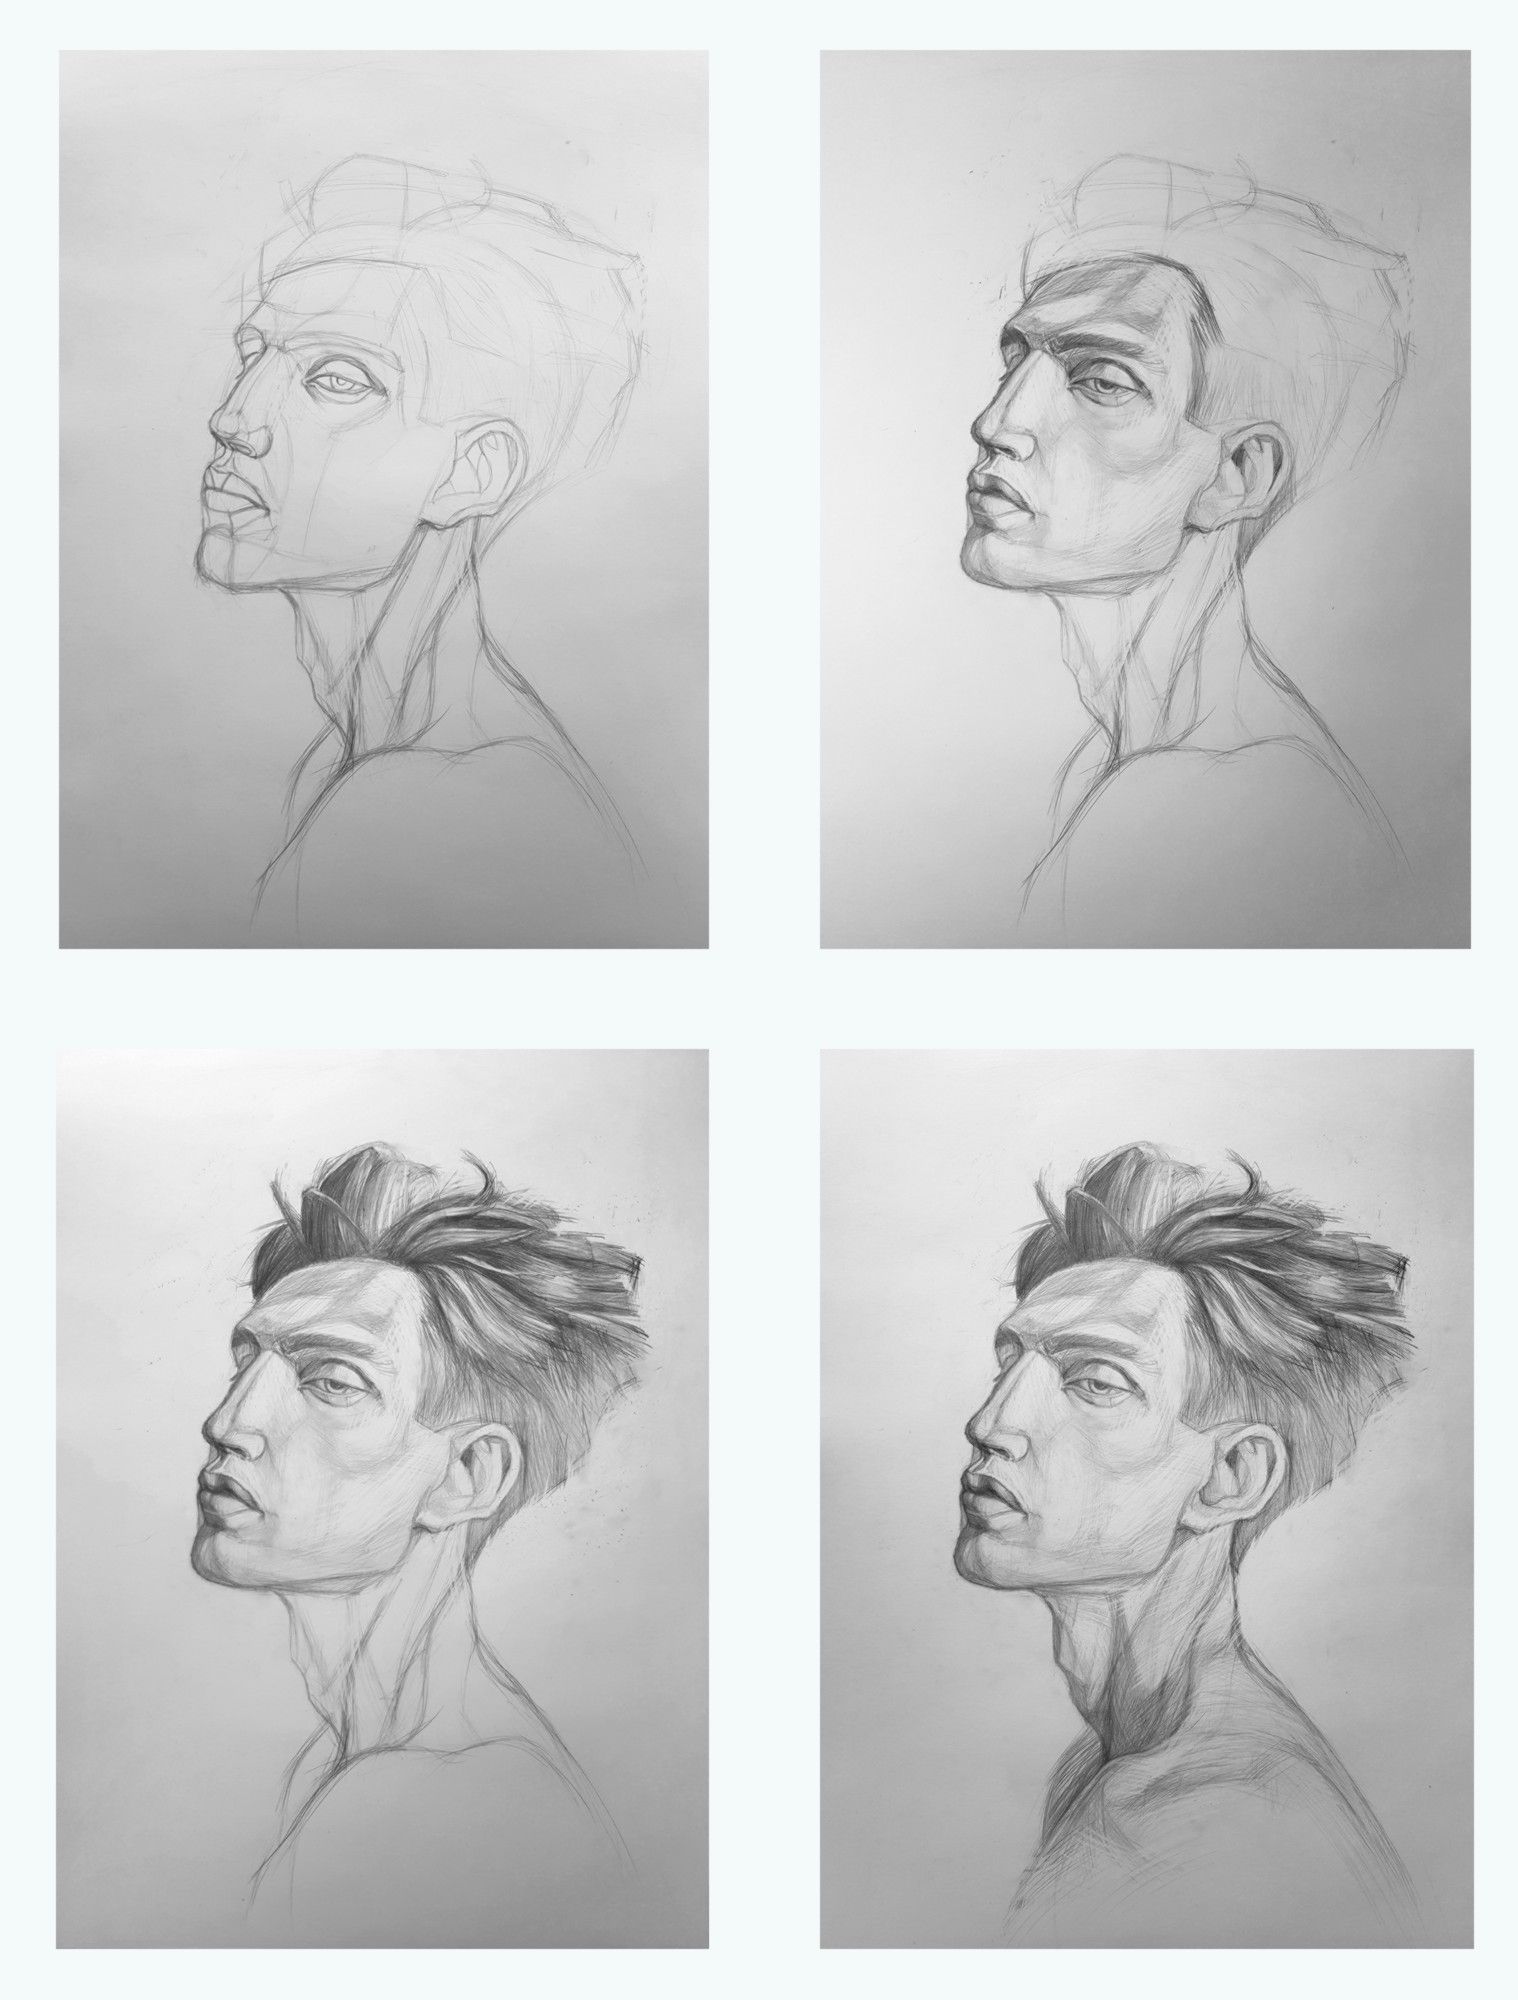
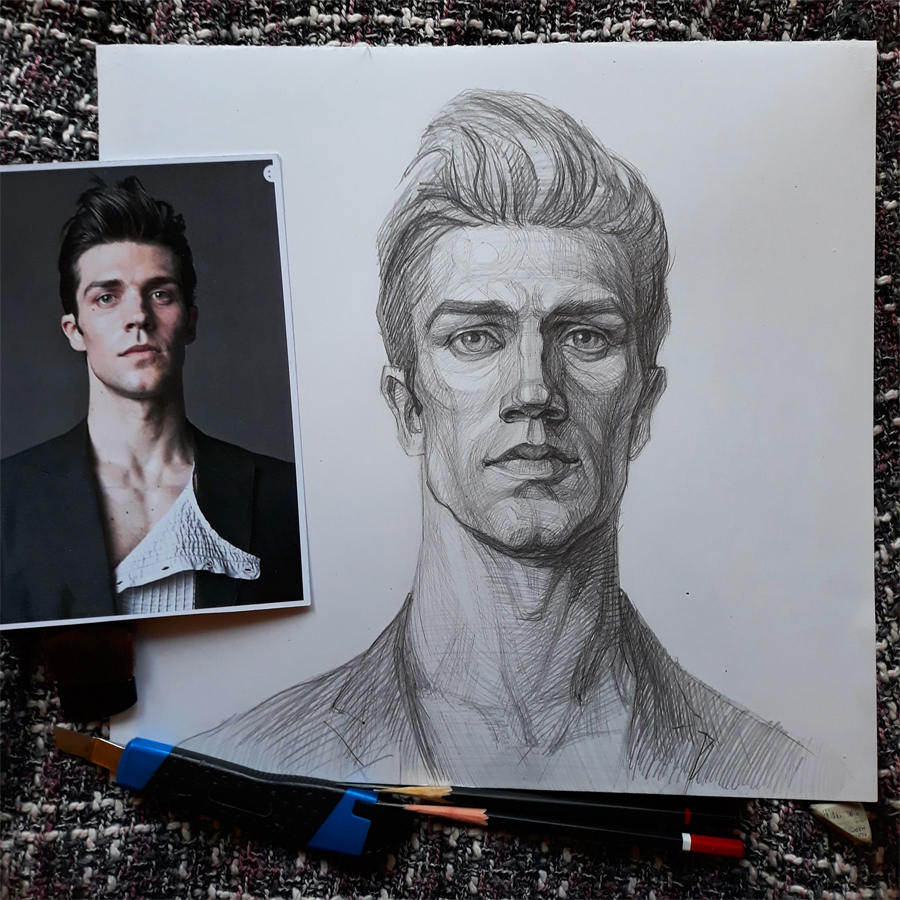
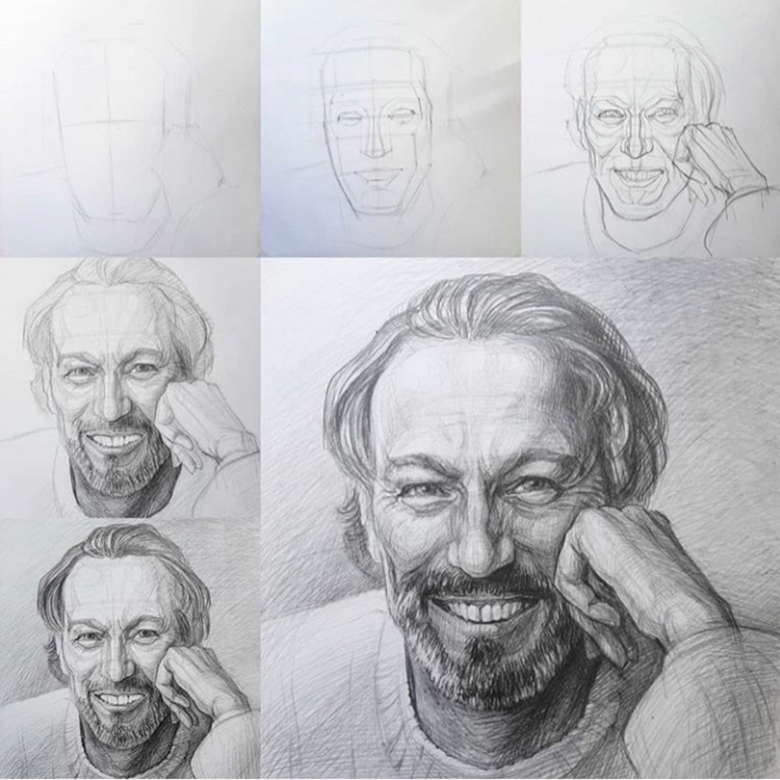
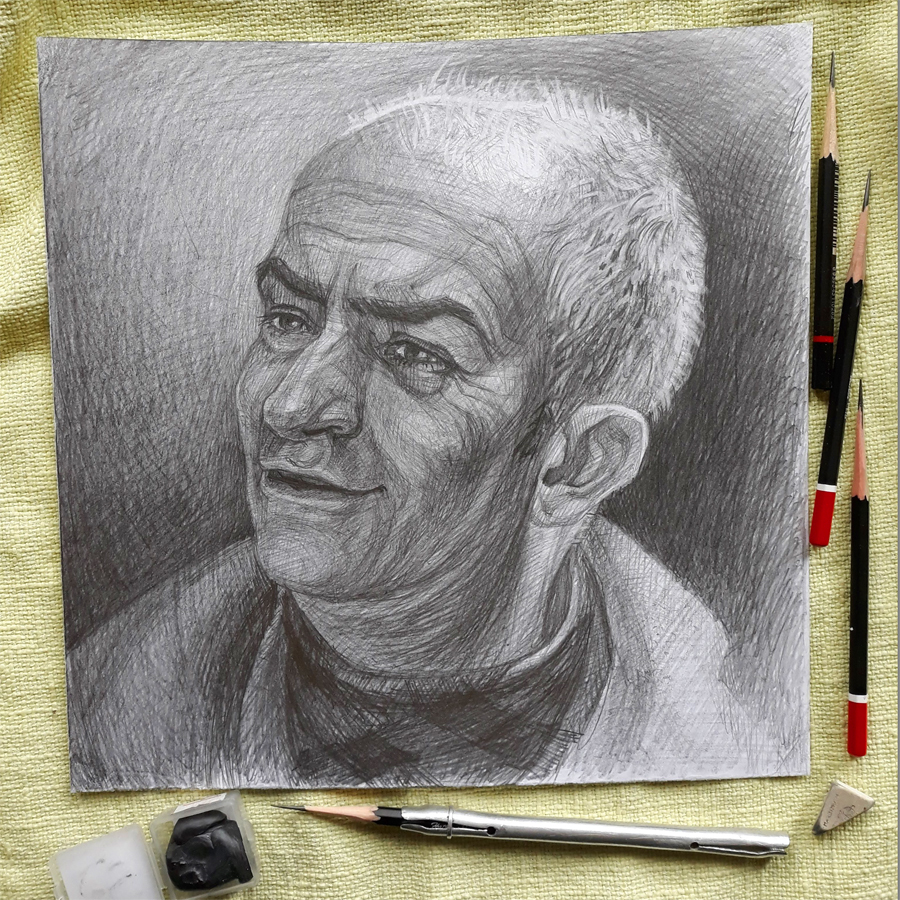
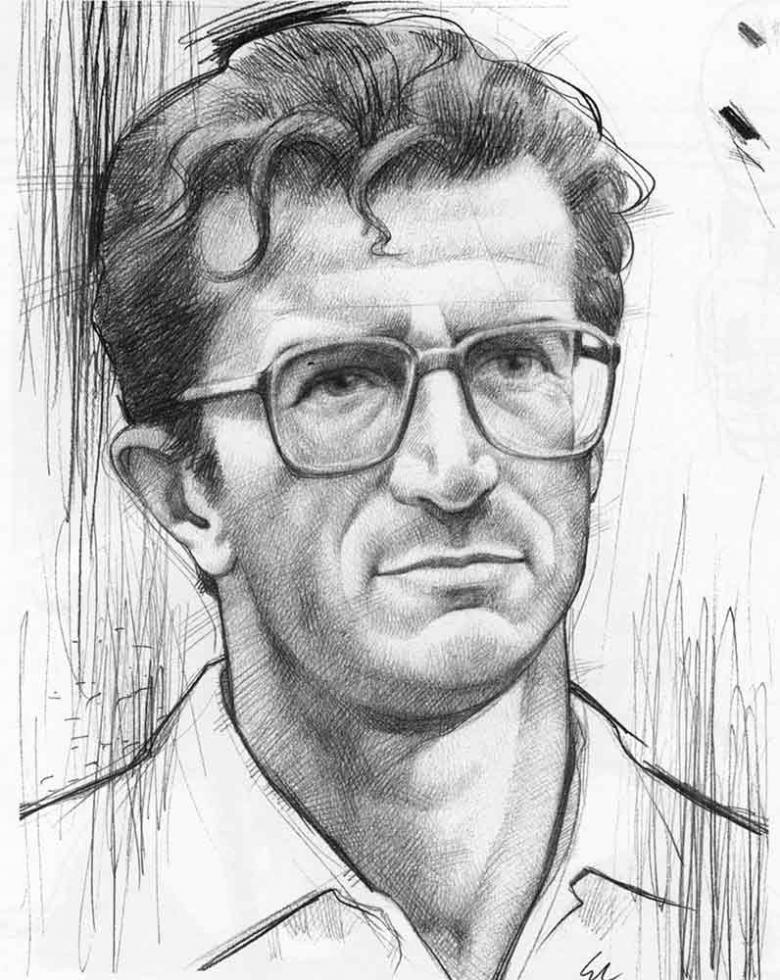
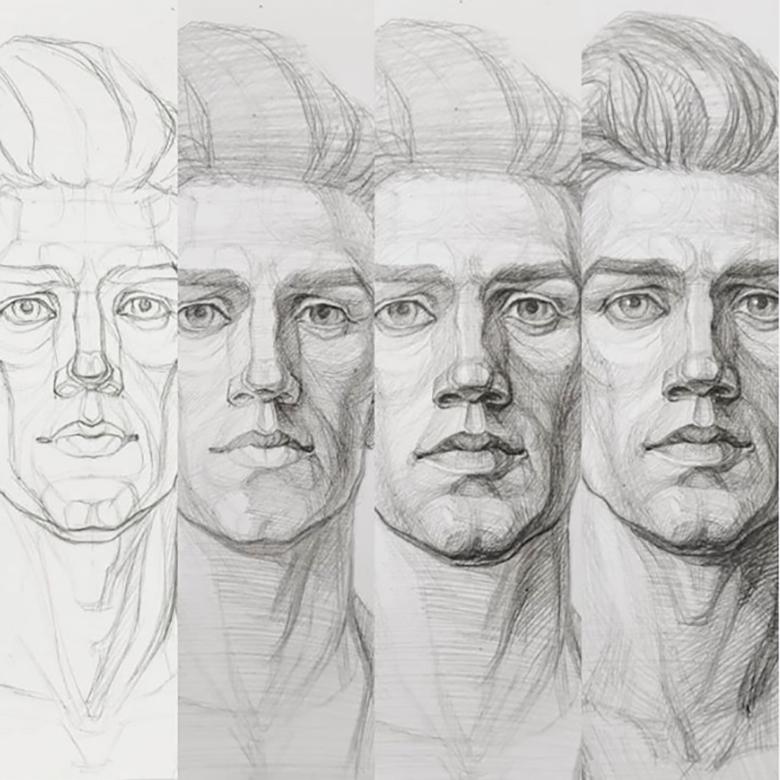
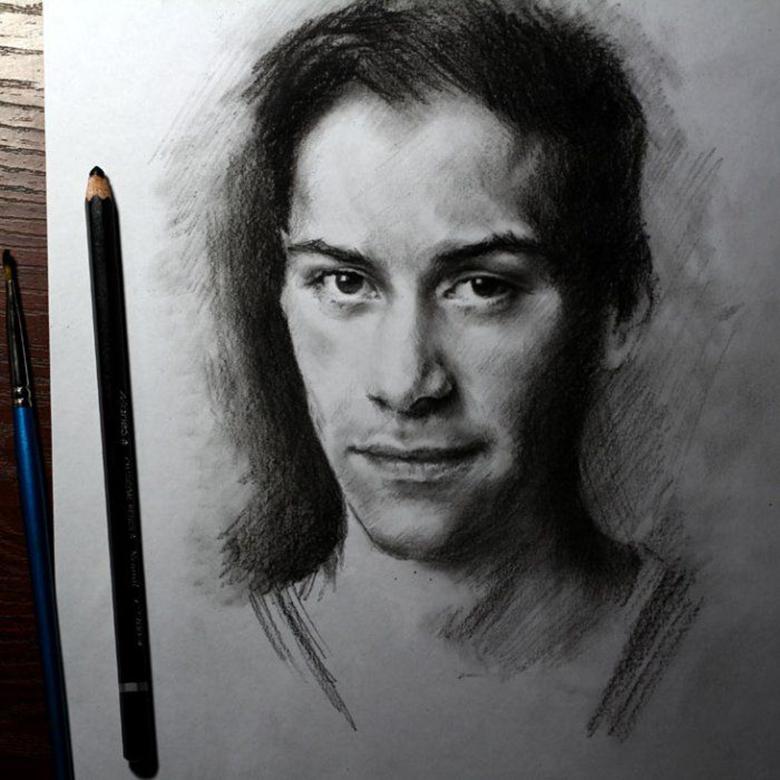
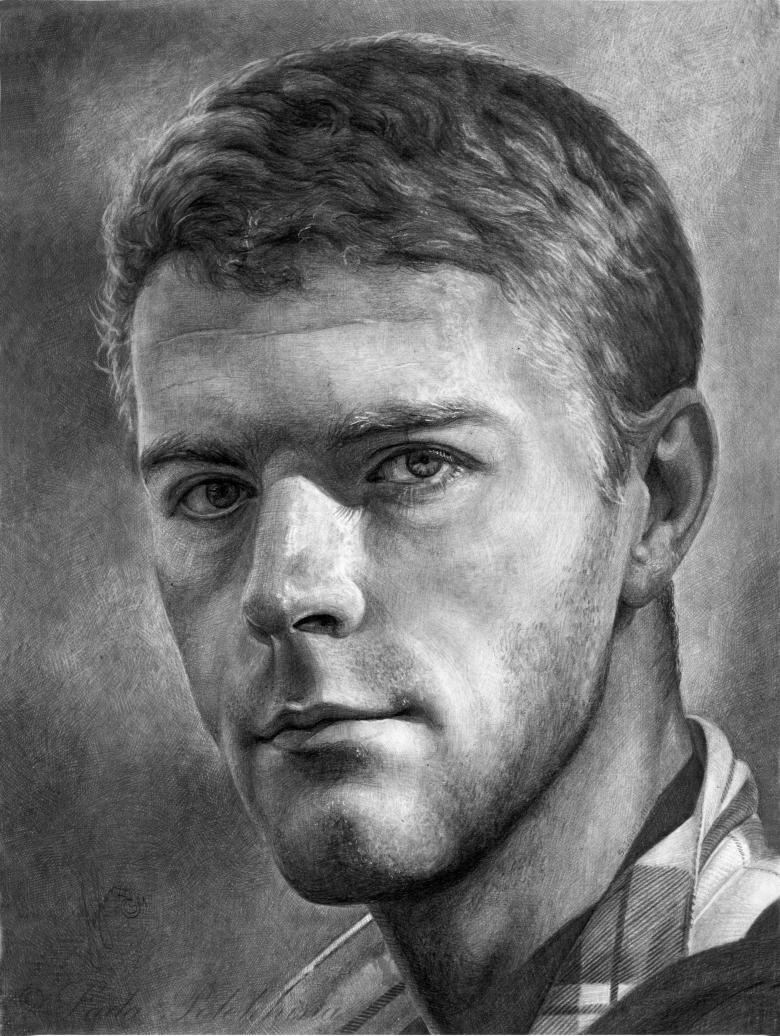
Portrait of a man
Drawing a picture of a face is not as difficult as drawing a man's face with a pencil step by step. There are only some differences:
- the oval is not necessarily drawn flat, the main points are marked on it, and the axes are drawn;
- the hairline is made higher;
- The contours of the chin are wider, but taper towards the bottom a bit;
- After drawing all the elements of the face, the cheekbones are highlighted;
- hair is divided into curls, shading and marking light and dark parts.
Learning to draw people's faces the axis of symmetry and correctly composed proportions help well. Drawing parts of the face, it is necessary not focusing on one thing in particular. First, a quick sketch is made, and then only do accents on the facial expressions.
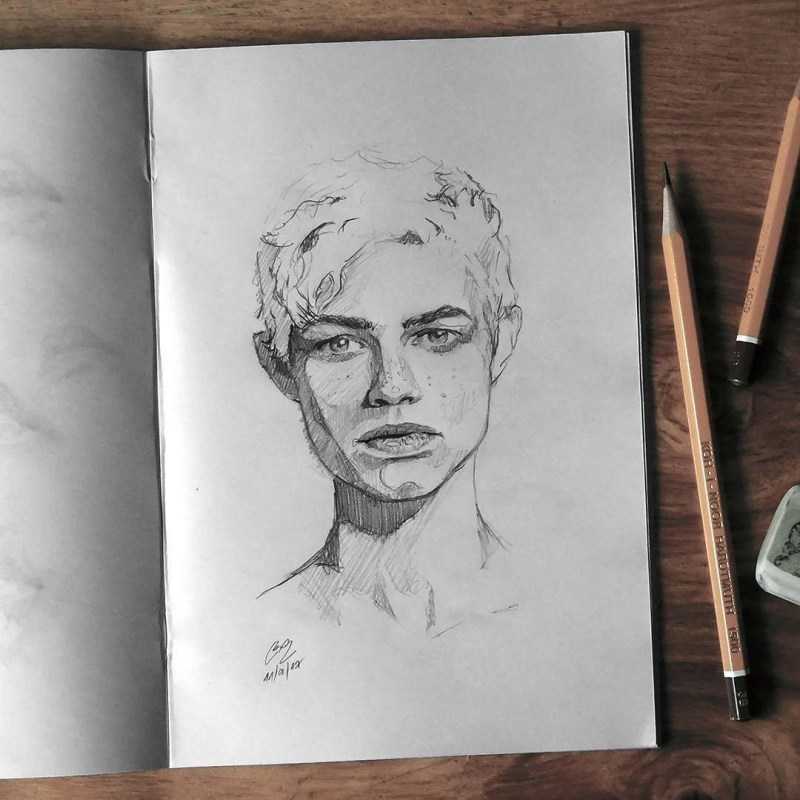
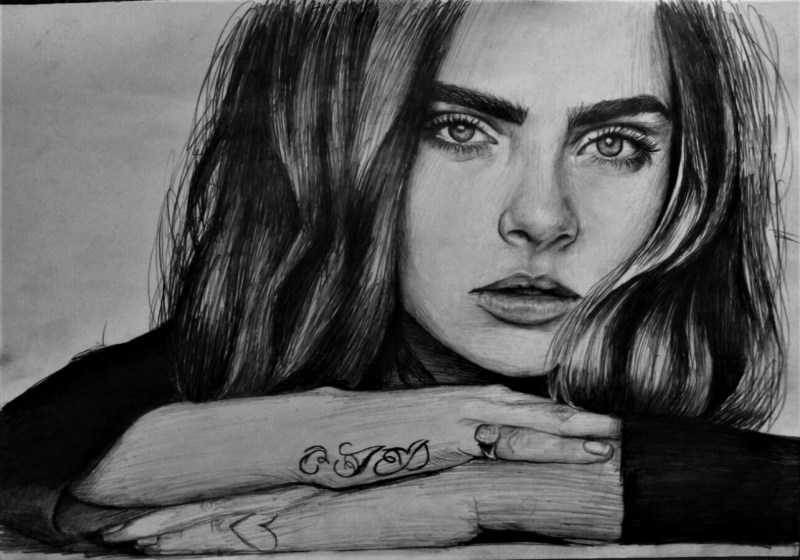
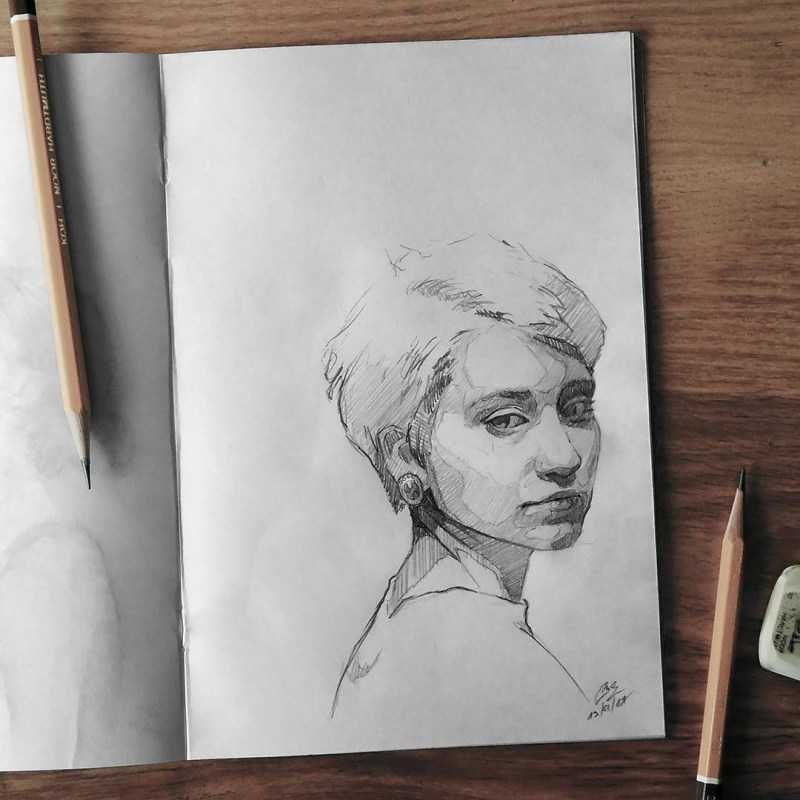
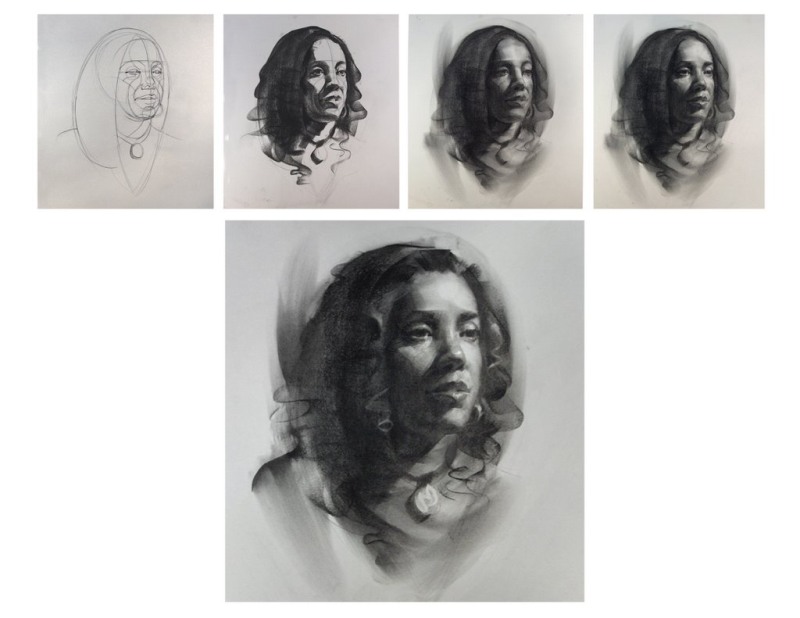
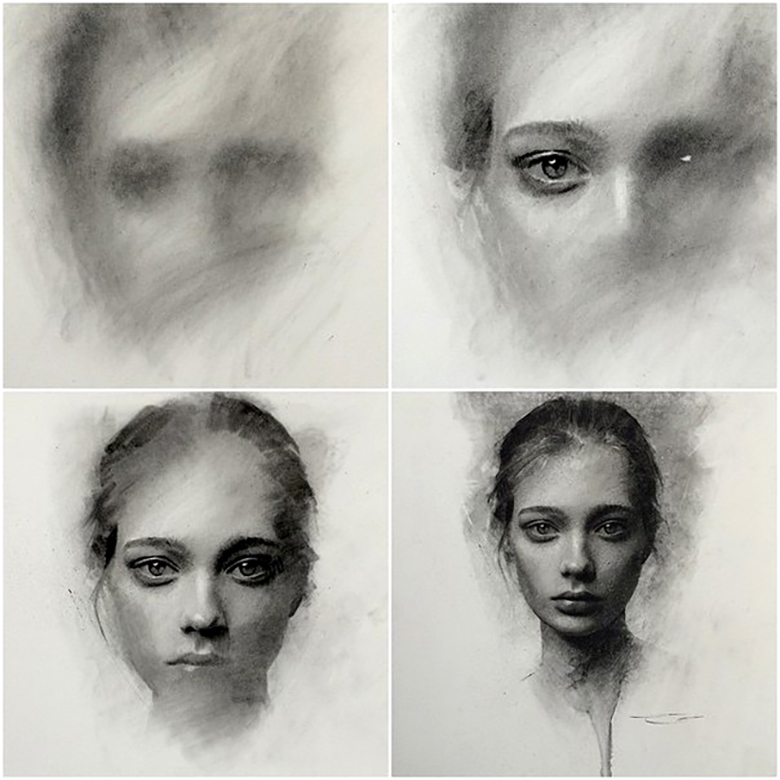
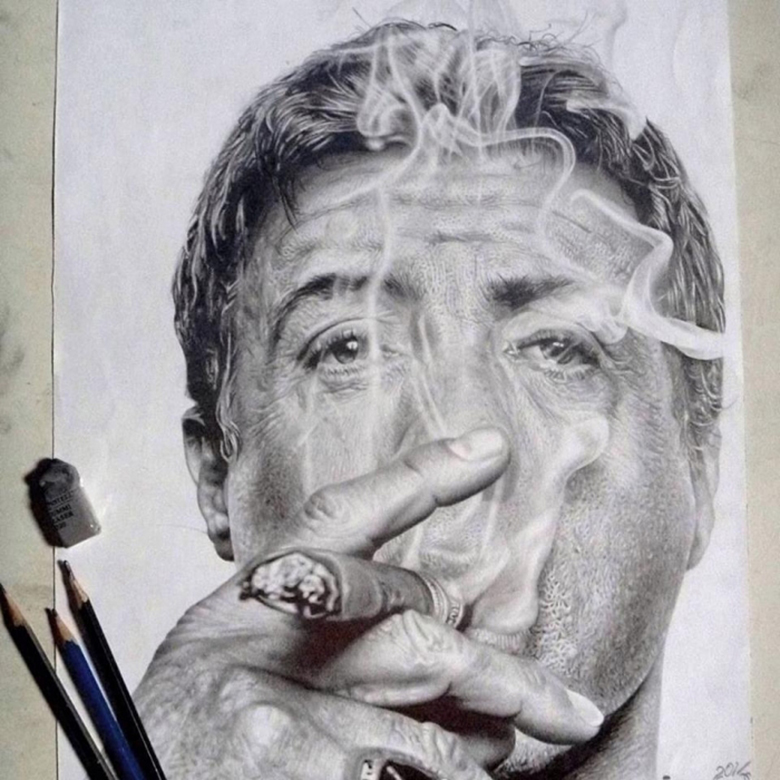
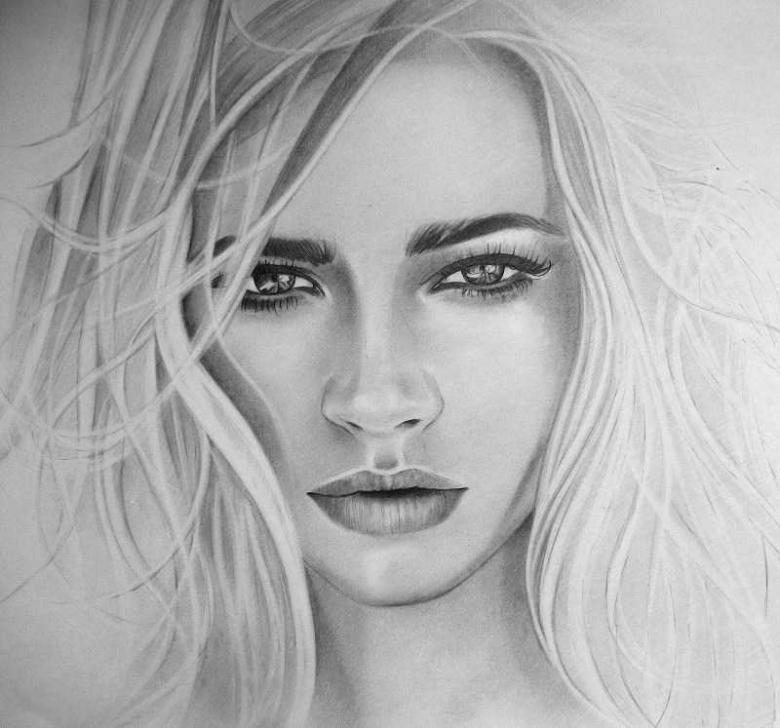
Pictures of faces for pencil sketching