Origami Santa Claus - scheme of the assembly of crafts and options for its decoration
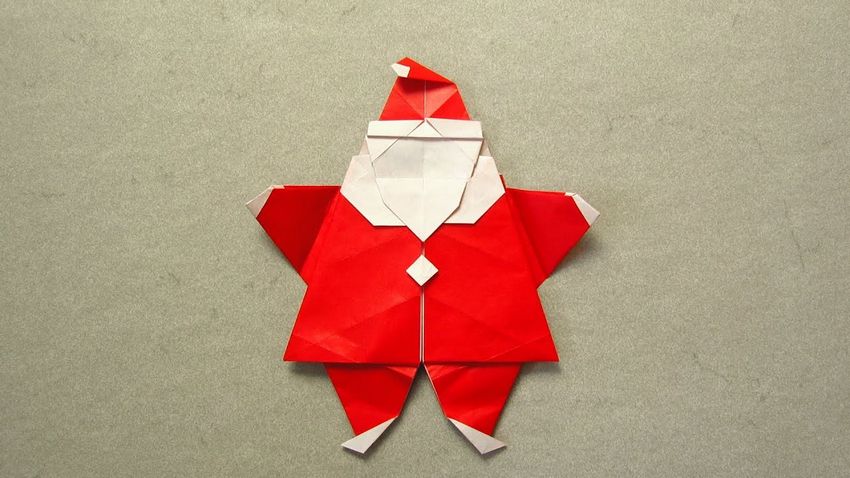
If the tree is already decorated with toys, candy, surprises and homemade crafts, then it's time to move on to the making of the central figure of the celebration - Santa Claus. It is on him that the emphasis of the holiday is made. To him is added snow maiden and other fairy tale characters. Often, for this purpose uses origami technique.
But how to make origami Santa Claus is not known to all. But thanks to this technique can create unique greeting cards, place cards, garlands, packaging for gifts based on the presence of a mythical creature. Any product created by this method is suitable for practical use. Therefore, we proceed to the study of methods of manufacture.
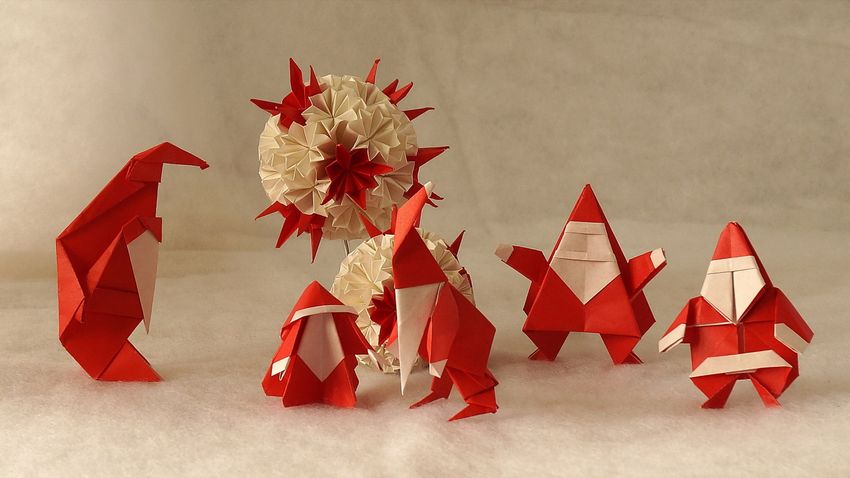
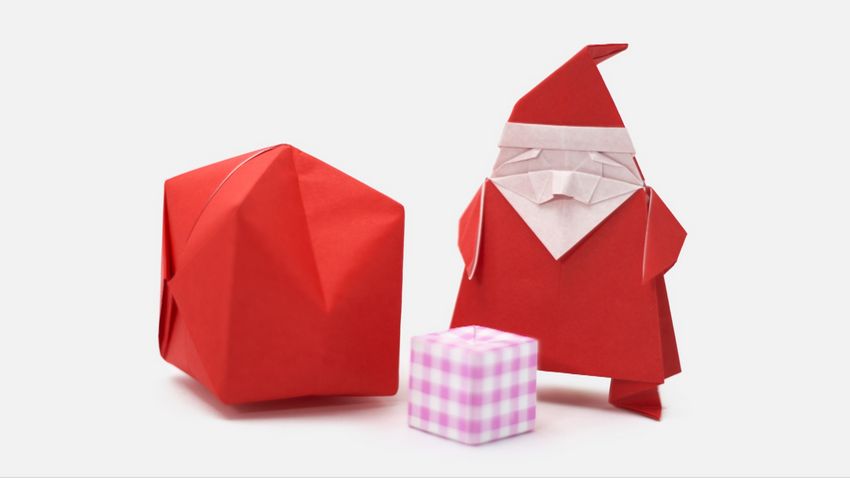
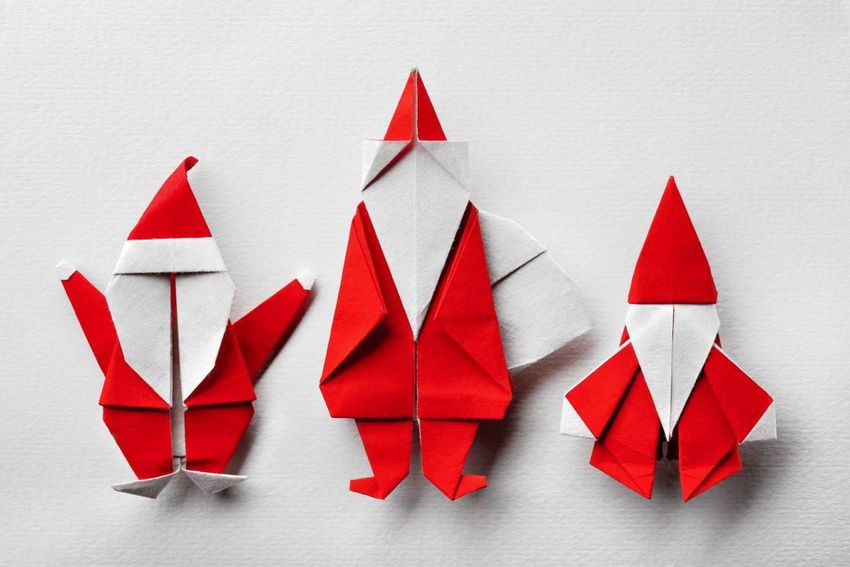
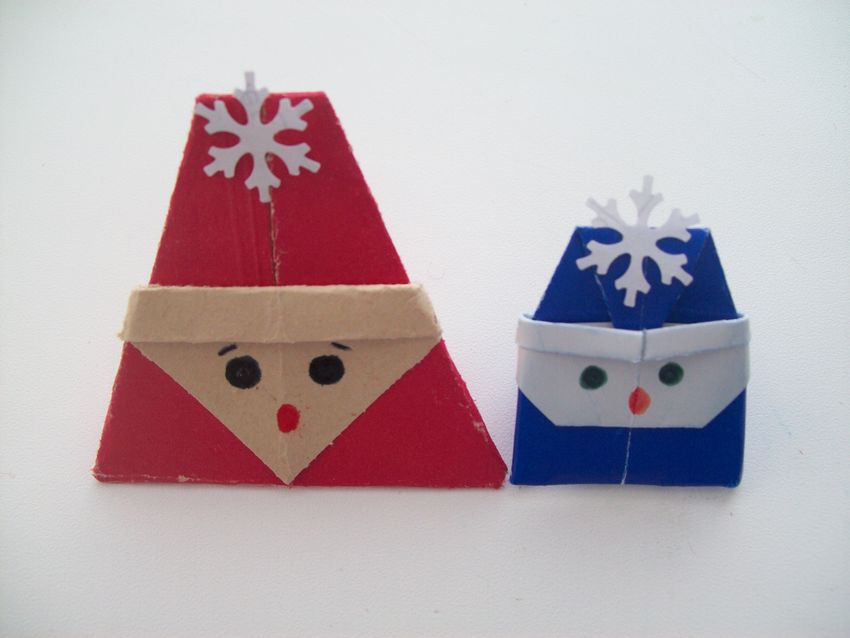
Figurines for the holiday table
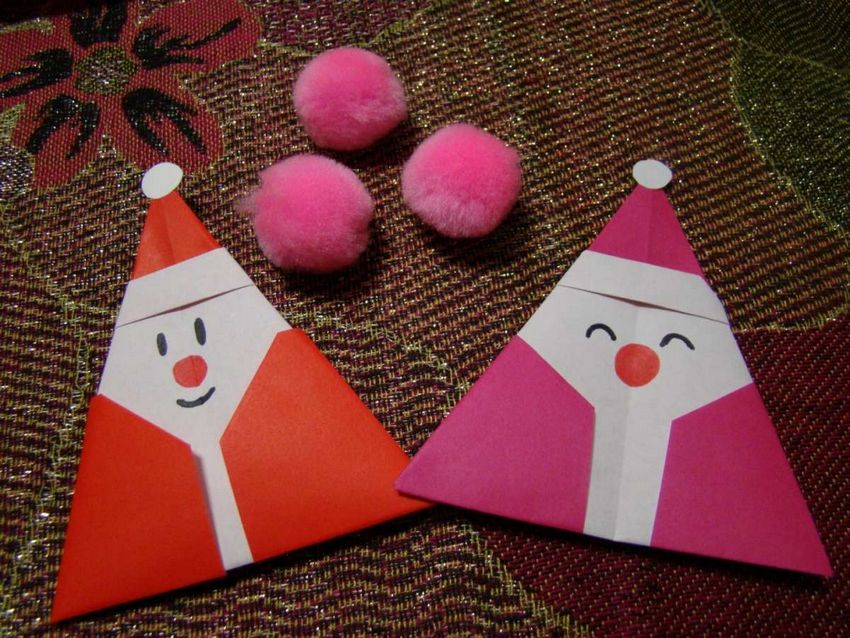
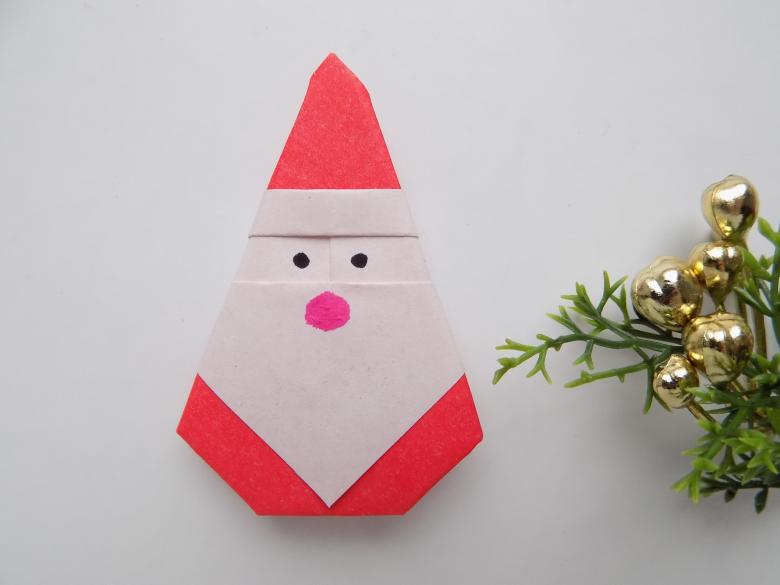
While adults are busy making holiday dishes. The younger generation can be busy making figurines for the holiday table. So they learn to do a simple origami Santa Claus.
It will need the same white paper on one side and red or printed on the other. Use a reliable sheet of "kami", as they will provide high quality, which can not be compared with a set of children's art.
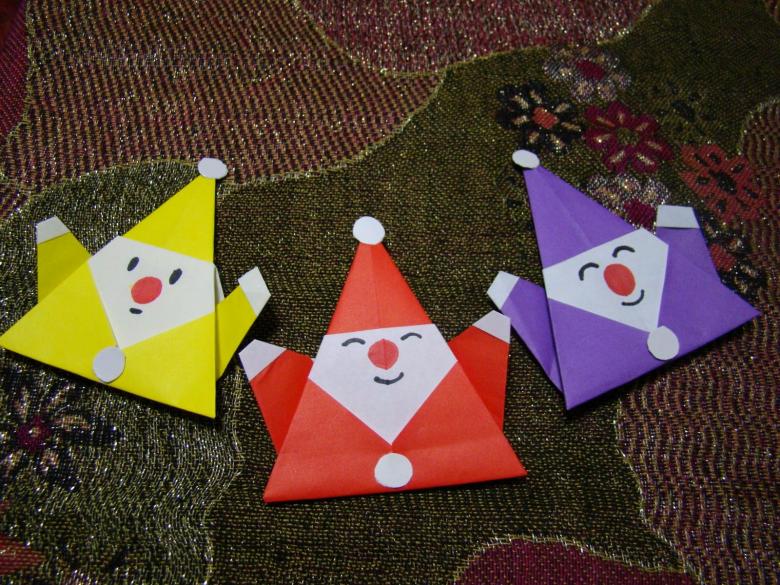
The result will be a uniform set of accessories for the holiday table. And children will feel part of the preparatory process. A themed base and a good mood are guaranteed for everyone involved in the celebration.
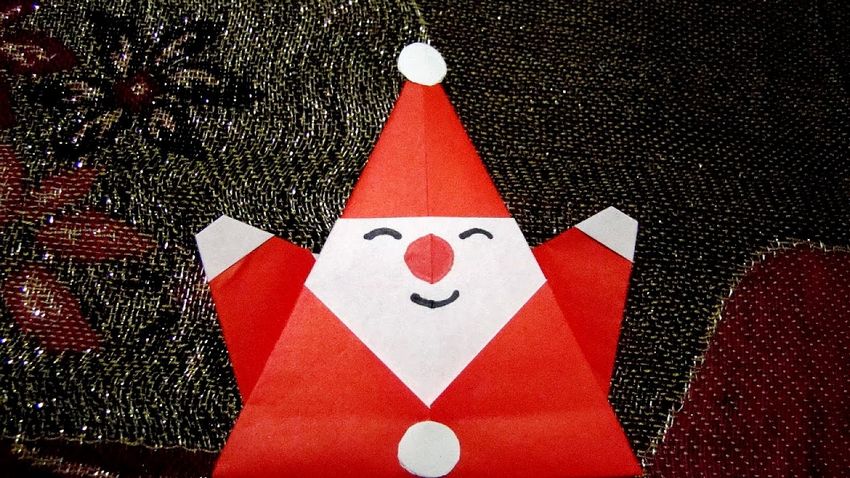
A seating card
New Year's Eve is considered an event for family unity. But don't forget about distant relatives and friends, when they can still visit you. So, if you manage to get a lot of unfamiliar people together, then they will need seating cards.
They will allow for a unique celebration at the level of an international reception due to the arrival of many guests from abroad.

The seating card will have the guest's name written on it - allowing them to quickly find their place at the table. People who do not know each other will easily get to know each other because they can see their names.

Themed entourage is given by the fact that this attribute of the table is made in the form of Santa Claus. Thus origami Santa Claus of paper will denote the essence of what is happening, cheer up and will be able to carry a functional purpose.
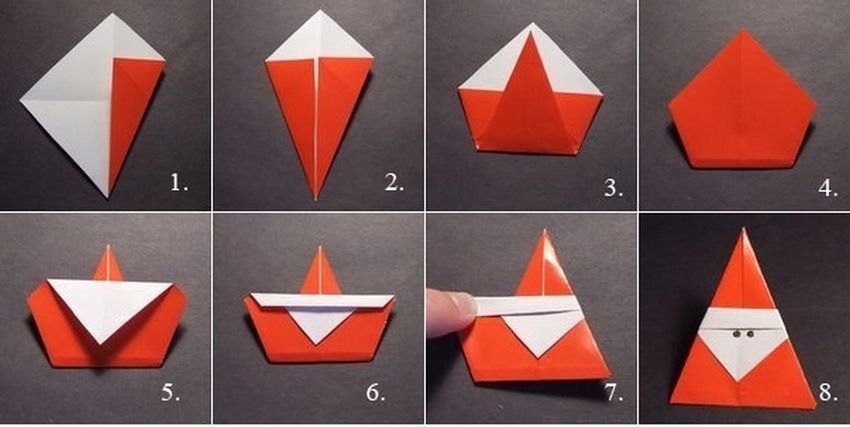
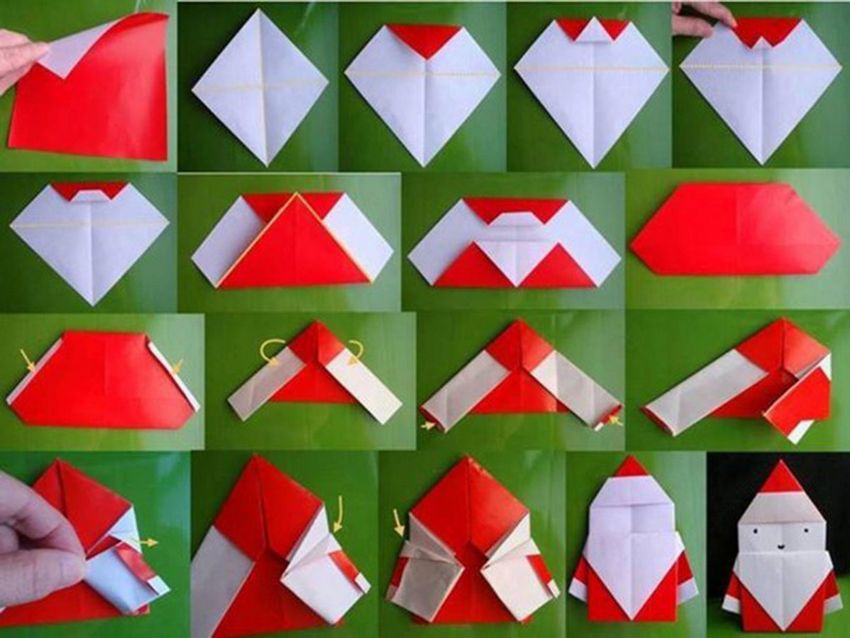
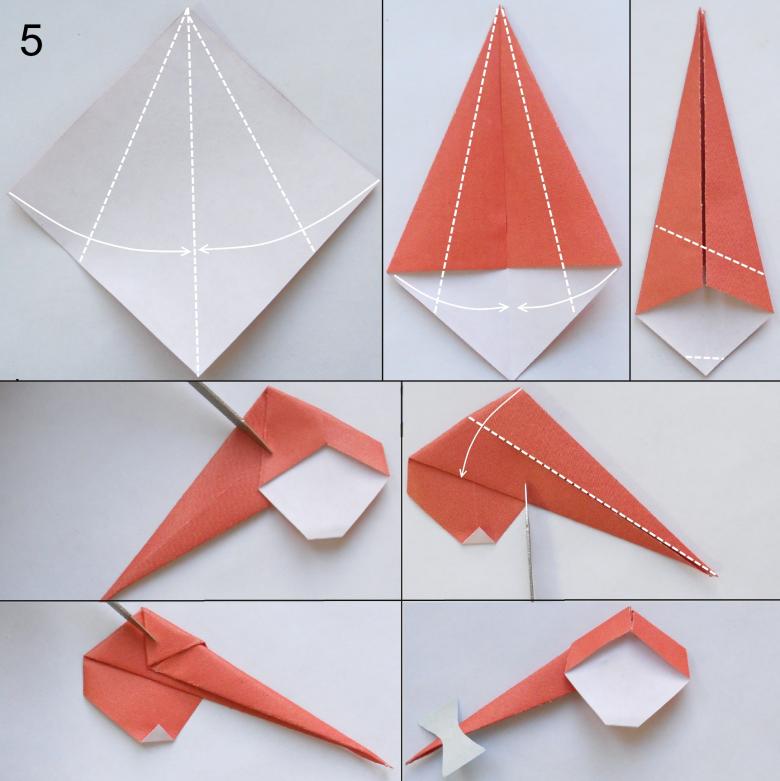
Step by step production:
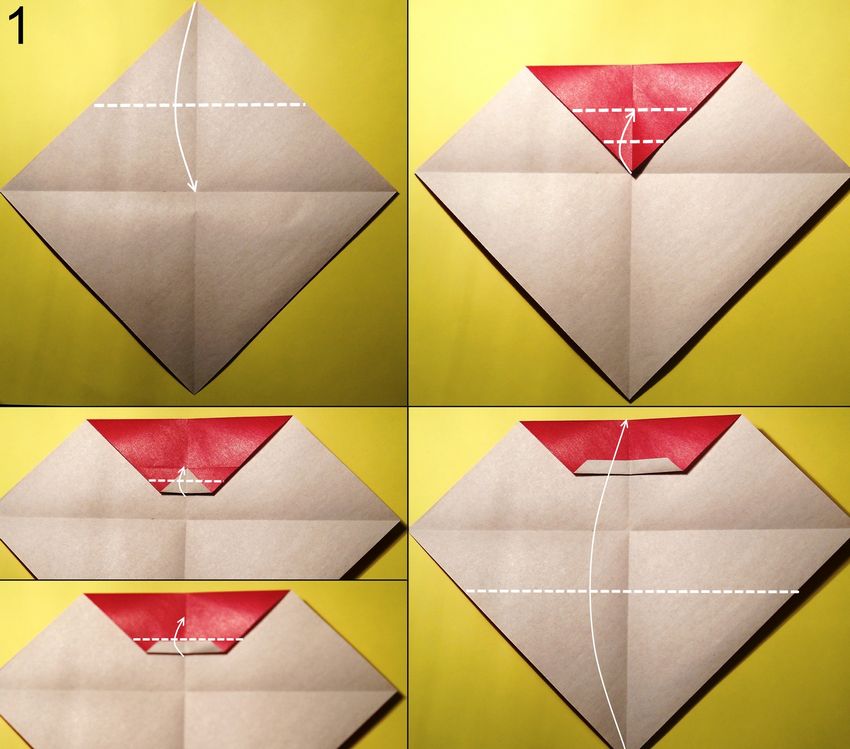
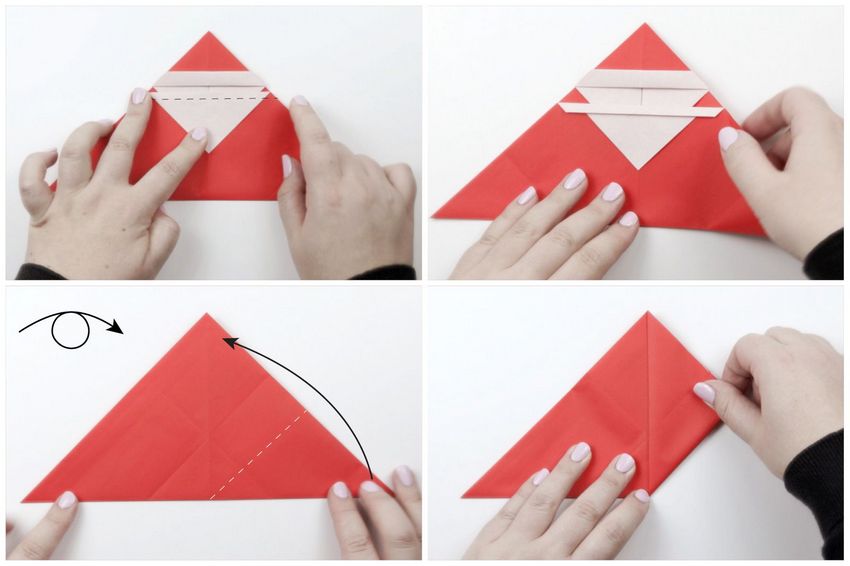
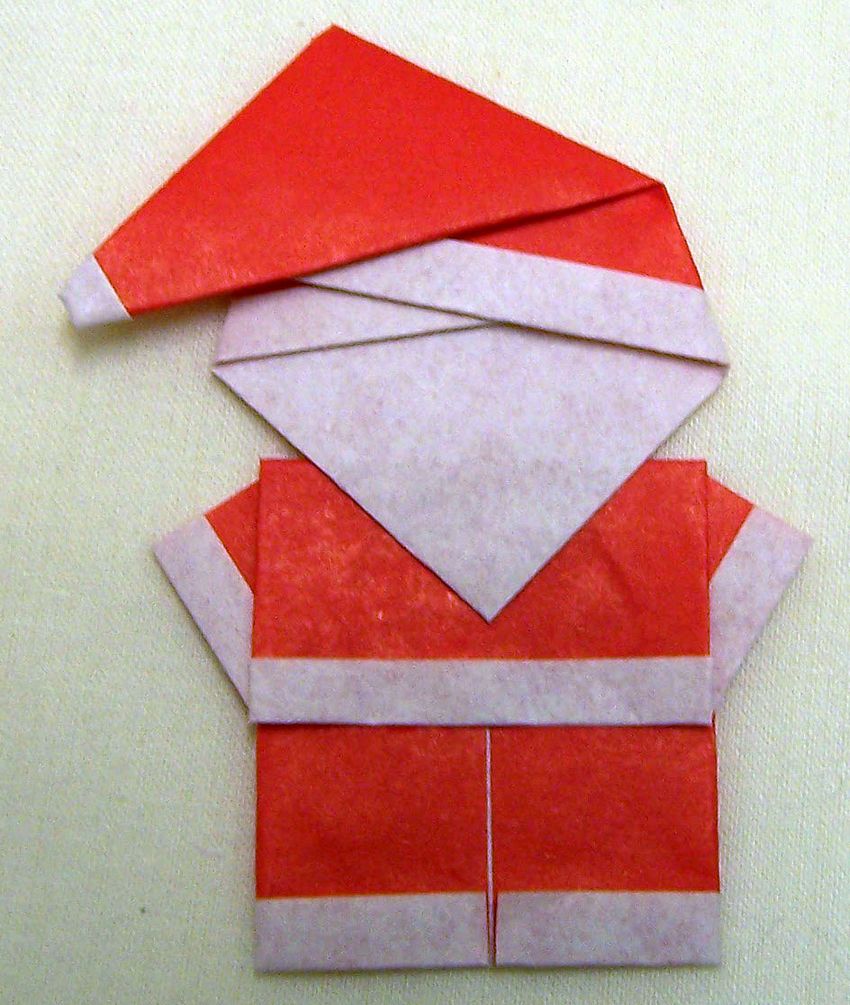
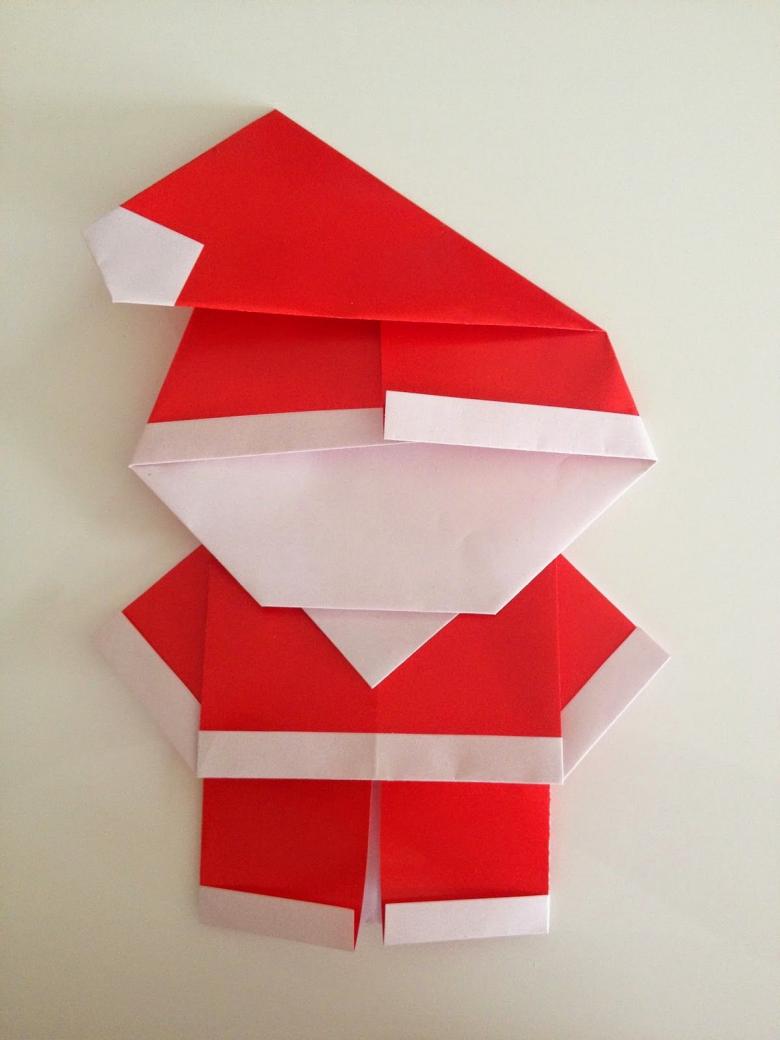
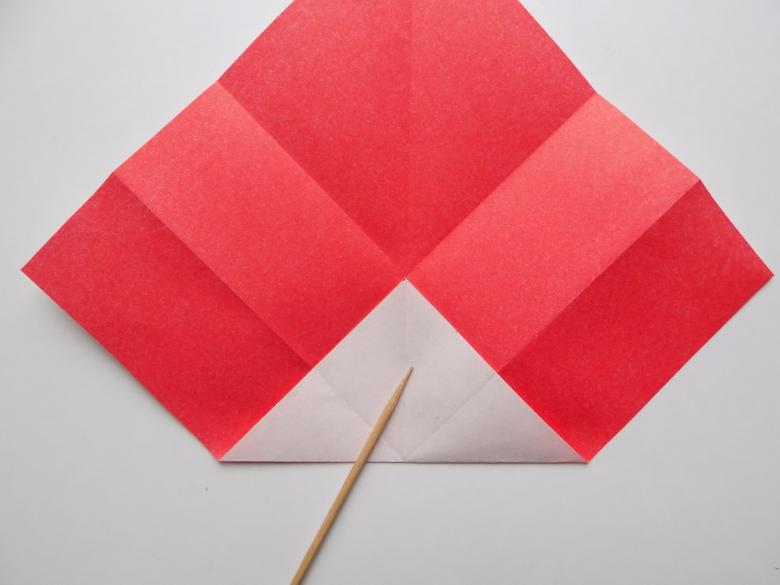
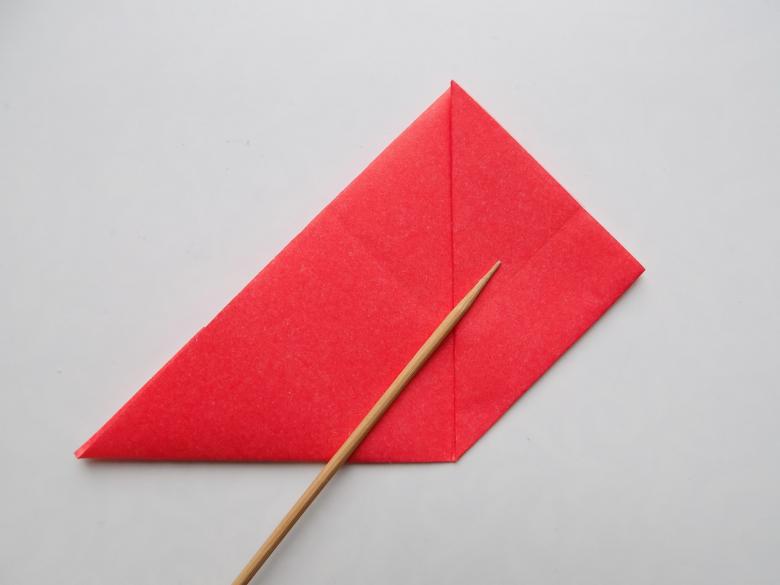
- We take a square of solid and a bit stiff white paper on one side and red on the other 15x15 cm. We start from the white part. Mark the diagonals by folding in half. Upper corner is folded to the center line to the right side, then to the left.
- Billet unfolded. The upper level of bending to the right on the previously marked folds.
- The bottom corner rises to the top. From him not a big step back and can unbend back.
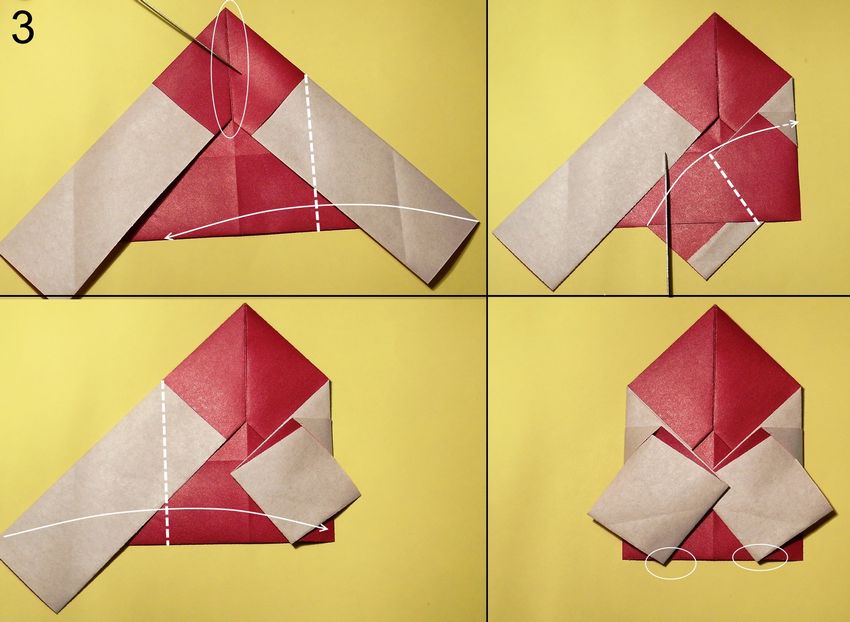
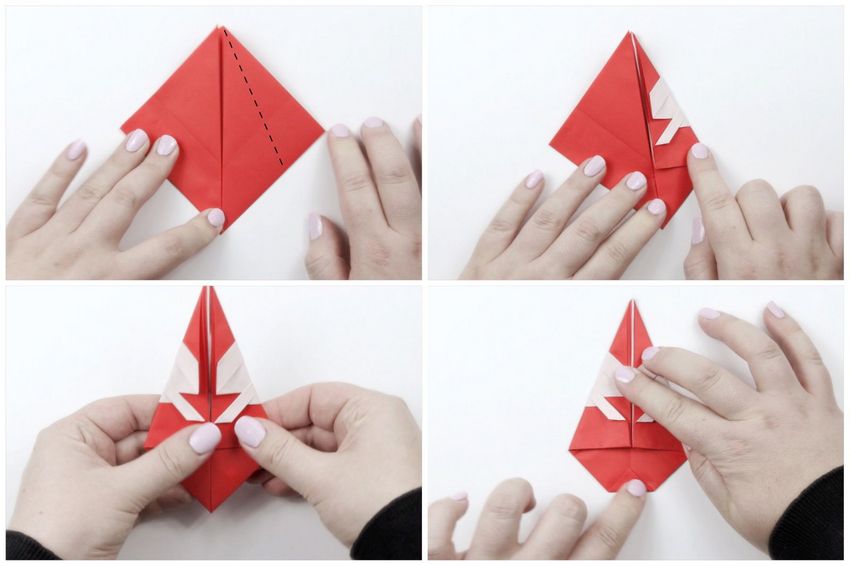
- The product is turned over. The sides are added to the scheme.
- They are glued with glue or a narrow strip of tape. The main thing is to form a secure fit.
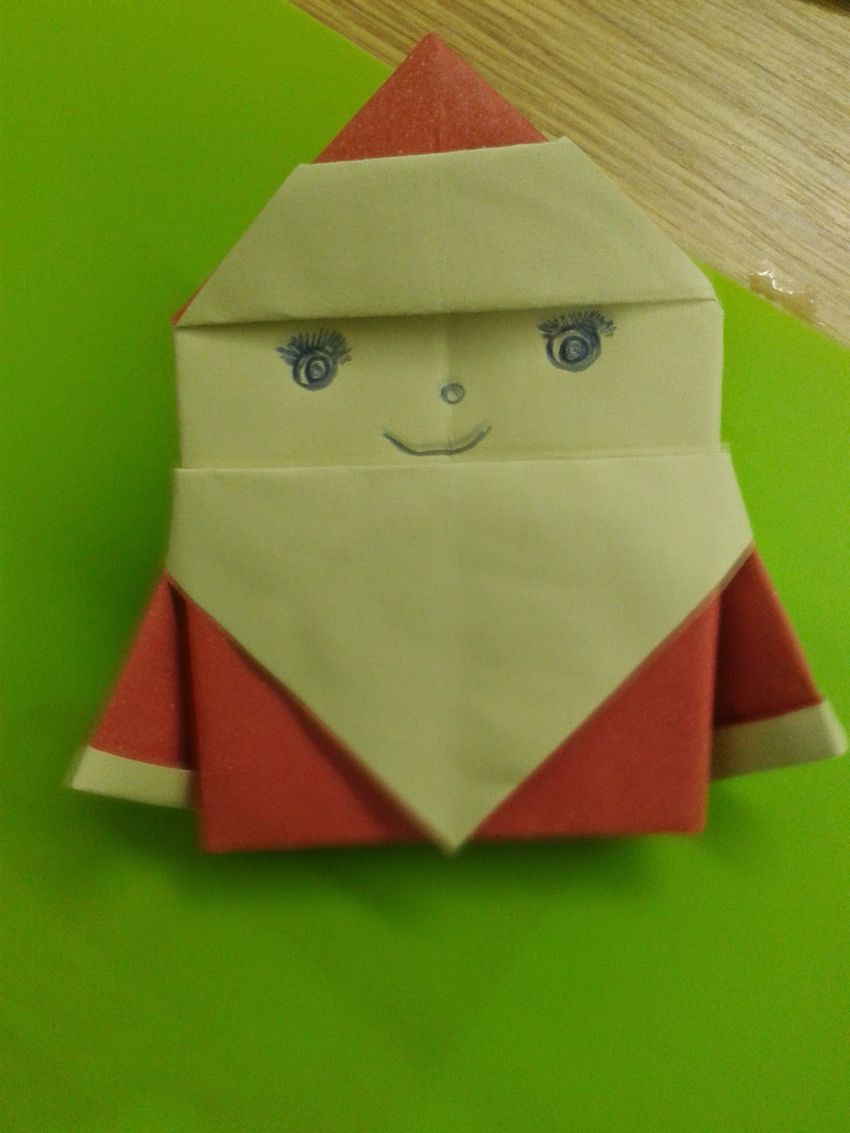
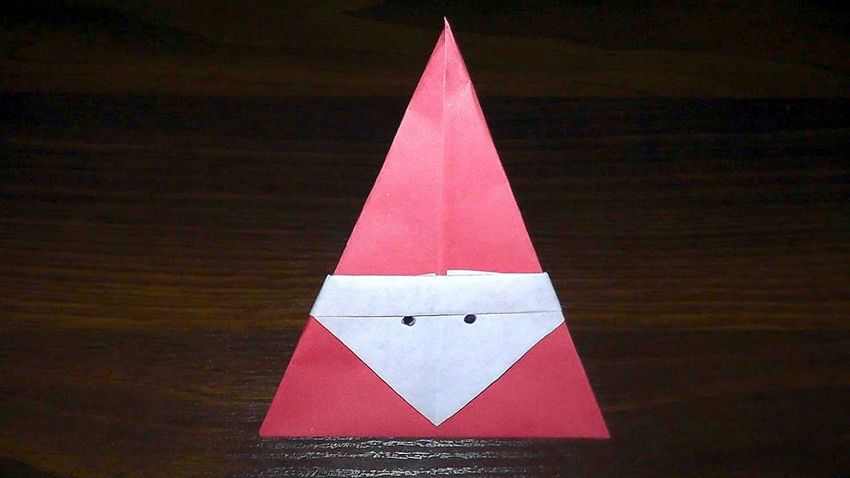
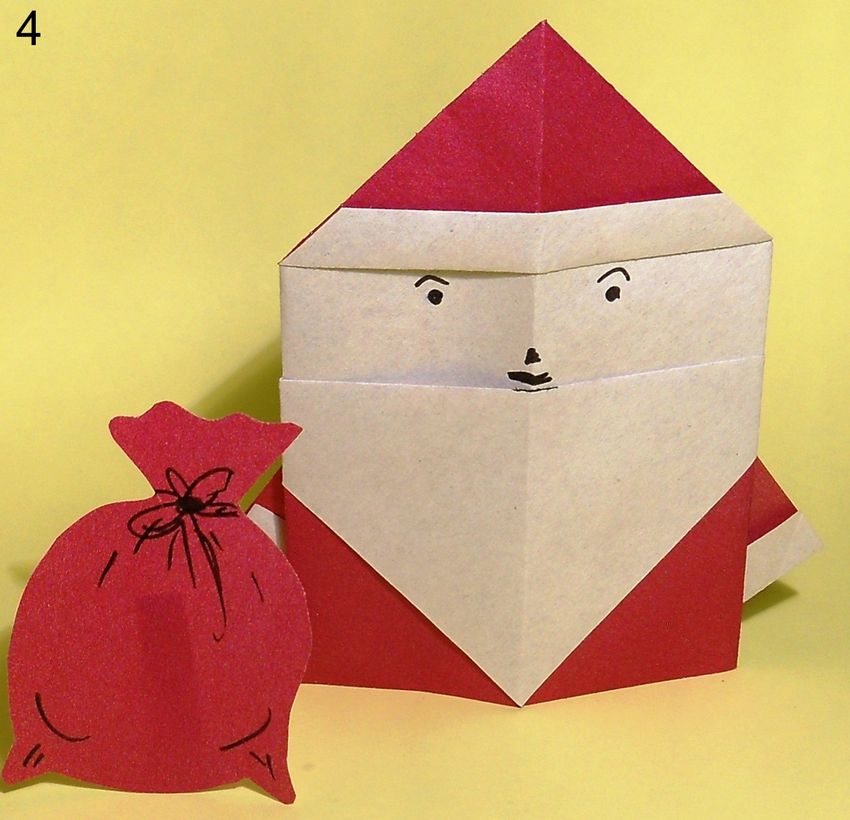
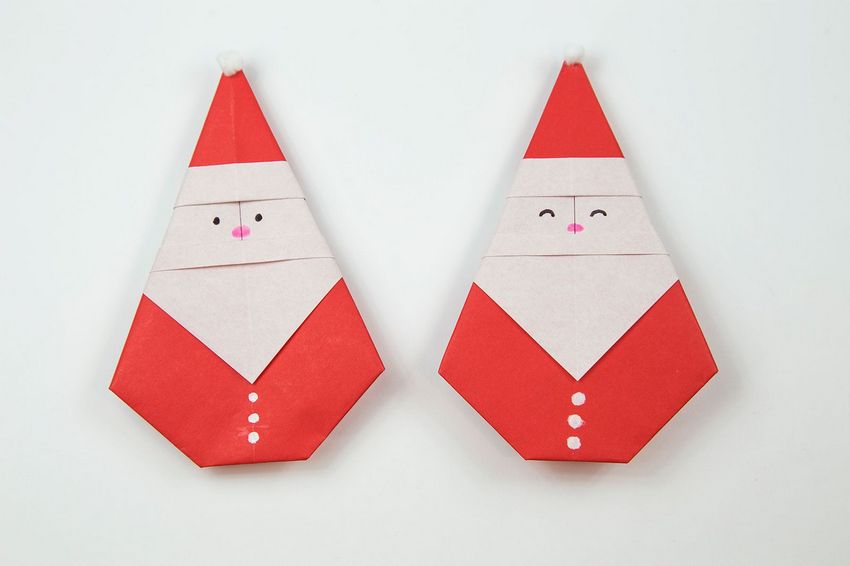
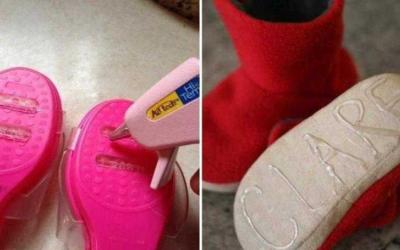
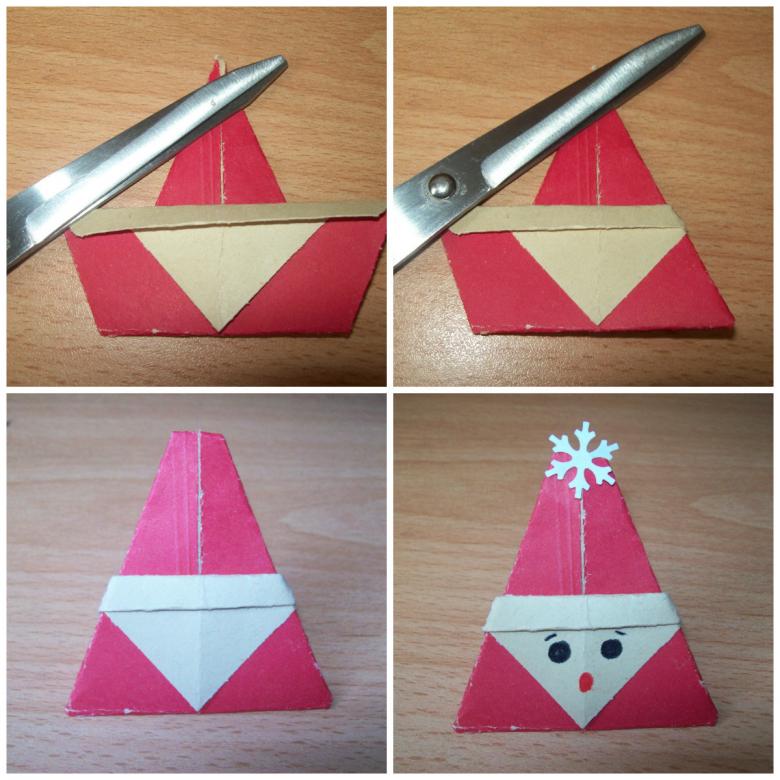
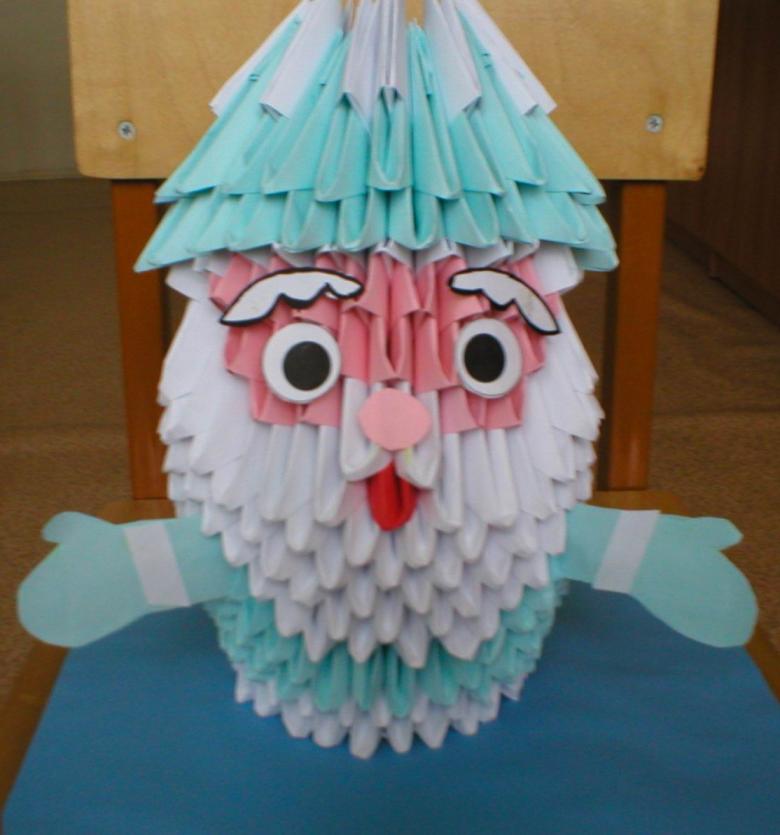
- The figure is turned over again. We got Santa Claus on the basis of the red cap and a beautiful beard. It is bent at about 1 cm. Created a support for the installation of handicrafts.
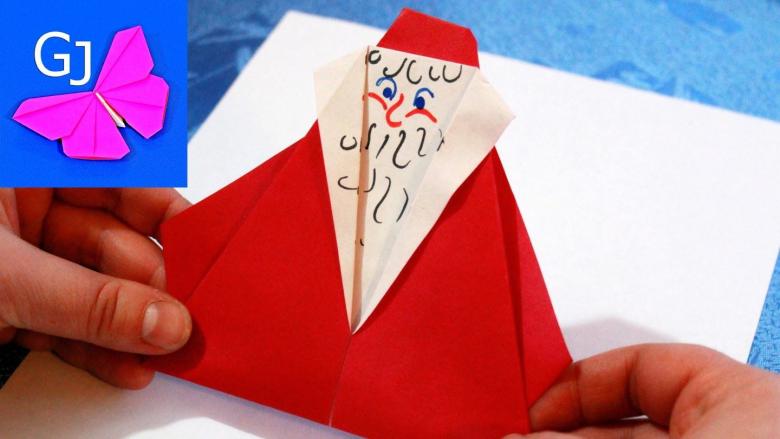
- Model finger opening from the inside. The base expands. This provides her additional stability.
- Santa Claus face is drawn. On the surface of the beard is written name of the participant in the celebration with a number of his seat. All is now boarding card is ready for use.
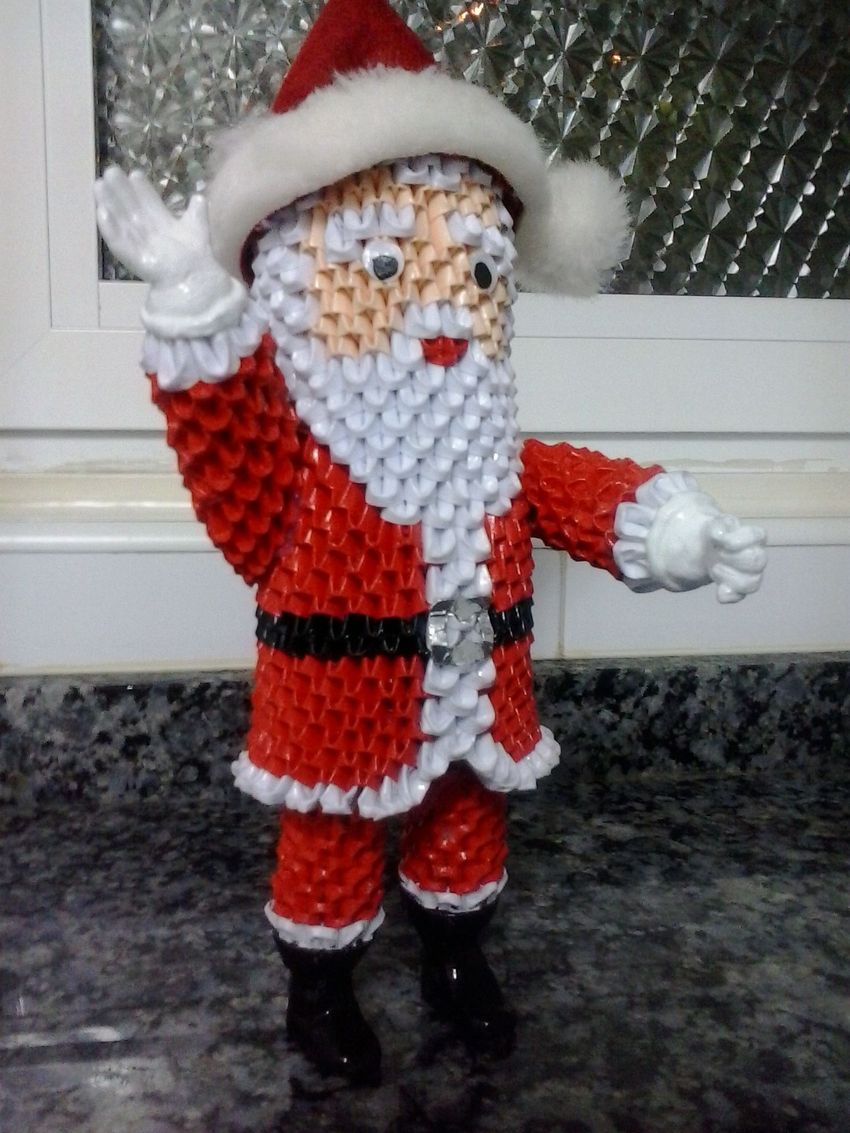
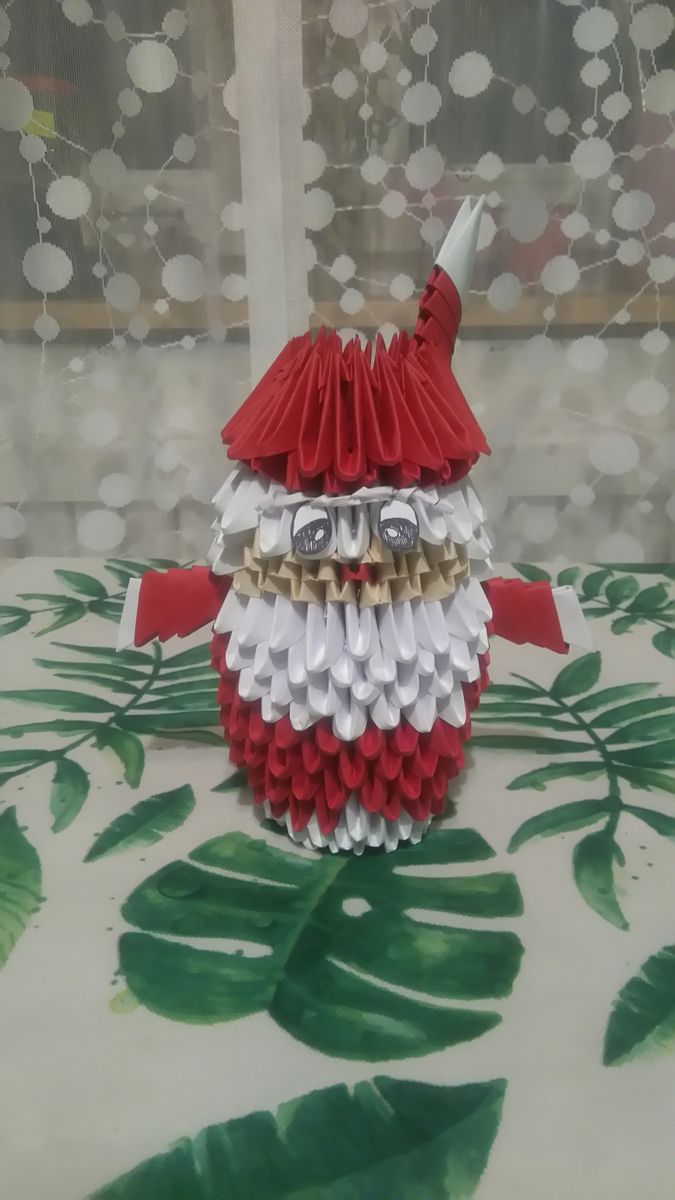
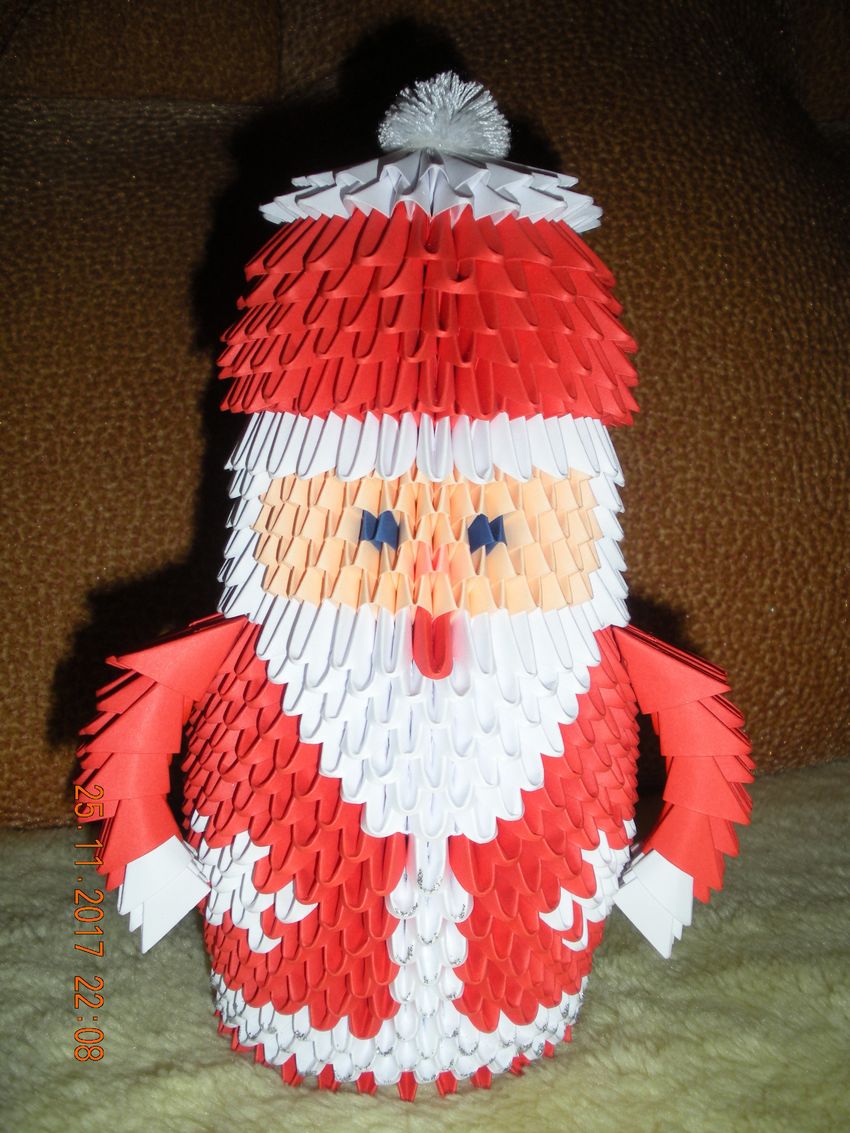
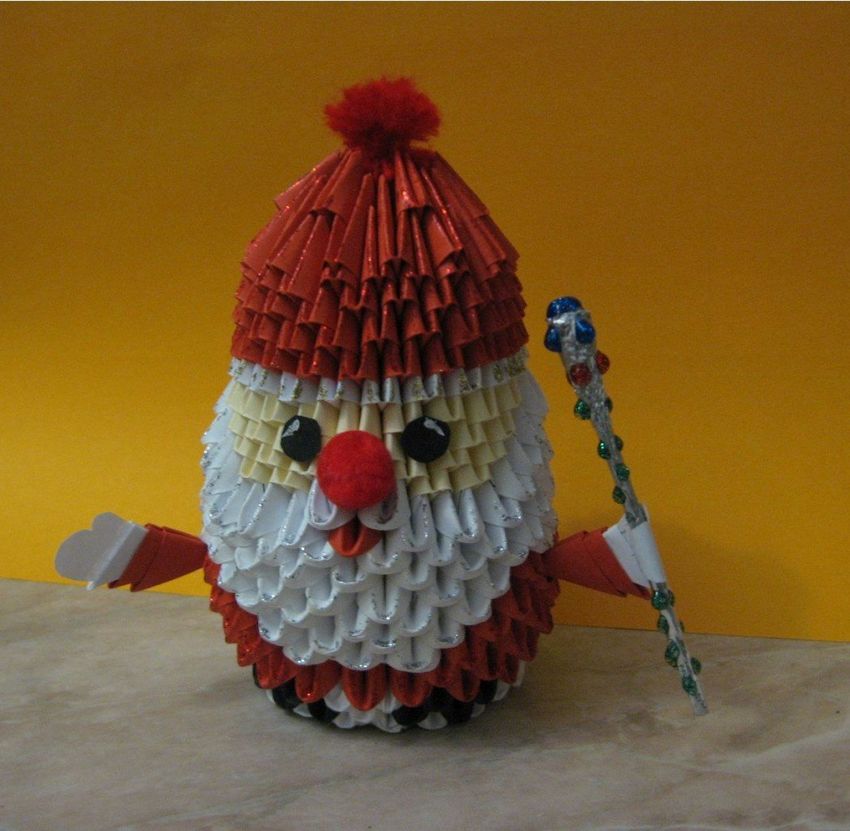
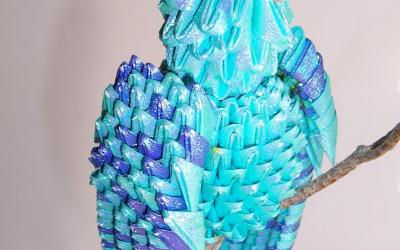
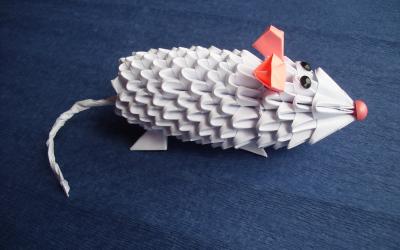
Santa Claus on the basis of modular origami
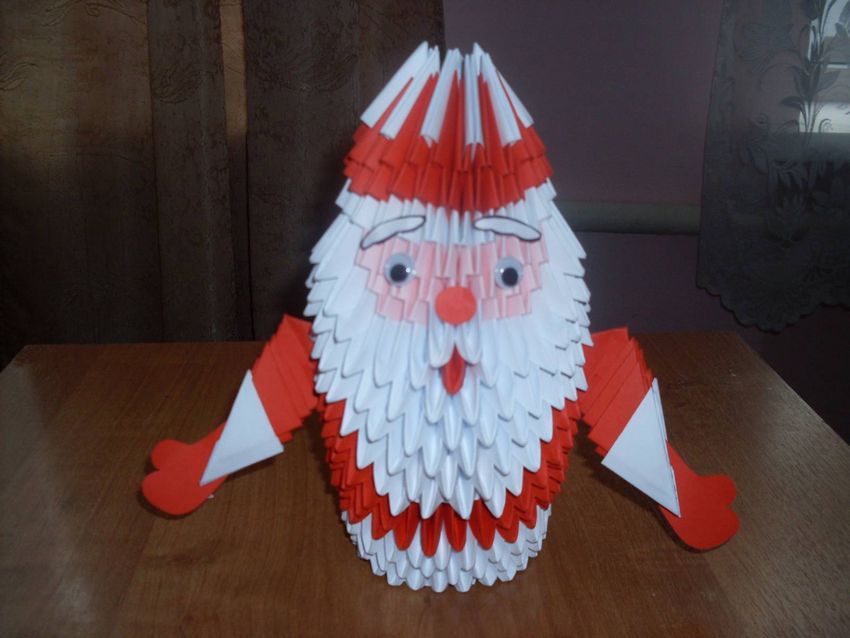
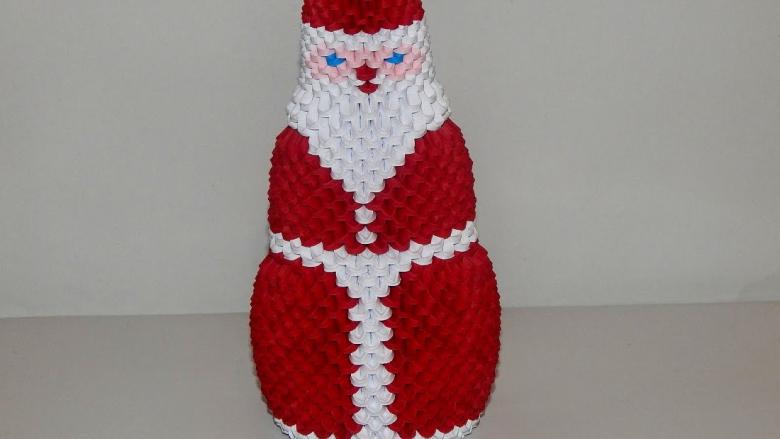
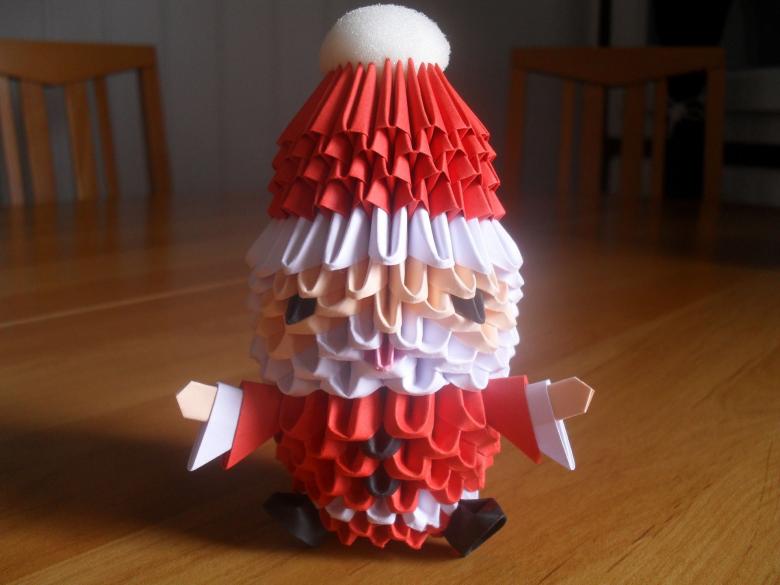
If you want to make a complex handicraft for the new year, then suit modular origami Father Frost, because it is created from more than a thousand elements. Even this figure sounds very long and hard to create. Naturally we will have to try, but the handicraft will be very high quality.
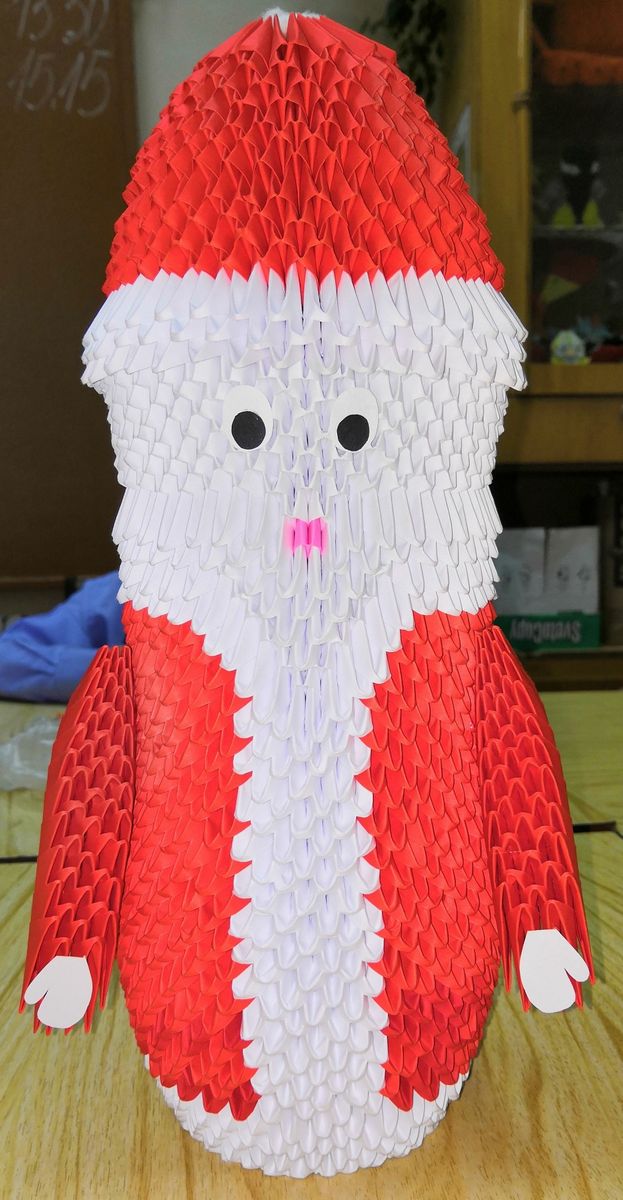
What will be needed for the work:
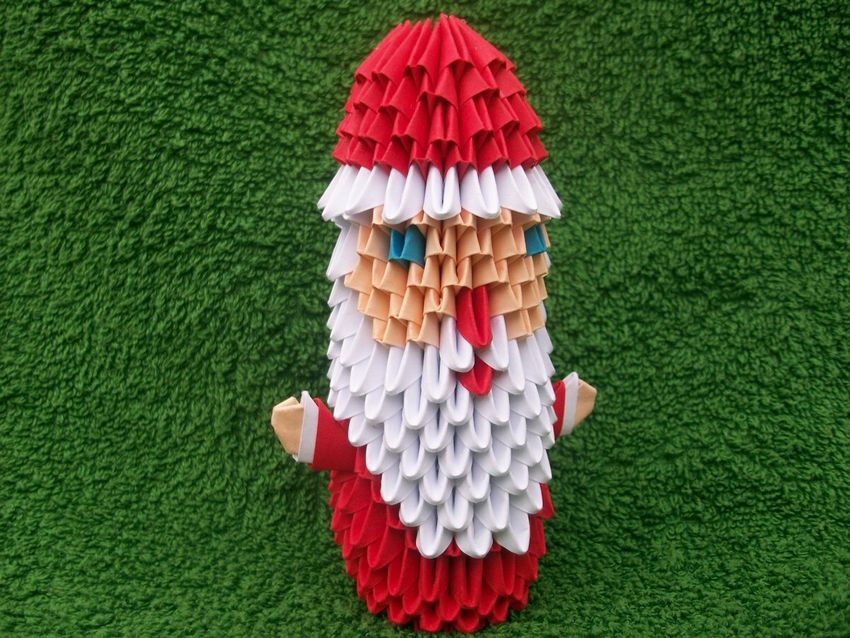
- White, light pink, and red colored modules. Neon pink;
- Used 1,163 modules. 559 white, 529 red, 28 light pink and 47 elements of pink neon.
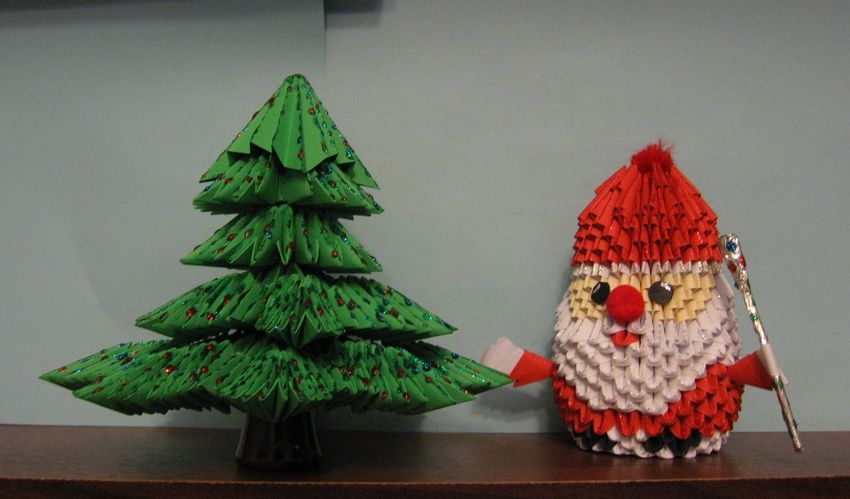
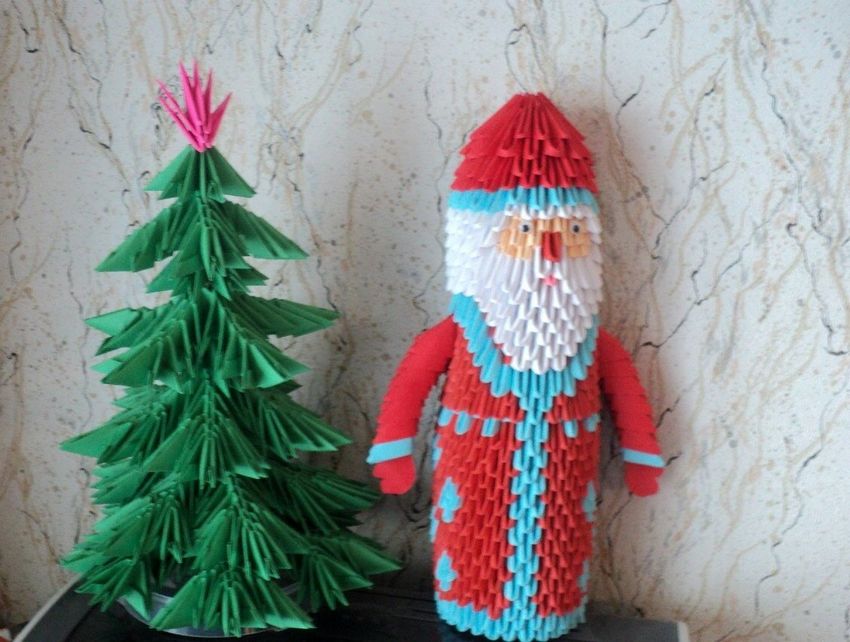
The result is a composition in which Santa Claus is holding a bag of gifts and a magic staff in his other hand. It is located next to the green Christmas tree.
Start making:
- Creates 3 rows of 30 modules each. Bottom is added. However, it is not counted in the number of rows, because it is used as a base or support;
- Add 3 more strips of white. In the 6th row 4 white elements are used. The others are red, but they are inserted backwards. In fact, they will continue to be placed this way, as required by the scheme;
- Level 7 has 3 white elements, the rest only red;
- Level 8 has 4 white and red;
- 9 - 3b and c. Pink neon inserts are added. Any shade of red is allowed;
- 10 - a couple of twin pink modules are inserted;
- 11 - completion of the pink insertion;
- 12 - another level of k, modules, but it is diluted with b, elements. This should not be forgotten;
- 13 - pink insertion again;
- 14 - two paired modules of pink;
- 15 - the end of the pink insertion;
- 16 - only k, modules are added, but b, also slightly blur the design;
- 17 - pink inserts, as was done on level 9;
- 18 - paired pink module;
- 19 - the end of the pink insert. They no longer apply. In the center section, the white module is installed backwards;
- 20 - 2 b, m, reverse side, clear to center, other place is taken by k, modules;
- 21 - Usually in the center, then 2 m, inside out. On the edges of 1m. Everything is done according to plan;
- 22 - Creates a collar, beard of Santa Claus;
- 23 - Only b, modules;
- 24 - Copies the plan;
- 25 - The pink module with the back side. In this way the mouth is highlighted;
- 26 - 2p, m, the other white;
- 27 - light pink m are inserted, according to the scheme. Count the number of elements spent, so that there will be enough for the final step;
- 28 - the face of Santa Claus is made. Inserted 8 light pink m, the other b, but the wrong side;
- 29 - 7 light pink and b, m;
- 30 - 6 light pink m;
- 31 - 5 light pink m. B, m based on reverse side;
- 32, 33 - two levels of b, m, the usual method of installation;
- 34 - reduction of k, m, backside. Reducing the number of gaps across the entire area. 20 m is used for the strip;
- We add 2 k, level. Cap is completed by k, m, but the level is reduced over the entire area. Applies 13 m. The last m, connects 2 m;
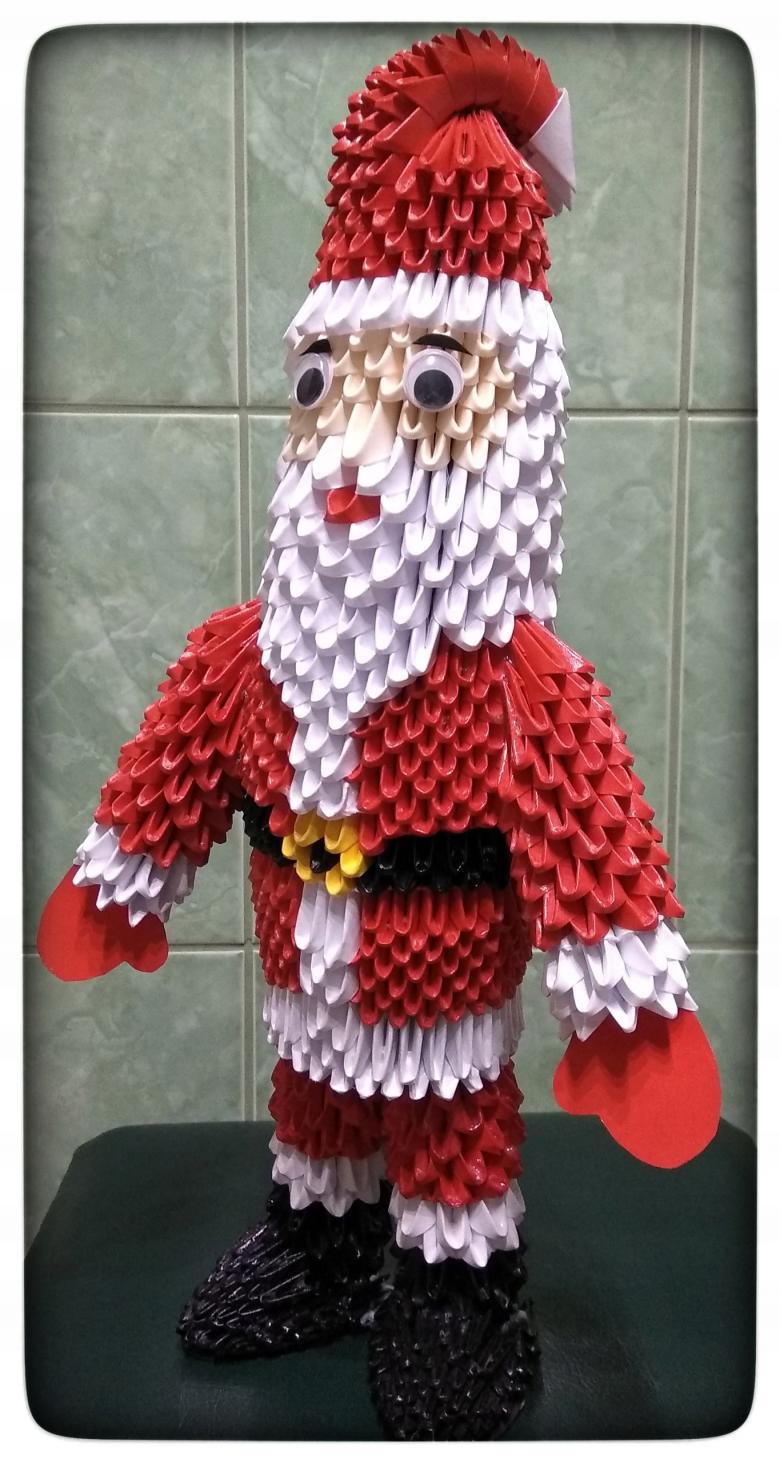
- The nose of a large red button is glued on. Eyes are added;
- The right arm is added. It is lifted to the upper side. The left hand is glued slightly lower. For reliability of the connection should be kept until it dries. Temporary bonding with a needle is allowed. When glued it is removed;
- The staff is made of red paper. It is twisted into a thin tube. Braid is glued in a spiral. It is applied glue, the ends are hidden inside. The star is made of gold-colored foil;
- Stitched and glued a bag of gifts.
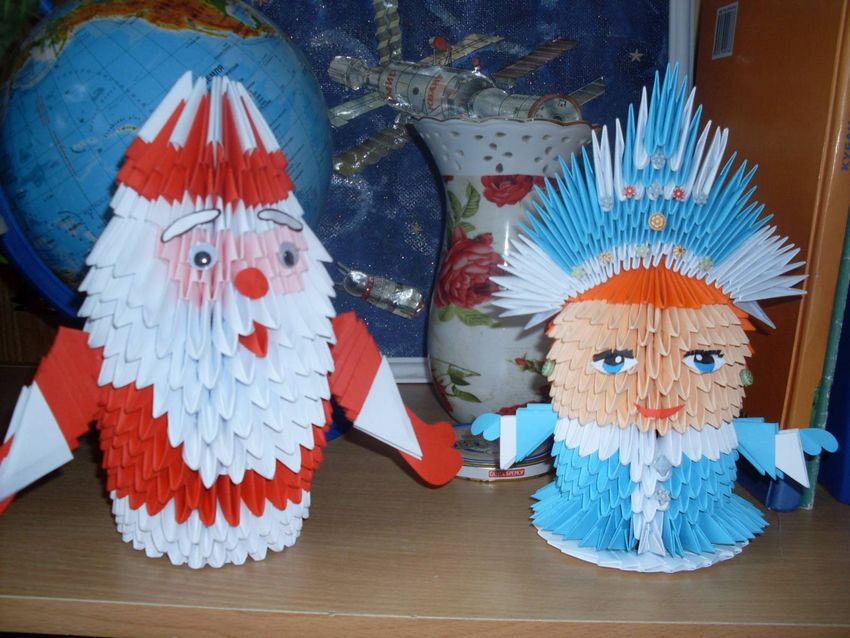
Santa Claus is ready. He turned out very smart, but looks somehow orphaned. It is necessary to add the snow maiden.
So we learned how to decorate the Christmas table and create an original Santa Claus for placement near the Christmas tree or in another part of the room.
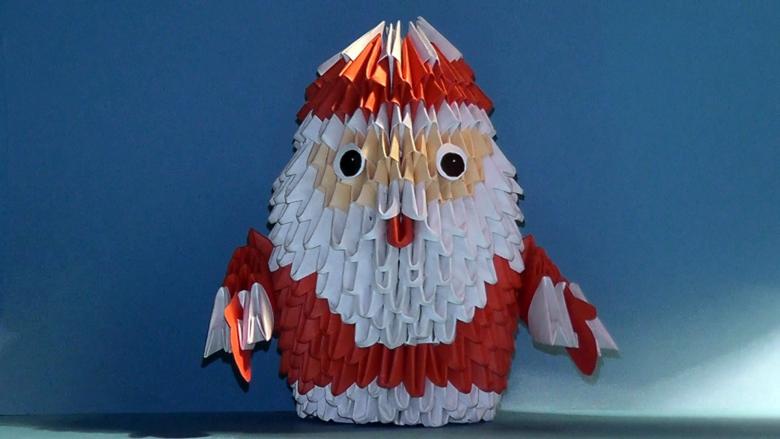
Photo origami ideas in the form of Santa Claus